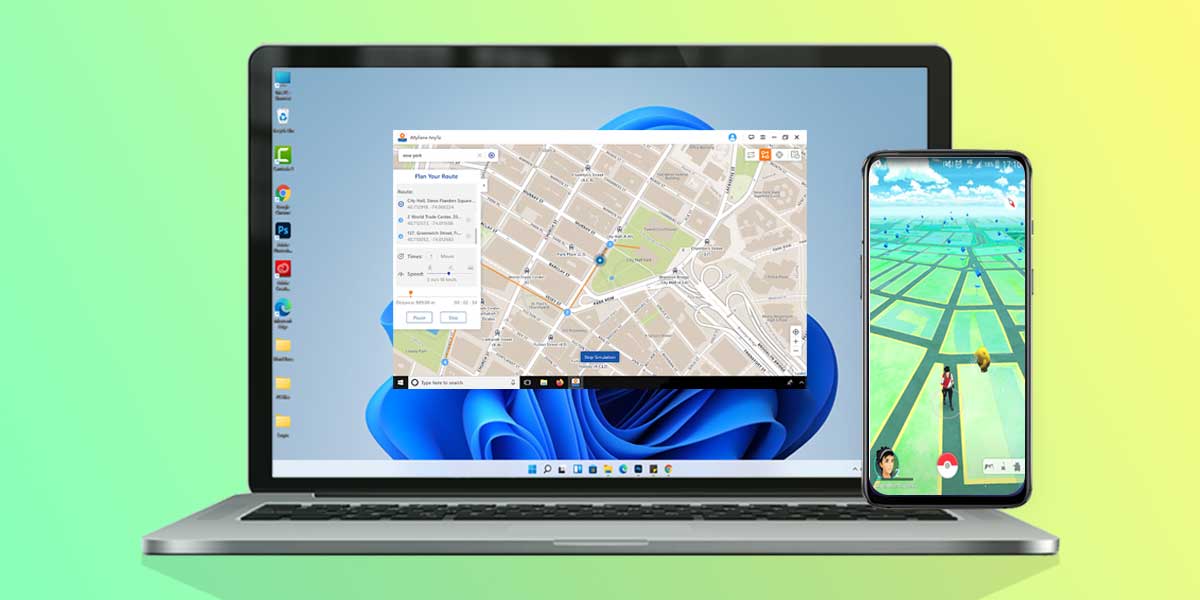
The Mobile gaming industry has been maturing a lot since early 2016. According to market intelligence company Newzoo, 2022 will see mobile (and tablet) gaming generating more revenue than all other types of gaming – console, PC etc – combined. But PC gaming has it’s own unique experience and advantages. It’s hard to play shooting games on mobile when compared to PC and console. Also, the screen size plays a major role in quick reflexes and viewability.
Niantic’s most hit game Pokemon GO created many mobile gamers. But it’s not possible for everyone to go places just to catch virtual Pokemon. In this article, we’ll guide through the process of using Pokemon GO on PC i.e Windows and Mac.
Many people might suggest you to install Remix OS or any other Android Emulator & enjoy Android games directly on PC but it’s not the case with Pokemon GO! With every new update, Niantic’s developers are trying to provide a better gaming experience by catching spoofers. Many articles still suggest installing Nox Emulator to play Pokemon GO and the servers won’t be able to catch you. Like, really? Are you still living in 2017? It’s 2022 now, game developers can catch you in seconds when you use any hacks.
Days after the release of this augmented reality game, people were found walking into unsafe neighborhoods, barricading into people’s houses, getting robbed by burglars in the process of catching Pokemon. I hope you don’t end up like one of these guys.
In this article, I’m going to guide you through different ways of using Pokemon GO on PC without any desktop client or risk of getting your account banned. All the methods which would be discussed in this article, actually work in [poke_date]. I try different ways after month to keep this method updated with the latest updates and patches.
Update: PC Emulators are leading to permanent ban after the latest Safety net update. Follow this guide at your own risk. I would strongly suggest you to follow our Pokemon GO hack for Android or iOS device which are 100% working and have very less ban rate.
Prerequisites
To start playing Pokemon Go on your computer, you will need to install and set up a bunch of tools exactly in the right order. To start with, just download the files given below and follow the given instructions carefully. If you have a system with MacOS, it’s great! If you’re using a Windows System, it’s highly recommended to install Mac OS on Windows using VMware. Trust me, it’s really easy!
Guide 1 (For MacOS or Windows using VMWare)
- If you’re using macOS, make sure you have the latest MacOS i.e High Sierra.
- If you’re using Windows PC, you can install Mac OS through VMWare.
- If you have the above condition satisfied, download the latest version of Xcode
- Pokemon GO WebSpoof: Download
Guide 2 (For MacOS or Windows using iMyFone AnyTo)
- System requirement for Windows: Win 11/10/8/7
- System requirement for Mac: Mac OS X 10.9 – Mac OS X 10.15
- Android compatibility: Android 5.0+
- iOS compatibility: iOS 7+
- iMyFone AnyTo App: Download
Guide 3 (For Windows Only using Emulator)
- The first thing you will need is a Windows PC to install the software.
- Bluestacks. Download it from here.
- Fake GPS Pro: Download
- Download KingRoot & Lucky Patcher
- Last, but not least. The game itself, download Pokemon Go but don’t install or run it until it’s time, or it won’t work: Download
After downloading, just transfer all these files into a single folder so you can easily find them later. Do not rush to install any of the apps without knowing the exact procedure. You need to follow each and every step very carefully so that you don’t miss out on any step which could cause you your Pokemon GO account.
How to setup & play Pokemon GO on PC using Emulator
Guide 1: Play Pokemon GO On MacOS (Working with Some Issues)
Pokemon GO still works on PC but only on MacOS when used along with your iPhone. If you’re using MacOS, you might be aware of Xcode. Xcode is an integrated development environment for macOS containing a suite of software development tools developed by Apple. There are many guides on the web about using Xcode for spoofing in Pokemon GO game using PC but all of them are very difficult when you want to change locations quickly.
According to those guides, you need to make a route (coordinate + time), compile the gpx file and add it to xcode. It works fine to walk around and collect pokestop items. However, it become problematic when you want to change your route. For example, if you see a gym that you want to check out, and it is not on your route, you will need to guess where it is on google map, find the coordinate, make a gpx file and import it. Most often you’ll miss the target by a little bit, and you will need to repeat the process fine tuning the coordinates.
Note: This can also work on Windows VMWare by installing MacOS in VMWare.
I have never used gpx files. It seemed like a waste of time. I use a ‘web spoofing’ app. Once you get used to it, it’s just like the old way of spoofing.
Step 1. Make sure your MacOS and Xcode are updated to the current versions. (High Sierra and 9.3 for Xcode)
Step 2. Go the Pokemon GO Webspoof link and under 1.2.1, download ‘ pokemongo-webspoof-v121.app.tar.gz’ and ‘ Source code (zip)’
Step 3. Open the actual program, ‘pokemongo-webspoof’ and it should open the app along with Xcode.
Step 4. In Xcode, make sure you sign with your apple ID and the ‘Bundle Identifier’ is your apple ID, just like as if you were installing any app using Cydia Impactor.
Step 5. You will have to trust your ID on your iPhone and enable ‘pokemongo-webspoof’ on your mac by going to System Preferences > Privacy > Accessibility.
Step 6. Now, plug your iPhone in. In Xcode, in the top left corner where it says ‘Generic iOS Device’, select your iPhone at the very top and hit play to the left. It should say ‘Build Succeeded’. Go up to the top tabs and select Debug > Simulate Location > and select ‘pokemonLocation’.
Step 7. You should get a white screen pop up on your iPhone saying to start the game. Now you should be in business. You can also use your keyboard arrows to move on the map
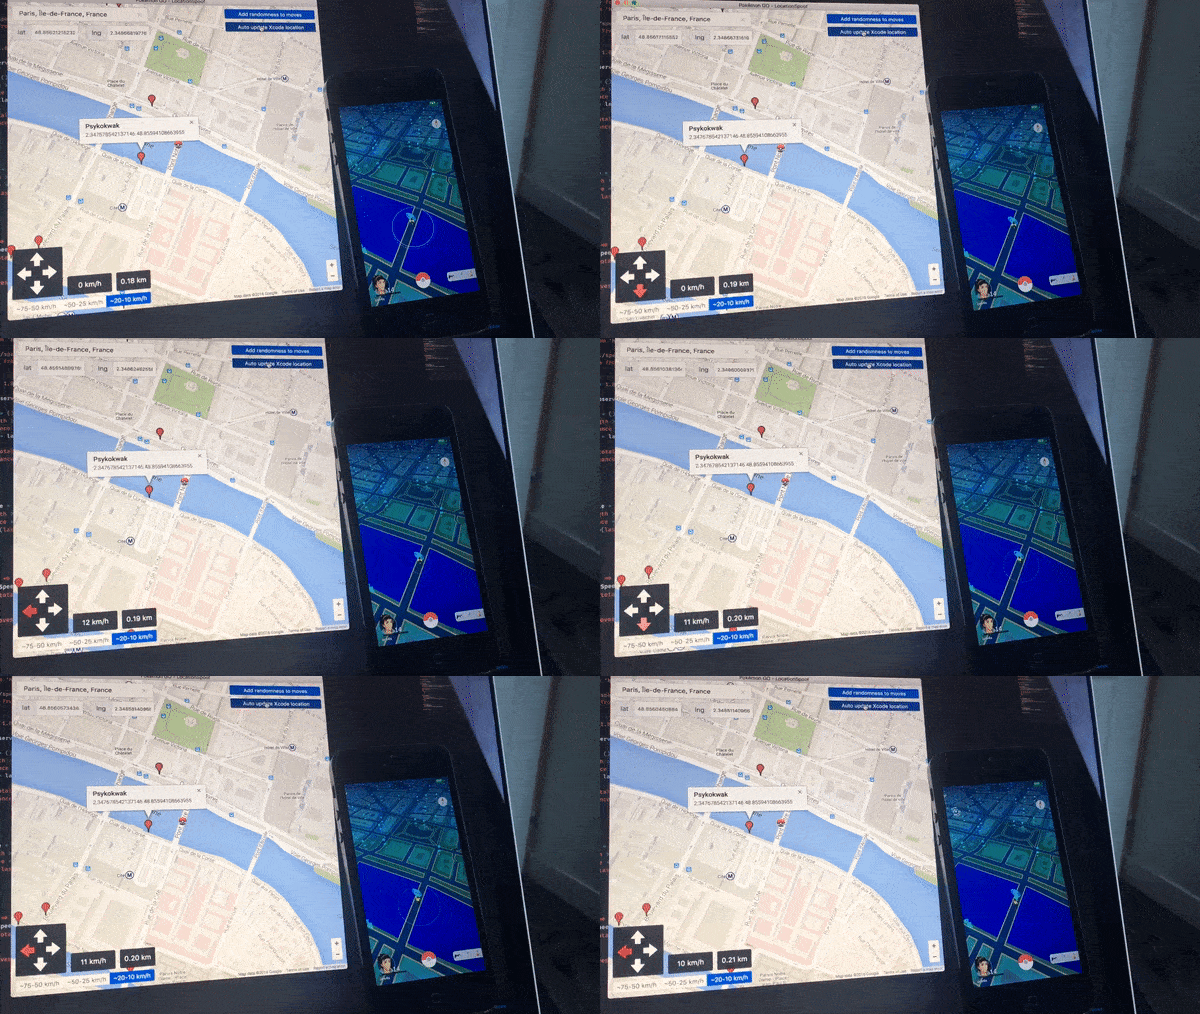
Just some quick notes, make sure you have all three buttons selected in the spoofing program to “update Xcode location” and all that. When the map is locked, you can click anywhere and simulate a walk, run or teleport path. It honestly just takes some messing around with to get the hang of.
Note: Many users have reported that they get Unable to authenticate error while using the above method. We have solved the issue in a different article. You can click here to check it.
Guide 2: How to Play Pokemon GO On PC using iMyFone AnyTo (Windows & MacOS)
This is the latest method to play Pokemon GO on PC. This is the 100% working method to play Pokemon GO on PC. Just follow the method given below.
- Install iMyFone AnyTo to your Windows/MacOS system
- Upon installation, open the app and Click on “Get Started”
- Now, connect your Phone (Android or iOS) to PC via USB
- Open Pokemon GO on your phone.
- On iMyFone AnyTo app, a Map will be shown on the screen
- From the top right corner, select “Teleport Mode” (third icon)
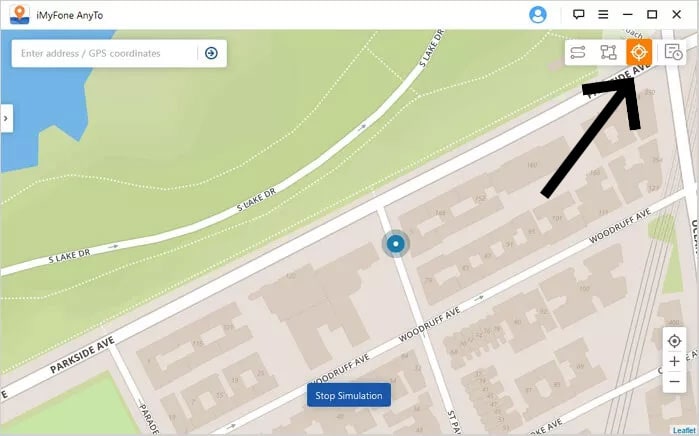
- Now, search your desired location in the search bar or drag and zoom to the desired location
- Once you have entered the location, click on “Move”
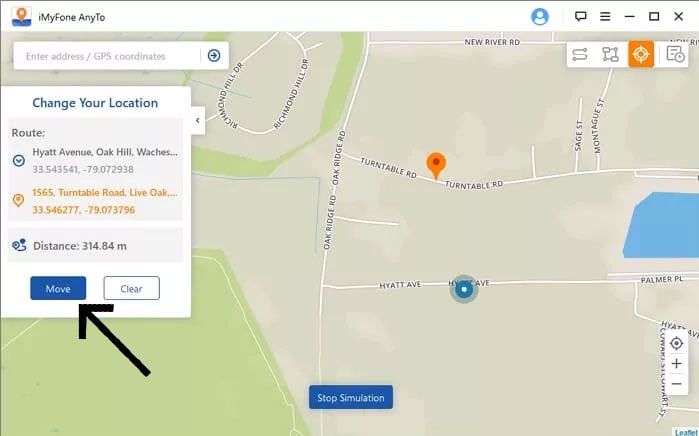
- You’ll be teleported to the desired location on the Pokemon GO app
With iMyFone AnyTo you can even plan a route on the map and select customized speed to move.
Guide 3: How to Play Pokemon GO On Bluestacks
1. Install Bluestacks
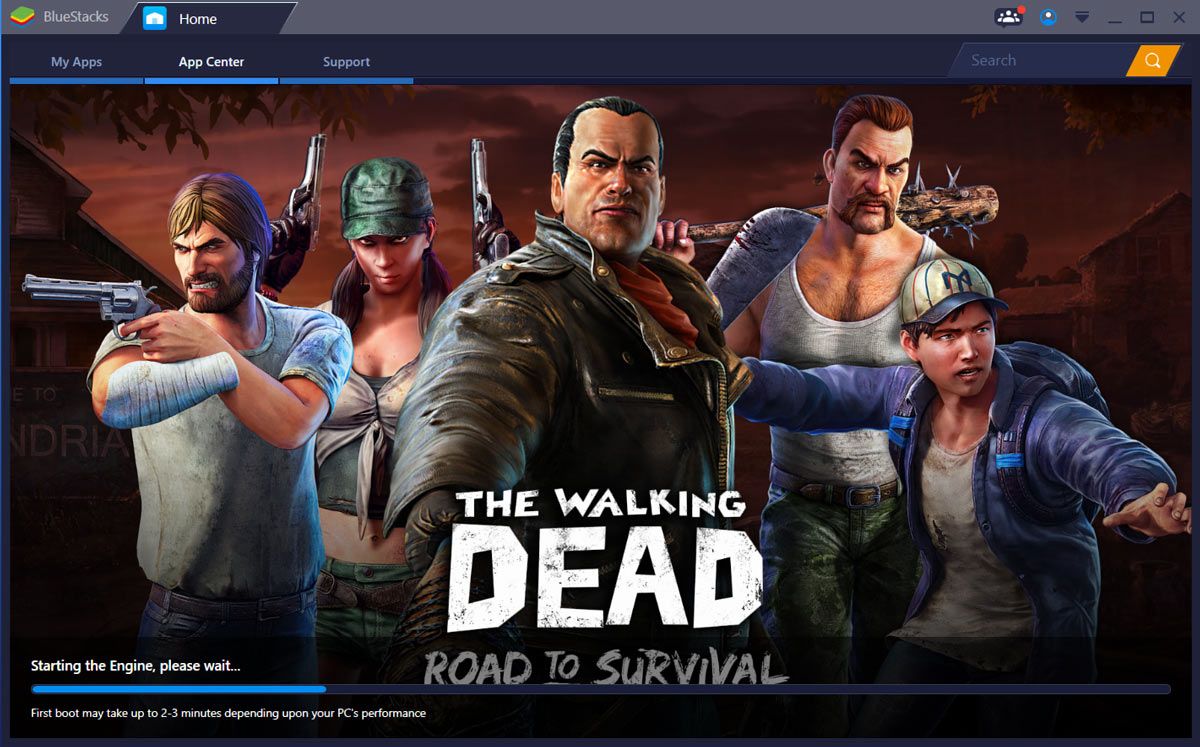
First, install Bluestacks on your computer. Make sure it’s working fine and doesn’t crash while running. If you’re experiencing issues download the latest fresh copy from their website and install it again. If you want to use any other Android Emulators, you can check the list here.
- Download the BlueStacks.exe file from the above link.
- Install the file in your Windows PC/Laptop by executing the file normally and granting permissions if required.
- During the installation process, you will be presented with different tips. Once the installation is done, make sure to Sign in using a Google Account or you can create one.
2. Install & Run KingRoot
- Open Bluestacks and Click on the APK icon from the left bar
- Locate the donwloaded KingRoot App APK
- Click on the file and it will install on Bluestacks
- Once installed, Open KingRoot app in Bluestacks
- Scroll down and click on Try it, then select Fix now
- The app will show your Security Index, Click on Optimize now
- Close the KingRoot app
3. Restart BlueStacks
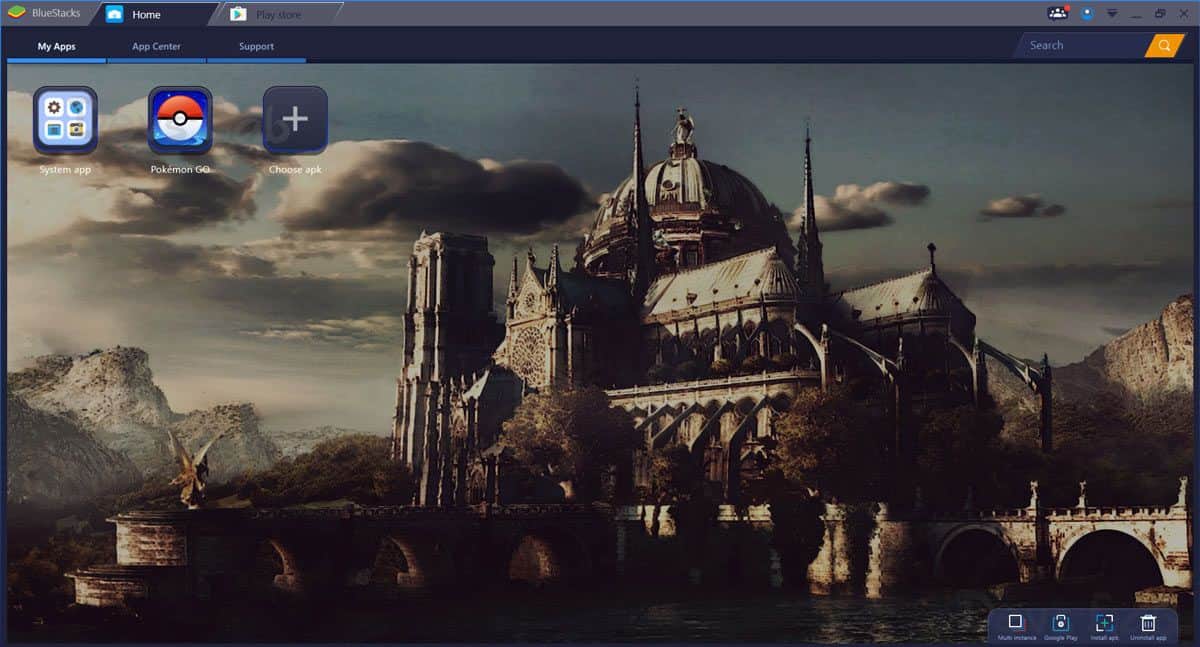
- Navigate to BlueStacks Home Screen and close all the apps to avoid freezing of the Emulator.
- At the top-right corner, click on the Arrow that is pointing downwards or the clog icon.
- From the drop-down menu, select “Restart Android Plugin” to restart the Android Emulator/Tablet Bluestacks.
4. Open FakeGPS
- Open Bluestacks and Click on the folder icon from the left bar
- Now open the FakeGPS application
5. Install & Run Lucky Patcher
- In Bluestacks, select the APK icon from the left bar and navigate to downloaded Lucky Patcher APK to install it
- Open the Lucky Patcher app on Bluestacks and Grant all the permissions
- In Lucky Patcher, navigate to Rebuild & install in the bottom right section
- Go to sdcard > Windows > BstSharedFolder.
- Select APK file for FakeGPS and Install as a System App.
- Select Yes to install FakeGPS.
- Now Restart Bluestacks using the 3rd step above.
6. Install Pokemon GO
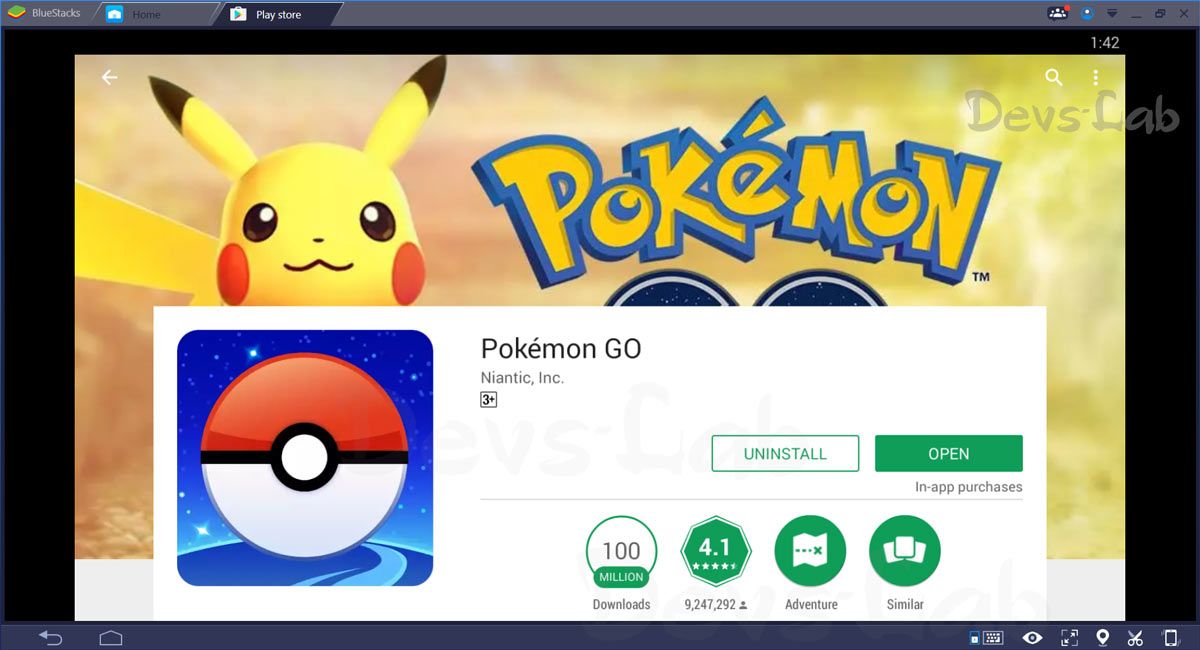
- Install the downloaded Pokemon GO APK
- Don’t launch the app after downloading it.
7. Check Location Settings
- In BlueStacks, click on the arrow icon or the cogwheel from the top right corner and select Settings > Location
- Switch the Mode to High accuracy.
- Now, in Windows go to Settings (Windows + I)
- Navigate to Privacy > Location and make sure the “Location for this device” or “Location services” is turned Off.
8. Set up Fake GPS Location
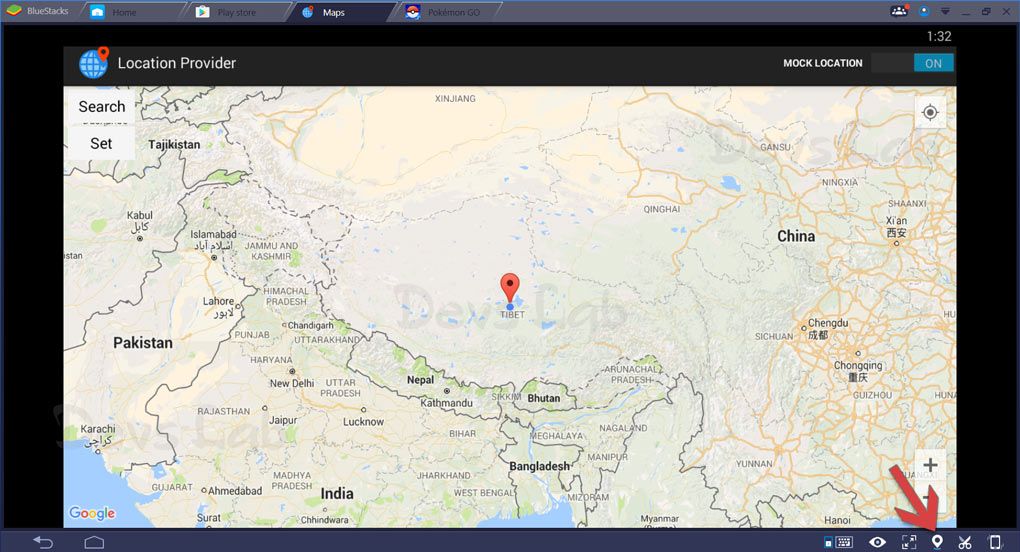
- Open Lucky Patcher, Fake GPS will be seen in the list of apps. (If you cannot locate Fake GPS in Lucky Patcher then go to Search at the bottom, select Filters from top right > check System apps and Click Apply)
- Launch Fake GPS application, Go through the popups and Click OK
- Now, get back to the Fake GPS Maps and select your Preferred location
- Once selected the location, Click on the Play button
Also Read: Pokemon GO Bonus & Rewards List
9. Play Pokemon GO
- Launch the Pokemon GO App and login with your Pokemon GO trainers account. You will have to set up Pokemon Go exactly as you would set it up on a standard Android or iOS device. Log in with Google or old ID and it should automatically load your previously set up Pokemon Go account.
- Accept all the terms and agreements of the game, if asked.
- Wait for the game to load and you’ll be redirected to your preferred location.
Now, after all this, we are finally ready to play the game on PC
When the game finally starts, you should find yourself at a fake location which you engaged earlier through Fake GPS. Every time you want to move to another location or a different spot, you have to go back to Fake GPS and engage a new location.
Now catch all the Pokemon and raid various Gyms and fight Pokemon GO Team Rocket right from your computer. Just make sure you avoid making long-distance map jumps as it may reveal GPS spoofing.
If you followed every step exactly how I told you, then you should be able to play it without any issues by now. If you still have any problems or troubleshooting issues, feel free to comment below. I will try to reach you as soon as possible.



Thanks for making way to play Pokémon Go when I’m unable to get out of the house with out screwing up all my phone settings! Now I can create a new account for the PC version without tarnishing my legit, cheat free account on the phone. 🙂
kingroot content trojan gen 2, becareful