It’s no secret that Apple’s MacOS is one of the best operating system when it comes to user experience and simplicity. MacOS contains some of the most amazing features in it which makes it a reliable, capable, and responsive operating system which makes it a perfect OS for everything except gaming. But with the current market prices, Apple products are quite expensive. While buying a $2000 Macbook just for MacOS doesn’t make any sense when you can install the same MacOS on your Windows system. In this article, we are going to show you that how to install MacOS on windows using VMWare.
Before we further go down the lane, there are some requirements which must need to fulfil if you want to experience the best experience after installing the MacOS in your windows machine.
Prerequisite:
- At least 2 GB of Minimum Memory
- Minimum Dual Core Processors, Higher than this are always welcomed.
- 80 GB free space in your HDD.
- At Least 256 MB of Graphics Memory
- Make sure that your system support Intel or AMD VT (Virtualization Technology)
- Make sure that VT (Virtualization Technology) is enabled from BIOS setup.
Important: For enabling the Virtualization Technology, you should boot your system into BIOS mode and then enable that. There are lot of guides on How to enable Virtualization Technology. You can find one of such tutorial here.
So, let’s get started and the very first thing you need to do in order to install MacOS on Windows using VMware, is to download the following things on your PC.
- MacOS Sierra 10.12 image file: Download
- WinRaR Tool: Download
- VMware Workstation Pro: Download or VMware Workstation Player: Download
- VMware Unlocker: Download
Once you are downloaded these files, you can proceed with the next step.
[toc]
Installing MacOS on Windows using VMWare
Step 1: Extract MacOS High Sierra Image
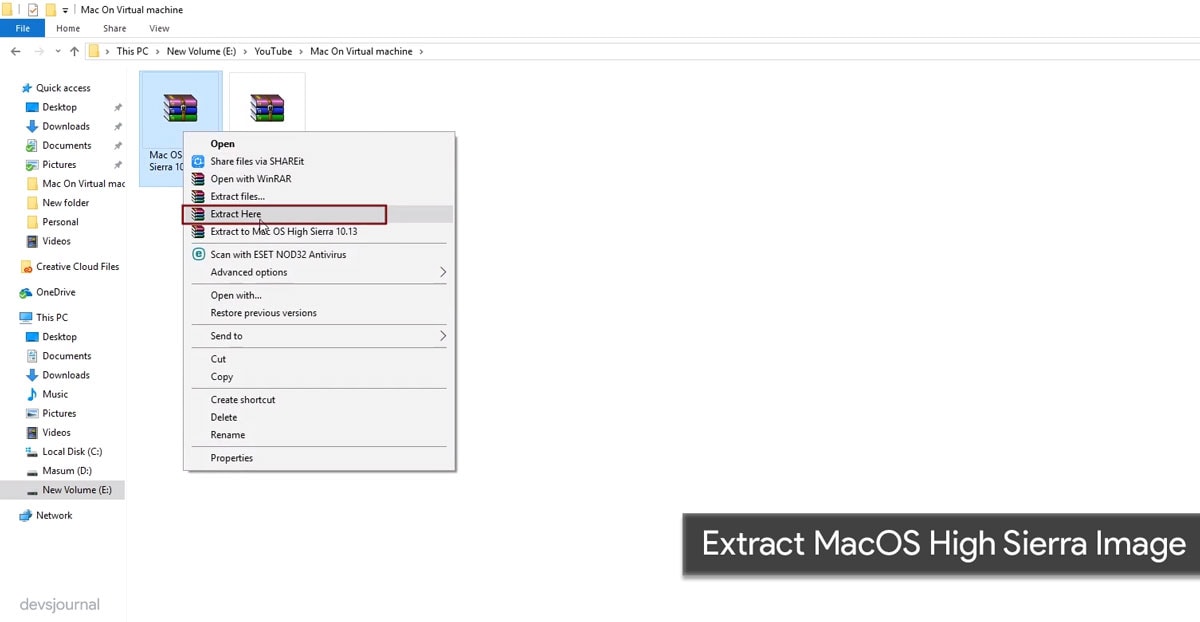
After Downloading the MacOS image file, you have to extract it via WinRAR. Unzip the file by right-clicking on the file and then select “Extract Here.” Wait for the complete file extraction before moving on to the next step.
Step 2: Now it time to install the VMware on your Windows PC
If you have downloaded the VMware then its ok but if not then you can follow the above link to download the VMware. After downloading the VMware, you need to install it on your PC. For installing VMware, click on the VMware setup file and follow the installing instructions. If you have installed already, then you can skip this step and move on to the next step.
Step 3: Unlock VMware using Patch Tools
Once you are done with installing the VMware, you need to unlock it for accessing all its features. For unlocking the VMware, we will use Patch Tools, which we have already downloaded. If not, then make sure to download the latest version of Patch using the above link.
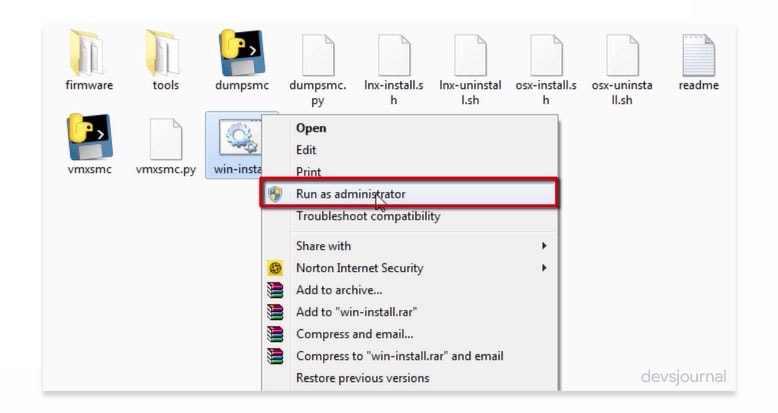
After downloading the Patch Tools, extract it using the WinRAR. Open “Patch Tool” folder and scroll down to the “Unlocker Master” and right-click on win-install.cmd and select Run as Administrator. It will install the patch file in the VMware, to unlock the VMware and let you install macOS on it.
Note: You have to wait for a while, until the command prompt window appears and disappear automatically. This is the sign that VMware is successfully patched or unlocked.
Step 4: Create & Edit New Virtual Machine in VMware.
- After Successfully unlocking the VMware, Open it and click on “Create a New Virtual Machine”(Ctrl+N) then select Typical (Recommended) and click Next.
- Select the default option => “I will install the operating system later” and click Next.
- Choose“Apple Mac OS X” from the operating system list then select macOS 10.12 from version and click Next.
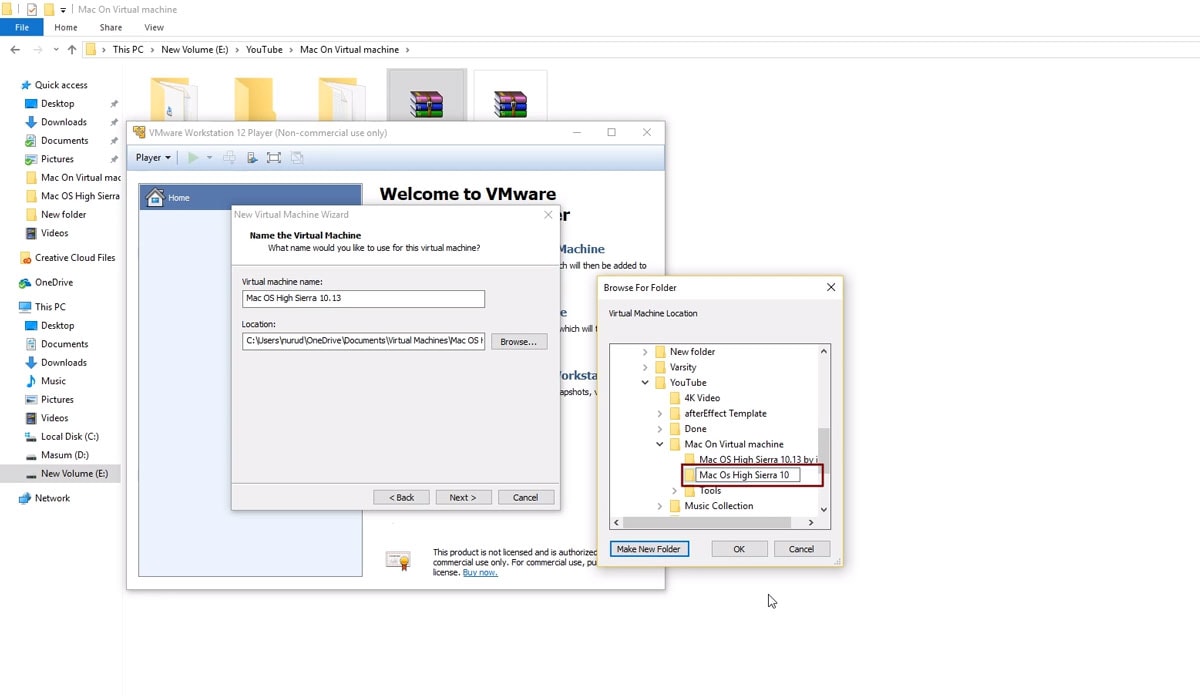
- Name the virtual machine MacOS any name which you like and then select a location where you want to save virtual machine files like the VMX file and click Next. Generally, this option is left default.
Note: Save it somewhere where you remember so that later on you can find this file when there is a need to edit it. - Don’t Specify the disk space just select Store virtual disk as a single file and click Next.
- The essential VM files for MacOS has been created, so go ahead and click Finish.
- Open the MacOS VM window on VMware workstation and click on Edit virtual machine settings.
Note: Don’t run the Virtual Machine until you made the essential steps. - Increase the Memory from 2GB to 4GB or higher GB of Ram memory for better performance.
- Increase the CPU processor core from 2 cores to 4 or Higher cores for better performance. That’s it, you are halfway done. Click on OK to save all the changes you made in the Virtual Machine Settings.
Step 5. Manage MacOS VMDK and Virtual Machine VMX file
1. Go back to the MacOS virtual machine files that we have saved in step 4. If you have left that steps as default then the files are saved in this location: “PC> Documents> Virtual Machine> virtual machine Name.”
In this file, you need to replace the MacOS Image with this existing VMDK (5 MB). Just drag the MacOS Image that you download and extracted in step 1, then drop it on the Virtual machine files and replace it with this file.
Note: Make sure that you have named the MacOS Image as your virtual machine name. It should be the same in order to be replaced and make it work otherwise, you need to add the image manually. Also, the size should change from 5 MB to 9.57 GB after you replaced the VMDK.
2. Now right-click on MacOS VMX and open it with Notepad.
3. Scroll down to the end, and type (smc.version = “0”) or (“smc.version = 0″as alternative) then press Ctrl+S to save it.
Step 6. Open the MacOS Virtual Machine
1. Open MacOS VM window and then click Power on this virtual machine.
Note: As we already installed the MacOS in the virtual disk(VMDK), we don’t need to install it again. All you need to do now, perform a clean installation of MacOS to set it up as your needs. When you played the VM, then it should take you to the next step where you can set up the MacOS as per your settings.
2. Choose your Country and click on Continue.
3. Pick a keyboard Layout and click on Continue.
4. Now choose your method to transfer information to this Mac and click on Continue.
5. In this step, you have to Sign-in with your Apple ID. If you have one then its good but if you haven’t then you have to create one, free Apple ID also work. If you don’t want to sign in with Apple ID or it doesn’t work, then Choose Don’t Sign in and Click on Continue.
6. Agree to the Terms and Conditions. Fill out all the details like Full name, Account name, Password, Hint and check the box of Set timezone based on Current location. After all this, click on Continue to create your user account for MacOS, which will be installed.
7. Just wait for a little as your MacOS is setting up. Once it is completely done, it can be run on the desktop. That’s it guys, You have successfully installed the MacOS on windows using the VMware.
Conclusion
While Windows has it’s advantages over MacOS, there are few softwares which are only available for MacOS. But VMWare can’t run graphics heavy applications like Final Cut pro on MacOS as it only uses very less graphic memory. If you have any doubt regarding the process or any apps not working, you can ask us in the comment section below.