Microsoft has finally unveiled its latest OS in Windows 11. As per initial reports, Windows 11 is known to be a sizeable upgrade over Windows 10. However, the majority of the users have reported several bugs when operating the system. One of the significant issues that have got tech experts worried is the high CPU usage in Windows 11.
Initially, the Microsoft Edge was responsible for high CPU usage in Windows 11. However, it is now being learned that overall CPU usage in Windows 11 is very high and needs to be under control.
This article will walk you through all the potential fixes that can drastically bring down your high CPU usage in Windows 11.
What Causes High CPU Usage in Windows 11?
There is no single cause that is causing high CPU usage in Windows 11. However, some of the common reasons for Windows 11 high CPU usage are as follows:
- Poor coding of the Browser engine
- Too many applications running in the background
- Antimalware Service Executable
- Antivirus overloading the CPU
These are some of the most common and recognized problems that can cause high CPU in Windows 11. However, thanks to the online tech community, experts worldwide seemed to have recognized furthermore causes that may be causing this problem, such as
- Insufficient RAM
- Native Command Queueing
- Windows Search Interference
Recommended: How to Free Up Disk Space in Windows 11
How to Check CPU Usage in Windows 11?
Before moving on towards fixing the problem, you must check the CPU usage on Windows 11 to determine whether the usage is higher than usual. To check CPU usage in Windows 11, follow the given steps.
- Close All Running applications
- Right-click on your Start Menu
- Alternatively, you can press Ctrl + Alt + Del on your keyboard.
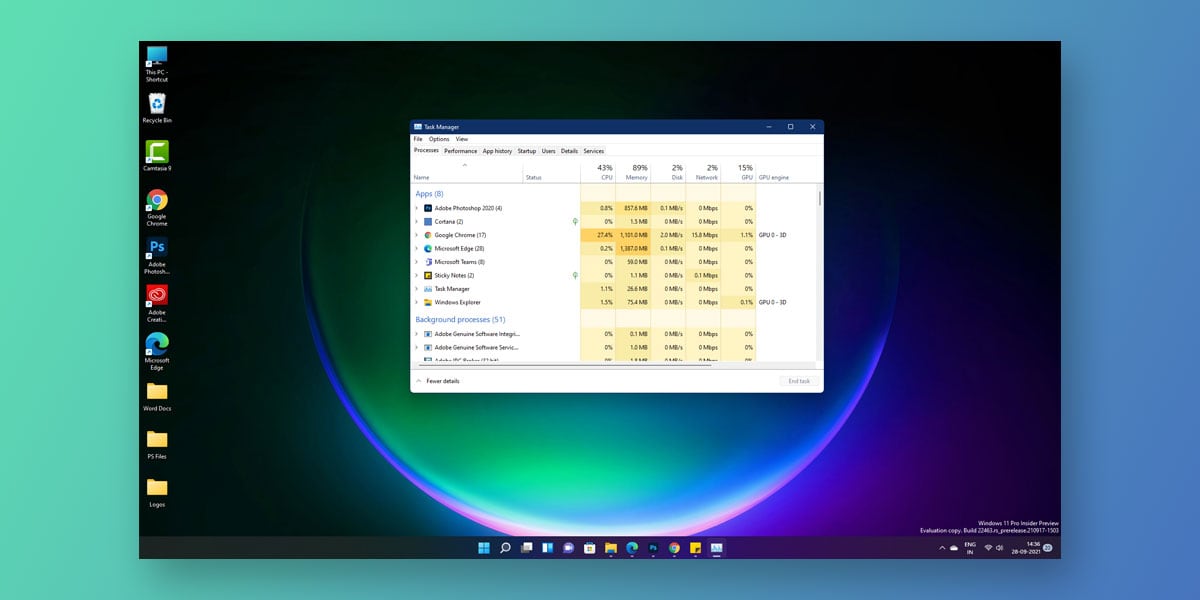
- Next, select Task Manager.
- Here, you can see the CPU Usage next to each running application under the CPU Column.

Now, you can check and identify which program or application is utilizing maximum CPU. The normal CPU for every program lies between 5-30%. This usage can go up to 80% if you are running high-end games on your system.
How to Fix High CPU Usage in Windows 11?
One of the most common symptoms of high CPU usage in Windows 11 is severe lagging and a dip in the overall functioning of the computer. Higher the CPU usage, the higher the chances of your system crashing, lagging, hanging, or crashing altogether.
The more power your CPU consumes, the faster your system fan will have to function, and the faster it functions, the more it is likely to fail. As we mentioned earlier, there is no one common reason as to what causes this problem in Windows 11.
Therefore, below are a list of solutions to fix high CPU usage in Windows 11. These fixes are generally aimed at solving the common causes of the issue.
Note: The fixes mentioned below are arranged as per the severity of the issue. Therefore, it is vital that you apply these fixes serially and do NOT jump directly to the final step. Doing so is likely to result in damage to Windows 11 altogether.
1. Restart Your System
There is nothing a quick restart cannot fix. Though it is a temporary solution, restarting your system can cause the PC’s services to reboot and go back to normal. Once your system starts, you can check your CPU usage once again using the steps mentioned above.
Also, you will be able to identify the root cause of the problem or even the program or application that can be causing the problem. Now, check to see if the CPU levels have dropped down. If not, continue to apply other fixes.
2. End/ Restart Processes
When you check your CPU usage, you will see the CPU consumption of a particular application, program, or service consumes. In such cases, your best bet is to either end or restart a process consuming heavy memory altogether. To end/restart operations in Windows 11, follow the given steps.
- Close All Running applications
- Right-click on your Start Menu and select Task Manager
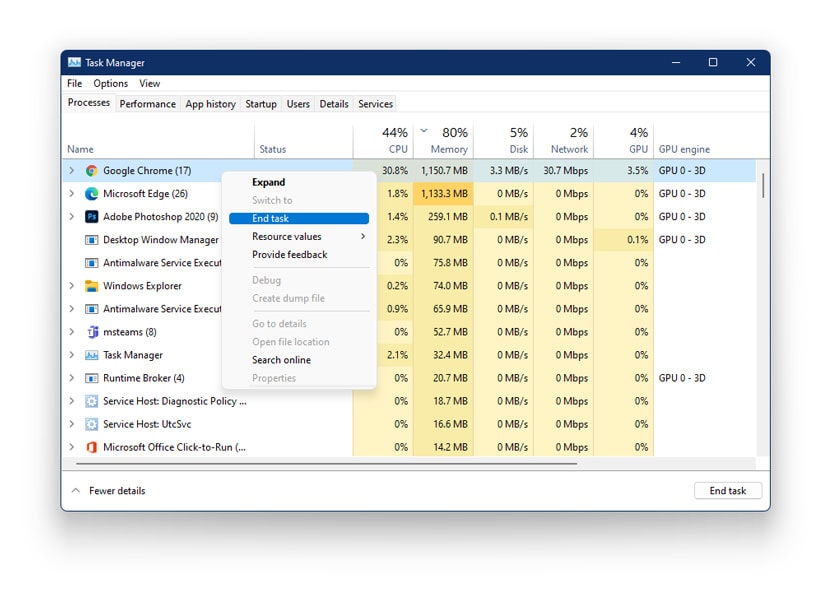
- Here, you can see the CPU Usage next to each running application under the CPU Column
- Look out for apps that aren’t in use at the moment but are consuming a significant amount of CPU memory
- Right-click on the service/application
- Click on End Task
Repeat this process to end tasks that aren’t in use but are eating a chunk of your CPU memory. Also, note that CPU usage is generally higher when playing high-definition games, streaming a video application, or running video-editing software. In such cases, it is best if you close all your background apps and focus on just a single application at a time.
3. Stop Background Applications
Irrespective of your system’s operating system and overall specifications, running too many applications in the background is never a smart move. The more applications you have running in the background, the more memory the CPU has to distribute to different locations.
This can lead to the primary application or service receiving less than the required memory to function. Similarly, some of the background applications can be heavy, ultimately leading to heavy CPU usage in Windows 11.
In such cases, stopping all the background applications on your system can do the job. To stop background applications on Windows 11, follow the given steps.
Note: There’s a fundamental difference between multitasking and starting/stopping apps. Also, note that in Windows 11, you have to stop each background application individually.
- Close all running applications
- Right-click on Start Menu & Select Settings
- Go to Apps > Apps & features
- From the apps given, locate the apps you don’t want running in the background and Click on the three vertical dots in front of the app
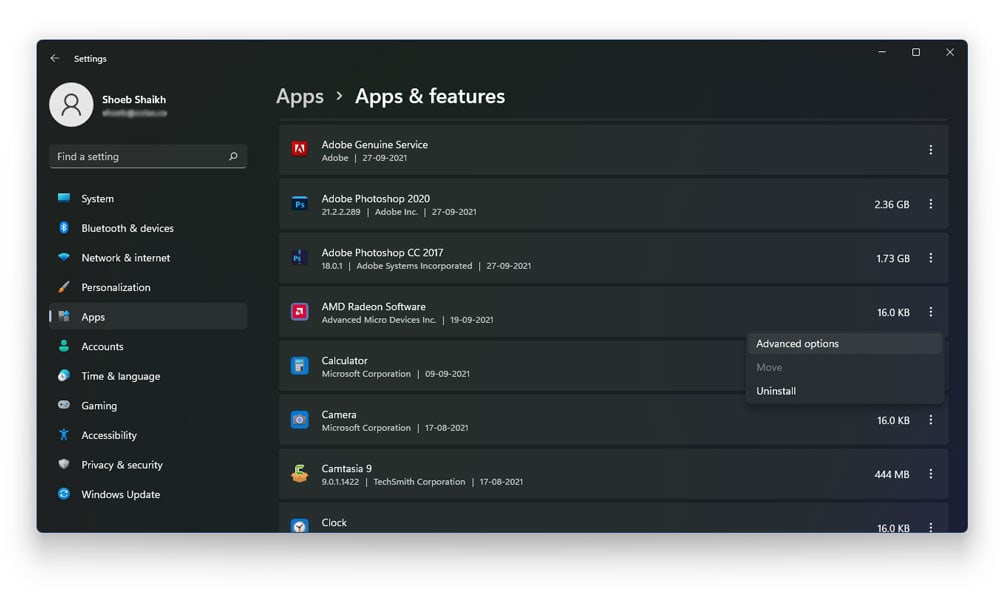
- Tap on Advanced Options
- Next, scroll to Background App Permissions
- Here, select Never from the drop-down menu
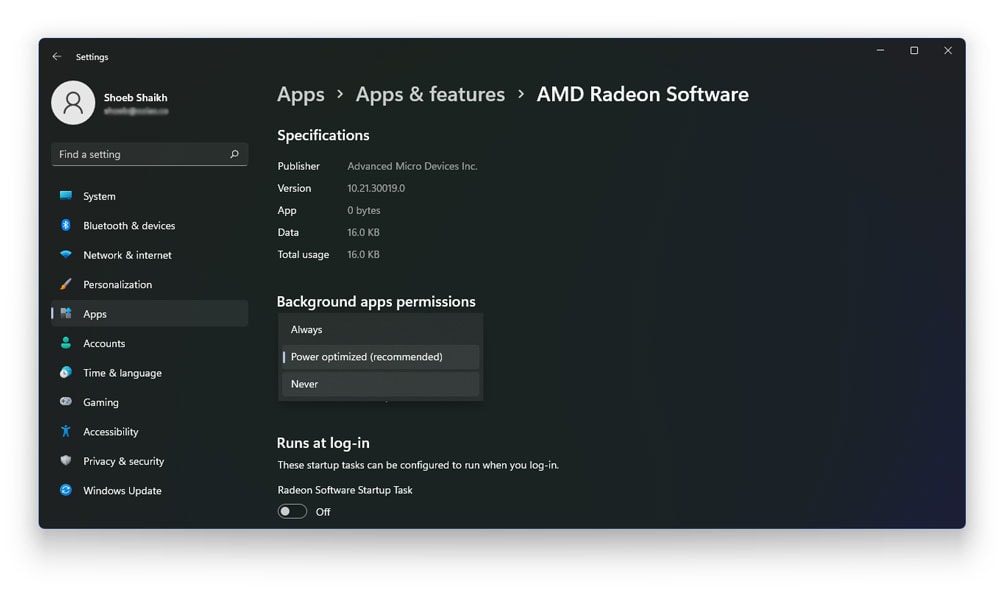
- This will now stop the selected application from running in the background
- Repeat this procedure for the apps you don’t want running in the background
Note: When going through the above-mentioned steps, you may find that some of the applications under Apps And Features will not have an Advanced Options button. This means that those apps cannot be restricted from running in the background.
Also read: How to Disable Startup Programs in Windows 11
4. Alter Windows Registry File
The majority of the users found this to be a recurring problem after they had enabled Cortana on Windows 11. In such cases, you can disable Cortana in Windows 11 or utilize the below-mentioned steps to delay the start of Cortana in Windows 11. All you need to do is make a few minor changes in the Windows Registry Editor.
To alter the Windows registry file, follow the given steps.
- Close all running applications
- Press Windows + R on your keyboard to open Run
- In the dialog box, type in the following command
regedit
- The Windows Registry Editor is now visible on your screen
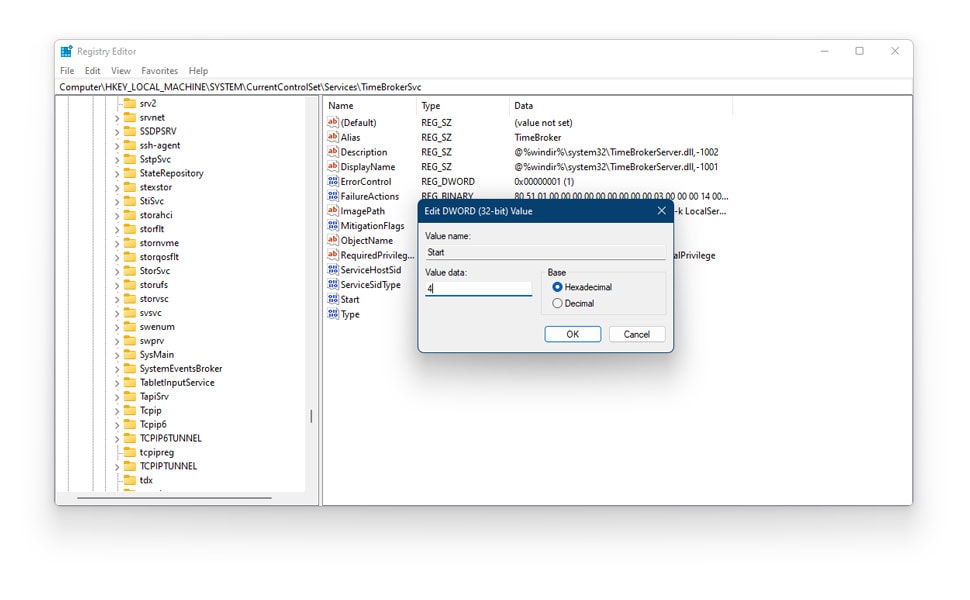
- Now, navigate to the below-mentioned path in the Windows Registry Editor
HKEY_LOCAL_MACHINE\SYSTEM\CurrentControlSet\Services\TimeBrokerSvc
- Locate a key called Start & Right Click on it
- Click on Modify & Set the value as four (4).
- Save your changes
Now that you have made changes to the Windows Registry file, check to see if all the services have resumed and the CPU usage has dropped. You can use the steps mentioned earlier in the article to check CPU usage in Windows 11.
5. Disable Windows Search
As we mentioned earlier, windows search interference is one of the major problems causing this problem. If you can trade off file indexing in Windows 11, you are likely to bring down the CPU usage on your system. Disabling the Windows Search function is known to have the job done in most low-end PCs and traditional HDDs, as doing so ultimately restricts file indexing from accessing the CPU memory. To disable Windows Search in Windows 11, follow the given steps.
Note: Implementing this step means you won’t be able to reaccess Windows Search as it will entirely suspend the search function.
- Close all running applications
- Press Windows + R on your keyboard
- This will open the Run dialog box on your screen
- In the dialog box, type in the following command
services.msc
- You will now see the Services tab on your screen.
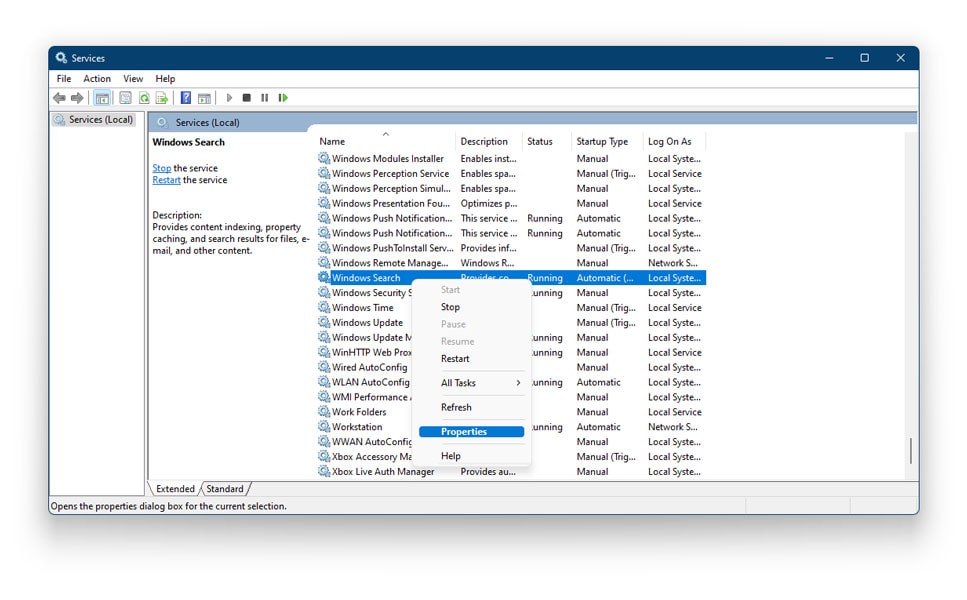
- Scroll down until you locate Windows Search on your right-hand pane
- Right-click on Windows Search and Click on Properties
- Next, access the General tab on the top.
- Check the Service Status to see if the service is running.
- If it is running, click on the Stop button below.
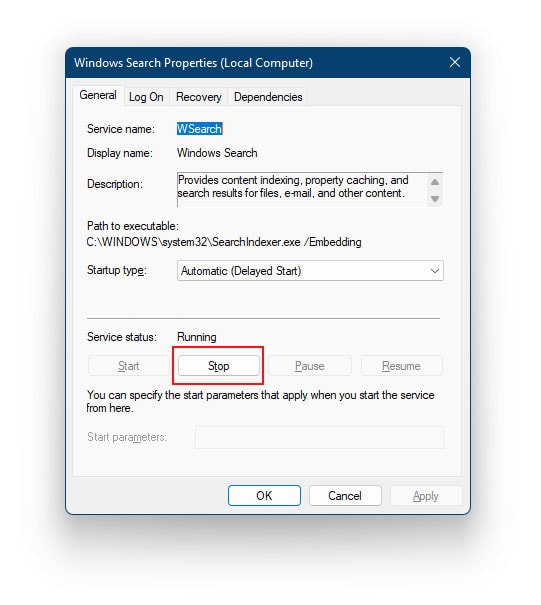
- Wait until the services are stopped
- Once the Windows Search service has entirely stopped, change the Status type above from Automatic (Delayed Start) to Disabled.
6. Disable Superfetch (Sysmain)
If disabling your Windows search didn’t work, you will need to disable Superfetch on Windows 11. You can check our article to learn more about SuperFetch. In general, the Superfetch service is responsible for improving the system’s overall performance.
To achieve this, the SuperFetch automatically preloads applications into your system’s RAM even before you use that application. However, this could be the reason why multiple services are hogging all the CPU memory. Though this isn’t a problem on high-end PCs, it could cause concern in low-end PCs.
Therefore, disabling the Superfetch system could bring down the overall CPU usage on your system. To disable superfetch (Sysmain) on Windows 11, follow the given steps.
- Close all running applications
- Press Windows + R on your keyboard to open Run
- In the dialog box, type in the following command
services.msc
- Scroll down until you locate SysMain on your right-hand pane
- Right-click on SysMain and Click on Properties
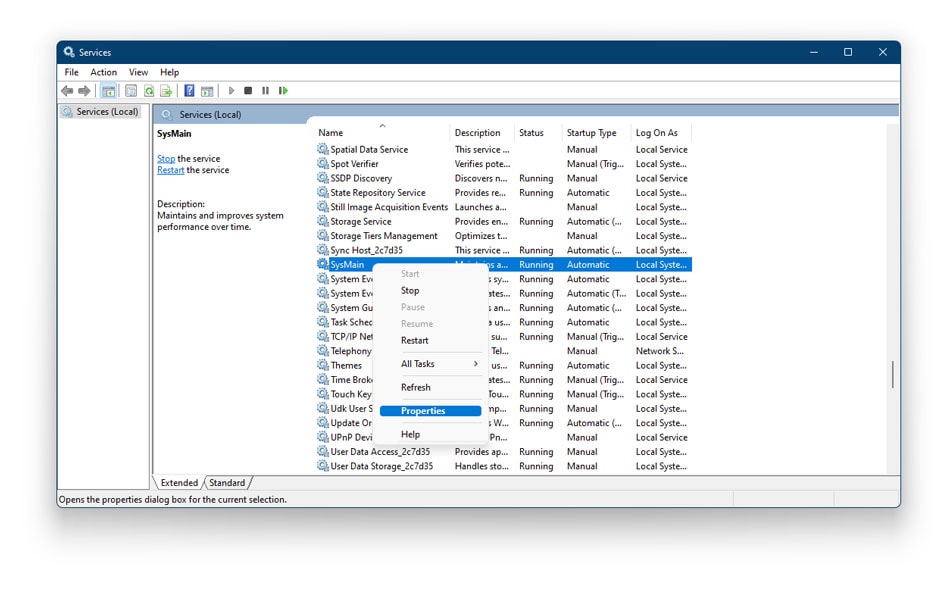
- Next, access the General tab on the top
- Check the Service Status to see if the service is running
- If it is running, click on the Stop button below
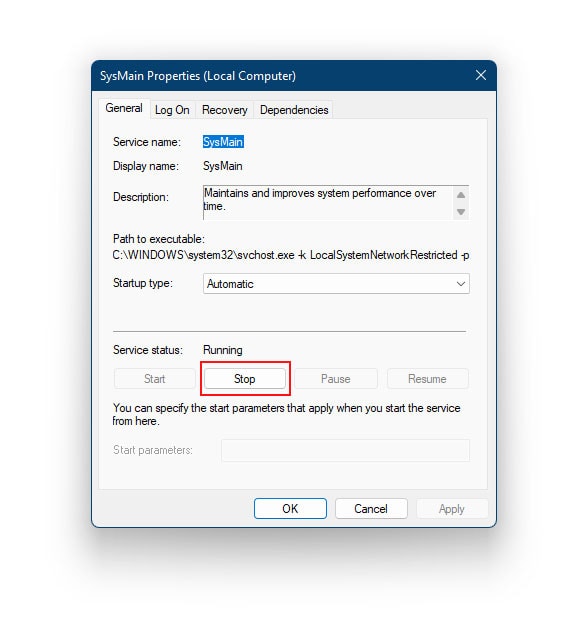
- Wait until the services are stopped
- Once the SysMain service has entirely stopped, change the Status type above from Automatic to Disabled.
- Click Apply to save the changes
Also read: Antimalware Service Executable High CPU Usage in Windows 11
Conclusion
We hope our article helped you fix the high CPU usage on Windows 11. As we have mentioned earlier in this article, there isn’t one specific reason behind this. However, the fixes mentioned in this article tend to attack each reason individually.
Note that all the fixes above are mentioned as per the severity of the issue. Therefore, it is vital that you apply these fixes serially and do not jump directly to the last one. If you think we may have missed out on any potential fix, please drop down your suggestions in the comments section below.