At times, we tend to store things without even knowing what they are. We skip the file size and keep on piling them up on our system. However, we fail to realize that the more data we have on our system, the more it keeps eating away our storage space.
Sometimes, we store data on our computers and completely forget about it. This further leads to unnecessary data getting stored on our system memory.
Windows also stores hidden cache, junk files, and many temporary files, apart from the visible files. A lot of programs on our system further contribute to this unnecessary storage space.
By the time you get around, you will realize that there is no storage space remaining for anything. This means you cannot install a new game, watch a movie, or download a TV series.
When the storage space is about to max out, you will realize significant changes in the overall functioning of your system. The more occupied the storage space, the slower your system tends to get. According to multiple tech experts, most of the computer’s problems are linked directly with the system’s storage space.
To avoid your system from malfunctioning, you must undertake a habit of routinely freeing up disk space on your PC. However, this does NOT mean you should go and delete everything on your system. Doing so will do you no good and can wreck your system. Therefore, this article will discuss the various ways to free up disk space in Windows 11.
Note: Freeing up disk space does NOT mean deleting anything. Do NOT delete anything before you ensure that it is safe to be deleted.
How to Free Up Space on Windows 11
There are numerous ways using which you can free up disk space in Windows 11. To ensure that your PC does not run into any issues due to excessive storage, it is always vital that you clean your system once every few months.
You can quickly check for huge files on Windows 11 using some of the methods given below. Windows 11 also comes with a built-in feature that automatically identifies the large files crammed onto your PC.
Mentioned below are some of the easiest ways that will help you clear disk space on Windows 11 and get rid of unnecessary files.
Note: These fixes are mentioned as per the severity of the problem. Therefore, you must apply these fixes serially.
1. Cleanup Recommendations
As the name suggests, the Cleanup Recommendations automatically brings forth unnecessary files, folders, and applications on your program that are of no use whatsoever. You will first have to enable this feature to clean your Windows 11 storage space. To enable cleanup recommendations, use the following steps.
- Close all running applications
- Right-click on the Start menu
- Click on Settings
- Locate and tap on System on the left navigation pane
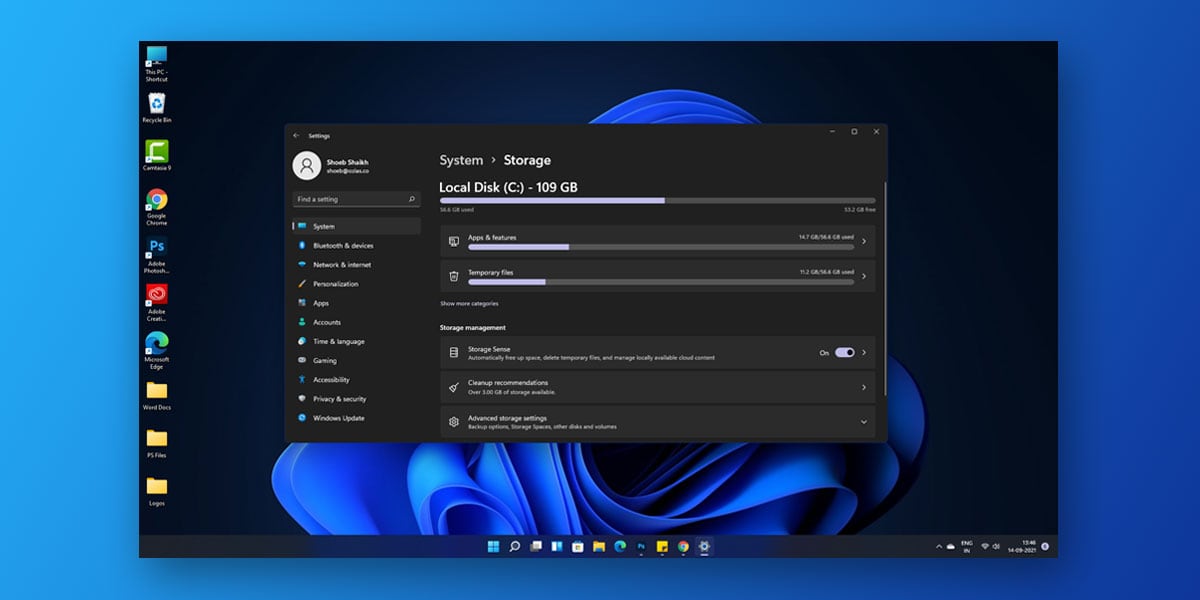
- Scroll down & Select Storage
- This will open the Storage Management Page
- Now, Windows will run an automatic scan to manually detect the applications and programs that are taking up most of your Windows 11 storage space.
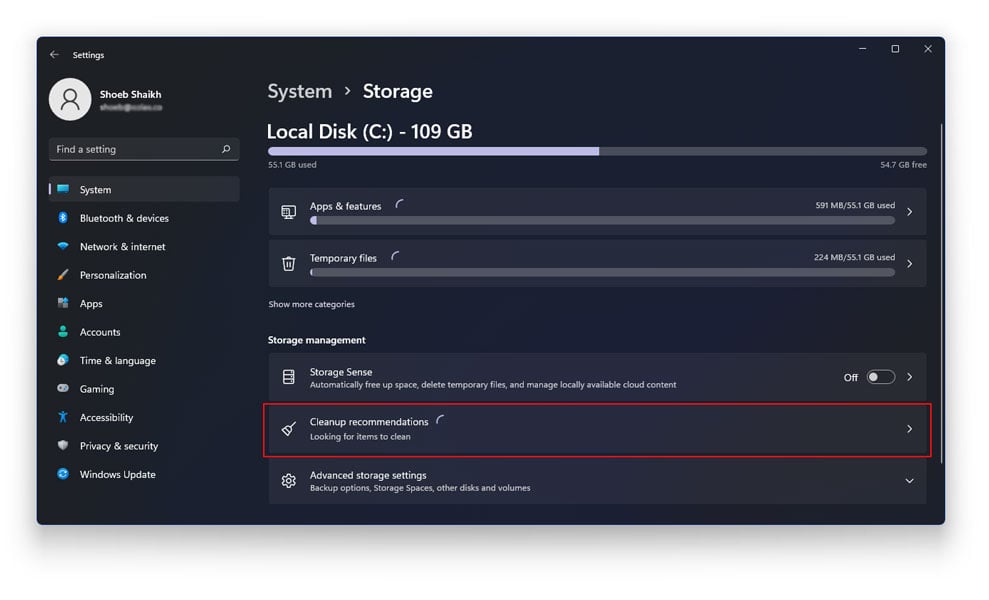
- Next, click on Cleanup Recommendations.
- Click on Each dropdown menu.
- Next, select the recommended items to delete
- The recommended items are categorized under the following.
- Temporary files
- Large or unused files
- Files synced to the cloud
- Unused apps
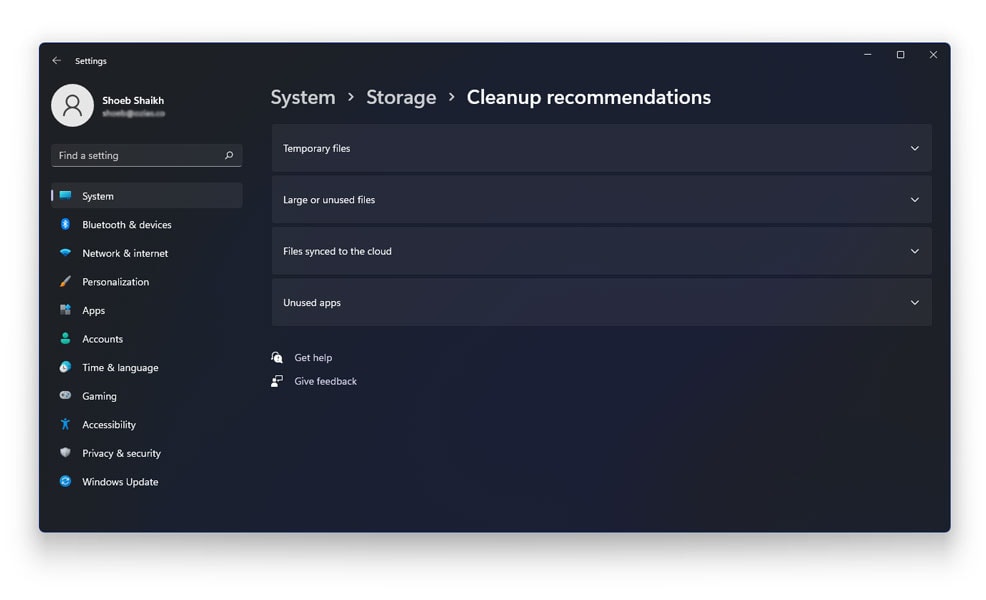
- Click on each category and see the recommended files
- Upon expanding a particular category, click on the item you want to delete and click the “Clean up” button.
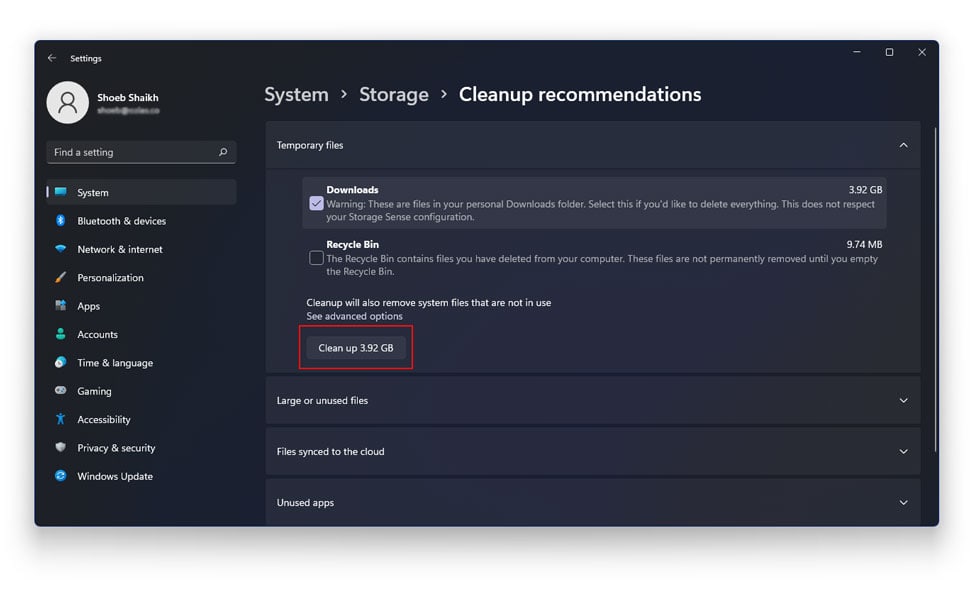
Note that you DONT have to delete every file suggested. The files are just a recommendation of the computer program, and you can choose to keep and delete specific files, respectively.
2. Enable Storage Sense
As we mentioned earlier, there are a lot of in-built features in Windows 11 that automatically detects files that take up a lot of storage space. The Storage Sense is one such built-in tool that automatically detects and deletes unnecessary files and empties the Recycle bin to free up disk space on Windows 11.
Once turned on, the storage sense will automatically take care of all the unnecessary files on your system. To enable storage sense on Windows 11, follow the given steps.
- Close all running applications
- Right-click on the Start menu
- Click on Settings
- Locate and tap on System on the left navigation pane
- Scroll down & Select Storage
- Under Storage Management, you will see an option that reads Storage Sense
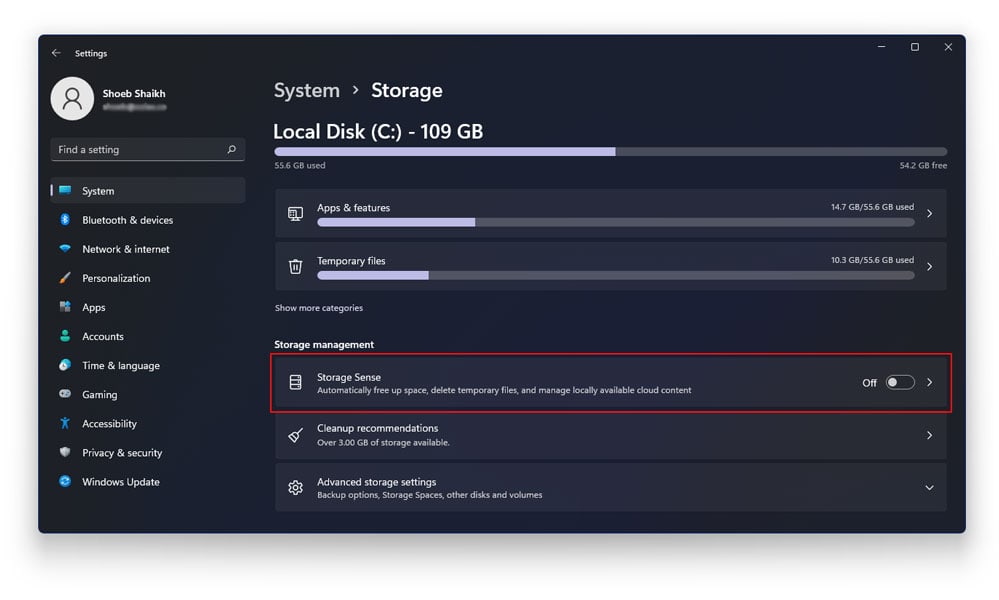
- Turn on Storage Sense
- Next, click on the > arrow right in front of Storage Sense
- Turn on Automatic User content cleanup. Doing this will help you choose the files that Storage Sense will automatically delete henceforth.
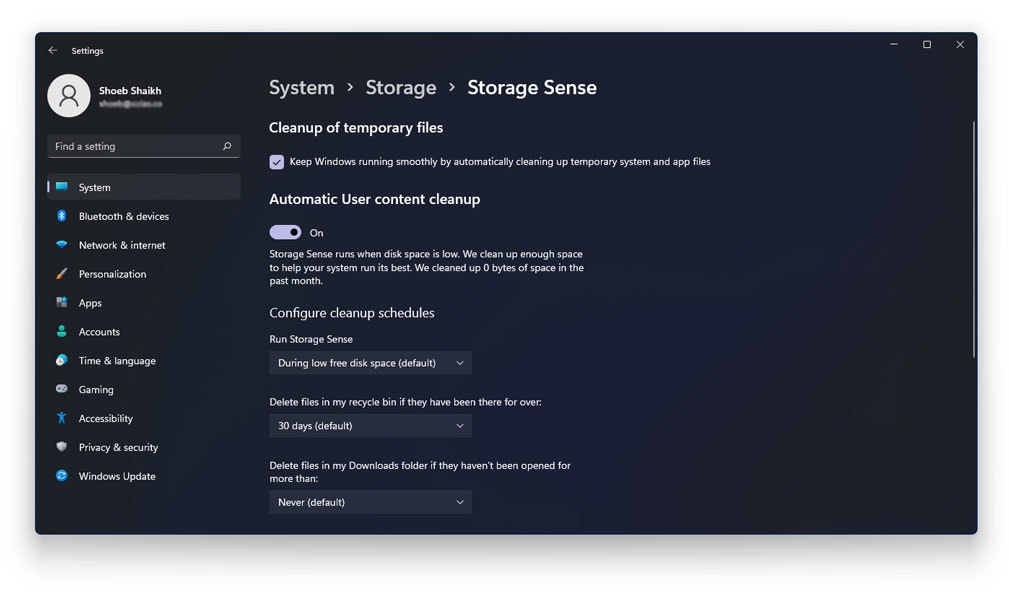
- Now, using configure cleanup schedules you can select various options to free up space in Windows 11 using Storage sense.
- Once you have selected required schedules, click on Run Storage Sense now.
Windows 11 will now automatically run a Storage Sense scan to look for unwanted files and clean out the temporary files based on your configurations. Alternatively, if you want Storage Sense to detect and delete unnecessary files automatically, select the checkbox in front of Keep Windows running smoothly by automatically cleaning up temporary system and app files.
3. Uninstall Large Sized Applications
At times, we tend to cram up our system by installing applications that eventually take up a lot of space, such as high-definition games, photo editing software, and so on. Courtesy of our saved files, the storage space of these programs keeps increasing over time. Therefore, you mustn’t install too many large-sized applications together. To identify and uninstall large-sized applications on your system, follow the given steps. the
- Close all running applications
- Right-click on the Start menu and Click on Settings
- Locate and tap on System on the left navigation pane
- Scroll down & Select Storage
- This will open the Storage Management Page
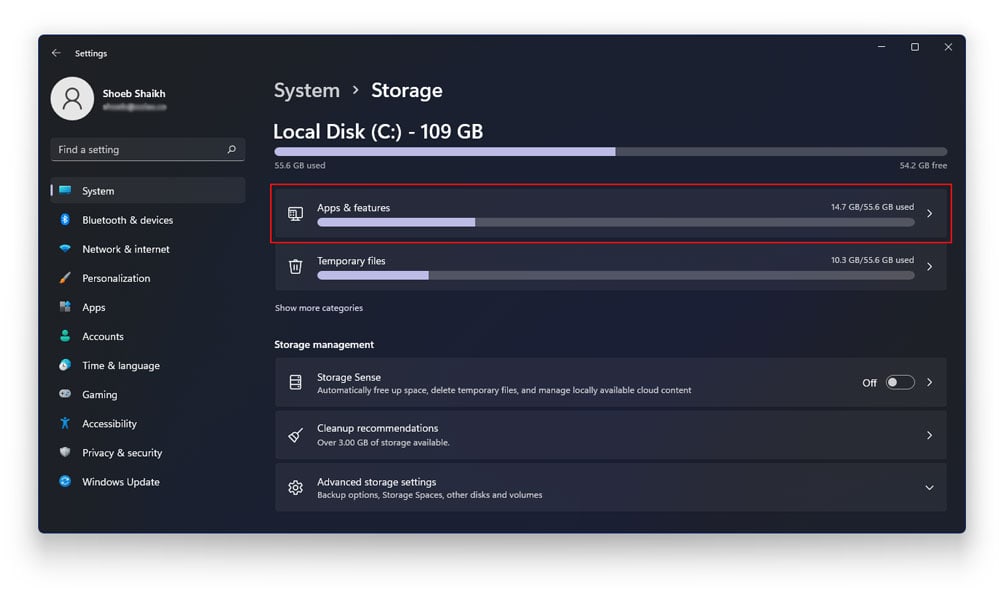
- Now, go to “Apps & features“
- Click on “Sort By” at the top
- In the drop-down menu that appears, select Size
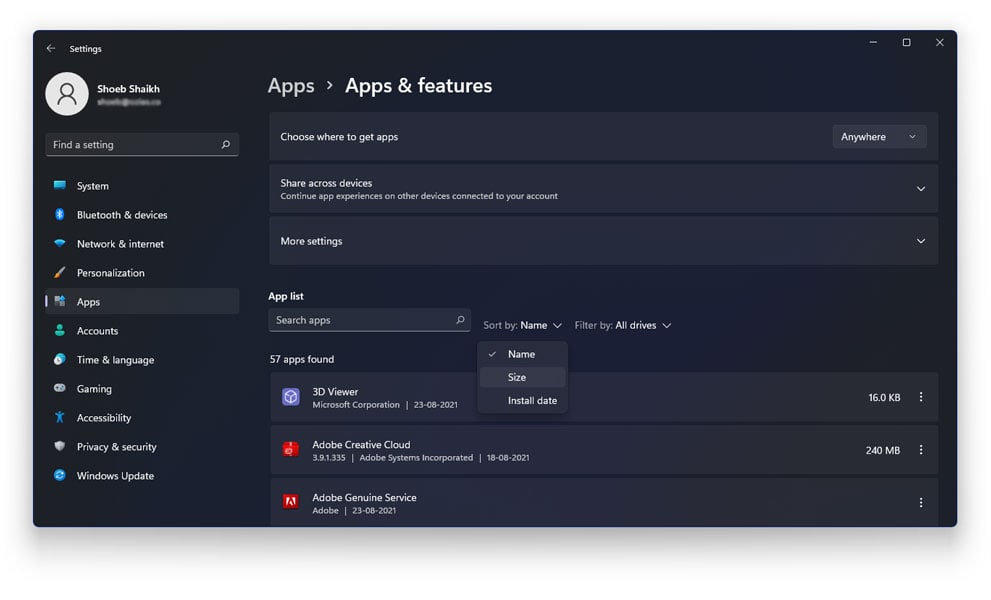
- This will now show the largest applications on your system
- Click on the three vertical dot icon next to each app you wish to remove from your system
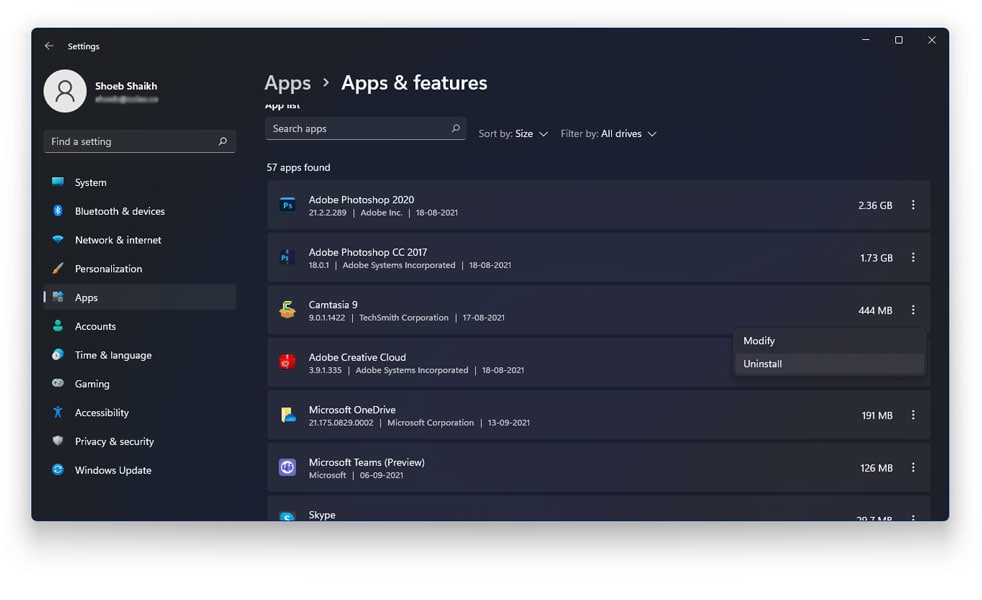
- Next, tap “Uninstall.”
- Click on “Uninstall” to confirm your choice
The app will now be removed from your system. Repeat this procedure to remove any unwanted extensive sized application from your system.
4. Uninstall Programs using Control Panel
There is more than one way to free up space in Windows 11 and delete heavy sized applications. The control panel is another easy and effective way to delete unwanted applications from your PC. To uninstall programs using the Control Panel, follow the given steps.
- Close all Running applications
- In the Start Menu, type & Select Control Panel
- When inside the Control Panel, select Programs > Programs and Features
- You will now see all the applications that are currently installed on your system, along with their respective file size
- Right-click on the application you wish to uninstall
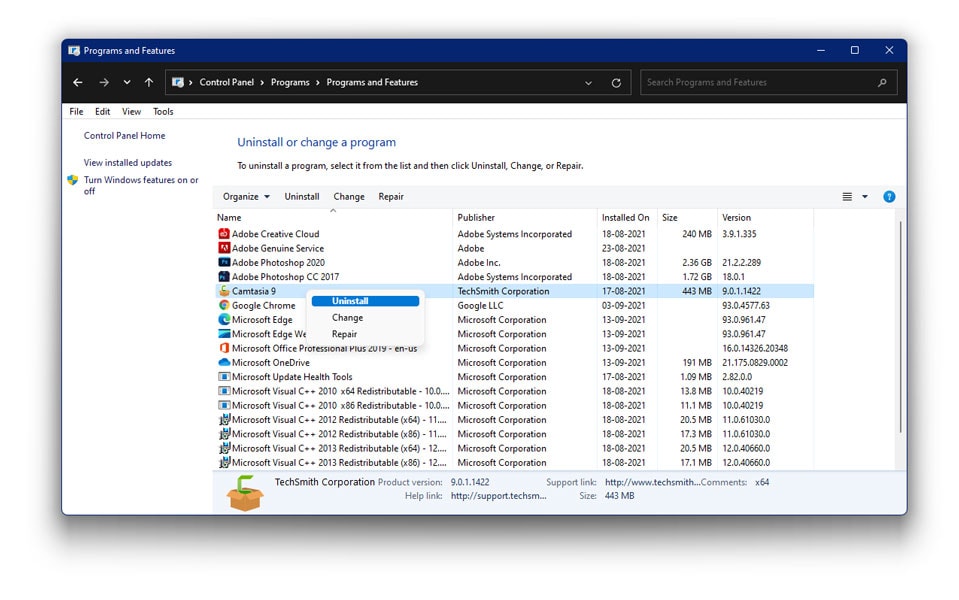
- Select Uninstall
- Click Yes to confirm
Windows will now remove the application and all its components from the system, including game data, saved files, etc. Repeat this procedure to remove any application you want to from your Windows 11 system.
5. Use Disk Cleanup Tool
The Disk Cleanup Tool is an in-built Windows 11 feature that deletes temporary and junk files from your system to free up space from your Windows 11 system. To use the disk cleanup tool, follow the given steps.
- In the Start Menu, type Cleanup
- Next, select Disk Cleanup
- You will now see a list of unused, temporary, and junk files on your system.
- To delete any of these files, check the box next to each file. The downloaded program files, temporary internet files, and thumbnails are selected by default
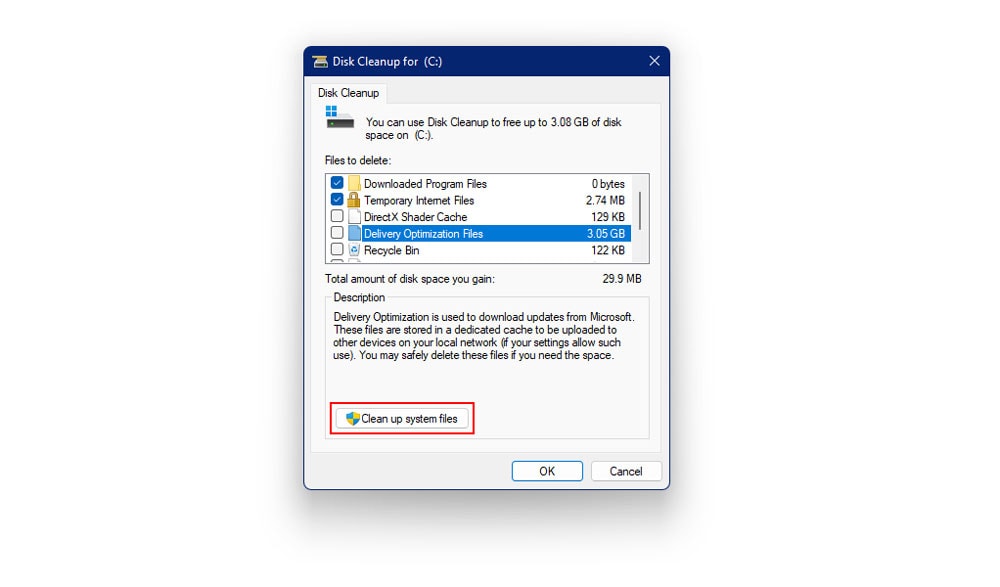
- Tap on Clean Up System Files
- This will start the cleanup process
6. Reset Windows 11
Despite having implemented every solution given above, you may still be unsatisfied with the results when it comes to freeing up disk space in Windows 11. Irrespective of the number of scans you run and files you delete, you will see that the storage sense will remain untouched. In such a case, you will probably have to reset Windows 11 to format your system completely.
Note: This step is to be implemented only if any of the aforementioned methods do NOT yield significant results. Resetting Windows 11 will completely wipe out every last ounce of data present on your computer. Therefore, ensure that you back up all the important files onto a separate drive before resetting Windows 11.
- Close all running applications
- Right-click on the Start menu
- Click on Settings
- Go-To System
- Next, tap on Recovery
- Click on Reset PC

- Next, click on Remove Everything
- Windows 11 will now work on resetting and will wipe out everything present on your computer.
Sit back and relax. This is a time-consuming process.
Conclusion
We hope our article successfully walked you through enabling storage sense and the different ways to free up disk space on Windows 11. Though the temporary and junk files may be small in size, they tend to accumulate on your system over time and can occupy a significant chunk of your storage space.
The storage sense is an in-built Windows 11 tool, when enabled, automatically detects and deletes temporary and junk files from your system. However, note that these fixes are mentioned as per the severity of the problem. Therefore, it is vital that you apply these fixes serially and do not jump to applying the final fix directly.
I installed a 8Tb drive (Drive-P:)and backed up my media from previous computers.
I installed 32Gb RAM to manage looking at the files.
I disconnected from the internet and just left my computer idle and my origional C: drive was at 172 GB free space.
After 1 week of my computer just sitting doing nothing my C: drive decreased to 140 GB free space.
I changed my storage settings so that all new app files and everything would be stored on the P: drive just 5 minutes ago.
I checked the C: drive just now while writing this comment and it has already decreased to 139 GB.
WTF! Windows 11 just bleeds storage. Eats it up with way too much data creation. How on earth do they sell a computer with a 220GB SSHD and expect it to even run Windows a year from purchase. I have grave concerns about the way Windows 11 runs and feel Microsoft will be seeing a lawsuit on their faulty system.
If your Windows 11 C drive is filling up without any reason, it can be due to a Windows restore point, malware attack, corrupted files or you might have too many temporary files. You can try cleanup recommendations (1st method above) and enable Storage Sense (2nd method).
You can also delete system restore point. To do that Go to Settings > System > About > Under related links select “System Protection” > Under Protection settings, make sure protection if “Off” for Local Disk C; if not then click on configure and select “Disable system protection”
Other possible way out is to disable hibernation or extend C drive partition. Check this article to extend the partition. This issue exists ever since Windows 10 was developed and there’s no proper update from Windows to fix it.