Virtual voice assistants are the need of the hour and a step ahead into the “Smart” world. Initially, voice assistants came into being when Apple came out with Siri, its voice assisting platform that truly changed the technical industry.
However, while Siri was going strong in the market, other major players in the industry weren’t too far behind. Then, taking a page out of Apple’s playbook, Amazon released “Alexa,” it’s very own voice assistant aimed explicitly at turning households into smart households.
It wasn’t long before Microsoft came out with Cortana. Partnering with Intel, Cortana now comes with every Windows PC, smartphone, and laptop. However, Cortana has become increasingly restrictive post the launch of Windows 11.
For performing essential functions like searching over the web, apps & documents, checking notifications, calendars, and much more, Cortana is very handy to the users. It can recognize natural voice without keyboard input and give you information from the Bing search engine.
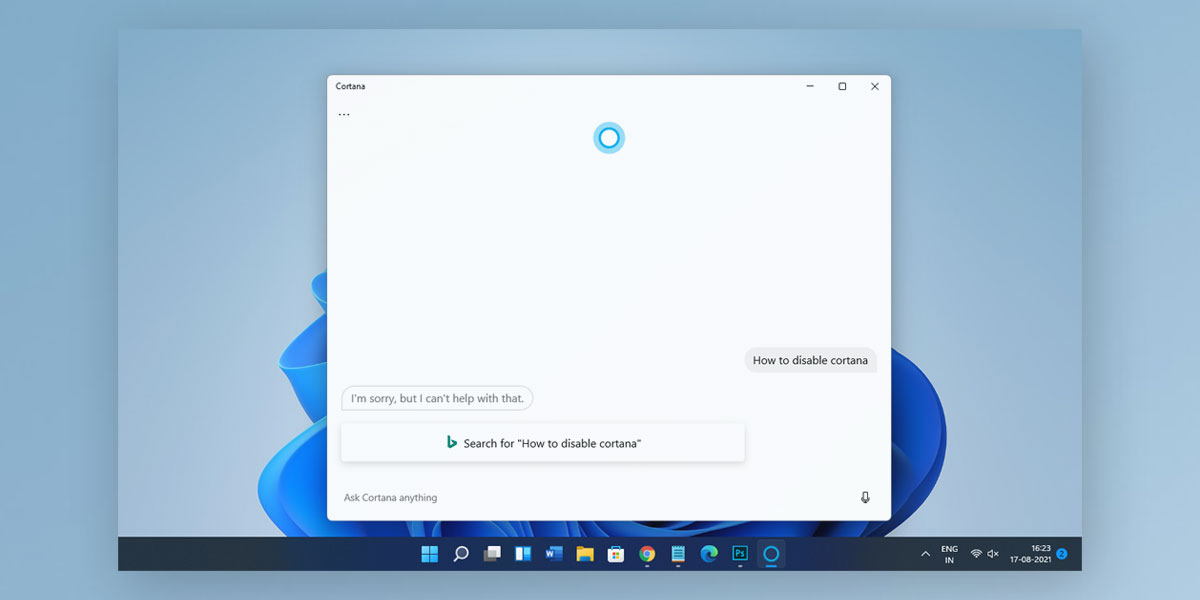
People using Windows 11 have expressed frustration with Cortana. Nowadays, Cortana instantly launches the Microsoft Edge Browser by default. It uses the Bing search engine to make things worse, which fits nowhere in the 21st century. And if you, too are wanting to move on from Cortana, we have you covered.
In this article, we will discuss the various ways to disable Cortana on Windows 11. Also, we have mentioned the steps using which you can altogether remove Cortana on Windows 11. But if you find Cortana helpful despite not using it much, we have also included the steps following which you can successfully restore Cortana in Windows 11.
Why Disable Cortana in Windows 11?
Microsoft Cortana, the voice-enabled virtual assistance for Windows 11, is a great application designed to help you do an array of tasks with just your voice commands. For performing essential functions like searching over the web, apps & documents, checking notifications, calendars, and much more, Cortana is very convenient to the users. However, Cortana has become increasingly restrictive post the launch of Windows 11.
Being an AI-based application, Cortana tends to keep track of everything you search and may collect user data that could threaten user privacy. This is done to give a better personalized experience by sharing it with Microsoft and its services.
Also, Cortana is configured to launch the Microsft Edge browser by default. In addition, this Microsoft voice assistant uses the Bing Search Engine, which is something users don’t like to have at their disposal. Also, this app occupies a lot of the free RAM even when your system is in an idle state. This can drastically impact your system’s overall performance.
Also read: How to Fix Microsoft Edge High CPU Usage in Windows 11
How to Disable Cortana in Windows 11?
If you don’t like the sound of Cortana constantly nagging you through your PC, you can disable it in Windows 11. There are various ways to disable Cortana in Windows 11, and here are our top picks for the same
1. Disable Cortana on Startup
Every time you get a new system (PC/laptop) or start your computer after a fresh factory reset, you must configure all the Startup Programs. Here, the system will ask you to apply all the settings as per your preferences. One such setting is regarding the Cortana Assistant.
Upon Startup, your system will ask you whether you would like to enable Cortana on Windows 11. To disable Cortana in Windows 11 on Startup, follow the given steps
- Right-click on the Start menu
- Select Settings
- Go to Apps
- Tap on Startup on the left navigation tab
- Locate Cortana under the Startup Apps on the right side of the navigation tab
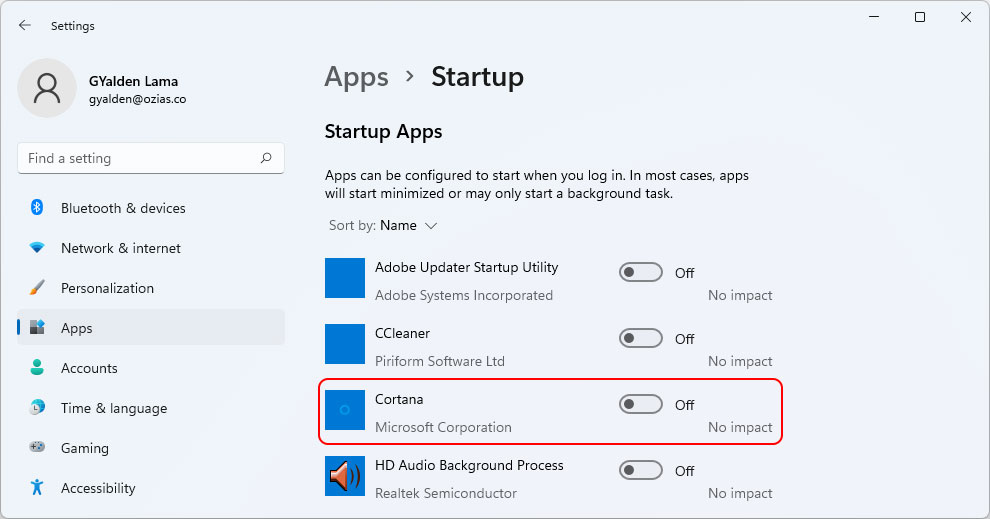
- Toggle Off Cortana
This will turn off Cortana as long as your system is on. Then, follow the same steps and tap on Turn On Cortana to start Cortana on Windows 11 again.
2. Disable Cortana in Windows 11 using Group Policy Editor
Disabling Cortana on Windows 11 using Group Policy Editor is the easiest method for those using the Pro or Enterprise edition. However, Windows Home users can also use the Local Group Policy Editor, but they will need to add it separately on the system first. To disable Cortana in Windows 11 using GP Editor follow these steps:
- Tap Windows + R on your keyboard and type “gpedit.msc” in the box that appeared.
- Locate Administrative Templates under Computer Configuration on the left navigation tab and click on it.
- Go to Windows Components
- Locate and click the Search option on the right navigation tab.
- Select “Allow Cortana,” right-click on it, and select Edit
- Tap on Disabled >> Apply, and lastly, hit the OK button to save the changes made.
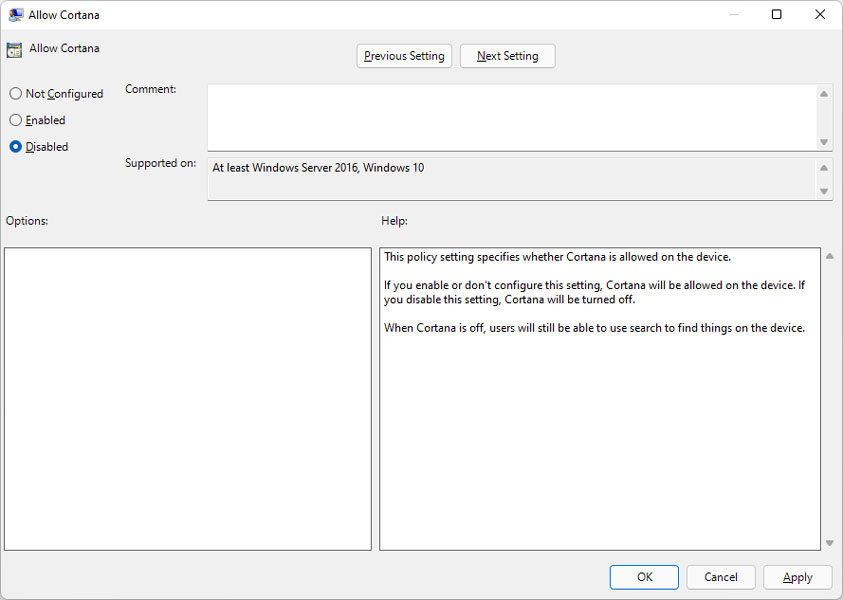
By following the same steps, you can re-enable the Cortana by selecting the “Not configured” or “Enabled” option.
3. Disable Cortana in Windows 11 using the Registry Editor
If you are a Windows 11 Home User, you can disable Cortana in Windows 11 using the registry editor. However, you will first need to create a System Restore Point before using the Registry Editor. To create a System Restore Point, follow the given step.
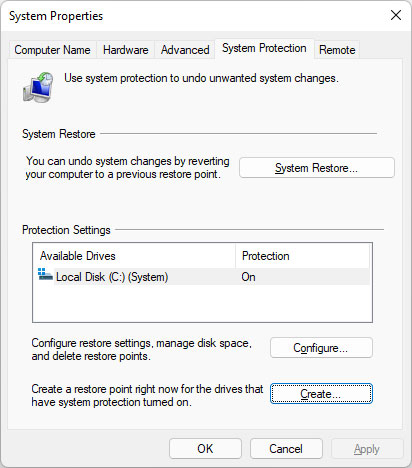
- In the Windows Search box, type “system restore” and Click on “Create a restore point”.
- Locate the “System Protection” tab,
- Tap on Create Button at the bottom.
- Type in a name for the System Restore Point
- Click on Create.
- And it will take you less than a minute to get the process done.
Upon successfully creating a system restore point, follow the given steps to disable Cortana in Windows 11 using the registry editor.
- Tap Windows + R and type “Regedit” in the box
- Press Enter
- You will get a dialog box asking you if you want the app to make any changes to the device; click Yes to proceed.
- Next, navigate to the path given below:
HKEY_LOCAL_MACHINE\SOFTWARE\Policies\Microsoft\Windows\
- Right-click on the Windows option on the left pan, choose New >> Key, and name “Windows Search.”
- Right-click on the Windows Search Folder
- Tap on New >> DWORD (32-bit value)
- Name it as “AllowCortana.”
- Next, double click on it set the value to “0,”
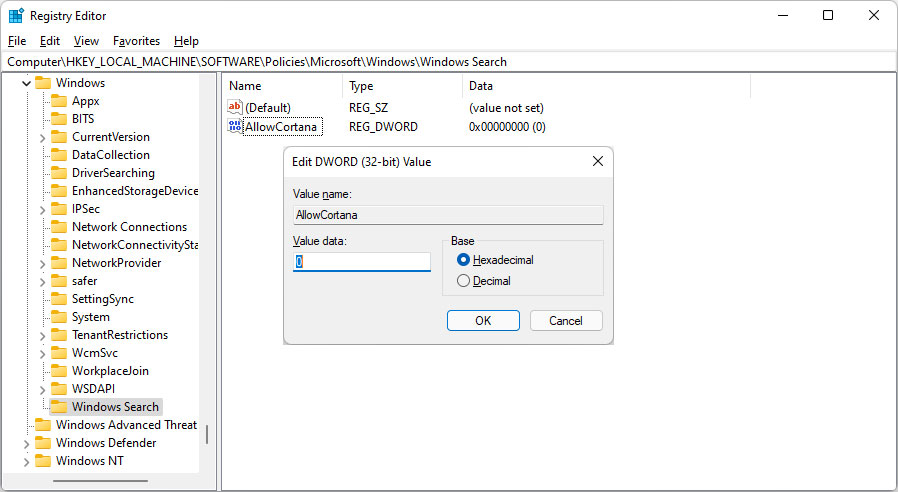
- Click OK
- Restart your PC
If you wish to get the Cortana back in the future, you can effortlessly do that by changing the “AllowCortana” value to 1.
How to Permanently Remove Cortana in Windows 11?
Cortana has become increasingly restrictive since Windows 11’s release. It is now a part of the system applications in Windows 11 and is no longer visible at the start menu.
Nowadays, Cortana instantly launches the Microsoft Edge Browser by default. It uses the Bing search engine to make things worse, which fits in nowhere in the 21st century. But there is a way through which you can permanently remove or Disable Cortana in Windows 11.
1. Remove Cortana in Windows 11 for Current User
If there are multiple user profiles currently working on your system, you can choose to remove Cortana for the current user or all users simultaneously. To remove Cortana in Windows 11 for Current Users, follow the given steps.
- Go to the Start Menu
- Type in Command Prompt
- Run Command Prompt as an Administrator
- Type in the following command
Get-AppxPackage *Microsoft.549981C3F5F10* | Remove-AppxPackage
- Press Enter
- Wait until Windows 11 removes Cortana.
This will remove Cortana in Windows 11 for the Current User.
2. Remove Cortana in Windows 11 for All Users
As we mentioned above, you can remove Cortana in Windows 11 for Current and All Users. To Remove Cortana in Windows 11 for all users, follow the given steps.
- Go to the Start Menu
- Type in Command Prompt
- Run Command Prompt
- Type in the following command
Get-appxpackage -allusers *Microsoft.549981C3F5F10* | Remove-AppxPackage.
- Press Enter
- Wait until Windows 11 removes Cortana.
This will remove Cortana in Windows 11 for ALL USERS.
How to Restore Cortana in Windows 11?
For performing essential functions like searching over the web, apps & documents, checking notifications, calendars, and much more, Cortana comes in quite handy.
It can recognize natural voice without keyboard input and give you information from the Bing search engine. Also, Cortana comes in handy for those who have a tight schedule and needs someone to help them keep track of things. In such cases, a voice-reminder can work wonders which is why most people prefer having Cortana in Windows 11.
However, there is no need to panic if you have disabled Cortana in Windows 11, as there are different ways to restore Cortana in Windows 11. Furthermore, it is relatively simple to restore Cortana in Windows 11 since there are no commands involved, nor is there a need to run Powershell, Command Prompt, or the Windows Terminal.
To restore Cortana in Windows 11, follow the given steps.
- Go to the Start Menu
- Locate and click on Microsoft Store
- When inside the store, click on the Search Bar
- Type Cortana
- Hit Search
- Locate the app which comes from Microsoft Corporation to get the genuine version of the app.
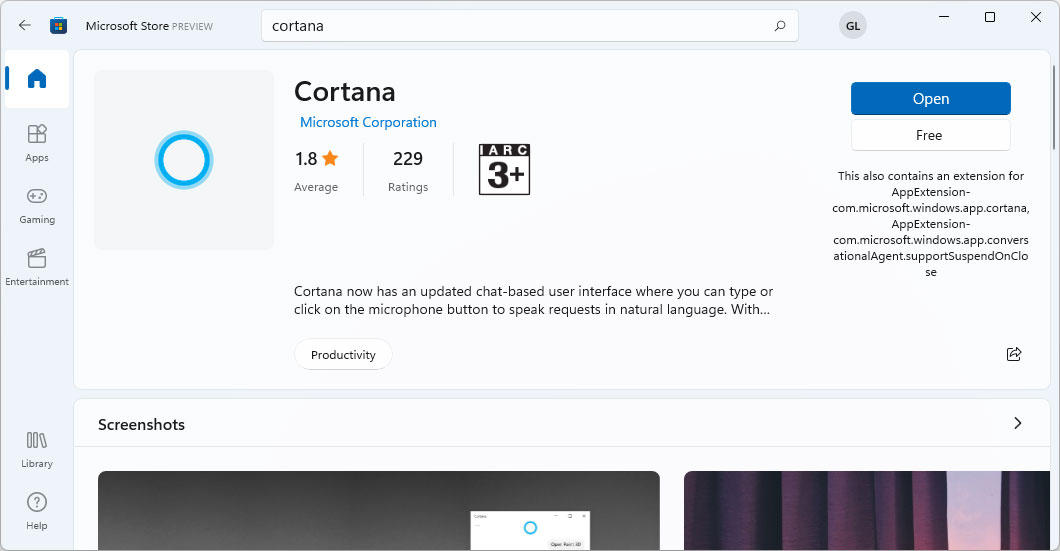
- Or, use the following link: Cortana
- Click Install
- Wait for the installation to finish.
Windows will now install and restore Cortana on your Windows 11
Conclusion
We hope our article successfully walked you through how you can disable, remove, and restore Cortana in Windows 11. You can straightforwardly disable Cortana in Windows 11 by implementing the methods we have shown to you. If you are still having any hard times getting the application shut down, you can feel free to reach us using the comment box below.


![How to Enable Drag and Drop in Windows 11 [5 Methods]](https://devsjournal.com/wp-content/uploads/2021/09/How-to-Enable-Drag-and-Drop-in-Windows-11-768x384.jpg)