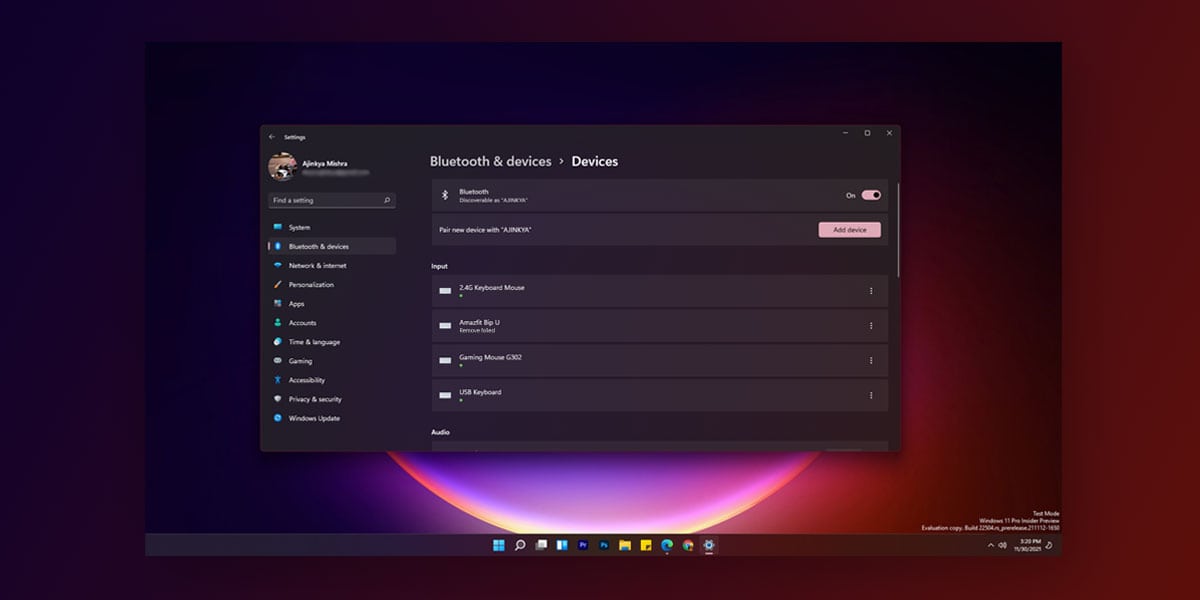
While Windows 11 has got the fans hooked already, there are quite a few issues that people have been reporting ever since they have first got their hands on the brand new OS. Although there are plenty of built-in features that allow for troubleshooting, basic issues and crashes continue to be a crucial part of Windows 11. One such issue is when users have reported the “Remove Failed” error every time they try to remove a Bluetooth device.
The majority of these issues are pertaining to wireless controllers and other Bluetooth audio devices. When users try to remove (unpair) a particular Bluetooth device, they are met with the “Remove failed” error on their screen. If you are someone who can’t remove Bluetooth device in Windows 11, we are here for you. This article will walk you through the different ways to fix “Bluetooth remove failed” error in Windows 11.
6 Ways to Fix “Bluetooth Remove Failed” Issue in Windows 11
There could a be a lot of reasons behind the “Bluetooth removal failed” error on Windows 11. At the same time, there are also 6 possible ways to fix it.
1. Remove Bluetooth Device in Windows 11 under Airplane Mode
Getting your device onto airplane mode pretty much works like a restart. So, one of the best ways to remove Bluetooth devices in Windows 11 is via airplane mode. To do so, follow the given steps
- Right-click on the Start Menu & Select Settings
- Go to Network and internet
- Now, click on the toggle to enable Airplane Mode
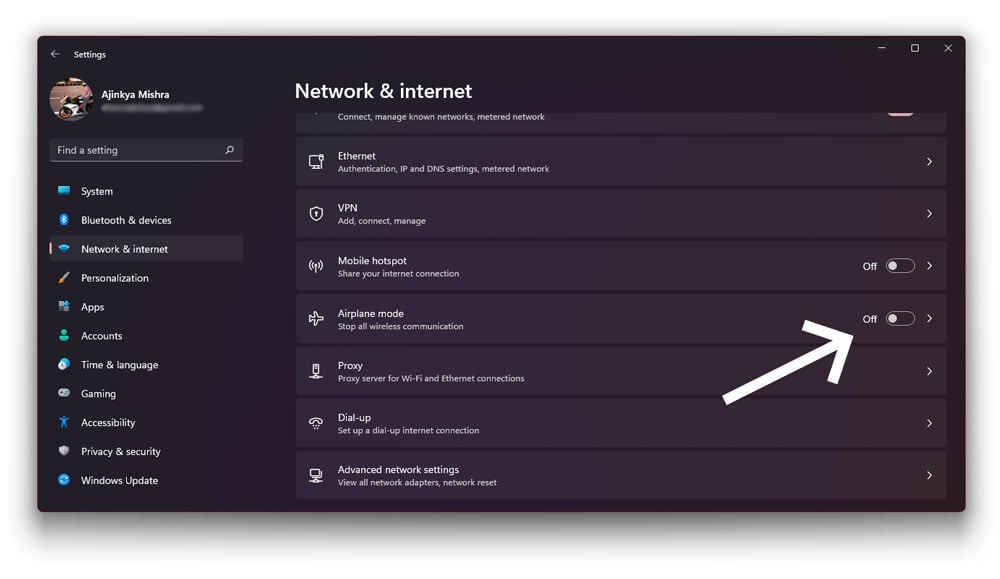
Your device will now shift into airplane mode. During this time, you can try removing your Bluetooth device. If you are successful, follow the same steps and turn off Airplane Mode to resume your system’s normal functioning
2. Remove Bluetooth Device in Windows 11 from Control Panel
As the name suggests, the Control Panel acts as the command centre that allows you to take care of multiple things that go on within your system. If you want to Remove Bluetooth device in Windows 11 from Control Panel, follow the given steps
- Search & Click on Control Panel from the Start Menu
- View by Category & Go to Hardware and Sound
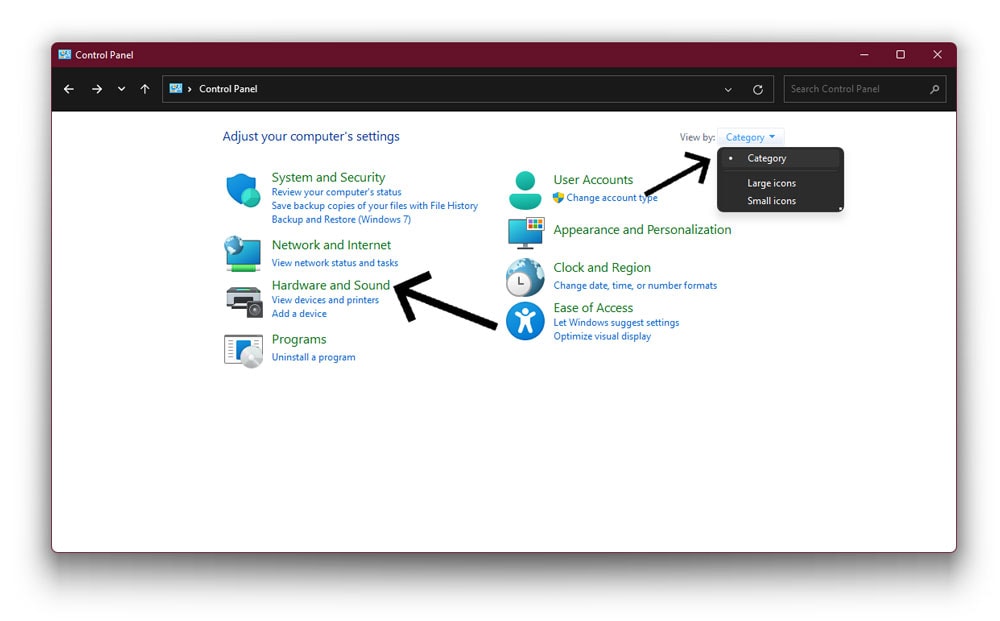
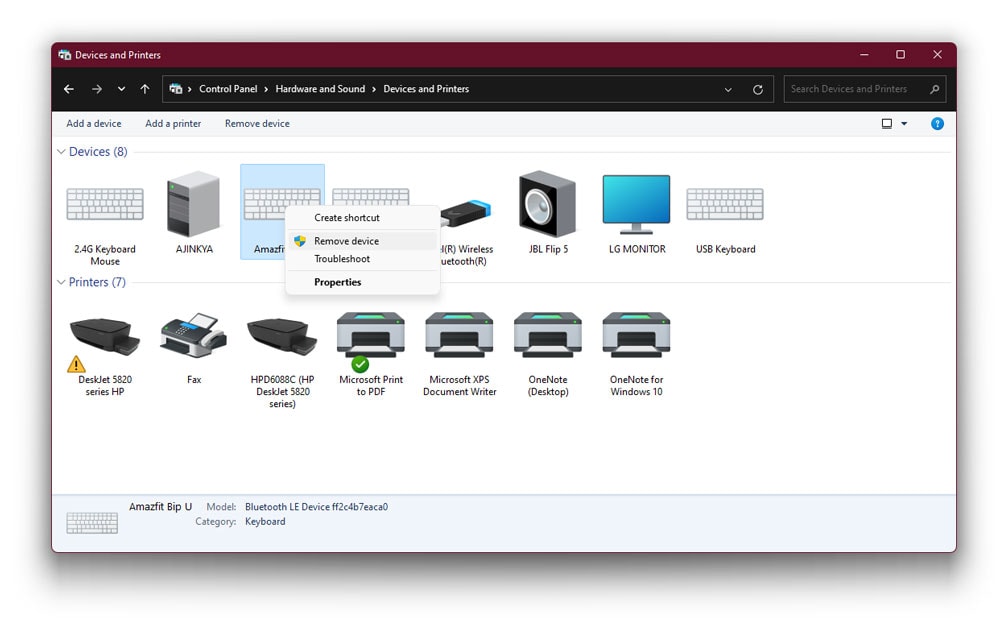
- Next, select Devices and Printers
- Now, right-click on the Bluetooth device you want to remove & Select Remove device
3. Remove Bluetooth Device in Windows 11 via Device Manager
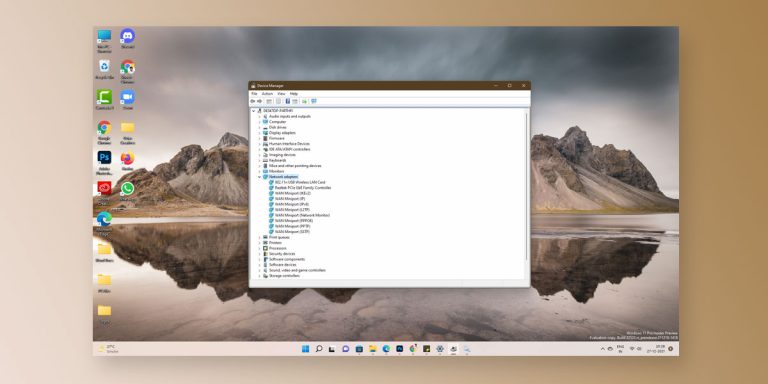
A quick way to solve the “Bluetooth remove failed” problem is to completely uninstall the Bluetooth device. To do so using the device manager, follow the given steps
- Right-click on the Start Menu
- Select Device Manager
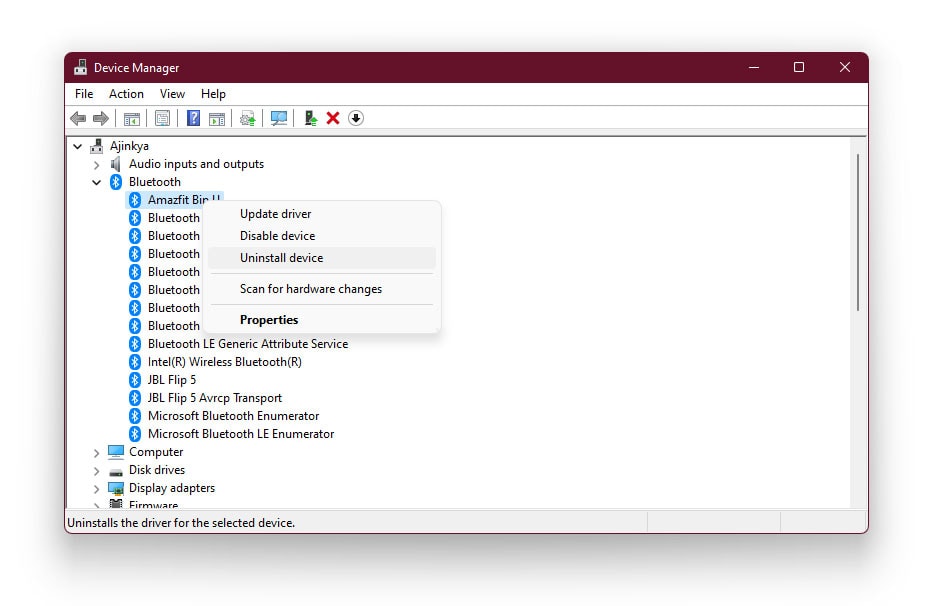
- Click on Bluetooth
- Right-click on the Bluetooth device you want to uninstall
- Select Uninstall Device
Note: In case the Bluetooth device is hidden, just tap on View in the menu bar. Then, select Show Hidden Devices
- In the pop-up that appears, tick the box next to Delete the driver software for this device
- Hit Uninstall
Windows will now uninstall the selected Bluetooth device. Once the uninstallation is done, restart your computer to see if the problem has been dealt with.
4. Remove Bluetooth Device in Windows 11 via Registry Editor
To Remove Bluetooth device in Windows 11 via Registry Editor, follow the given steps
Note: Using the registry editor directly includes making changes to the system registry. This can have serious consequences if done incorrectly. Therefore, we strictly advise you to carefully follow the steps.
- Press Windows + R on your keyboard to open RUN
- In the Run dialog box, type in the following command and press OK
regedit
- The Windows Registry Editor will now appear on your screen
- Navigate to the given path
Computer\HKEY_LOCAL_MACHINE\SYSTEM\CurrentControlSet\Services\BTHPORT\Parameters\Devices
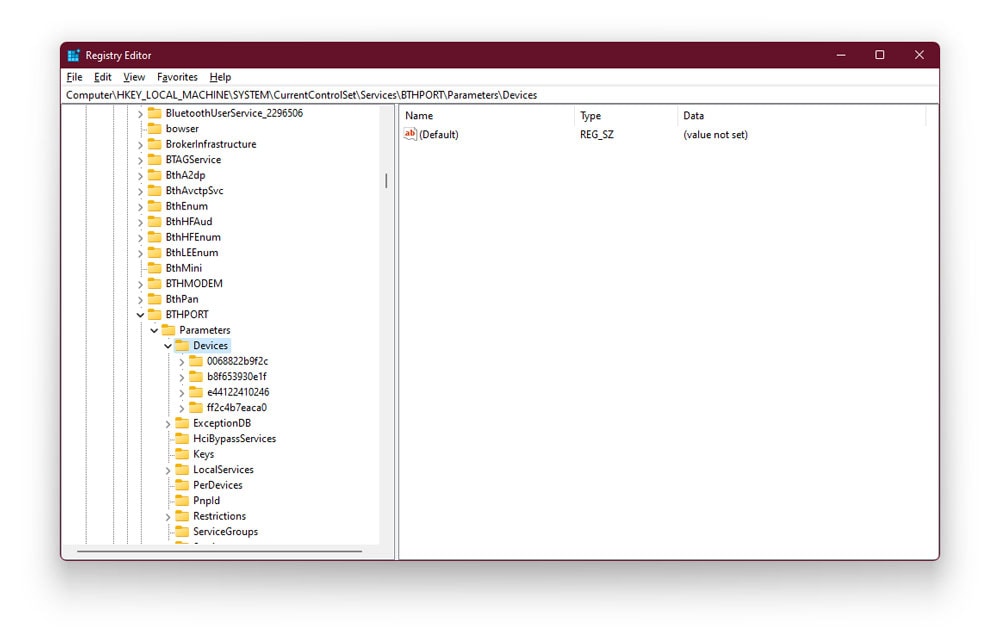
- Under devices, you’ll notice multiple 12 digit device keys
- Locate and right-click on the registry key that represents the Bluetooth device you want to remove
- Select Delete
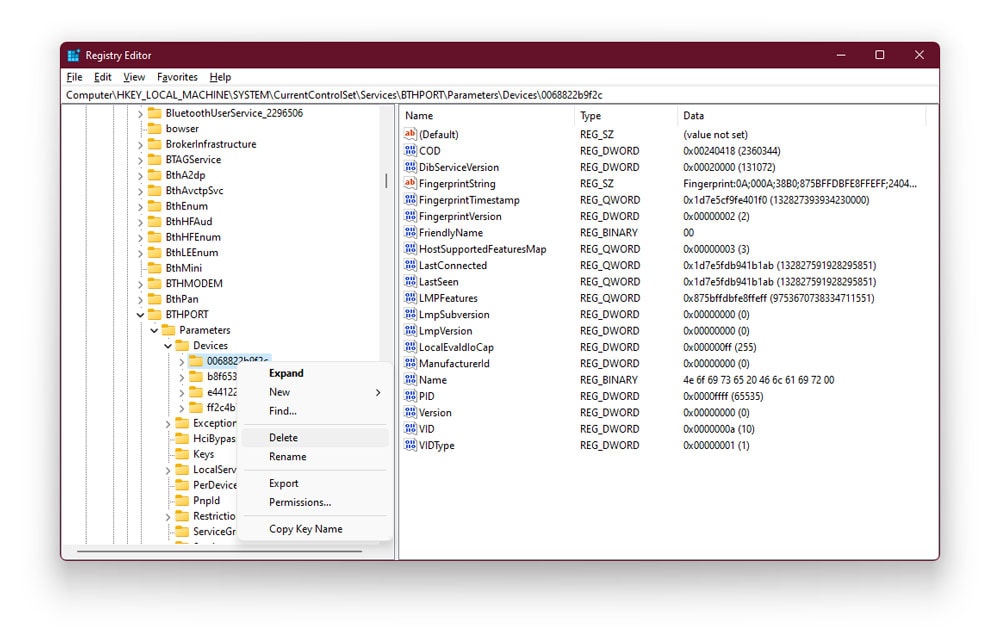
- This will completely erase the Bluetooth device from the system registry
- Restart your computer and check if the issue is dealt with
5. Remove Bluetooth Device in Windows 11 under Safe Mode
To Remove Bluetooth device in Windows 11 under safe mode, follow the given steps
- Press and hold down the Shift Key
- Holding down the Shift Key, click on the Start Button & Select Restart
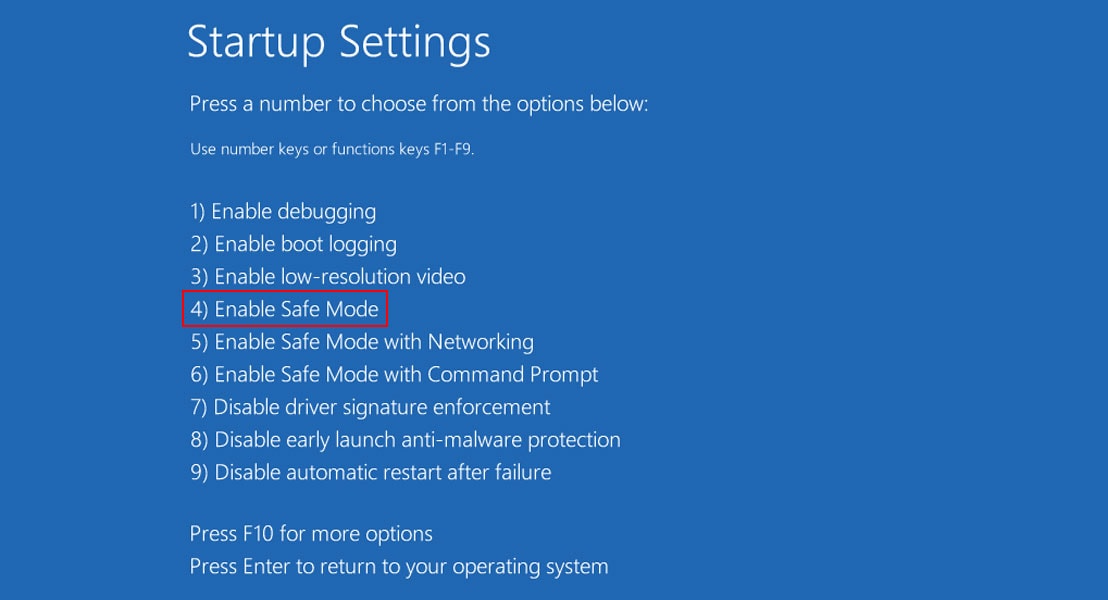
- A blue screen with options will appear on your screen
- Select Troubleshoot > Go to Advanced Options > Select Startup Settings
- Tap Restart
- Press 4 or F4 on your keyboard to enable safe mode
- Once the system enters safe mode, press Windows + X and opens the Device Manager
- Right-click on the main computer Bluetooth adapter
- Choose Uninstall
This will uninstall the Bluetooth adapter. However, the adapter will be automatically reinstalled upon restart
6. Switch Back to Previous Bluetooth Adapter/Receiver
At times, we fail to realise that the problem has been in front of us altogether. A change in adapter or receiver can sometimes have a negative impact on the system’s functioning. If you have recently updated your Bluetooth adapter, there are higher chances that your system won’t be compatible with the newer version. In such cases, you can Switch back to the previous Bluetooth adapter/receiver.
To Switch back to the previous Bluetooth adapter/receiver, plug in the old adapter. With both devices plugged in, try to remove the problematic Bluetooth device using the System Settings. If it is successful, then you don’t need to use the new Bluetooth adapter
Conclusion
These are some of the quick ways to fix “Bluetooth Remove Failed” in Windows 11. While you are likely to get the issue dealt with within the first 2-3 fixes, a complex issue will need you to apply each fix at least once before sorting out the problem. In case none of the fixes work, seek out technical expertise at once.
