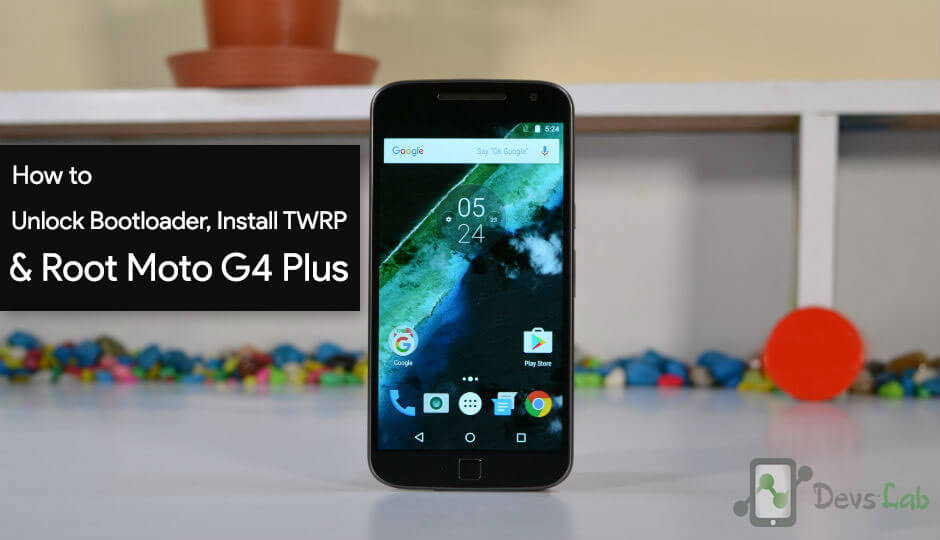
As expected, Motorola has launched a new Motorola G budget phone for 2016. For the first time, a more premium option for the Moto G range. It’s called the Moto G & Moto G4 Plus. It comes better features than Motorola G4. The phone seems a perfect device which can last long & deliver stunning performance. We have already seen Motorola’s build quality which is simply great. Most of us prefer Android device because of it’s great level of customisation & never ending way to amaze you with its feature.
But in term of customisation and optimization options, Stock ROM doesn’t have too many possibilities. Most of us prefer to go beyond the Stock features & gain main access to your device i.e Super user access. Today we’ll guide you step by step How to Unlock Bootloader of Motorola G4 Plus, Installing TWRP in G4 Plus & Rooting Motorola G4 Plus. Rooting your device is not only for performance but to get tones of new features. You can find some of the features of rooting your device.
Prerequisites:
- Follow the Procedure to setup & install Minimal ADB files. – Minimal ADB Tool & Setup.
- Official TWRP Recovery for Motorola G4 Plus (athene): Download
- SuperSU to Root Motorola Moto G4 Plus: Download (Nougat Root file: Download)
How to Root Moto G4 & G4 Plus 2016
Stage 1. Unlocking Bootloader of Motorola Moto G4 Plus: In this step, we’ll unlock bootloader which will allow us to install custom softwares & TWRP recovery.
Stage 2. Installing TWRP Recovery in Motorola Moto G4 Plus: In this step, we’ll install a custom recovery named as “TWRP”. It allows flashing custom zip files. We can install TWRP recovery only if bootloader is unlocked.
Stage 3. Gaining Root Access in Moto G4 Plus: In this step, we’ll flash SuperSU.zip from TWRP recovery. SuperSU hooks into your system files & acts as bridge between system files & other Apps which require Root access.
1. How to unlock Bootloader of Motorola Moto G4 & G4 Plus
Step 1. Enable USB debugging mode in your Motorola Moto G4 Plus, Goto Settings > About Phone > Tap on build Number 7 times. Now go back to Settings, you’ll find a new option as ‘Developer options’. In Developer options, enable USB Debugging mode.
Step 2. Follow the Minimal ADB Tool setup guide. Connect your device to PC using a USB cable. Launch the ADB.exe file which will open up as a command window.
Step 3. Type “adb reboot bootloader” in command window. This would boot your device into Bootloader mode. (If it return any error like no device found, check if you have installed USB drivers properly.)
Step 4. Type “fastboot oem get_unlock_data” in command window. It will return a code which will look similar to this:
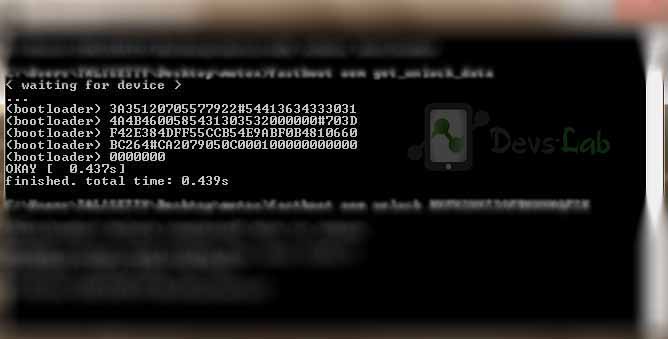
Example: On a Windows Desktop, the returned string format would be
$ fastboot oem get_unlock_data
(bootloader) 0A40040192024205#4C4D3556313230
(bootloader) 30373731363031303332323239#BD00
(bootloader) 8A672BA4746C2CE02328A2AC0C39F95
(bootloader) 1A3E5#1F53280002000000000000000
(bootloader) 0000000
Example: On a Mac OS Desktop, the returned string format would be
INFO0A40040192024205#4C4D3556313230
INFO30373731363031303332323239#BD00
INFO8A672BA4746C2CE02328A2AC0C39F95
INFO1A3E5#1F53280002000000000000000
INFO0000000
Step 5. Paste together the 5 lines of output into one continuous string without (bootloader) or ‘INFO’ or white spaces. Your string needs to look like this:
0A40040192024205#4C4D355631323030373731363031303332323239#BD008A672BA4746C2CE02328A2AC0C39F951A3E5#1F532800020000000000000000000000
Step 6. Now, Goto Motorola’s Boot loader unlock site & login with Google. Paste the entire code in the input box which says, Check if your device can be unlocked by pasting the string by pasting the string in the field below & clicking can my device be unlocked.
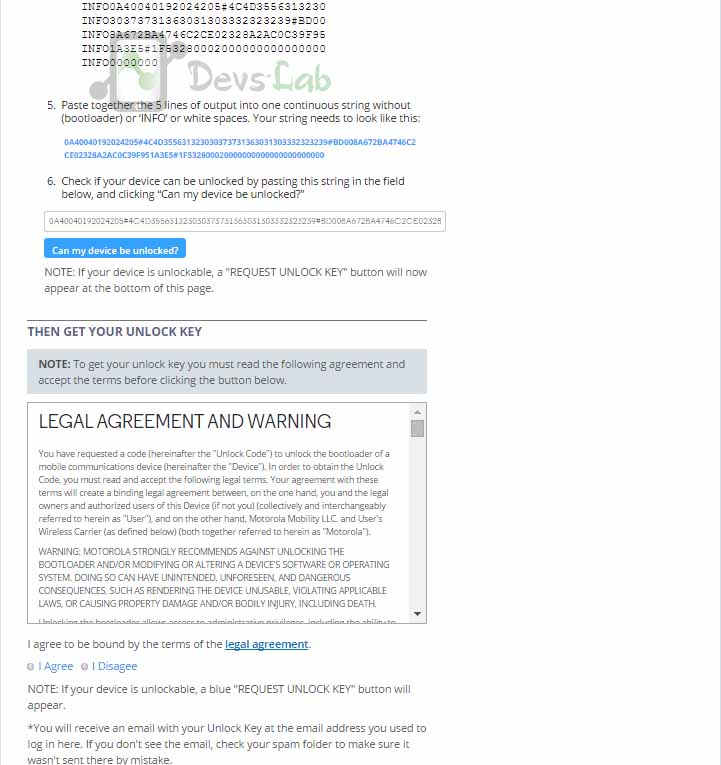
Step 7. After pasting click on “Can my device be unlocked.” After that, you’ll see a request unlock key option at the bottom of the page. Check I agree and click Request Unlock Key. You’ll receive the unlock key in your Gmail.
Step 8. Copy the key from your Gmail Account and paste in a notepad file, Open the previously opened Command prompt / Terminal & type:
fastboot oem unlock "YOURKEY" (Replace YOURKEY with the key you received)
It will unlock your device. Congratulation you have successfully unlocked your device.
You can also refer this video to understand things much better:
2. How to Install TWRP Recovery in Motorola Moto G4 & G4 Plus
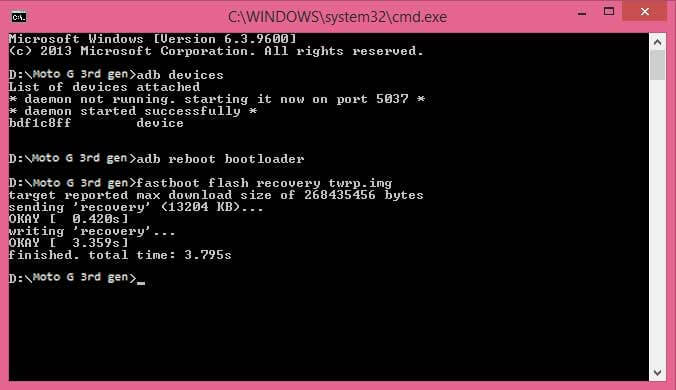
Step 1. Transfer the TWRP recovery image file in installed ADB folder. You can refer the below image:
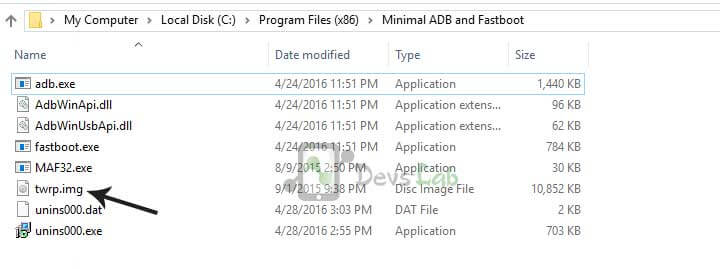
Step 2. Boot your device into fastboot mode (Switch off your device. Press & hold, Volume down button and power button).
Step 3. Open adb.exe file & type “fastboot flash recovery twrp.img” (If the file name is something different like twr232.img, just replace twrp.img with twr232.img in the command). This will flash the TWRP recovery in your device.
3. How to Root Motorola Moto G4 & G4 Plus
Step 1. We are going to use the Systemless Root procedure.
Step 2. Make sure you boot or install TWRP. Boot into it.
Step 3. TWRP -> Advanced -> Terminal -> type this:
echo "SYSTEMLESS=true" > /data/.supersu
Step 4. Now return to TWRP & flash SuperSU.zip file as per your Android version. (different file for Nougat, check download section)
Now as you have rooted your device, you can checkout our list of Top 10 Apps for Rooted Smartpones. You can also install Xposed Framework & change System files without installing Custom ROMs. Soon we’ll update new Custom ROMs for Motorola G4 Plus as soon as their are out. If you are stuck at any point, you can comment your query below.
![[Android P] LineageOS 16 for Motorola Moto G4/G4 Plus](https://devsjournal.com/wp-content/uploads/2017/01/LineageOS-for-Motorola-Moto-G4-Plus-768x384.jpg)
twrp successfully installed but after installing supersu device not booting…still can access twrp window though..any help?
I got this while flashing TWRP. However I can boot into TWRP… so am not sure if it has been installed properly
My bootloader is definetly unlocked
I flashed the ElementalX Kernel as per recommendation of @charlynavarrete:disqus
Wiped Cache/Dalvik
Still stuck on boot loop
https://uploads.disquscdn.com/images/30504290e2cc29c51249f7137e90a604d7f2b327c0a566a62ca4521648a7a2d4.png
Hey guys, if anyone is facing problems on Nougat after following this tutorial, just boot in TWRP and flash the ElementalX Kernel, you can find it here https://forum.xda-developers.com/moto-g4-plus/how-to/guide-how-root-nougat-moto-g4-plus-t3484672
I followed the steps and I also flashed the elementalx kernel… I am still stuck on the Moto Logo… I tried wiping the cache/dalvik and it still won’t boot… any ideas?
After unlocking the bootloader and installing TWRP, I attempted to install super SU, after trying to boot my device after this my device freezes on the moto logo and is stuck on a bootloop.When the device dies i can still access TWRP. Any help?
Looks like some issue with the stock firmware. You need to contact Motorola service to fix this.
https://uploads.disquscdn.com/images/f02dd8ca1a4e97ae22023ce0b8b7a39cadc3b39b225950e530b257359f629395.jpg i will try many more time but same error view in d=adb fastboot window what can i do
Have you unlocked the bootloader?
Yes sir i have already unlock our phone bootloader
After unlocking bootloader, the adb tool doesnot show connected devices. so i can’t install twrp
what to do???
Switch on the device & enable USB debugging. Allow Computer fingerprint in device. Now try again.
Be aware: The Amazon lockscreen ads & bloatware on the Moto G4 (XT1625) can NOT be removed. Nor can the phone be rooted.
It is possible to unlock the bootloader, and TWRP can be loaded, either in RAM (temporarily) or flash (non-volatile). But the additional SuperSU.zip root package can NOT be loaded, doing so will soft-brick the phone.
After the soft-brick, I was able to reload a Motorola XT1625 factory image on it, after which all the Amazon stuff and associated lockscreen ads are actually gone. However, the phone will then keep pestering you about downloading the latest “system update”. When you agree to that, all the Amazon stuff will be back. When you don’t agree to that, it will pester you for the update from here to eternity.
The update message nag can NOT be removed.
So my end conclusion about this phone, after having worked on this for several days with just about every method tried as described on the internet, is that this phone can NOT be de-Amazoned. At least not with the methods as they are known today.
The problem seems to be in the update software channel which is set for “AMZ”. This causes system updates forced on the phone to be of the Amazon kind. The only way to fix that is to get the software channel setting set for a generic code. However, there is no working method available on the internet today to accomplish that, believe me.
So to summarize: Spend the extra $50 and get the generic G4 model without the advertising crap. That is what I have done now; I have returned it and successively bought the ad-free version for $50 more. Because that is the good news: The Moto G4 X1625 is a VERY good phone, it is worth the extra $50.
thxx mn thx a lot ;0
Yeah, I had the same error. The US XT1644 variant can’t use the boot.img for the XT1643 and below. I was able to root by installing SuperSU. Run this command:
fastboot boot twrp-3.0.2-0-athene.img
Make sure you copy the SuperSU zip file in the /sdcard/TWRP folder on your device. Then when twrp loads, you can just pick the zip file and install.
I suggest you delete or strikeout the steps on rooting using the SuperSU.zip file. It is obviously incorrect advice. The result for me and others was to flashboot stock firmware and start all over.
Then I followed the steps at [ROOT][GUIDE] Systemless Rooting with SuperSU 2.78 .
A helpful experience turned ugly at the end which could have been prevented.
Everything was working well with unlocking and installing TWRP so big mistake – onto installing SuperSU without a backup. Stuck now on the Moto screen.
How do I get out of this problem? And, @Theocs what is the guide you mentioned? Any help surely appreciated.
install SuperSU uninstaller zip. It will be fixed, I guess.
I’m also having the exact same problem. Any update would be appreciated.
Same problem here, could you resolve it?
ive followed all the instructions but now my phone doesnt boot up, it gets stuck on the moto screen after i install SuperSU through TWRP and now its stuck there
Same thing happened to me…Thank god that I backup before flashing..I restored it.
I had this same problem but it is now resolved. Follow this guide to do a systemless root instead.
This guide , which guide , I tried same thing stuck on Boot screen !