Motorola has rolled out their new budget lineups, Moto G5S and G5S Plus. Unfortunately, features like NFC or USB-C are still left out, for the price they’re still very good phones. Majority of the users root their budget smartphones because of the limited hardware & high demand. If you’re one of those tinkers who would love to explore whole new posibilities with your all new Moto G5S and G5S Plus, you can start with the rooting process.
Before starting off, here’s a quick overview of what your device comes with. Moto G5S Plus is a very beautiful smartphone having 13 MP f/2.0 Dual back Camera, 4Gb Ram, 64 GB internal storage along with 3000mAH of Lithium-ion battery with 15W Turbo charging. It is available in Lunar grey and Gold colours. It has a 5.5 inches Full-HD capacitive screen with Gorilla Glass 3.0. It has dual Sim(4G+4G), metal body with a pretty sensitive fingerprint reader. So, without wasting anymore time, let’s just jumping into Rooting your Moto G5S and G5S Plus.
Prerequisites
- A Windows/Linux PC
- ADB Drivers (Click the link and you’ll find installation and download in the post)
- Minimal ADB Fastboot Tool (This is the minimal version ~1MB of Android Studio. Helps you to perform operations from your PC directly into your phone)
- A working USB Cable (Make sure you’re using the original one)
- TeamWin Recovery: Moto G5S | Moto G5S Plus
- Magisk zip and Magisk Manager
- Charge your device upto 60% to avoid any Shutdown during the process.
- Make sure to backup all your important files, photos, apps, contacts etc. as unlocking the bootloaders erases the Internal storage.
How to Unlock Bootloader in Moto G5S/G5S Plus
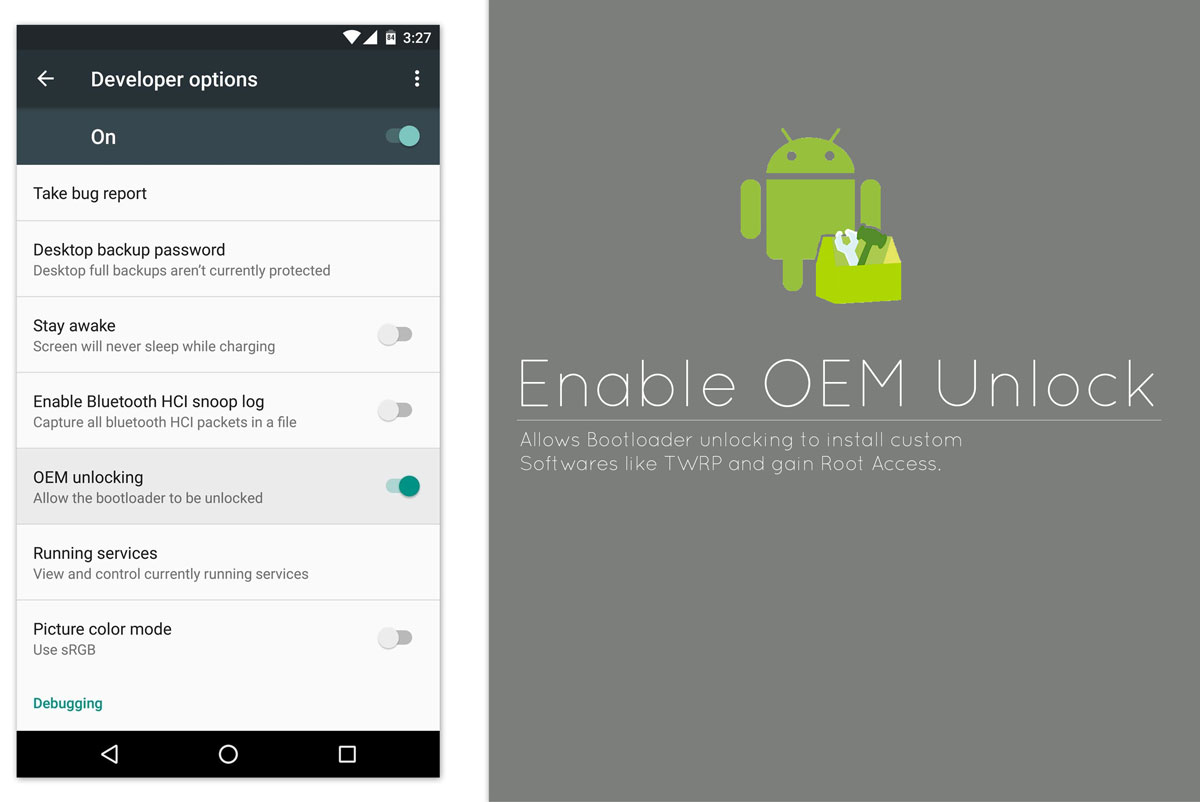
Step 1. Enable OEM unlock: Go to Settings > About Phone and > Tap Build number 7 times > Select Developer options and then > OEM unlocking.
Step 2. Boot your device into Bootloader Mode: Power off your device > Press “Volume Down + Power button” for 3-4 seconds. After this connect your device to PC.
Step 3. Open ADB Folder and run adb.exe (It will open up a black command window)
Step 4. Go to Motorola Unlock Bootloader website here. Read the instruction before proceeding. You should Sign-in using your Motorola/Google Account.
Step 5. Now, open the command window on your PC and issue the command:
fastboot oem get_unlock_data
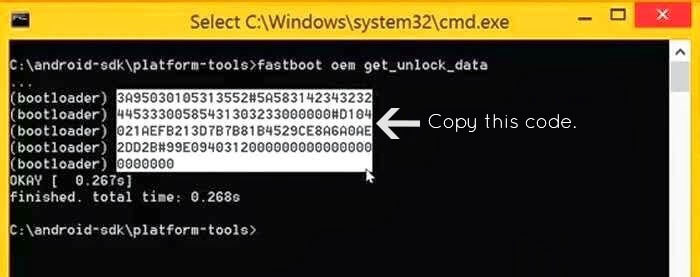
Step 6. This command will generate 5 strings which will be used to retrieve your unlock key. Copy all the 5 strings in one line without space without ‘bootloader’ text.
Step 7. This string should be pasted on the Motorola website. After Sign-in, go to”Unlock Bootloader” page, and click Can my device be Unlocked?
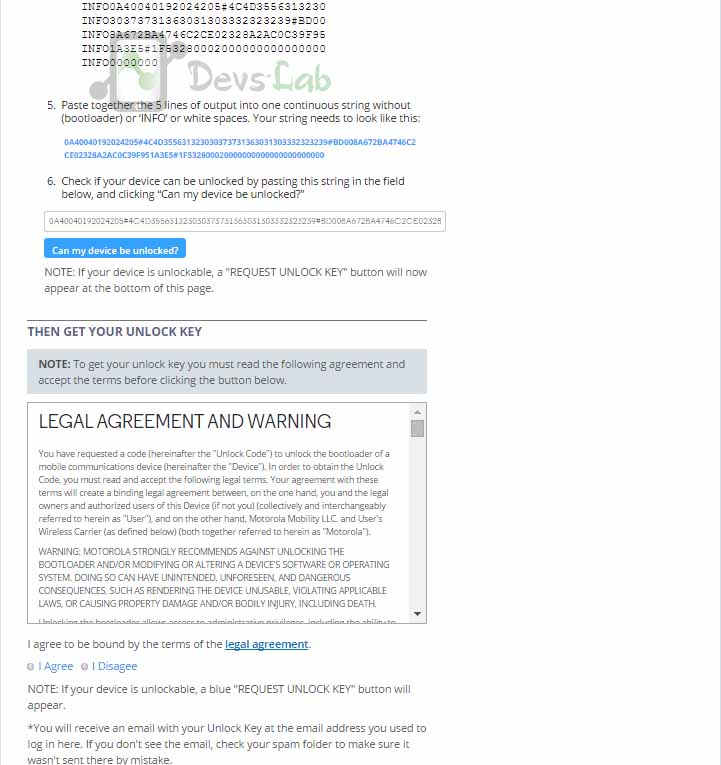
Step 8. You unique code will be processed and if your device is unlockable, a “REQUEST UNLOCK KEY” button will appear.
Step 9. Scroll down, accept terms and conditions, and press the button. You will receive an Email with the UNLOCK KEY at the Email you used to register yourself at Motorola website.
Step 10. Open the command window once again in your PC and run the following command with your UNIQUE KEY:
- fastboot oem unlock paste-your-unlock-key-here
Step 11. Your Moto device will confirm the bootloader unlock and reboot the device.
How to Install TWRP Recovery in Moto G5S/G5S Plus
Step 1. Download the TWRP recovery from above downloads.
Step 2. Connect your phone to PC with a USB cable.
Step 3. Open a command window in the folder where you have downloaded TWRP. For this, go to that folder, and then in the address bar, type cmd and hit enter key.
Step 4. Now, use the following command to boot the device into bootloader mode:
adb reboot bootloader
Step 5. Now install the TWRP recovery by issuing the following command:
fastboot flash recovery twrp-3.1.1-sanders.img
That’s it. TWRP has been installed in your device. To access TWRp, use command:fastboot boot twrp-3.1.1-sanders.img, or while in bootloader mode, use volume button to highlight and then press the power button to boot into recovery mode.
How to Root Moto G5S/G5S Plus
Step 1. Download the Magisk zip file and Magisk Manager APK.
Step 2. Copy both the files to your device.
Step 3. Boot your device into TWRP recovery, and tap on install Magisk zip file.
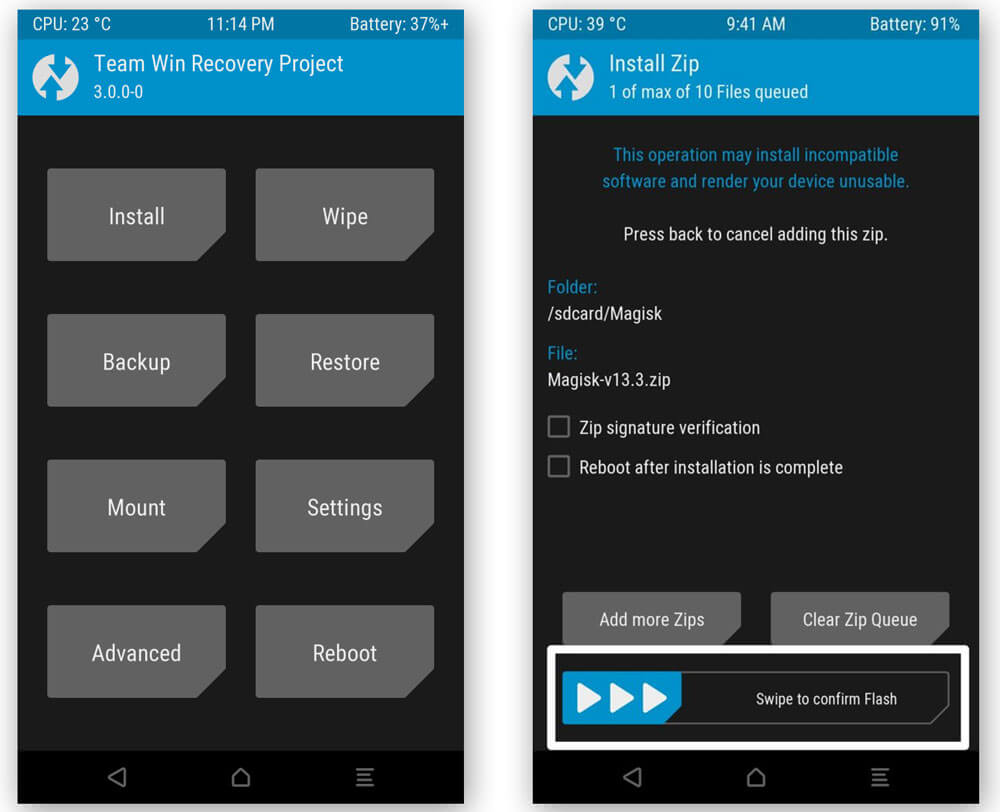
Step 4. After selecting, perform, Swipe to Confirm Flash at the bootom of screen.
Step 5. After it is flashed, you will get the Reboot System Option. Select it.
Once your device reboots, go to file manager app > Folder of Magisk APK > Install it. After the APK is installed, open it and check the root status. Enjoy your newly Rooted Moto G5S/G5S Plus.




acho que deveria ser melhor para obter informações sobre.