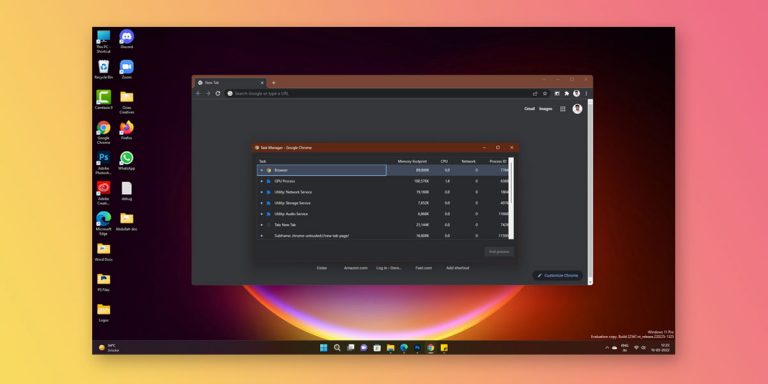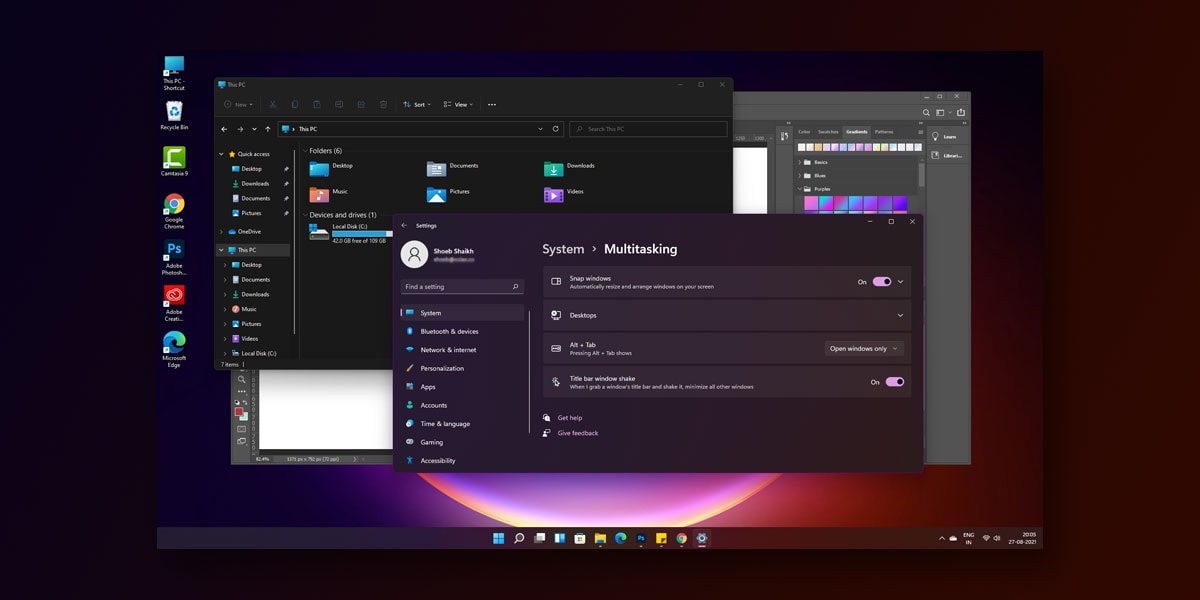
As per the initial reports, Microsoft’s new OS Windows 11 is a significant upgrade over its predecessor. Windows 10 users have already hopped on to using the Windows 11 on their system. According to the majority of those users, Windows 11 is great for multitasking.
Multitasking on Windows 11 is pretty straightforward. Similar to Windows 10, Windows 11 too sports the Aero Shake feature, which allows users to minimize all running applications in a single window and just shake the window title bar to open all the running applications. This saves people from the hassle of minimizing every application individually and helps them restore all apps at once.
This “Shake Title Bar” is one of the most exciting features in Windows 11. Unfortunately, the “Shake The Window” is deactivated at first, and users will need to enable it to make the most out of it. Also, this “Shake The Window” feature could be a bit challenging to use for those who haven’t utilized Windows 10’s “Aero Shake.” Therefore, we will be discussing all the ways using which you can enable and disable “Title Bar Window Shake” in Windows 11.
How to Enable or Disable “Title Bar Window Shake” in Windows 11?
As we mentioned earlier, the “Shake The Window Title Bar” is an excellent feature in Windows 11 that allows for effortless multitasking. Unfortunately, this feature is initially deactivated, which means you will need first to enable it to use it.
There are three ways using which you can enable or disable the “Title Bar Window Shake” in Windows 11. Mentioned below are all the methods along with the required steps using which you can enable or disable the “Title Bar Window Shake” in Windows 11.
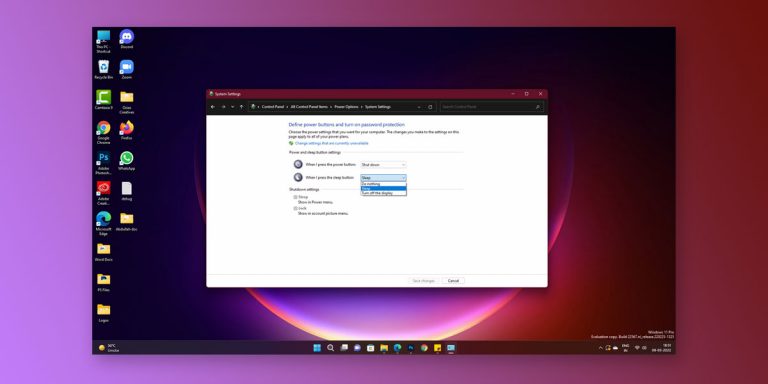
1. Via The Settings App
To enable or disable the “Aero Shake” in Windows 11 using the settings application, follow the given steps.
- Right Click on the Start Menu
- Tap Settings
- Click on the System category on the left navigation pane
- Scroll down to locate the Multitasking tab
- Locate the option which reads Title Bar Window Shake
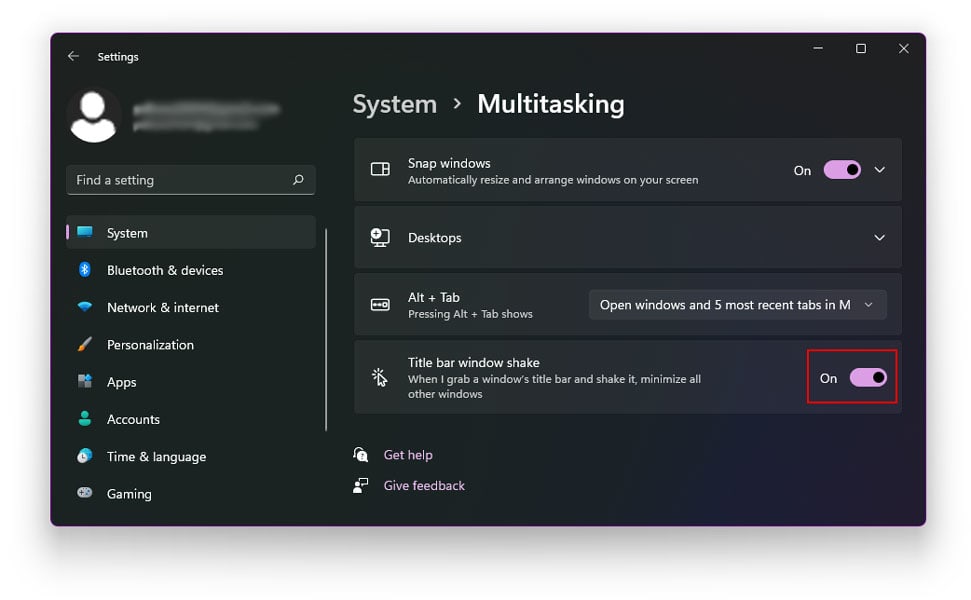
- Next, toggle the switch to the ON position.
This will enable the “Shake Title Bar Window” on your Windows 11. To disable the “Aero Shake” in Windows 11, follow the given steps
- Right Click on the Start Menu
- Tap Settings
- Click on the System category on the left navigation pane
- Scroll down to locate the Multitasking tab
- Locate the option which reads Shake Title Bar Window
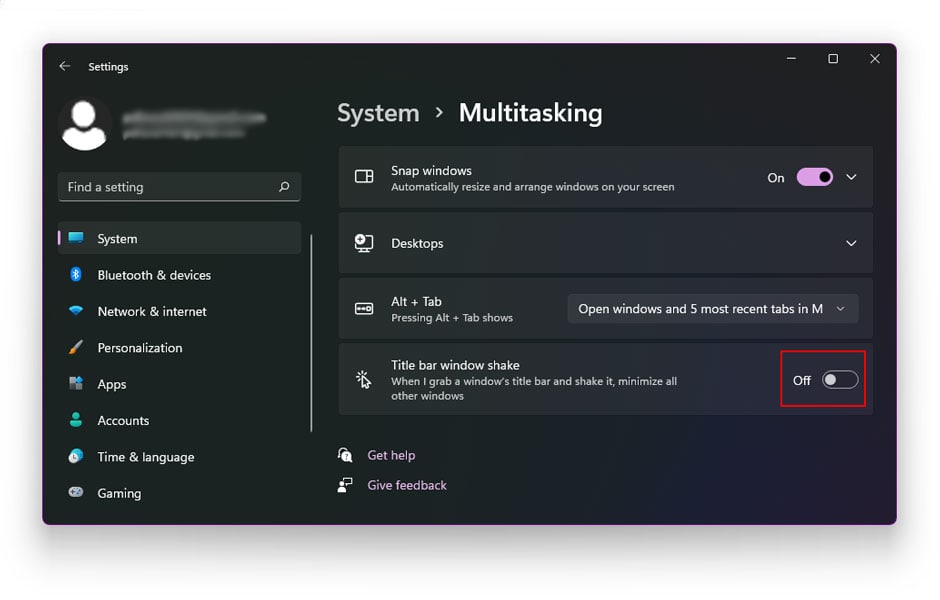
- Next, toggle the switch to the OFF position.
2. Via the Group Policies In Windows 11
Another effective method to enable or disable aero shake Windows 11 is via the group policies. To enable the “Windows 11 Title Shake” using the group policies, follow the given steps
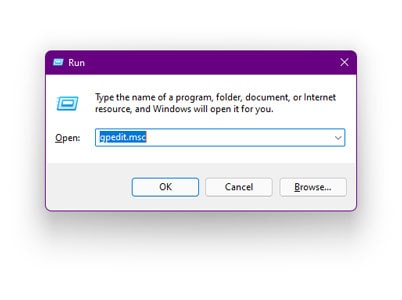
- Press Windows + R simultaneously on your keyboard
- In the RUN dialog box that appears, type in the following command.
gpedit.msc
- Press OK
- This will open the local registry editor on your screen
- Next, navigate to the below-mentioned path
Computer Configuration > User Configuration > Administrative Templates > Desktop
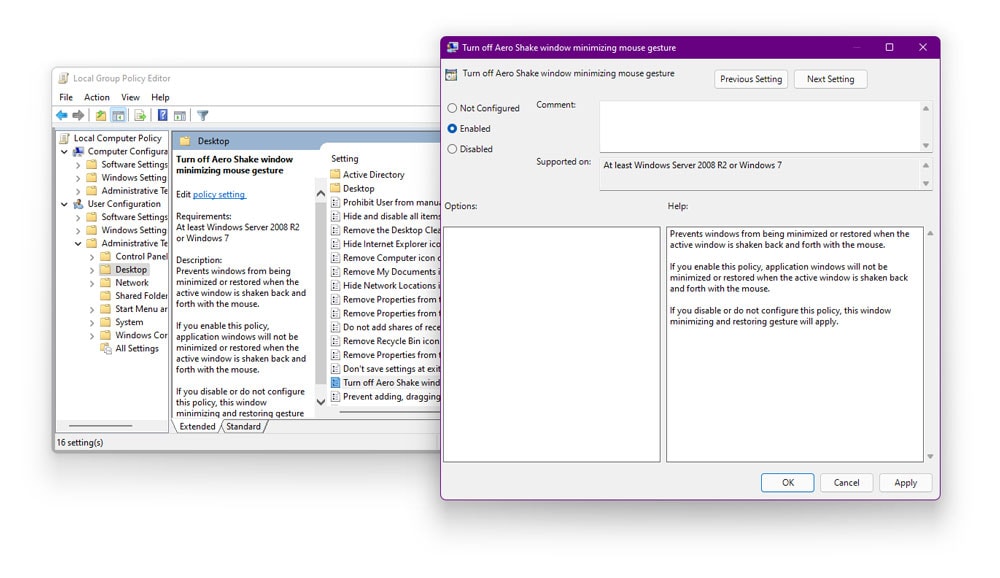
- On the right navigation pane, look for the option which reads.
“Turn Off Aero Shake Window Minimizing Mouse Gesture”
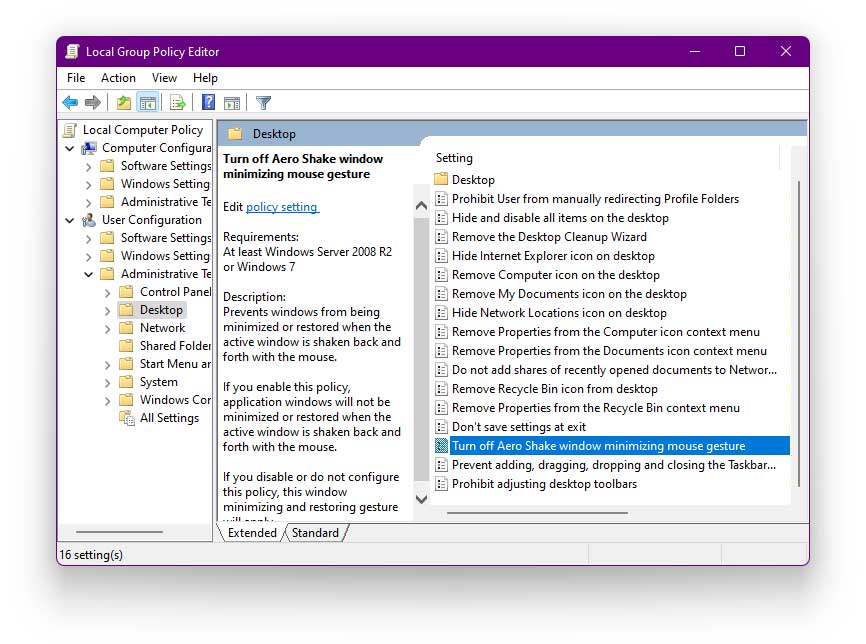
- In the dialog box that appears, select Enabled on
- Click Apply
- Tap OK to save the changes
This will enable the “Windows 11 Title Bar Shake” on your system. To disable the “Aero Shake” in Windows 11, follow the given steps.
- Press Windows + R simultaneously on your keyboard
- In the RUN dialog box that appears, type in the following command.
gpedit.msc
- Press OK
- This will open the local registry editor on your screen
- Next, navigate to the below-mentioned path
- On the right navigation pane, look for the option which reads.
“Disable The Aero Shake Window To Minimise The Mouse Gesture”
- In the dialog box that appears, select Disabled at the left
- Click Apply
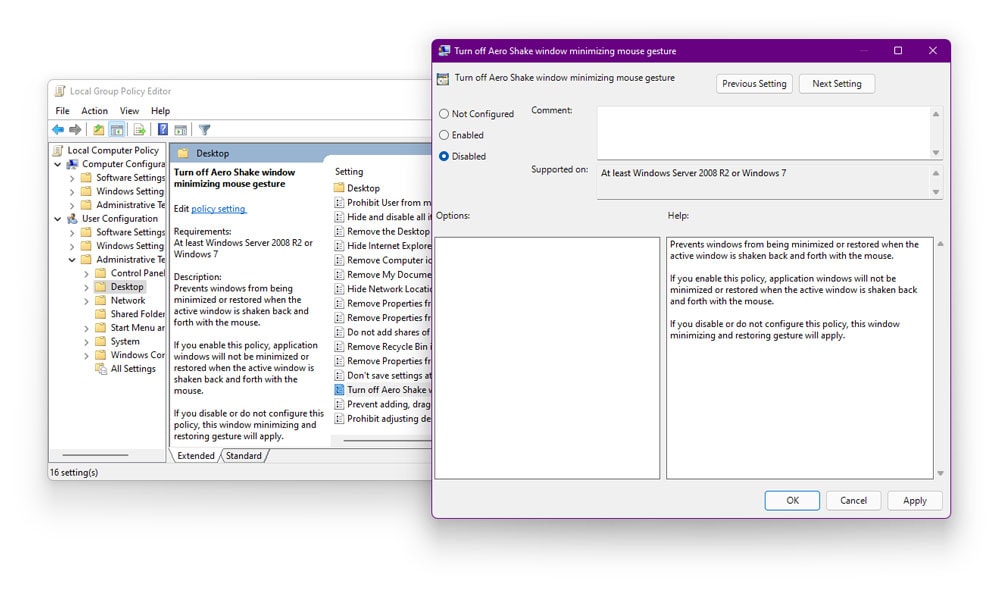
- Tap OK to save the changes
3. Using The Windows Registry Editor
Another easy way of enabling or disabling the “Shake The Title Bar” feature in Windows 11 is through the windows registry editor. To disable the “Aero Shake” in Windows 11, follow the given steps.
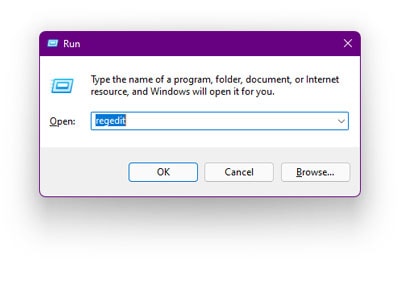
- Press Windows + R simultaneously on your keyboard
- In the RUN dialog box that appears, type in the following command.
regedit
- Press OK
- This will open the Windows registry editor on your screen
- Next, navigate to the below-mentioned path
Computer>HKEY_CURRENT_USER>Software>Policies>Microsoft>Windows
- Right-click on the Window folder on the left navigation window
- Next, choose New
- Now, select Key
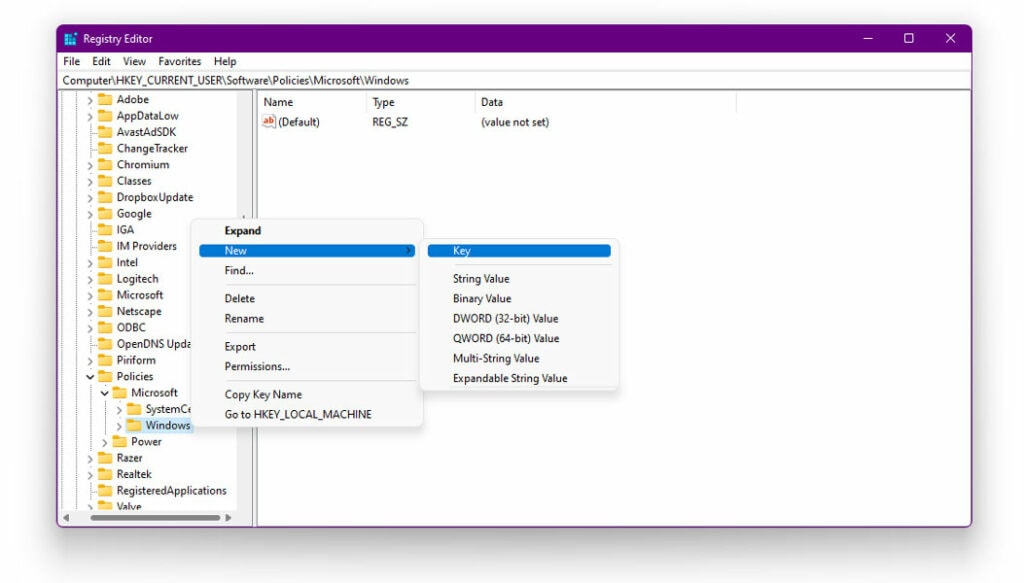
- This will create a new Key Explorer in the Windows Registry
- Name this newly created Key Explorer
- Now, right-click on the right navigation plane
- Next, choose New
- Now, select DWORD (32-bit) value
- This will create a new DWORD
- Name the newly created DWORD as NoWindowMinimizingShortcuts
- Double on NoWindowMinimizingShortcuts
- Change the value from 0 to 1

- This will DISABLE the “Title Bar Window Shake” on Windows 11
- Click OK
To enable the “Title Bar Window Shake” on Windows 11, double click on NoWindowMinimizingShortcuts and set the value to O
The Bottom Line
We hope our article was able to successfully able to walk you through enabling and disabling the “Windows 11 Title Bar Shake” feature on your system. This is a handy feature when it comes to multitasking which saves you from minimizing and maximizing every application individually. Note that this feature is generally disabled in Windows 11, which means you will have to enable it using any of the three methods given above.