Some performance tests show that Windows 11 has better and faster loading times than the previous Windows versions. In fact, some people went out to install Windows 11 on older machines (which isn’t officially supporting it), and found out that the Windows 11 still works lot faster, considering how archaic the hardware it runs on. But of course, there are also other factors in regards to boot up and loading times. Like the type of drive the laptop or desktop PC comes with.
Whilst current macOS hardware now uses flash storage (also now soldered, because Apple), most Windows laptops today still come with the spinning hard disk drive (HDD). Yes, it’s cheaper, which allows for a larger storage capacity, but it is also atrociously slow when compared to a solid state drive which is dramatically faster in overall performance.
Some manufacturers also started adding smaller capacity solid state drive (SSD) in their computers solely for Windows installation (alongside higher-capacity hard disk drive for local storage), but most of these computers asks a premium price. But the good thing about the computers with spinning drive though is that you can certainly remove the hard disk drive inside and replace it with a solid state drive.
Today, we will help you in migrating windows 11 to new SSD without losing your files, or reinstalling Windows 11 and the current programs you have on your computer.
Things you need to know before we start
- If you have a full-fledge desktop PC, then you can just simply install an SSD alongside your current HDD to clone it.
- In case of a laptop computer, you will need to find a way to externally connect your new SSD through the USB port on your laptop. Currently, there is a plethora of cheap SSD/HDD enclosures available online. Make sure that the cable it came with supports the USB port on your computer (USB-C, or USB-A).
- This method applies only when you do not have an NVMe/SATA SSD slot in your computer (because what’s the point?). Unless, of course, you want to upgrade to a much faster SSD available.
- Always backup your important data. While this method will not delete the current data on your HDD, unfortunate things can still happen along the way. So it’s always best to have a backup drive. You can import all your important data to an external hard-drive or on cloud-based services like Google Drive or Dropbox. If you have a fast and unlimited bandwidth, a cloud-based service is the best backup solution. Mostly, they are free to a certain limit, let’s say 100 GB. And that is pretty much enough to store your data.
- Have a Windows system repair disc ready (if you have it). Since we are dealing with a hard-drive, this process may corrupt your master-boot data (only in some instances) which won’t even allow Safe boot. It’s better to have the disk, just in case if something gets broken.
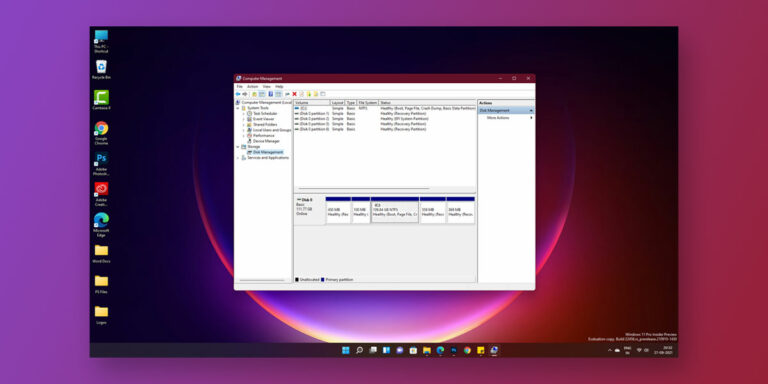
- Make sure you have enough space on your SSD. You can check the storage by right-clicking the drive and select Properties. You can always delete unnecessary files to speed up the process, or totally reformat it if the data inside serves no purpose.
- Update your SSD firmware.
How to Transfer Windows 11 from HDD to SSD
Below are 4 methods to Clone/Migrate Windows 11 from HDD to SSD:
Method 1: Using AOMEI Backupper Standard
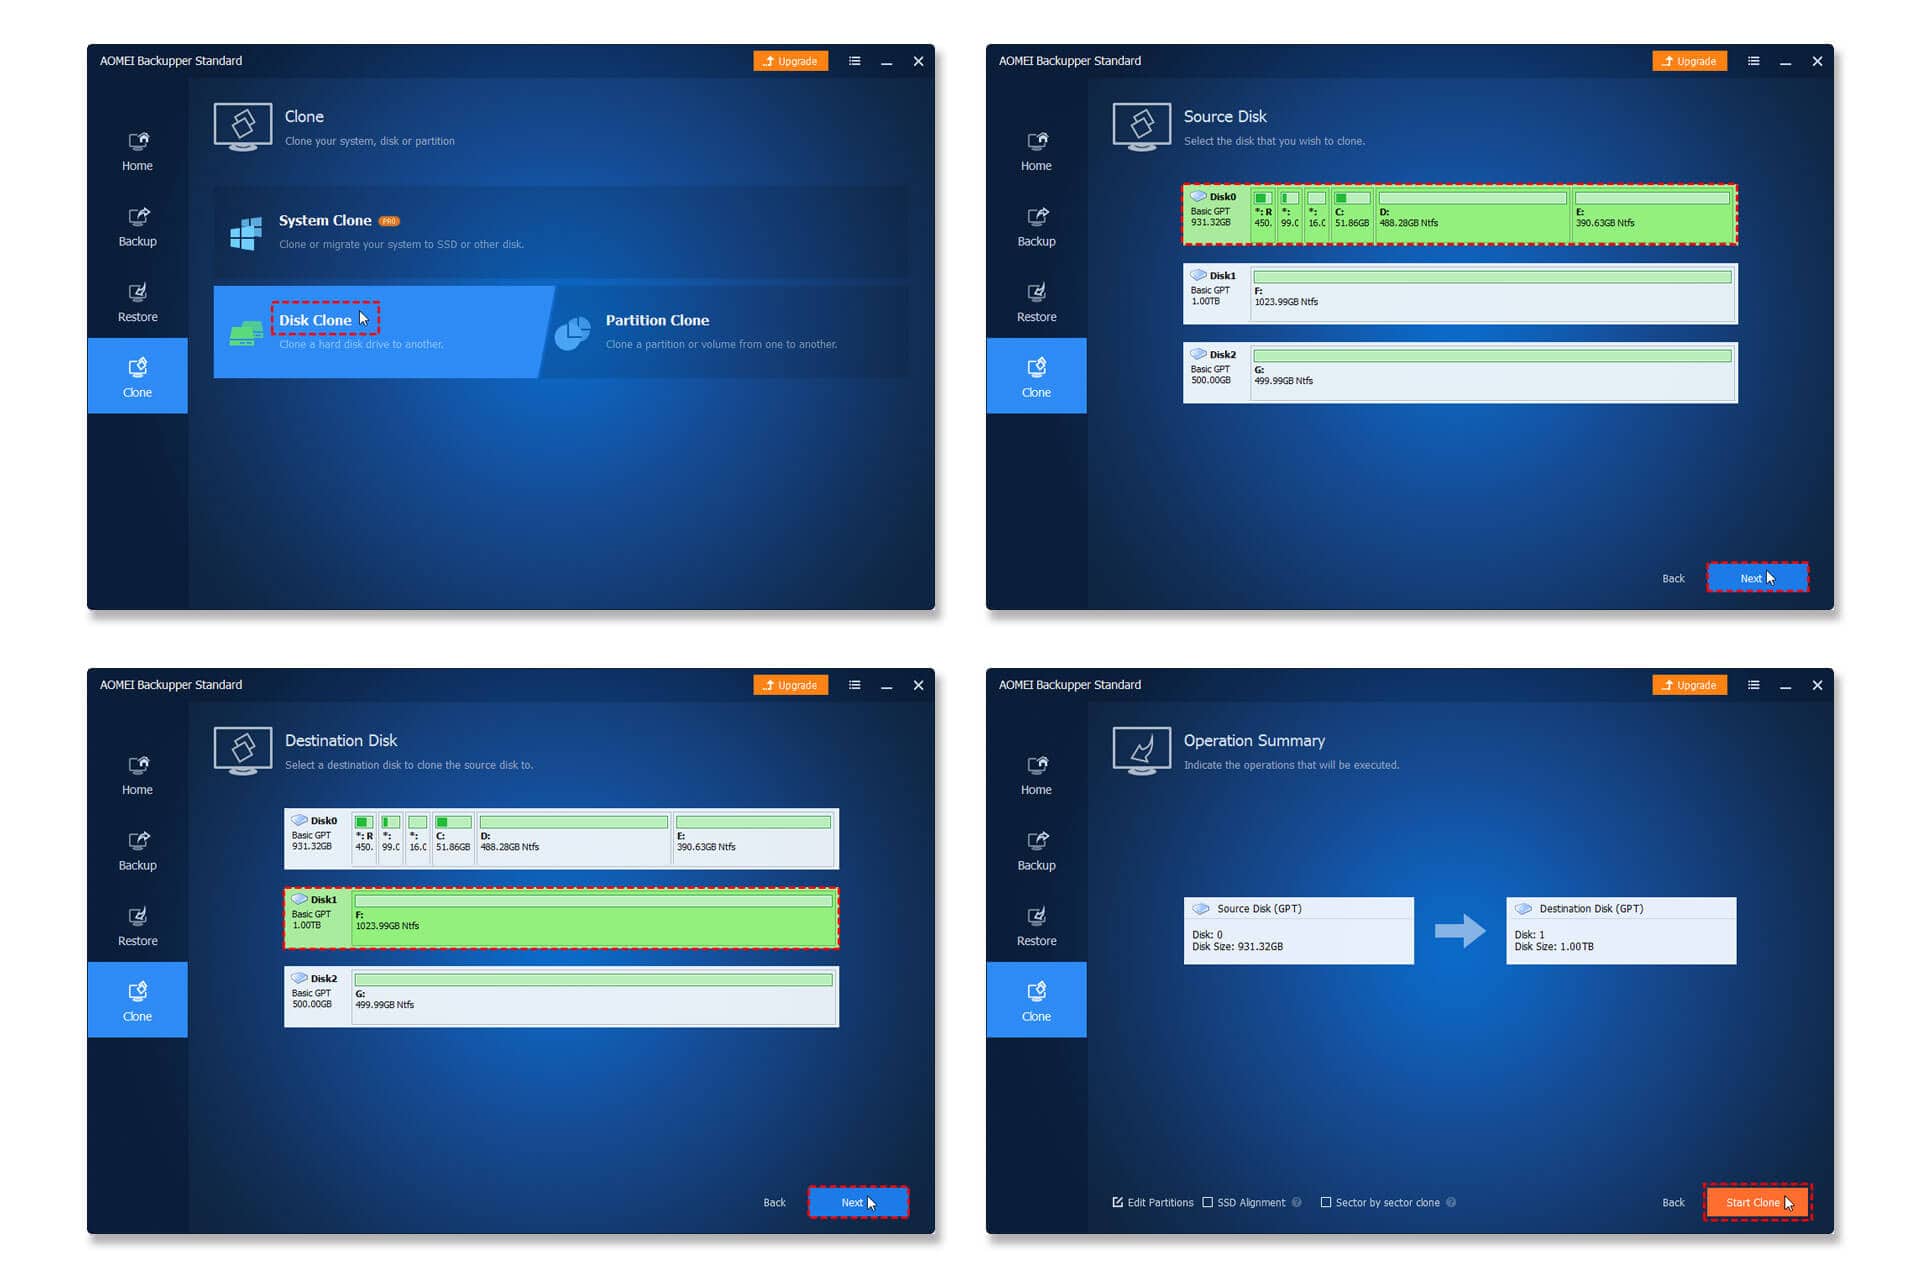
AOMEI Backupper Standard is the best free Windows backup software to protect files, systems and hard drives on PCs. We can use the free version to clone system to ssd (windows 11 to ssd). Below are the steps on how to move windows 11 to ssd using AOMEI Backupper Standard .
- Download and install AOMEI Backupper Standard to your desktop/laptop.
- Connect your new hard drive (SSD) to your new computer. Wait until it has been recognized by your computer.
- Launch the software, then select “Clone”.
- Below that, there should be more options. Just go ahead and select “Disk Clone.”
- Now, a new window will appear asking where to move your OS files. Select your SSD at this stage.
- Click on next and wait for the process to be completed.
Method 2: Using Macrium Reflect (Free Edition)
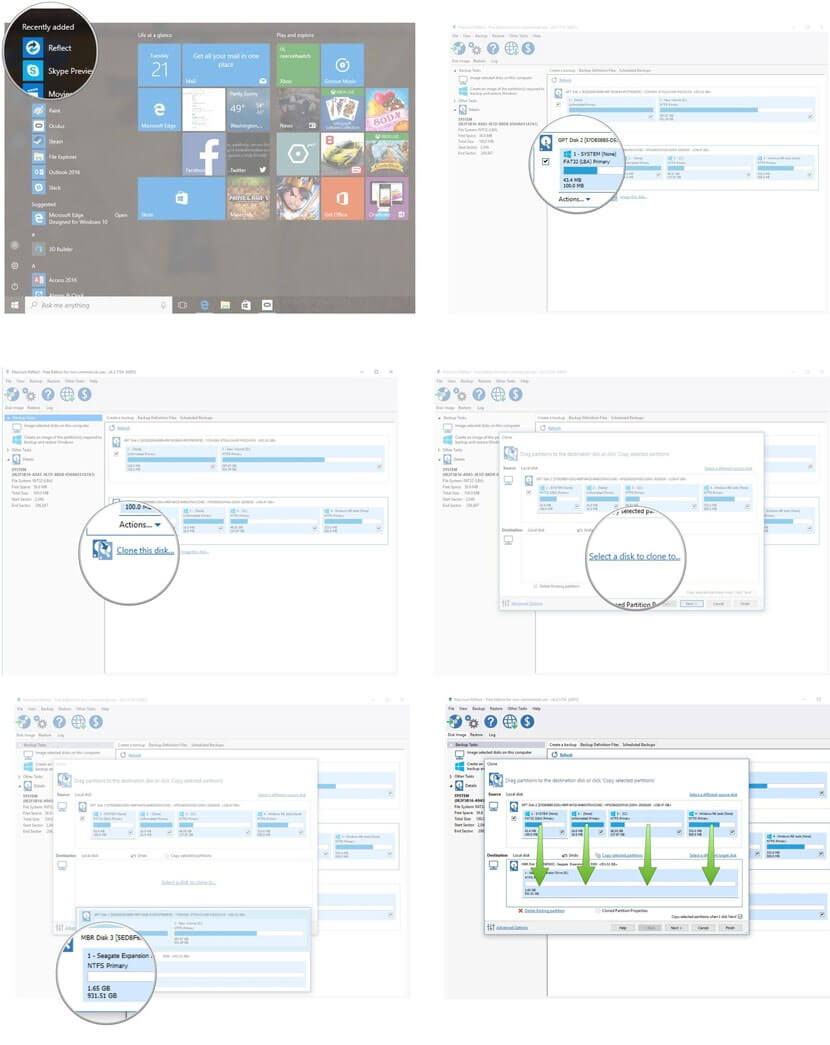
Although Macrium Reflect is a paid-software, it also offers free versions like some of the software on this list. Migrating windows 11 to new SSD is also fairly simple using this software. Below are the steps on how to move windows 11 to ssd using Macrium Reflect (Free Edition).
- Launch Macrium Reflect and click on “Backup” tab on the left pane.
- Click on “Create a backup” in the right side, and click the “Clone this disk” option.
- A pop-up should appear which will ask you to “Select a disk to clone to” your SSD.
- Click “Cloned partition properties” and select “Maximum size” to use all that free space.
- Click on “Next” to begin the cloning process.
Method 3: Using EaseUS Todo Backup
EaseUS Todo Backup Free will allow us to clone a hard disk drive to solid state drive with just few simple clicks. Its sector by sector clone feature will allow us to clone every file to our new SSD while keeping the same disk layout. Below are the steps on how to move windows 11 to ssd using EaseUS Todo Backup.
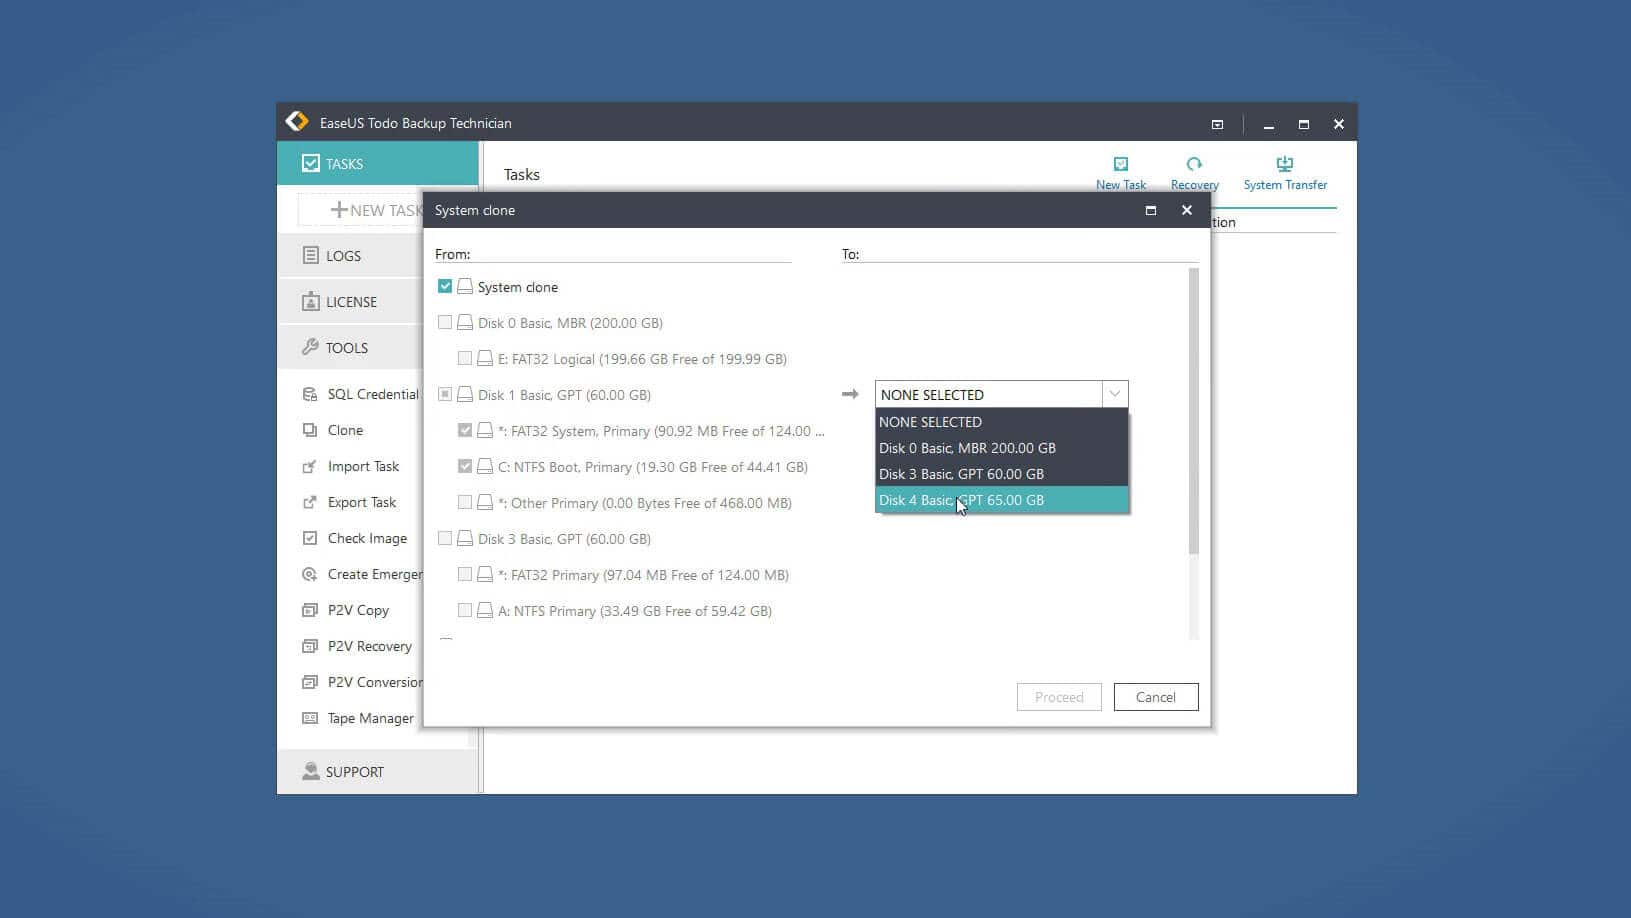
- Launch the EaseUS Todo Backup on your computer, and select clone on the left panel.
- Select the disk or partition that you want to clone, and then select the destination disk (that’s your new SSD) which where you want to install the clone of your current system.
- If you want your new SSD to have the same file layout as your HDD, just enable sector level clone by clicking “Advanced options” and selecting “Sector by sector clone.” Also check “Optimize for SSD.”
- Make sure all partitions have been checked: actual boot partition, active boot partition, and recovery partition.
- Tinker around a bit in the edit option to make sure that the correct storage is allocated to the system partition.
- Click on “Next”, and then “Proceed” to start cloning your old disk.
- If done, click “Ok” then “Finish”. You should be good to go.
- Finally, shut down your desktop computer and replace your old HDD with new SSD.
Method 4: Using Clonezilla Live
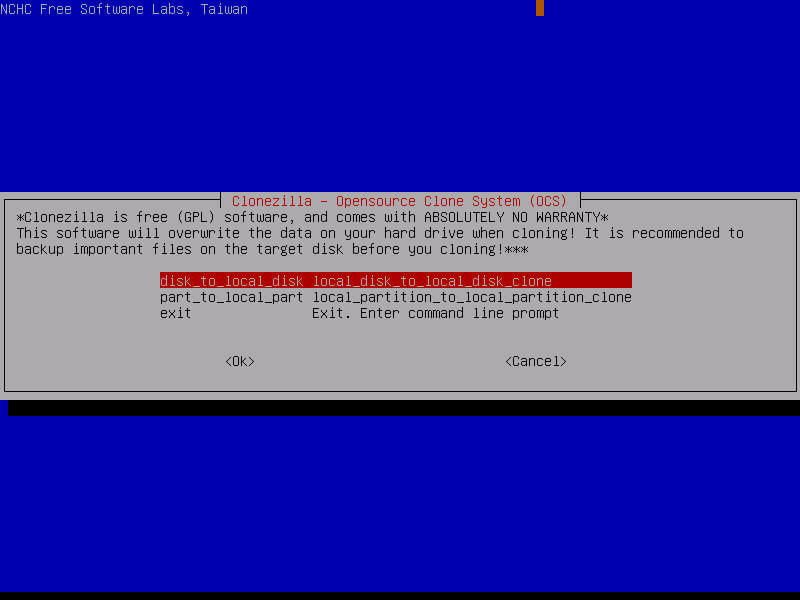
Clonezilla Live is also another free software we can use to clone system to SSD. The following will guide you through the process on how to move windows to ssd.
- Download and install Clonezilla Live on your computer. Make sure that you select “.iso” as the file type and not “.zip”.
- Use Rufus to copy the ISO file to a flash drive, or if you choose to install Clonezilla on a CD/DVD use a tool like ImgBurn. Make sure you have both hard drives connected to your computer.
- Insert your Clonezilla media and reboot your computer.
- Enter into the boot menu and select Clonezilla disk or USB.
- You will now be presented with the Clonezilla Live splash screen.
- Simply press enter to start Clonezilla.
- Select your language and press enter when it says “Don’t touch keymap.” This should start Clonezilla Live.
- Select “device_device” cloning using your arrow key.
- Select “Beginner mode” and the default options and press the Enter key.
- Select the “Local mode”, since we’ll be cloning one physically connected disk to another.
- You’ll select the hard disk first and press enter.
- Select the SSD and press enter.
- Press Y if all seems correct to you.
- Again press Y to clone bootloader as well.
- Finally, the cloning process will begin.
- Open the boot menu and select your SSD.
- And that’s it. You have successfully cloned the Windows 11 installation to your new SSD.
Adding Final Touches to your SSD
The TRIM feature allows Windows 11 to notify an SSD which blocks of data are no longer in use and can be safely wiped out to be writable again. This should improve the performance of your SSD as it won’t have to spend time erasing a particular block when a space is need to store a new data.
To check if TRIM is enabled on your Windows 11 computer, open Command Prompt. Then click “Enter” after typing the following: fsutil behavior query DisableDeleteNotify. If the result you get is zero (0), that means TRIM is enabled and that no further action is required. If not, continue below.
How to enable TRIM in Windows 11?
Launch Command Prompt and type fsutil behavior set DisableDeleteNotify 0, then click Enter. To disable TRIM, just change the “0” at the end of the command to “1”, then hit Enter.
Now to turn off defragmentation, open the “Start Menu”. In the run box, type dfrgui to open the Disk Defragmenter. Click on the Schedule button, then click “Select Disks.” Uncheck your SSD (which should be your C: drive) and click OK.