Everyone wants to make their computer setup as aesthetically pleasing as they can. People go to great lengths to ensure an ounce of their hardware looks good every time someone checks out their system. Just as people pay great attention in detailing their hardware peripherals, they do the same with their desktops as well. And what better way to customise a monitor display than with themes.
Every Windows OS comes with a predefined set of themes that one can use to customize the overall appearance of their desktop. For example, you can use these themes to change the background color, sound, and also the appearance of the mouse cursor. These themes can make your PC stand out in terms of aesthetics and appearance.
Thanks to Microsoft, Windows 11 comes with a redesigned settings menu which lets you create customised themes. In addition, you can also download additional themes off the internet if you want that suits your PC well. Just like Windows 10, Windows 11 also lets you download themes from Microsoft store or via various websites.
In this article, we will be discussing about how you can create, customise, and download Windows 11 themes to better personalise your desktop.
How To Change Themes In Windows 11?
There are numerous ways using which you can change the themes in Windows 11. Also, you can opt to create and customise your own themes with the options given. To save you from the hassle, you can choose to download Windows 11 themes either from Microsoft Store or from the various websites that offer free themes.
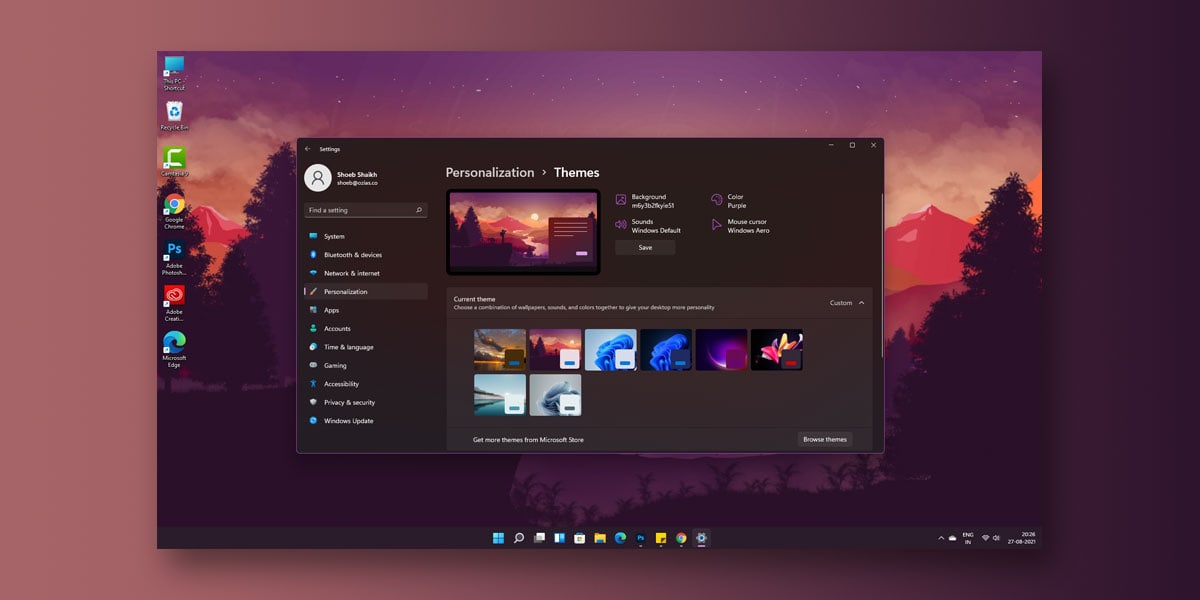
1. How To Change Default Theme In Windows 11?
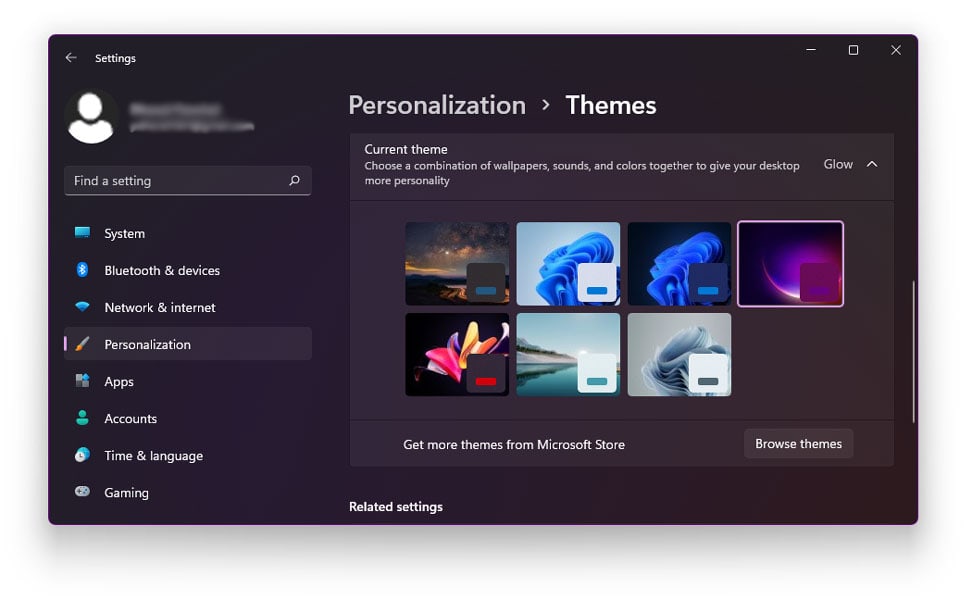
Every Windows OS comes with it’s unique default theme. While the theme may appear good at first, you just get tired of looking at it over time. However, there are plenty of in-built themes in Windows 11. You can toggle through these themes and equip any particular theme of your liking. To change the default Windows 11 theme, follow the given steps.
- Close all running applications
- Right-click on your Desktop
- Select Personalise
- On the left navigation panel, select Themes
- Now, a theme-related settings window will appear on the right navigation pane.
- Windows 11 has six default themes to choose from
- Choose any one out of the six themes
- Select anyone of the theme you want to apply on Windows 11
Also read: How to Make Taskbar Transparent in Windows 11
2. Install Themes From Microsoft Store
As mentioned above, there are only four different default themes to choose from in Windows 11. This can largely limit your customization options. However, in such cases, you can always opt to install themes from Microsoft Store.
In addition, you can download and install Theme Packages from Microsoft Store. Each package comes equipped with numerous desktop wallpapers, accent colors, mouse pointer settings, and even has a sound package.
To download and install Windows 11 themes from the Microsoft store, follow the given steps.
- Close all running applications
- Right-click on your Desktop
- Select Personalise
- On the left navigation panel, select Themes
- Now, a theme-related settings window will appear on the right navigation pane.
- Click on the link which reads “Get More Themes From Microsoft Store.”
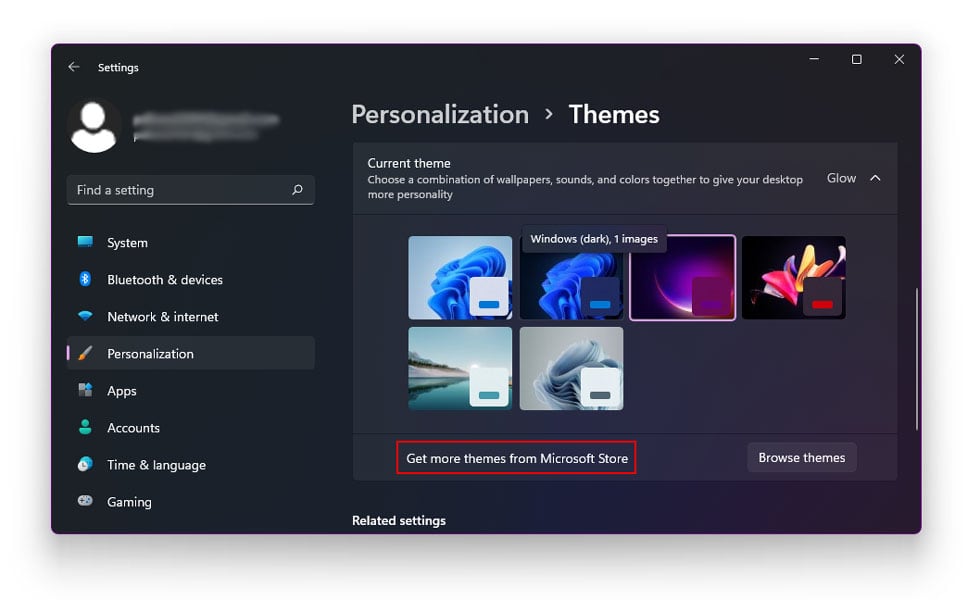
- This will automatically launch Microsoft Store on your system
- You will now see thumbnails of various theme packages available for download
- Click on any one thumbnail to see more screenshots of the themes and wallpapers and get additional information about that particular theme package
- Browse through the theme packages
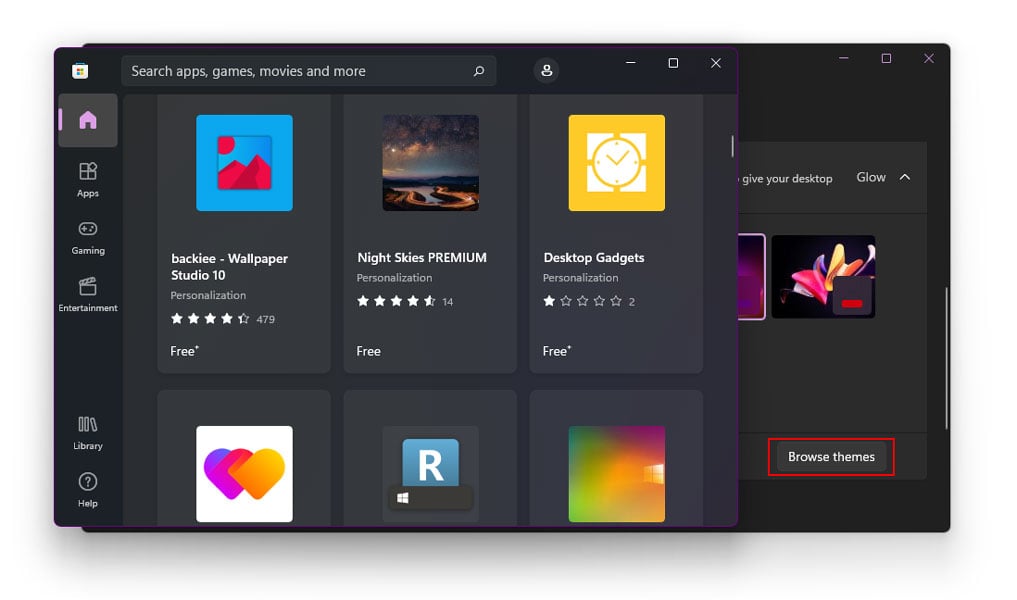
- If you come across a theme package you like, click on the GET button
- Next, click on Install
- Wait for the download to finish
- When the installation is finished, click on Apply to apply the downloaded theme right away.
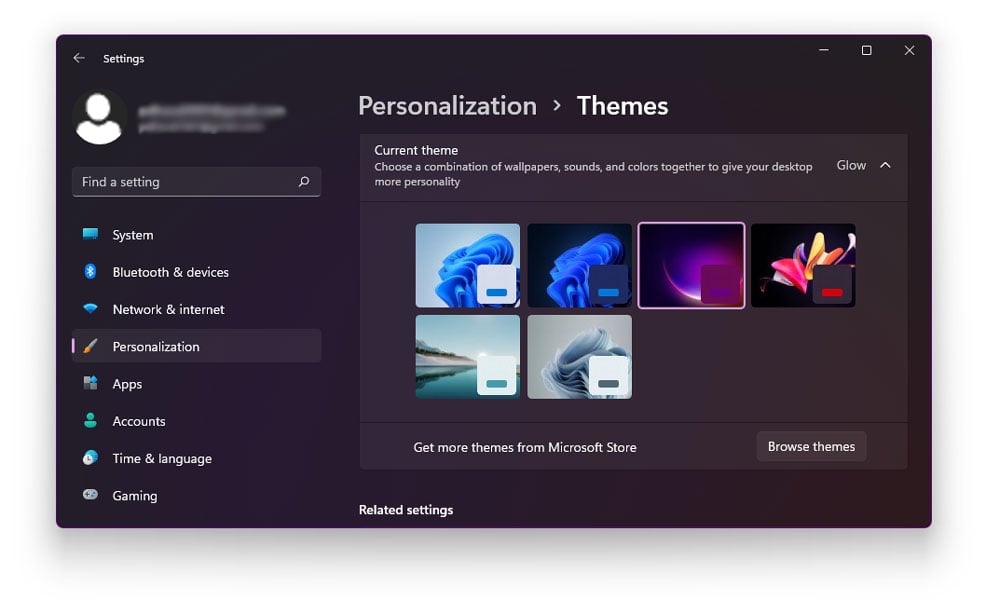
The themes from the downloaded theme package will be available along with the Windows 11 themes in the Themes menu. To apply any of the installed them, follow the given steps.
- Right-click on your Desktop
- Select Personalise
- On the left navigation panel, select Themes
- Now, a theme-related settings window will appear on the right navigation pane.
- You will see the default along with the installed themes
- Select any theme of your liking
- Click Apply
How To Create A Theme In Windows 11?
At times, even after installing numerous theme packages, you aren’t satisfied with the appearance of your desktop. Despite browsing through countless themes, you still cannot find a satisfying theme that will go perfectly with the appearance of your desktop. In such a case, you can always create Windows 11 themes. Furthermore, you can add your own colours and detail any particular theme of your liking in any way you choose.
To create Windows 11 themes, follow the given steps.
- Right-click on your Desktop
- Select Personalize
- On the left navigation panel, select Themes
- Now, a theme-related settings window will appear on the right navigation pane.
- Under Themes, you will be able to see the current theme along with the background, colors, sounds, and cursor used.
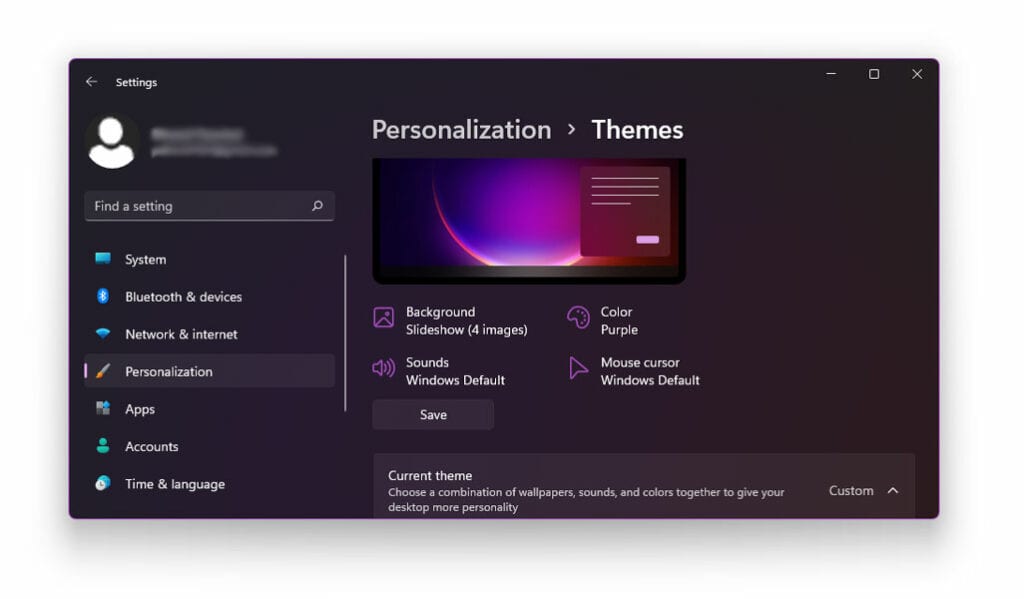
- Here, you can add your own collection of wallpapers, colors, and background.
- Under Current Theme, you will be able to able to create a custom theme
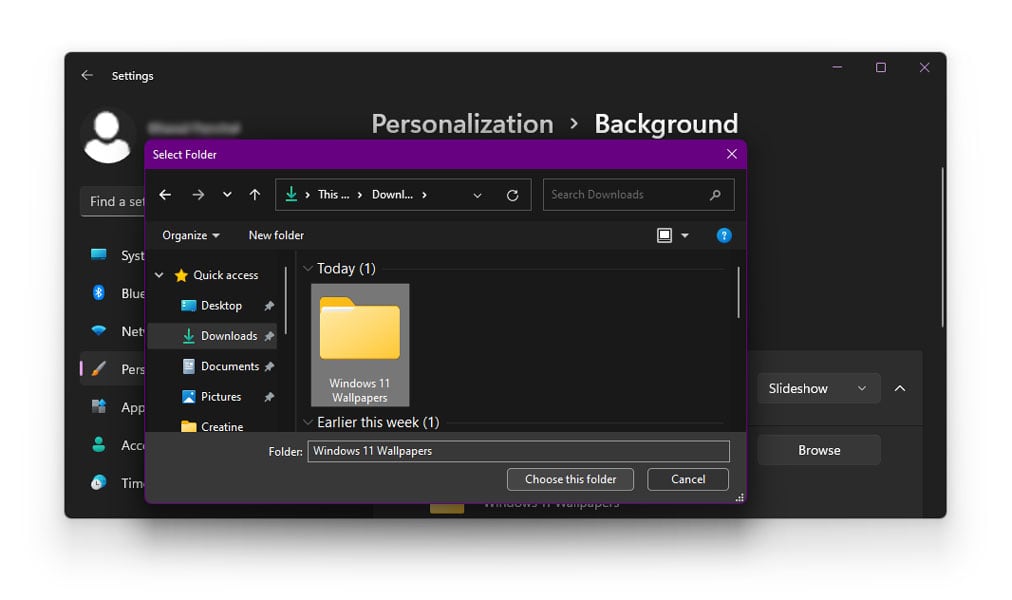
- To create a custom theme, tap on Background and select the image you want in the background
- Next, tap on Color to add colors and other additional details such as transparency, color to the start menu and title bar
- Next, choose Sounds and set a custom notification sound
- Once everything is done, click on Save Theme
- Enter a name for your custom theme
- Click Save
Your custom theme is now created. This custom created theme will be available under the Themes menu along with the default as well as download theme package.
How To Change The Color Scheme In Windows 11
If you like your theme but are unsatisfied with the color, you can always opt to change the color scheme in Windows 11. You can add or remove excess colours and can even mix and apply multiple colours to your existing Windows 11 theme. To change the colour scheme in Windows 11, follow the given steps.
- Right-click on your Desktop
- Select Personalise
- On the left navigation panel, select Themes
- Now, a theme-related settings window will appear on the right navigation pane.
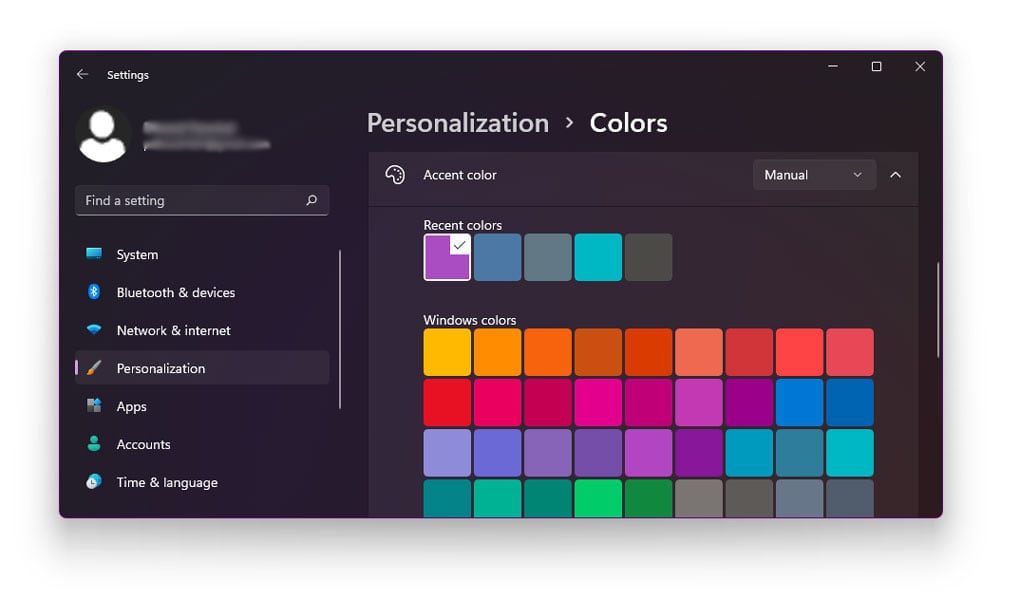
- Go to Colors
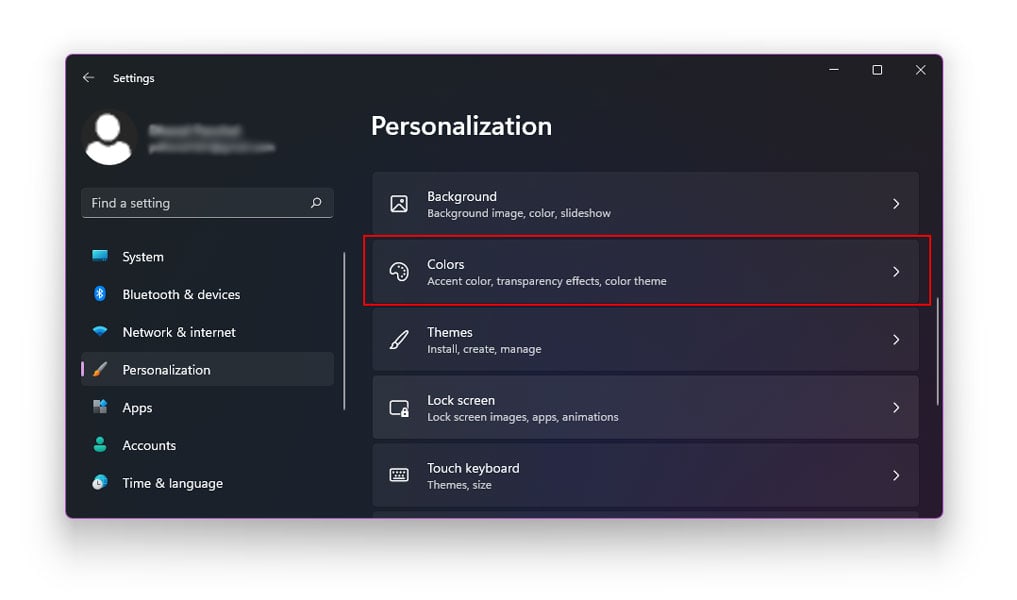
- First, choose the colour scheme in which you want your apps and Windows surface to appear.
- Next, toggle the Transparency effects on/off to make the apps and overall Windows surface appear translucent.
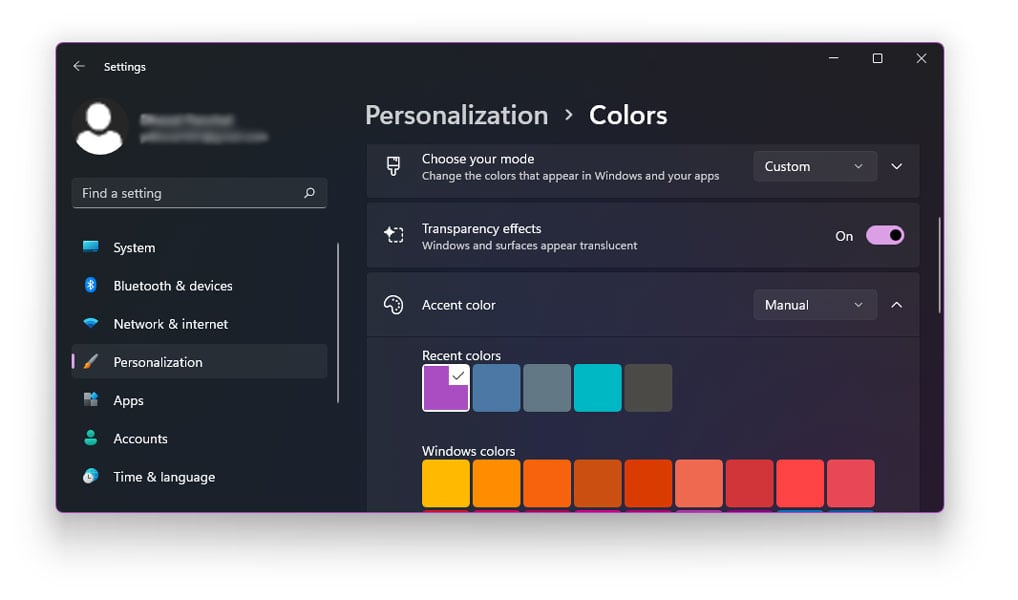
- Change the accent colours to check out additional colour settings on the start menu and the title bar.
How To Change Icons In Windows 11?
Once you have the colours and themes in order, you will need to mould the icons accordingly so that they go well with your customised theme. If you have taken a look at the Windows 11 preview version, you know that Microsoft has provided redesigned icons and sounds with their new OS. And to make your icons match the overall Windows experience, you can change the icon appearance.
To change the icon appearance, follow the given steps.
- Right-click on your Desktop
- Select Personalise
- On the left navigation panel, select Themes
- Now, a theme-related settings window will appear on the right navigation pane.
- Under Related Settings, choose on the option which reads Desktop Icon Settings.
- A dialogue box will now appear on your screen.
- In this dialogue box, click on Change Icon to change the appearance of your Desktop icons.
How To Change The Font In Windows 11?
While there are plenty of options in terms of customising the themes and colour grading, the opportunities to change your font in Windows 11 are fairly limited. You can either a font from the default built-in fonts or can choose to download font packs from Microsoft Store.
- Right-click on your Desktop
- Select Personalise
- On the left navigation panel, select Fonts

- Now, a fonts-related settings window will appear on the right navigation pane.
- Under Available Fonts, you can choose from a number of available fonts in Windows 11
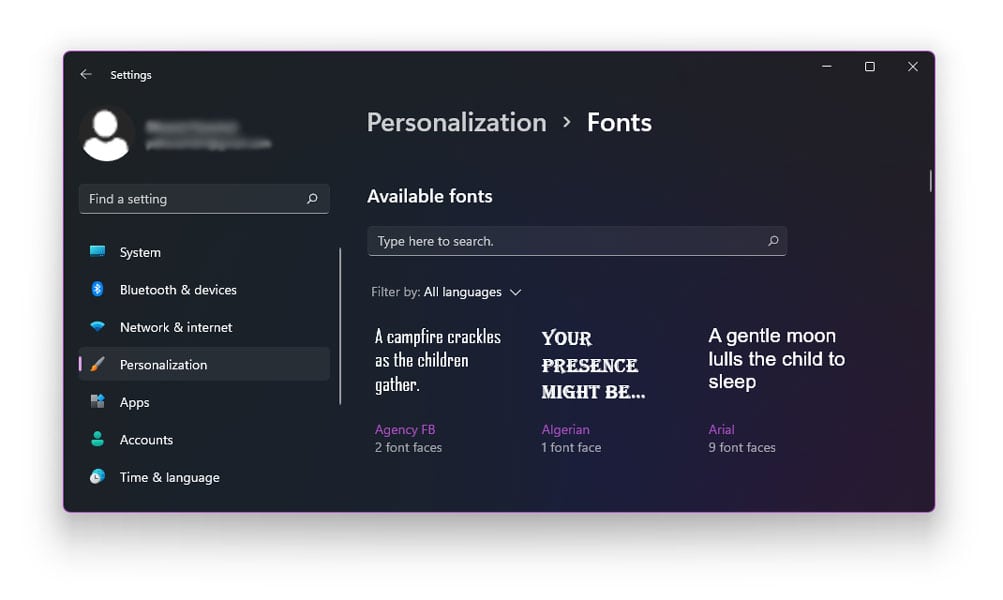
- If none of the fonts is available, click on the option which reads.
Get More Fonts In Microsoft Store
- This will automatically launch Microsoft Store on your system
- You will now see thumbnails of various font packages available for download
- Click on any one thumbnail to see more screenshots of the fonts and get additional information about that particular font package
- Browse through the font packages
- If you come across a font package you like, click on the GET button
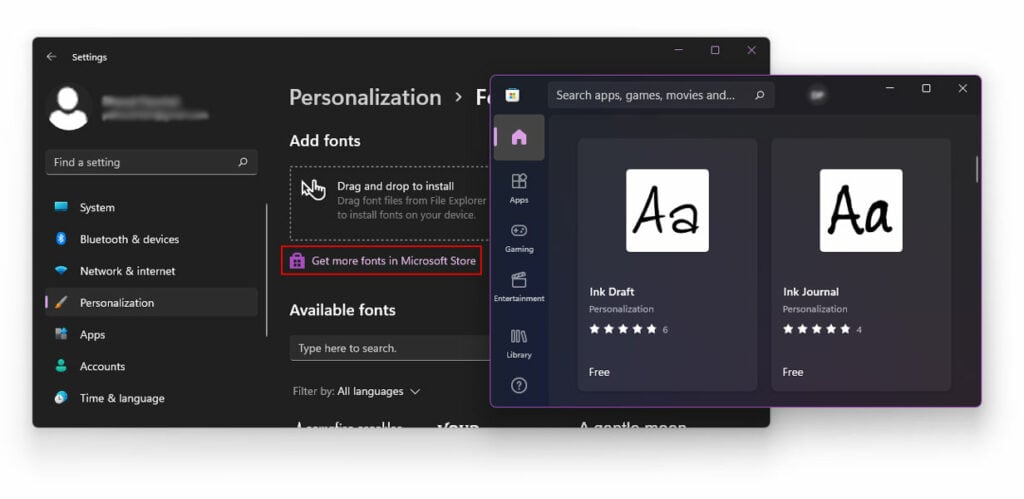
- Next, click on Install
- Wait for the download to finish
- When the installation is finished, click on Apply to apply the downloaded font right away.
The fonts from the downloaded font package will be available along with the rest of the Windows 11 fonts in the Fonts menu. To apply any of the installed fonts, follow the given steps.
- Right-click on your Desktop
- Select Personalise
- On the left navigation panel, select Fonts
- Now, a font-related settings window will appear on the right navigation pane.
- You will see the default fonts along with the installed fonts
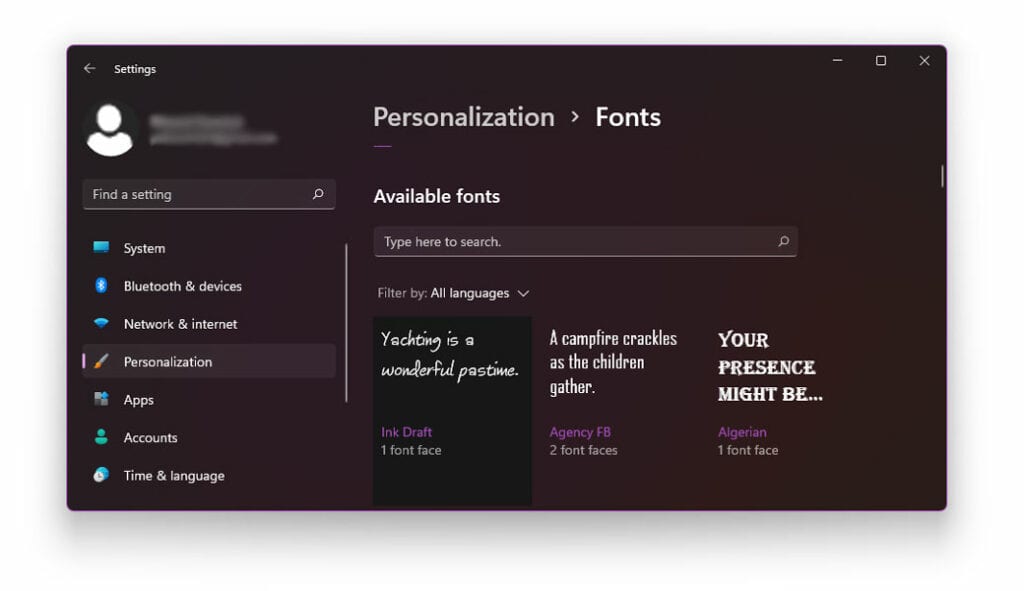
- Select any font of your liking
- Click Apply
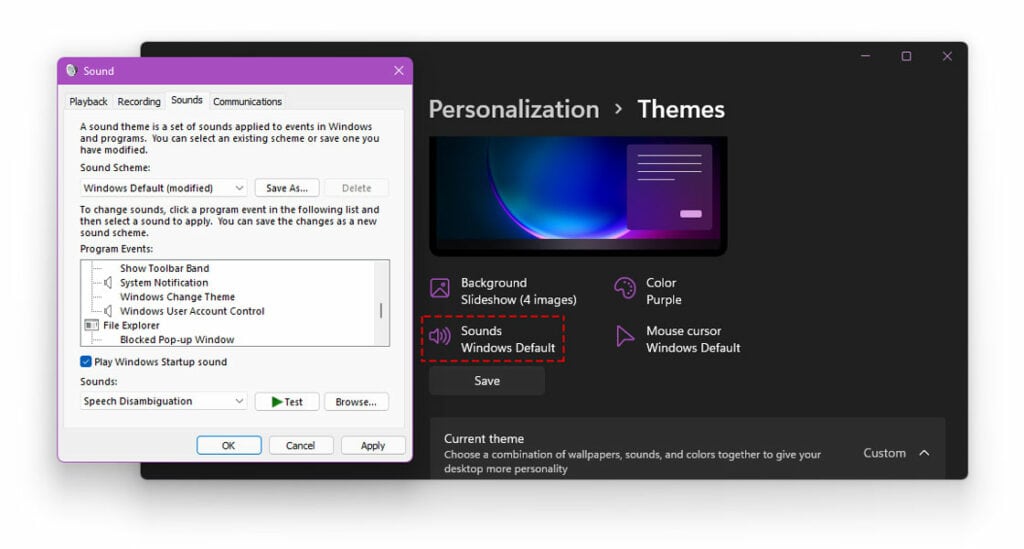
How To Change Sounds In Windows 11?
Just like the themes, colours, fonts, and background, you can also change the notification sounds in Windows 11. The sounds available in Windows 11 is a mix of the new as well as the older versions present in Windows 10. But it is pretty easy to change the sounds in Windows 11. To change sounds in Windows 11, follow the given steps
- Right-click on your Desktop
- Select Personalise
- On the left navigation panel, select themes
- Now, a theme-related settings window will appear on the right navigation pane.
- Choose Sounds
- A window will appear on your screen that will help you change the sound scheme on your system.
- Here, you can change any of the Windows 11 sounds system-wide.
Also read: How to Fix Sound Problems in Windows 11
The Bottom Line
We hope our article was successfully able to walk you on how to create a theme in Windows 11. Themes are a great way of customising your overall desktop appearance. Windows 11 comes with a unique set of custom made themes for you to choose from. However, you can always opt to download Windows 11 themes from the Microsoft Store. In addition to the themes, you can also personalise the colour, background, and sounds on your Windows 11 accordingly.
Absolutly useless, what about actually chynging how the win looks like? What about colors of menus, color of opened windows etc….
To change the colors of Start, Taskbar and opened Windows, you can enable the options, “Show accent color on Start and taskbar” and “Show accent color on title bars and windows borders” under Settings > Personalization > Colors. There are many limitations when it comes to personalization on Windows. However, if you want to change the look you try various Rainmeter skins for Windows 11.
Seriously? You didn’t deal with the serious problem of getting rid of the white-on-black windows. Horrible. And for all your massaging Microsoft’s egos every version of Windows offers less access to appearance settings.