Just like your everyday routine, you get ready for work at the given time. Given that majority of us are working from home for the past year, you start your computer. As always, you wait for your computer to load while getting dressed simultaneously. However, by the time you are dressed, you see your Windows 11 stuck on the loading screen. Like any other normal person, you force shutdown your computer and start it again hoping to make it start.
But the problem continues to persist as you find your computer stuck on Windows 11 logo. Although the hype around Windows 11 continues to grow, Windows 11 users have reported significant errors ever since they have got their hands on it. One of the commonly reported problems is their Windows 11 stuck on loading screen with nothing but the spinning dots on startup.
If you too are facing the same problem, then you’ve come to the right place. In this article, we will walk you through the different fixes to solve windows 11 stuck at loading screen.
Note: Since your computer is stuck on Windows 11 logo, you are unable to access any of the computer’s functions. So, if you are unable to access a particular fix below, try booting your Windows 11 into safe mode. You can refer this guide to boot your Windows 11 system into safe mode.
How to Fix Windows 11 Stuck on Loading Screen Issue
Here are some of the easiest, fastest, and proven fixes to fix Windows 11 stuck on boot screen error.
1. Restart your Windows 11 System
A quick restart goes a long way. Restarting your computer is likely to counter any bugs present and tackle any issue that is hampering the sytem’s functioning. Restart your computer and check if the issue has been resolved.
2. Remove all External Devices
Although this may sound like a silly fix, it is known to have fixed the problem for many. If your computer is stuck on the loading screen, the best thing to do in this situation will be to first remove all external devices connected to your system (both wired and wireless) such as the mouse, external keyboard, pen drivers, card readers, LAN cable, and so on.
3. Perform Automatic Repair
Windows comes loaded with dozens of utility tools that are designed to help the system get back up automatically. Just like we have the Windows troubleshooter, there is the Windows automatic repair tool that can help troubleshoot the problem. To perform automatic repair, here is the procedure you ought to follow.
- Power on your computer
- Turn off the computer once you see the Windows logo on the screen. Repeat this (turn on and turn off) thrice
- This will make Windows launch the Automatic Repair Screen on your system
- You will see a dialogue box with the message Windows couldn’t load correctly
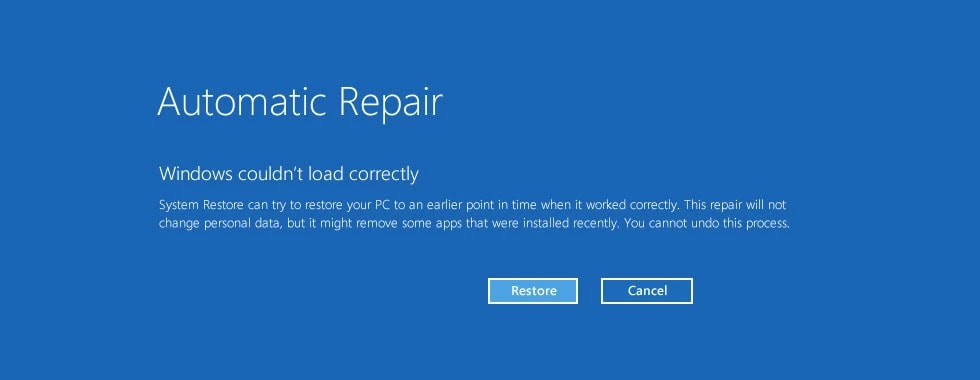
- Here, select Restore
- This will launch the Windows 11 automatic repair
The Automatic Repair tool will try to fix the Windows 11 loading screen issue. Similarly, you can use the Automatic Repair Tool to fix a number of problems that are hampering your system’s functioning. However, if you find your self stuck in the automatic repair loop in Windows 11 then refer this guide to fix it.
4. Install Pending Updates (If Any)
To ensure that nothing drastic happens in this scenario, it is vital that you install any pending Windows 11 updates immediately. This will help the system address the critical issues that typically arrive through other updates. Trace the following steps.
- Turn off and turn on your computer multiple times using the power button on CPU
- After a while, your computer will automatically enter the Automatic Repair mode
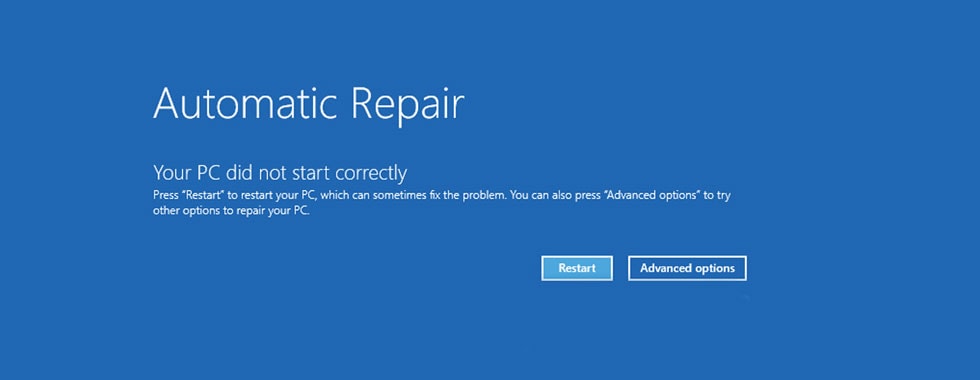
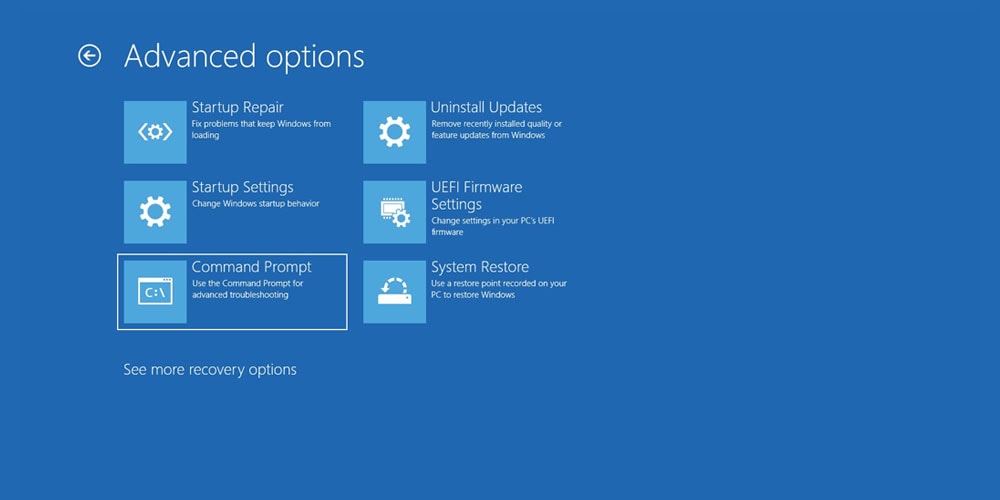
- Now, when you get the screen with “Automatic Repair couldn’t repair your PC”, select Advanced options. This will launch the Windows Recovery Environment
- You will now see a blue screen with a list of options present
- Then, click on Troubleshoot > Advanced Options > Go to Command Prompt
- Type the following command and press Enter
bcdedit /set {default} safeboot network
- Your Windows will now boot into Safe Mode With Networking
- Wait for your system to fully boot into Safe Mode
- Now, go to Settings > Windows Update
- Here, tap on Check for updates
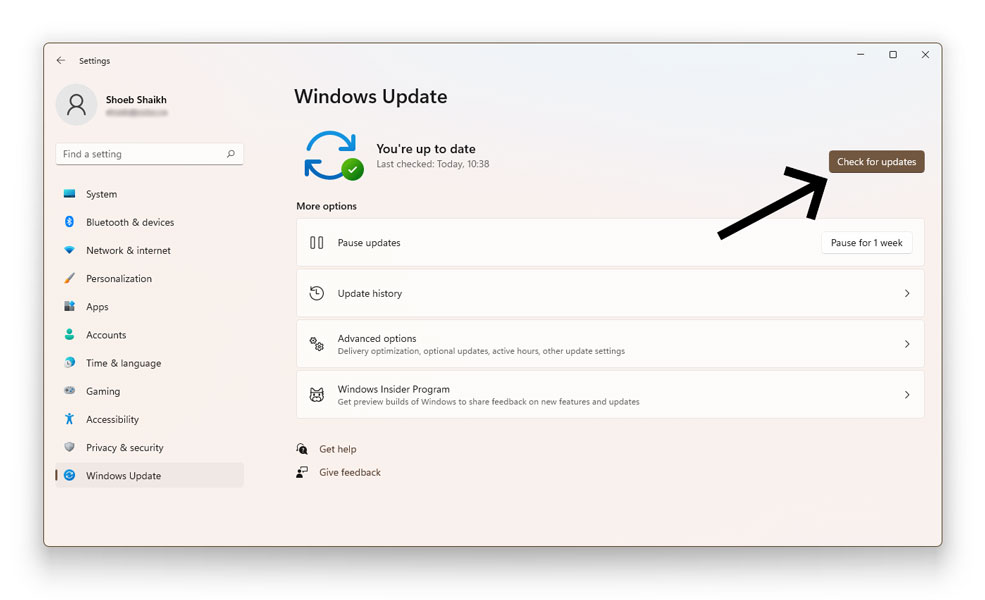
- If there are new updates present, Windows will automatically search, download, and install those updates on your system
- When prompted for Restart, say yes
- Upon restart, check to see if “Windows 11 stuck at loading screen” issue has been resolved
5. Run Startup Repair
The startup repair tool is designed to detect, diagnose, and repair any problems that might tamper with your system’s overall functioning. Similarly, performing a startup repair will automatically detect and tell you why is your Windows 11 stuck on loading screen.
- Load into Windows Recovery Environment using the given methods above
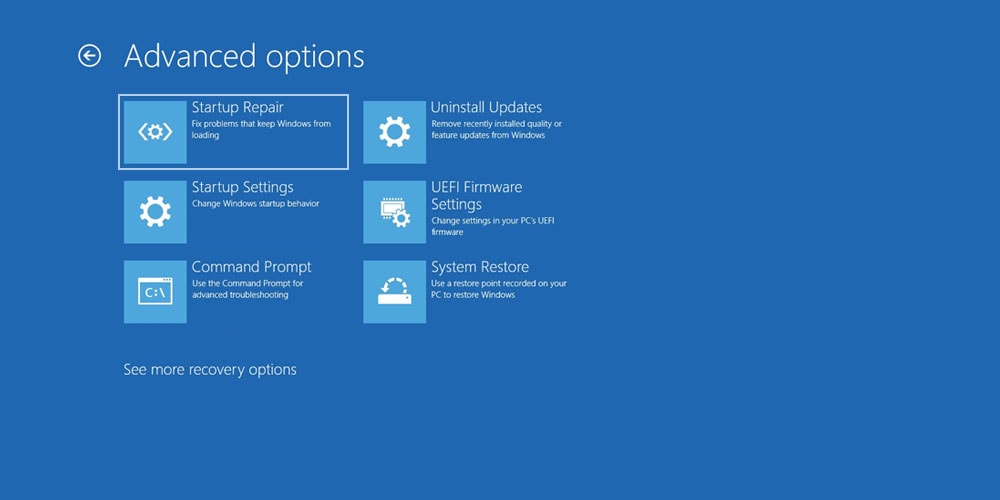
- Then, click on Troubleshoot > Advanced options > Go to Startup Repair
- Select an account with admin privileges and Enter your password
- This will now run the Windows Startup Repair Tool
- The Startup Repair Tool will now perform a thorough scan of your system to detect and diagnose the root causes of the Windows 11 loading issue.
6. System Repair using Command Prompt
If you are unable to fix the “Windows 11 stuck on boot screen” issue then try to perform system repair using Command Prompt. To do the same, follow the steps mentioned below.
- Load into Windows Recovery Environment using the methods given under the 4th solution above
- Then, click on Troubleshoot > Advanced Options > Go to Command Prompt
- Type the following command and press Enter
bootrec.exe/fix
- This will make Command Prompt launch a system repair to fix the problem of your Windows 11 computer stuck on loading screen.
7. Check Hard Drives using Command Prompt
A corrupted drive could be the reason why your system is stuck on Windows 11 logo. In such cases, you’ll need to check the hard drive and fix those issues.
- Load into Windows Recovery Environment using the methods given under the 4th solution above
- Then, click on Troubleshoot > Advanced Options > Go to Command Prompt
- Type the following command and press Enter
chkdsk C: /f /r /x
- Now, insert the following command and press Enter
CHKDSK C:
- Wait for the scan to finish
- Once done, restart your computer to see if the Windows 11 load screen issue is taken care of.
8. Revert to Previous Build (System Restore)
The majority of the time, we tend to run an update without checking whether it is compatible with our system or not. Similar is the case with Windows 11. Several users who updated to Windows 11 reported problems post updating their system. In such cases, reverting to the previous version of Windows can help solve the “Windows 11 stuck at loading screen” problem. To do so, use the steps given
Note: This step poses a mild risk of data loss. Therefore, ensure that you back up all your important data and ensure that your computer is powered on at all times during the restoration process.
- Load into Windows Recovery Environment using the methods given under the 4th solution above
- Then, click on Troubleshoot > Advanced Options
- Select the option which reads Go Back to the Previous Build
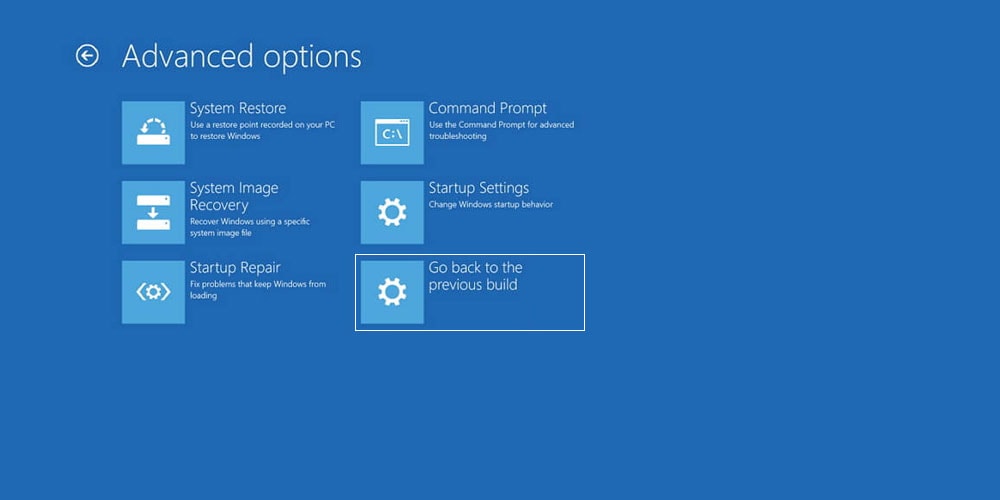
- Follow the instructions on the screen to revert your build updates
9. Adjust the Lock Screen Behavior
If none of the fixes has gone in your favour so far, you’ll need to make changes to the lock screen menu itself. In this case, you will need to Disable the lock screen so that this bug can no longer appear every time your put your system to Sleep.
- Load into Windows Recovery Environment using the methods given under the 4th solution above
- Then, click on Troubleshoot > Advanced Options > Go to Command Prompt
- Type the following command and press Enter
bcdedit /set {default} safeboot network
- Your Windows will now boot into Safe Mode With Networking
- Wait for your system to fully boot into Safe Mode
- Press Windows + I to open settings
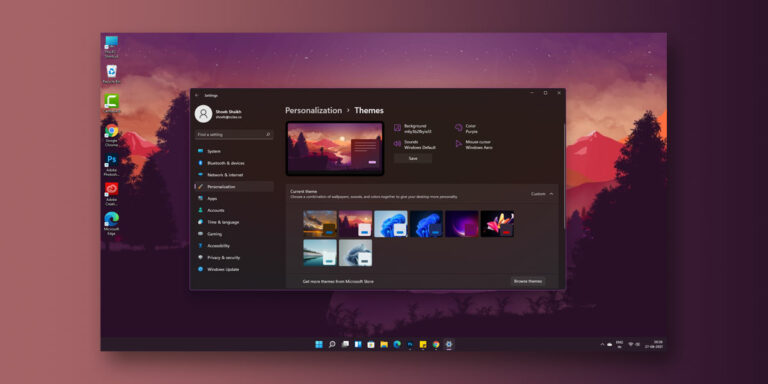
- Go to Personalization and Click on Lock Screen on the right navigation pane
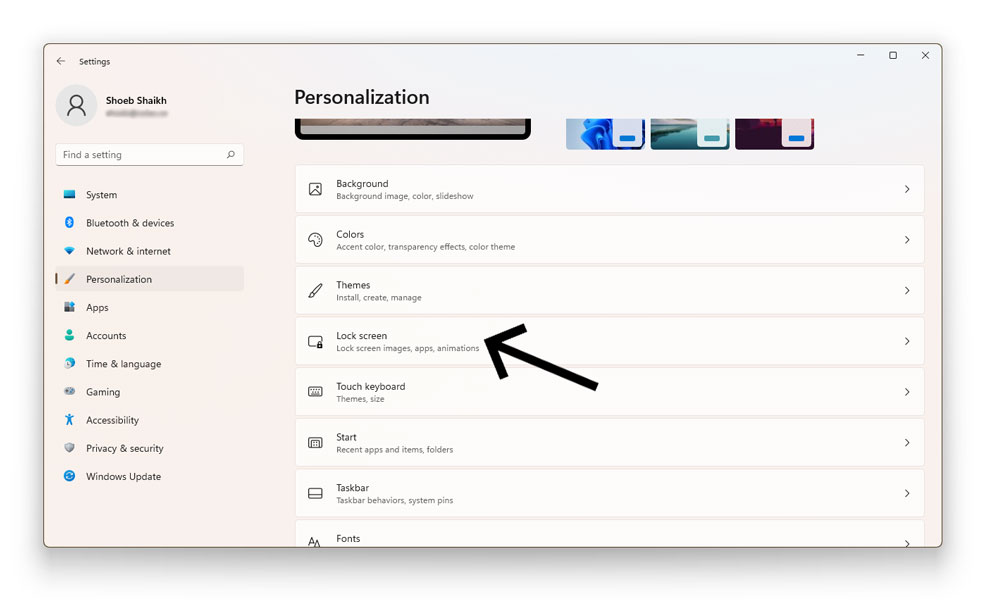
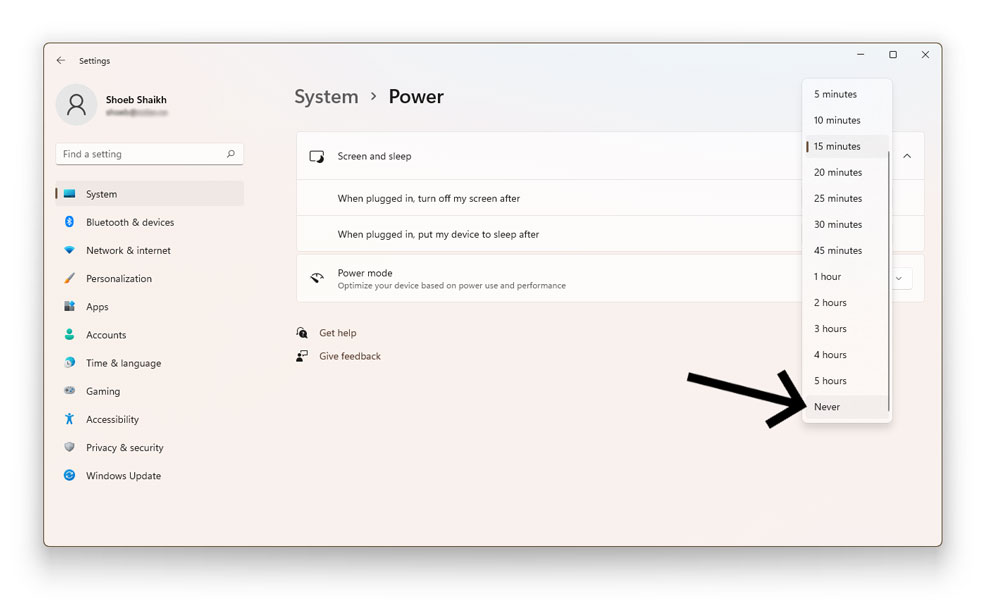
- Next, under Related Settings, click on Screen timeout
- Go to Screen and sleep and select Never under “When plugged in, turn off my screen after” and “When plugged in, put my device to sleep after“
10. Boot into Safe Mode
Safe Mode is one of the easiest and most proven ways to fix any issue that arise within your Windows 11. Trace the given steps to boot your system into safe mode.
- Load into Windows Recovery Environment using the methods given under the 4th solution above
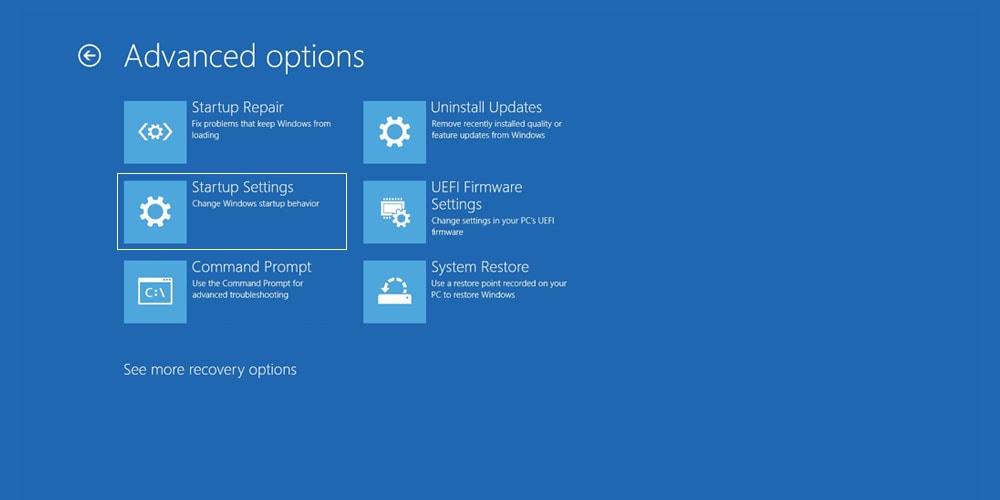
- Then, click on Troubleshoot > Advanced Options > Go To Startup Settings
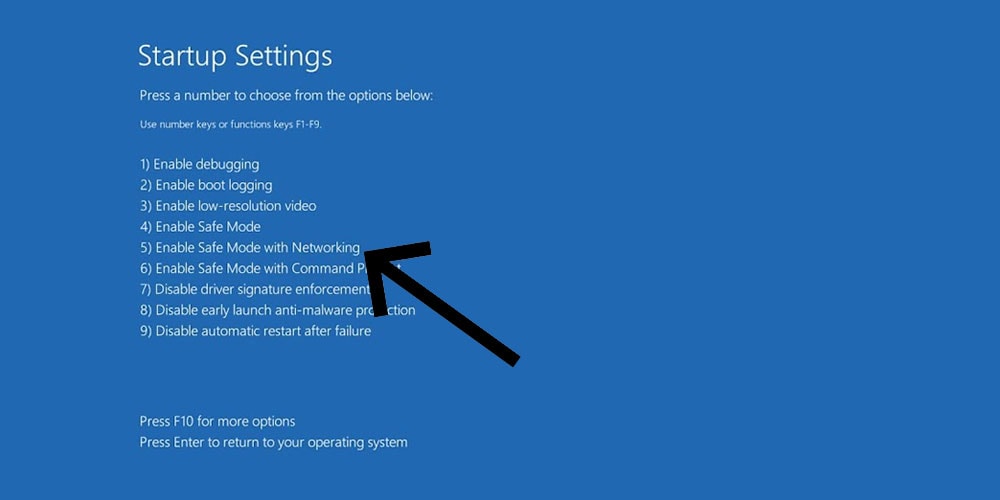
- Now, select the option which says “Enable Safe Mode with Networking“
- Your Windows will now boot into Safe Mode With Networking
- Wait for your system to fully boot into Safe Mode
- Press Windows + R to open Run
- Insert the following into the dialogue box and hit enter
msconfig
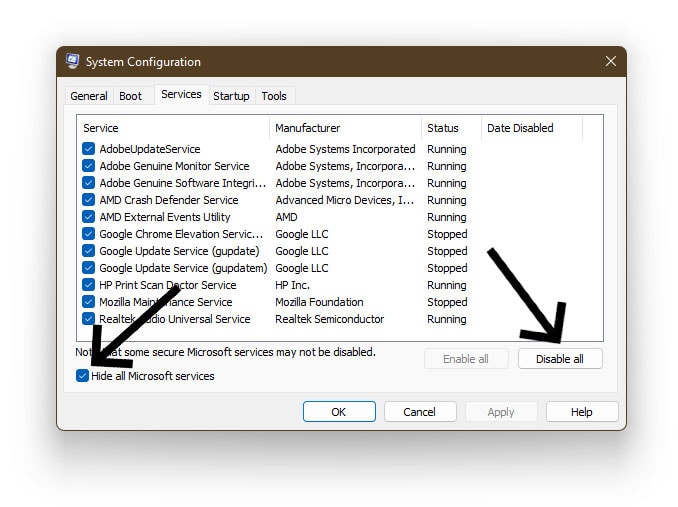
- Go to Services
- Next, tick the Hide All Microsoft Services Checkbox and Select Disable All
- Go to Startup & Open Task Manager
- Here, locate any startup program you think might be tampering with the system
- Select Disable
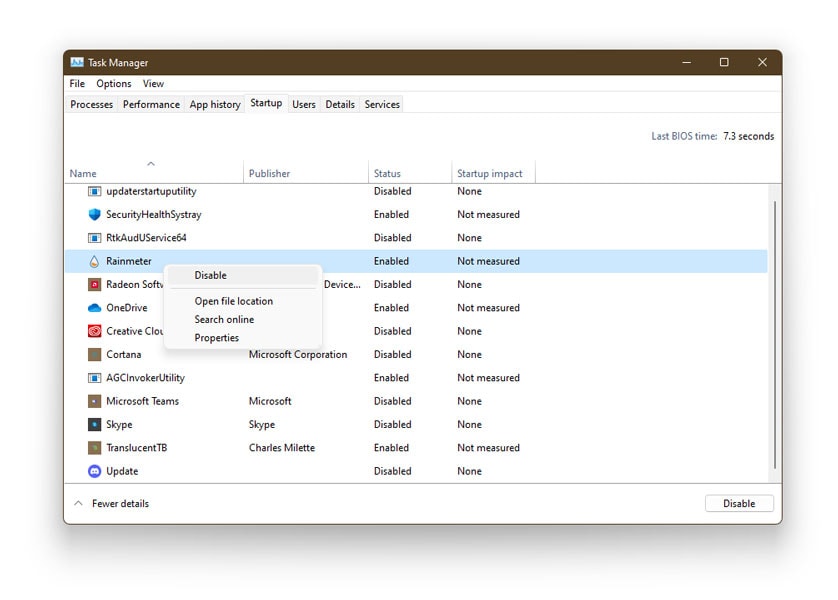
- Follow the same procedure to disable any faulty startup program
- Restart Your System
Other Hardware Fixes to Try
If none of the fixes mentioned above have fixed the “Windows 11 loading screen stuck” issue, then it is time you looked at your system’s hardware. At times, we tend to unknowing tamper with a few things we have no idea about and end up changing the settings in the process. A likely scenario here is that you have may have mangled with your BIOS post a failed overclocking setup. In order to revert the damage causes, here are a few other hardware files to try.
1. Clear CMOS Memory
If you have a high-end motherboard embedded in your system, it is likely to have a CMOS button onboard that will help you reset your CMOS and clear the memory. To do so, trace the following steps.
- Turn off your computer
- Disconnect your computer from the power outlet
- Next, unplug the power supply from the back of your computer from the wall socket
- Now, press the case’s power button on your motherboard multiple times
- Doing so will discharge the motherboard capacitor
- Refer to the motherboard’s manual to locate the correct CMOS button
- Once located, press and hold the CMOS button for 5-10 seconds
- Reconnect all the sockets to the power supply
- Reboot your computer
- Press the key to enter your BIOS options
- Adjust the BIOS settings accordingly
2. Replace CMOS Battery
Removing and replacing your battery erases all your CMOS data and forces a reset. To reset your CMOS battery, follow the given steps.
- Refer the method above to discharge the motherboard capacitor
- Locate the CMOS Battery button on your motherboard (look for a coin-sized button right near the PCIe slots)
- Carefully remove the CMOS battery
- If it has a clip, gently slide the battery from under the clip
- Ensure that you DO NOT BEND THE CLIP
- Wait for 5-10 minutes
- Now, replace the CMOS battery with a new one
- Reboot your system
3. Check System RAM
Your PC can stuck on Windows 11 logo if you have a loose connection of RAM. If you are well versed with your motherboard parts and connection them unplug the power source to your PC and locate the RAM slot on your motherboard. Try to remove it and put it back again and ensure proper connection.
Conclusion
If you too have recently updated to Windows 11 and found your Windows 11 stuck on loading screen, then our article is bound to come in handy to you. We have laid down some of the most easiest, fastest, and proven fixes to get the issue. However, if none of the fixes have worked out for you, we insist that you contact your nearest service center at once.