The majority of the time, one needs to use a proxy server before using a particular website. This is because a proxy server is required to access several websites which generally aren’t allowed or are restricted by either your ISP or the government. Just as there are laws restricting content/websites on the internet, there are also a whole lot of proxies that can help you bypass those laws.
However, choosing one single proxy server from a pool of options can be challenging. But thanks to Windows 11, you no longer have to rely on external proxy servers to access the Internet. This is because Windows 11 comes with a built-in proxy feature which is probably more effective than an external proxy software.
In this article, we will be discussing about how to set up a proxy server in Windows 11. Note that Windows 11 isn’t configured to detect Proxy settings automatically. Therefore, users will need to manually configure a proxy server on their system before accessing the Internet.
What Is A Proxy?
A proxy or a proxy server is something that falls in between your system and the Internet connection. Several users across the globe need to first gain access to a proxy server before they can access the Internet. It is also widely used by business organizations to keep track of everything that comes in and goes out of their private network.
A proxy server works on behalf of your Internet Connection. In simple words, a proxy server makes requests for websites and services the user wishes to access. Companies primarily use a proxy server to save bandwidth and to protect their company from ads and malware.
This is because a proxy server translates traffic between networks and protocols ultimately separating end-user clients from the Internet destinations they wish to browse. Proxy servers provide varying levels of functionality, security, and privacy depending on your use case, needs, or company policy.
How To Setup A Proxy Server In Windows 11?
As we mentioned earlier, a proxy server is used for a variety of reasons. However, Windows 11 comes with a built-in proxy which is just as powerful as the rest of the proxy servers available. Note that Windows 11 isn’t configured to detect Proxy settings automatically. Therefore, users will need to manually configure a proxy server on their system before accessing the Internet.
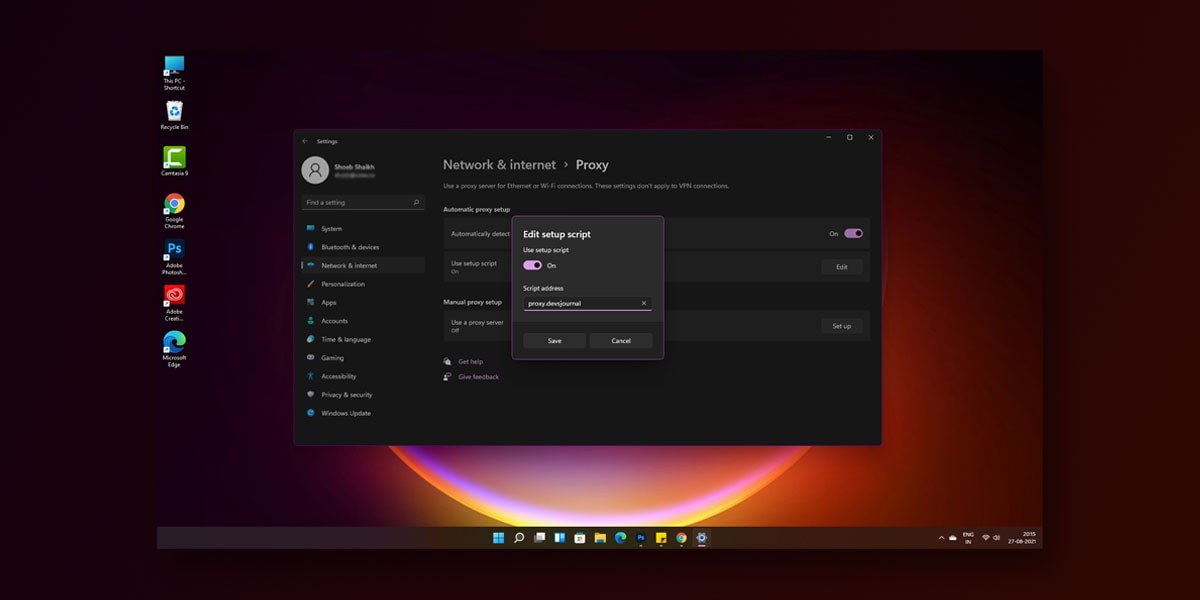
1. Setup A Proxy Server Using Script In Windows 11
Your network administrator will provide you with a network script using which you can configure proxy servers on your Windows 11. It is pretty straightforward to set up a proxy server in Windows 11 using script.
NOTE: You will need to have the script address provided by your network administrator or ISP in order to set up a proxy server in Windows 11 using a script
To set up a proxy server using script in Windows 11, follow the given steps:
- Right-click on the Start Menu
- Select Settings
- Go to Network And Internet
- Tap on Proxy on the right navigation panel
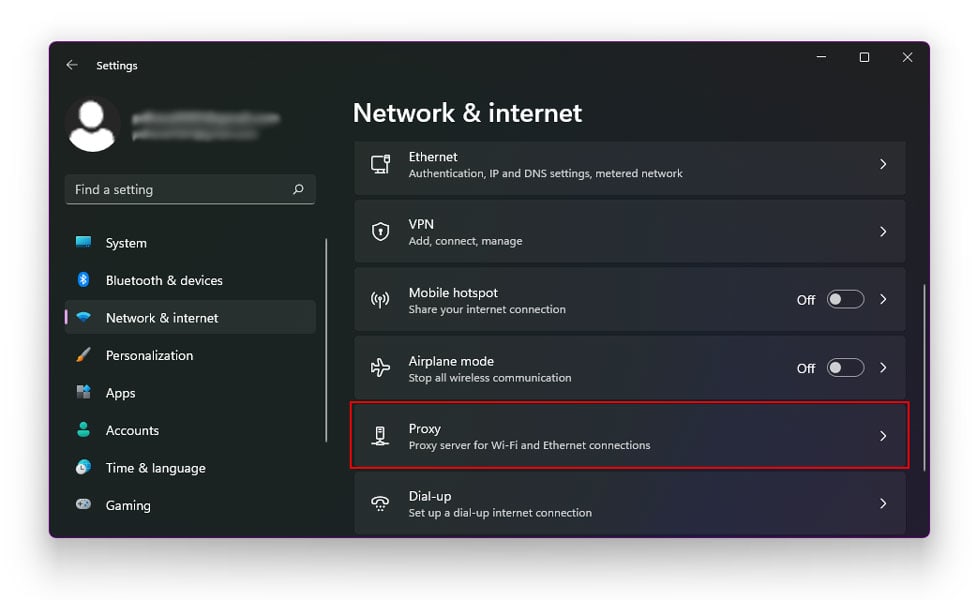
- The Proxy Settings Panel will now be visible on your screen
- On this Panel, select the Set Up button
- Next, turn on Script Proxy
- Now, type in the script address provided by your network administrator or ISP.
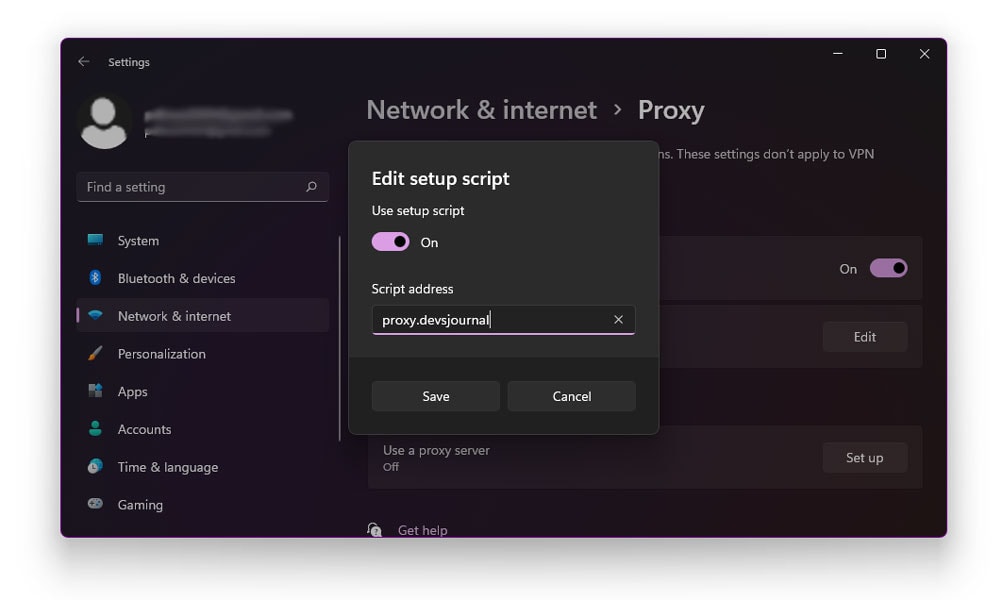
- Enter the script address
- Click Save
2. Manually Setup A Proxy Server In Windows 11
If you don’t have a script with you or if your setup does not require a script to add a proxy server, you can opt to manually set up a proxy server in Windows 11. To manually set up a proxy server, follow the given steps
NOTE: If you are opting to set up a proxy server manually, you will need to have the proxy server address and port number with you.
- Right-click on the Start Menu
- Select Settings
- Go to Network And Internet
- Tap on Proxy on the right navigation panel
- The Proxy Settings Panel will now be visible on your screen
- Go to Manual Proxy
- Click on the Setup button to add the proxy details
- A pop window will now appear on your screen
- Toggle the button to turn on the manual proxy server in Windows 11.
- In the Address field, type the proxy server IP
- In the port field, type the port number
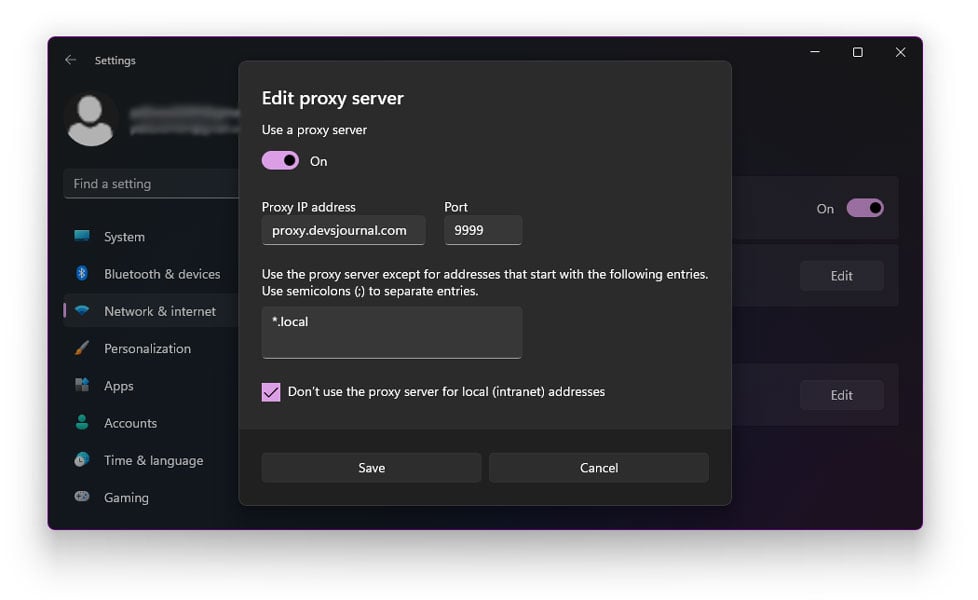
- Click Save
- Close the Settings Window
3. Setup A Proxy Server Using Internet Options
To set up a proxy server in Windows 11 using the browser settings, follow the given steps.
- Close all Running applications
- Launch Internet Explorer
- Open Tools
- Select Internet Options
- Go to the Connections tab
- Next, tap on LAN Settings
- You will now see a LAN dialog box
- In this dialog box, check the box which reads Use A Proxy Server For Your LAN Settings.
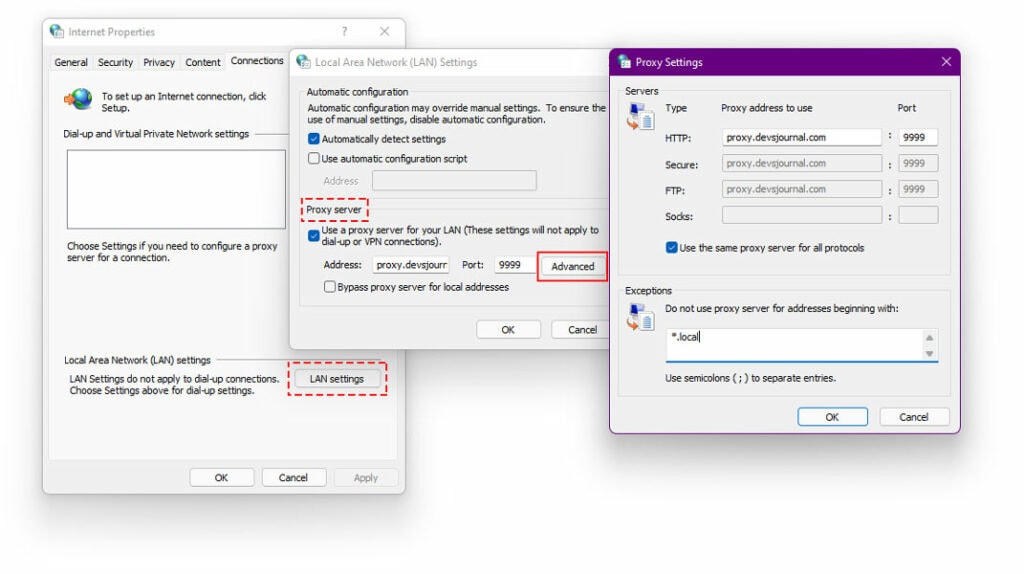
- ext, select the Advanced tab
- Enter the appropriate exceptions in this tab
The Bottom Line
We hope our article was able to successfully walk you through setting up a proxy server in Windows 11. Proxy servers are generally used to gain access to websites and Internet services that are generally prohibited by your ISP or the government. However, there are a ton of proxy servers available. Choosing from a pool of options can be tricky.
Thanks to Microsoft, Windows now comes with a built-in proxy feature which is just as powerful as the rest of the software available in the market. Mentioned above are some of the few ways using which you can set up a proxy server in Windows 11.
If you have any other methods to set up a proxy, kindly let us know in the comments section below. Also, if you come across any error when setting up a proxy server in Windows 11, mention it in the comments section below, and we will get back to you ASAP!