We probably don’t need to tell why you ought to trash out the Clipboard content or clear clipboard every time you use it for the critical data pasting, otherwise, you might be the next victim of the ever so popular Clipboard data theft.
Moreover, we got bad news for the folks who don’t find clearing the Clipboard as a mandatory habit.
You might be at some risk – no pun intended.
You must have a few cool predetermined notions regarding Windows Clipboard. But you never thought of it as something that may put you in some unwanted situations you may never dream of.
We most probably are aware of the number of advantages of using Clipboard in Windows 10. However, we never tend to look out the other side that recommends us to clear it out after copying any sensitive data.
If you can relate to us, then congrats, since this guide is certainly going to help you with a boatload of good reasons, here we have accumulated a few real-life facts that you cannot agree with us enough on “why you should clear Clipboard after its use.”
Along with “Why,” we have also got you covered on “how to clear Clipboard in Windows 10.” There are several workarounds listed in the article so you can opt for the best-suited one.
Why you must clear Clipboard?
You might know that in Windows the last copied or cut content remains into the Clipboard memory that can be readily available to anyone having access to your computer. It got stored in the temporary memory until you restart or log off your PC.
For the sake of security breaches and privacy, isn’t the reason itself enough for you to contemplate towards the consequences? If not, take a chill pill because we have got you more along the way.
Technically, Clipboard referred to as a special storage location in RAM that is used by systems to stockpile bits of data temporarily. To view your Clipboard history, Press Windows+V Key.
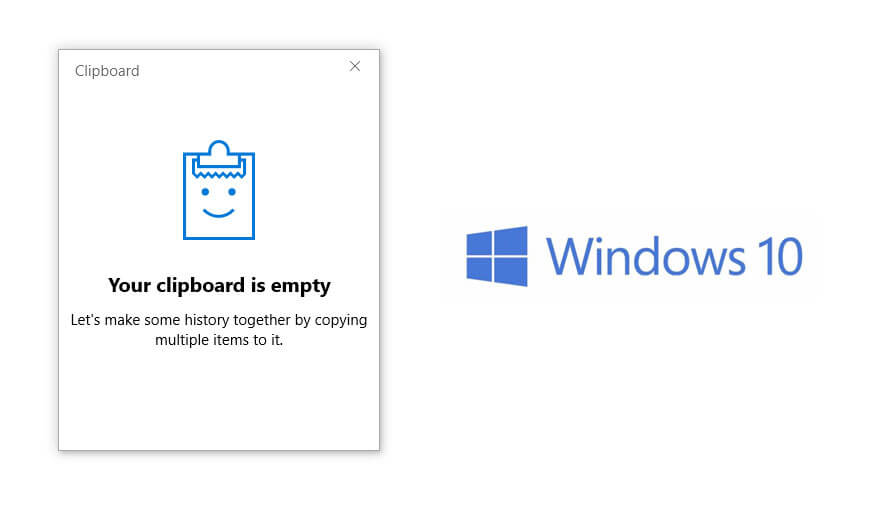
Text, images or different sort of data can get stored in Clipboard whenever you hit CTRL+C or Cut anything. And next, when you perform either of the action to other data, the prior one would be replaced with the current.
If you are one who operates or work from a public internet cafes, you should primarily take care of it. Always follow the cautionary measures before you leave the seat. The next guy getting access to the computer could GAME you terribly if you left any sensible data stored in Clipboard.
Even if you use a personal computer that is accessible to others, to be on the safe side, don’t forget to clear Clipboard memory.
Also Read: Windows Explanatory: Windows Services explained.
Copying and pasting passwords, usernames, security keys/pins is a typical use of Clipboard, hence removing it, is extremely important.
Lastly, if it does make sense to you for any reason, toggle your eyes to the next section.
How to clear Clipboard in Windows 10/8/7
You can feel free to choose any one of the five methods we have listed below:
1. Copy useless stuff
This is the easiest of all, just copy anything random that isn’t important for you and voila! You have successfully replaced your essential data with meaningless stuff.
Practically, this method doesn’t entirely clear Clipboard but just replace the data you cared about with which you don’t.
2. Tap Print Screen
Use this method wisely. What it does is it screen the image to the system Clipboard or computer printer depending on the administration setup.
However, this method identically acts as the former one that is replacing your text or other Clipboard data with the screen image.
3. Clear Clipboard using Shortcut
Employing this workaround you can create a Shortcut on your desktop, so whenever you need to clear your Clipboard in Windows 10, all you will be required to do is tap that icon once, and that’s it – now there is no data stored in the Clipboard memory.
Here’s how to do:
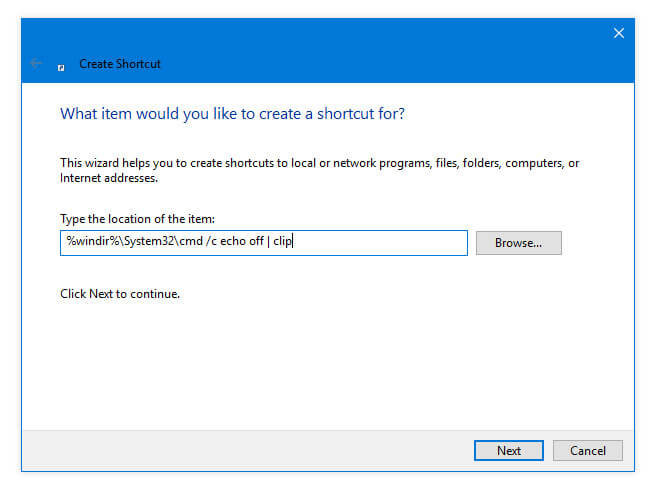
- Right-click on your desktop
- Select New >> Shortcut
- Paste the below command in the prescribed box given
%windir%\System32\cmd /c echo off | clip
- Tap on Next
- Type in a name for the Shortcut, preferably choose “Clear Clipboard,” that will be quite easy to locate.
- Lastly, hit Finish and the Shortcut is ready for you to use.
You will notice that the icon of the created Shortcut is same as the CMD so if you wish to, you can additionally change it by right clicking on it then selecting Properties >> Change icon >> browser the location of the image and click on OK.
There are a few more tweaks that you can do via navigating to the Shortcut Properties.
4. Using Command Prompt
Open CMD and run the command given below to clear Clipboard in Windows 10.
echo off | clip
Also Read: How to fix Windows 10 Start menu
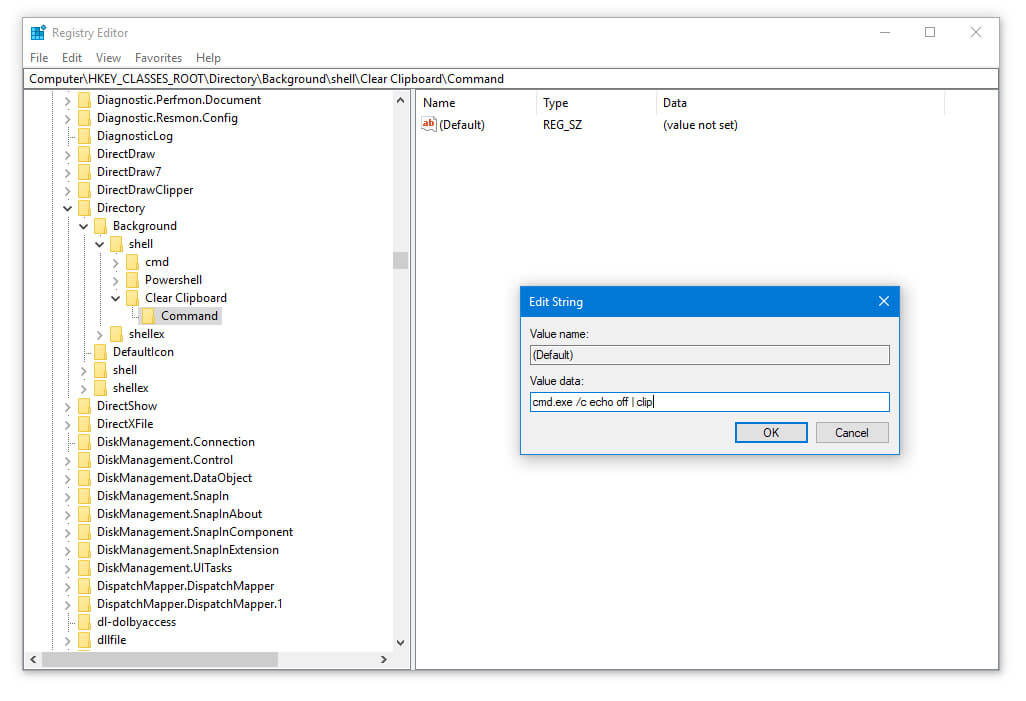
5. Add Clear Clipboard to Context Menu
Unlike the rest four methods in the list, comparatively this one is quite long. But still, you don’t need to be tech savvy for trying this out.
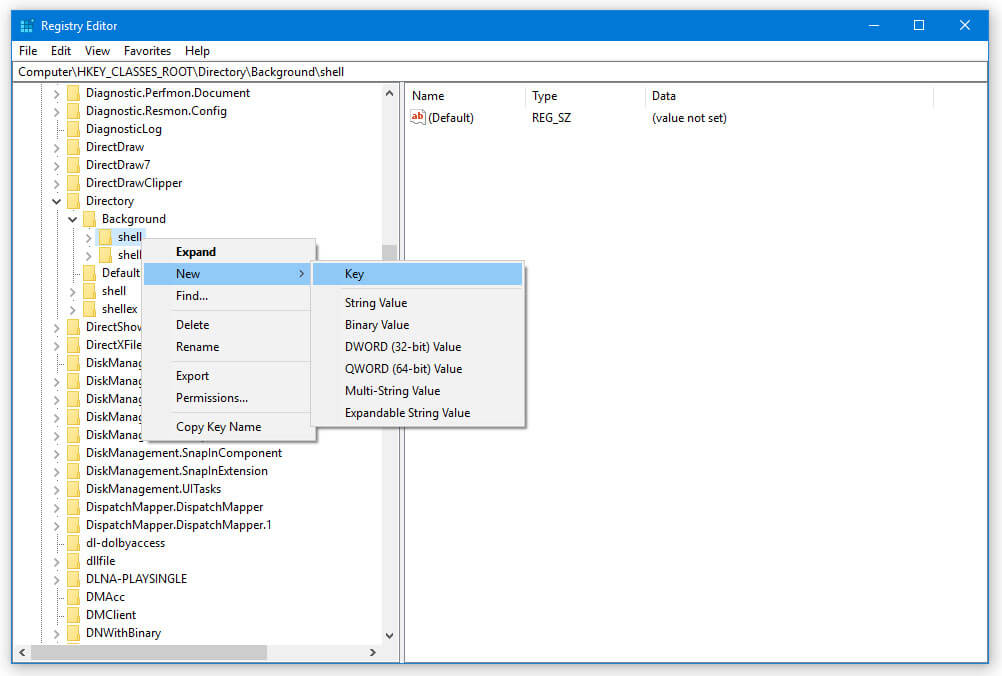
- In Windows 10, type “regedit” in the search bar located at the bottom-right corner of the screen and hit enter.
- Open it and on the right pane click on HKEY_CLASSES_ROOT >> Directory >> Background
- Right-click on Shell and tap on New >> Key and name it “Clear Clipboard.”
- Now right-click on the newly created Clear Clipboard Key and tap on New >> Key and name it “Command.”
- Next, you will see an option “Default” at the right pane, double click on it and paste the below-mentioned command on the box says “Value data.”
cmd.exe /c echo off | clip
- Tap on OK and exit the window.
- Now right-click on your desktop, and you will have a new option named “Clear Clipboard” in your Context Menu.
Did you find the workaround to be complicated to follow? Tell us in the comment box below.
Conclusion
So now onwards don’t forget to clear Clipboard whenever you use it for pasting any sensible data. It undoubtedly helps you in safeguarding your critical info from any kind of Clipboard data theft.