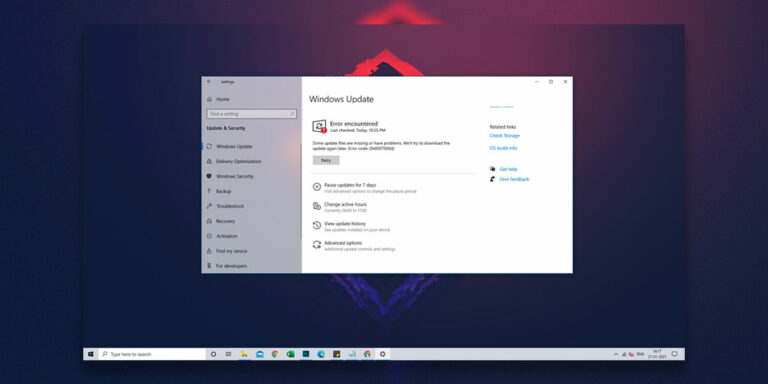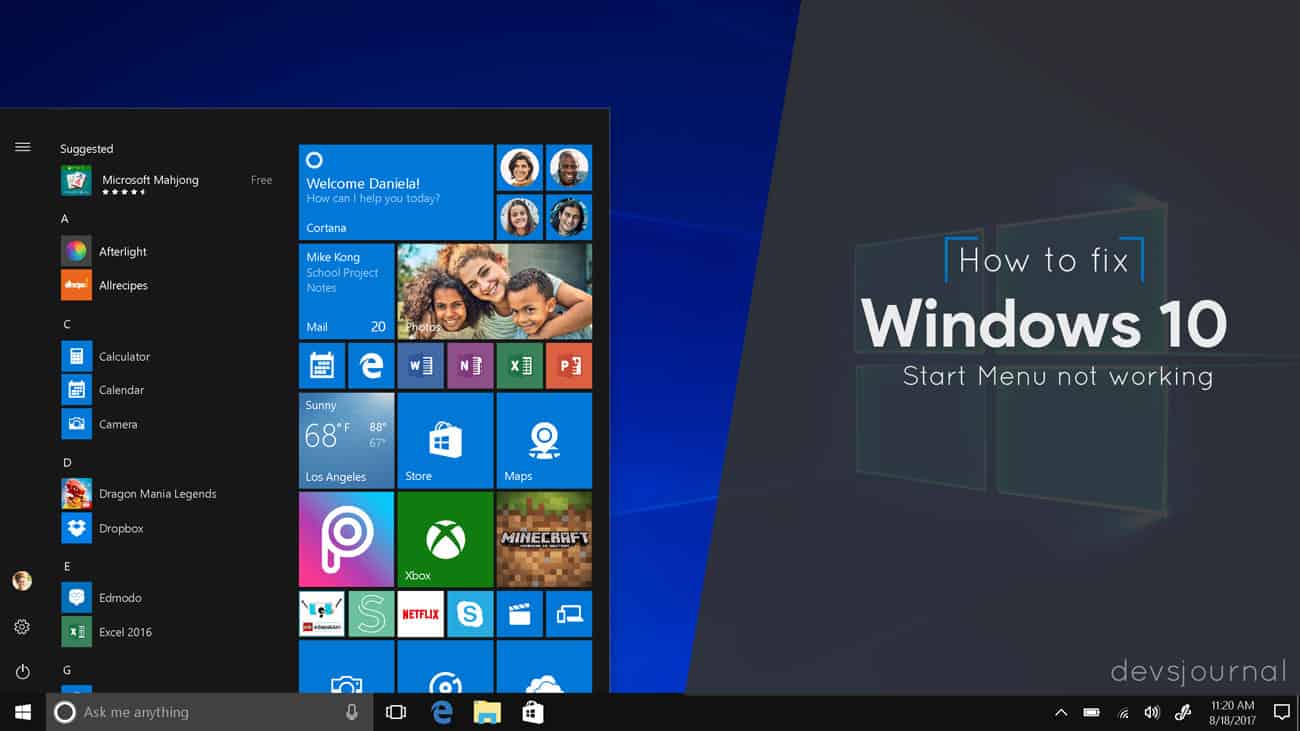
If you have recently received an update or have updated your windows 10 to the creator’s version of 1709 (well that’s what they say it), you might have come across an issue that is quite irritating and intimidating; Start menu doesn’t open or Windows 10 start menu not working! While some of us know the shortcuts to different start menu options, it’ really frustrating to use a malfunctioning operating system.
One of the most crucial and important button on your computer screen. You are clicking, pressing, typing but it simply does not work. Quite depressing isn’t it. We have report of multiple users, and our followers who are facing this issue. This problem has been fixed b Nevertheless through this one let’s understand how we can work out different solutions for you.
[toc]
How to fix Windows 10 Start menu not working issue
1. Shaking off | A general approach
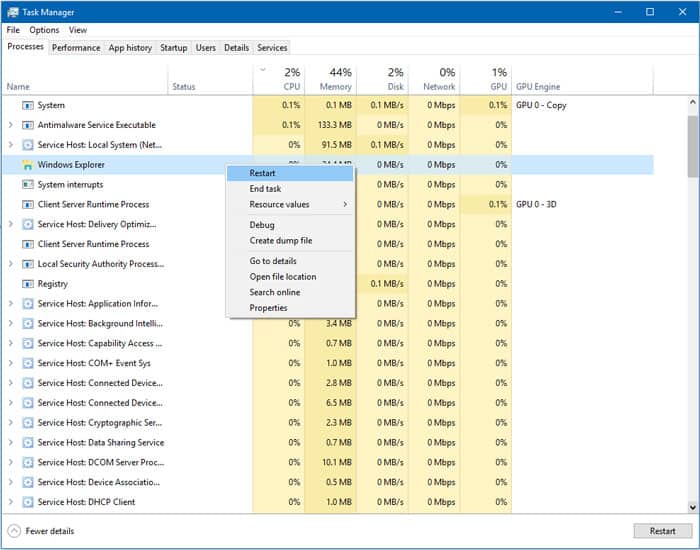
- Punch in keys ALT – CTRL – DEL or launch the Task manager.
- Under Processes tab, find “Windows Explorer”.
- Right the Windows Explorer and click on Restart.
This restarts the Windows Explorer every time your do it. This should shake of the Windows explorer service responsible for handling start menu requests and reroute it to respond in a normal way. This is one of our tried ways and Start Menu responded after this. This method is probably the easiest way to solve start menu problem but it only works in some cases.
If you want to know about different Windows services and why are they running, check our guides on rundll32.exe, svchost.exe, dwm.exe and more.
2. Run Windows Powershell to fix corrupt Start menu files
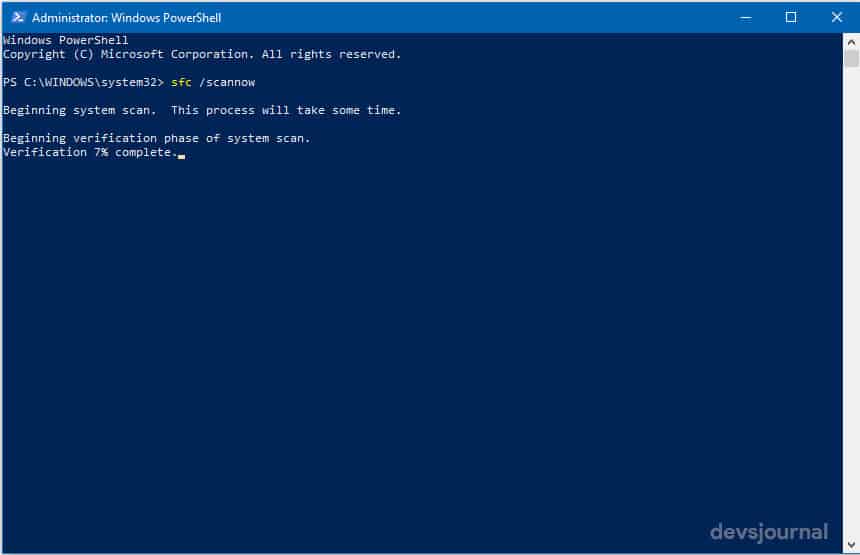
Step 1. In the start menu, search for “Windows Powershell”, right click on it and select Run as Administrator
Step 2. In the powershell window, type the following command: sfc /scannow
Step 3. The scan may take some time and will end with one of three results.
- Windows did not find any integrity violations.
- “Windows Resource Protection found corrupt files and repaired them” mean there are now no corrupt files.
- Windows Resource Protection found corrupt files but was unable to fix some (or all) of them indicates a problem.
Step 4. Once the scan is completed and it showed corrupt files were found & windows couldn’t fix it, enter this command in Powershell window:
DISM /Online /Cleanup-Image /RestoreHealth
This will download the corrupted files via Windows update and automatically install the files and, again, this may take some time. This process will fix your Start menu issues if it was caused due to corrupt system or windows files.
3. Reinstalling Cortana to fix Start menu
There is a high possibility that during the update Cortana was incorrectly updated. For users just for knowledge and I am sure most of you must be aware that Cortana is Microsoft’s Virtual Assistant for Windows 10. You need to follow the procedure and I am sure it works since it has worked for many of the users.
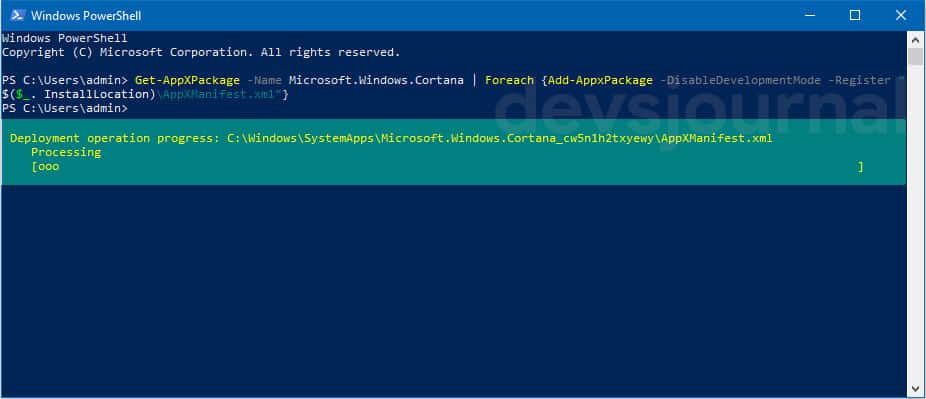
Step 1. Click on the desktop bottom and click task manager; when task manager is launched, click on File and it drops to run new task
Step 2. After launching Run New Task, type the word “powershell” and tick for the box that is “create this task with administrative privileges” and then punch in ok.
Step 3. After punching ok, you need to type below command without any errors and punch in enter key
Get-AppXPackage -Name Microsoft.Windows.Cortana | Foreach {Add-AppxPackage -DisableDevelopmentMode -Register "$($_.InstallLocation)\AppXManifest.xml"}
In case the above command does not work due to any issue, there is second command that you can try;
Get-AppXPackage -AllUsers | Foreach {Add-AppxPackage -DisableDevelopmentMode -Register "$($_.InstallLocation)\AppXManifest.xml"}
So Cortana has been now reinstalled on your windows 10. Alas your start menu should also start to function.
4. Editing Windows Registry to fix Start menu issues
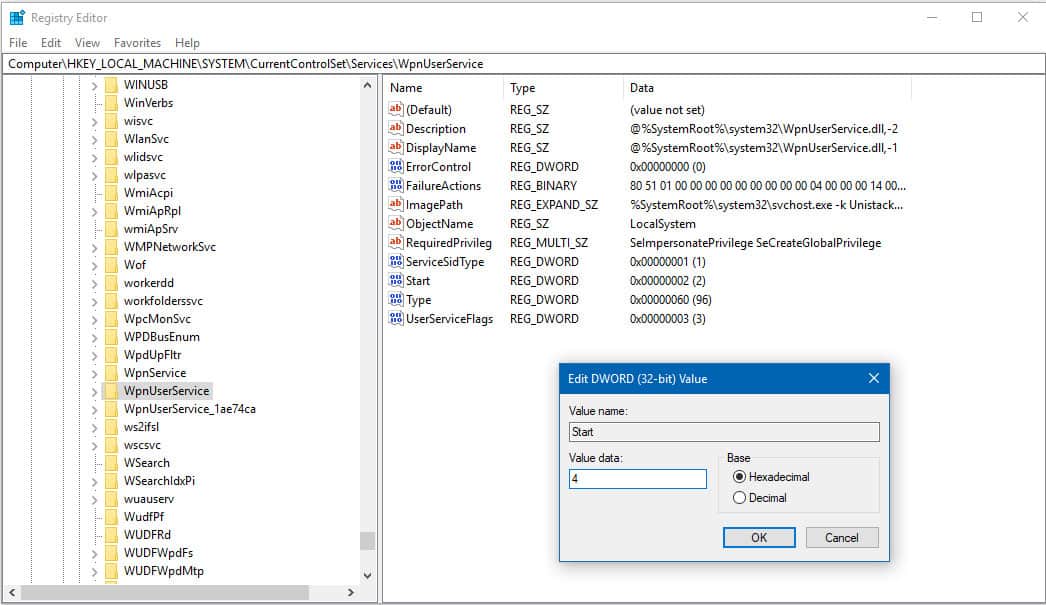
This method generally fixes all the Start menu not working or Cortana issues after a fresh Windows Update. After the Windows 10 Creators update, Microsoft combined both Cortana and Windows search into one, which caused many start menu problems to different users.
- Open Task manager (CTRL+ALT+DEL), click on New Task from File menu at the top.
- Type “regedit” in the New Task window and click on “OK”.
- Go to path [HKEY_LOCAL_MACHINE\SYSTEM\CurrentControlSet\Services\WpnUserService].
- Double click on “Start” on the right side of the screen.
- Change the value data to “4” with “Base” set to “Hexadecimal” then “OK”.
- Reboot.
After restart the Svchost.exe that runs WpnUserService was not started. Which means you don’t have to end the task every restart to fix Start menu or Cortana.
5. Reinstalling Dropbox
For some reasons developers cannot fathom at the time being, DropBox is showing some sort of conflict with start menu. This is weird. Try to uninstall Dropbox for time being restart your computer. We have found this solution as one of the doable solution until Microsoft comes up update for the issue.
In case you are not able to locate Control Panel to uninstall DropBox follow below procedure.
- Punch Windows + R key on your keyboard that will prompt open Run Box
- Type in Control in it and click ok – voila! You control panel has now opened!
- Now click uninstall a program and remove DropBox.
6. Change user or Create a new Windows user
While this is not the most satisfying solution to hear, some users did manage to fix the problem with this simple trick. If you have a single user account on your Windows OS, you can follow this procedure and if you have 2 or more user accounts, just switch to another to see if the Start menu works now. To create a new user account, follow this steps:
- Open Task manager (CTRL+ALT+DEL) and click on New task from the File menu at the top.
- Enter “cmd”, select the check box which says “Create this task with administrative privileges” and click OK.
- Type the command:
net user username /add
- In this command, “username” can be replaced by any username you want for the new user.
There you go, now your Start Menu is functioning as before. Some users also reported about the Sound icon shows a cross icon after using the Start menu fix, if you’re facing any such issue, make sure to check our Windows 10 Sound not working fix. If you’re still not able to fix the issue, let us know about it in the comment section, maybe we can fix it using different command prompt hacks.