
Samsung has been introducing some outstanding models of smartphones that has given tough competition to even brands like Apple’s flagship Iphone. With Android growing more popular and Samsung’s alliance with Android has given the industry some of the best smartphones it could witness.
Samsung is so far the best manufacturer of android smartphones. The company introduced its first smartphone in the year 2009 and by 2018 it enjoys a market share of whopping 24.64%.
SAMSUNG Galaxy is a series of high end smartphones, tablets and phablets introduced by Samsung Electronics. For a normal user the Galaxy smartphones have all the features it can offer. However, a power user usually needs more features in his/her smartphone and so usually they root theie phone. Rooting gives the privileges to modify the codes of the software. Let us learn more about rooting and also steps you need to follow to root a Samsung Galaxy S9 or S9 Plus smartphone.
What is rooting in Android?
Rooting is a process that enables a user of smartphone or tablets and other devices to obtain control over the android system. The mobile network providers and device manufacturers usually puts some limitations or restrictions on the android devices. Rooting gives the ability to change the system settings of the phone and run specialised apps that require administration/root-level permission. Moreover rooting enables user to perform certain tasks or operations that are not possible by a normal android user. Further the operating system can be completely removed or replaced by a new version of the operating system. Rooting allows the user to delete, edit or add system files which in turn enables them to do tweaks with the phone and the apps installed in it.
Isn’t this Interesting? We will cover the steps required to root a Samsung Galaxy S9 or S9 plus smartphone. To know that, continue reading till the end of this article.
Like every other things, rooting also has its own advantages and disadvantages. And it is better to know the pros and cons of the process, before you proceed with the rooting process. The below list will give you an idea of the same.
Advantages of Rooting
- You will be able to install a custom ROM or kernel in the device, which means the device will seem new at software level.
- When you purchase an android devices, most likely you would find some OEM (original equipment manufacturer) apps that are completely useless. The worst part is you cannot even remove those apps. However, with rooting you get the power to remove these apps and free some storage of the phone.
- Rooting enhances the performance of your device by increasing the battery life and speed.
- Rooting gives access to the system files which are otherwise inaccessible to you. This gives you the freedom to perform whatever you want with your device.
Disadvantages of Rooting
- No doubt, rooting is a risky task. One single mistake in the process will convert your device into an unusable, worthless brick. It is therefore necessary that rooting is done with full care and ensure that none of the steps given in the rooting guide you are following is missed.
- One big disadvantage of rooting is that you will lose the warranty of the device as the manufacturers of most devices do not provide warranty to a rooted device.
- Moreover, rooted devices will not accept any software updates since modifications made in softwares while rooting.
- Rooting enables users to increase or decrease the speed of processor of the device. This is called CPU clocking. While it may be considered as an advantage, it may also be regarded as a disadvantage as CPU clocking may overheat the processor of the device.
Now that you have known the advantages as well the disadvantages of rooting, you can make an informed decision weather you should root your phone or not.
Since this article is about rooting Samsung Galaxy S9 and S9 plus, we will first discuss in brief about the two models or variants before elaborating the steps to root these two smartphones from Samsung.
How to Root SAMSUNG GALAXY S9 and S9+
Follow the steps which will guide you thoroughly to root the Galaxy S9 and S9 plus smartphones. First of all, we will guide you to install TWRP on Galaxy S9/S9 plus.
- TWRP Recovery: Galaxy S9 | Galaxy S9+
- Samsung Odin Tool: Download
- Noverify Zip file: Download
- Magisk 16.3 Modified: Download
- N965F_root_OEM_issue_devices.zip: Download
1. Install TWRP on Galaxy S9/S9 plus
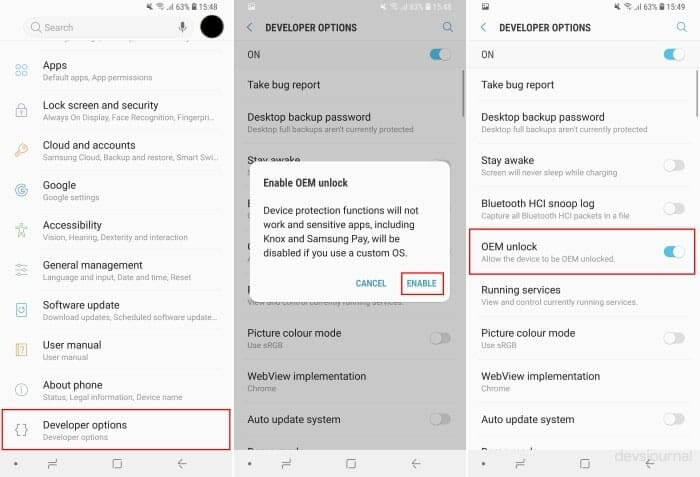
Step 1: Go to Settings, and head to the About phone option where you will find Build No. Tap on this seven times to enable the Developer option.
Step 2: Go to Settings -> Developer Options. Near the “OEM Unlock”, you can find a small toggle button. Enable the button.
Step 3: Now download the ODIN package of Samsung in your PC and extract it to a preferable location.

Step 4: Also download the .tar file of the TWRP image.
Step 5: Turn off the device and reboot it into download mode. The download mode can be enabled by holding down the [VOLUME DOWN] + [BIXBY] + [POWER] for approximately 15 seconds. You will see a warning message. Use the [VOLUME UP] to enter the download mode.
Step 6: Open the Odin, that you have extracted in your PC, tap on the [AP] option and browse to the TWAP .tar files that you have downloaded.
Step 7: In the next step , you need to connect your smartphone to the PC. As you do this, you will see notification in the left side of the ODIN saying the phone has been connected.
Step 8: Now pressing the [VOLUME UP] + [BIXBY] + [POWER] buttons click on the “Start” button in the Odin. This will begin a flashing process. Don’t let the button combinations go off until the TWRP is initiated.
Step 9: This will take you to the TWRP recovery. Once there, you will see a system partition warning message. To allow modifications, swipe the bottom slider to right. On doing this you will head on to the TWRP main menu. Tap on Wipe->Format data and then type “yes” on the text field and press enter. This will start the formatting of the data.
Step 10: Now that the data has been formatted, Go to Reboot->Recovery to restart the TWARP.
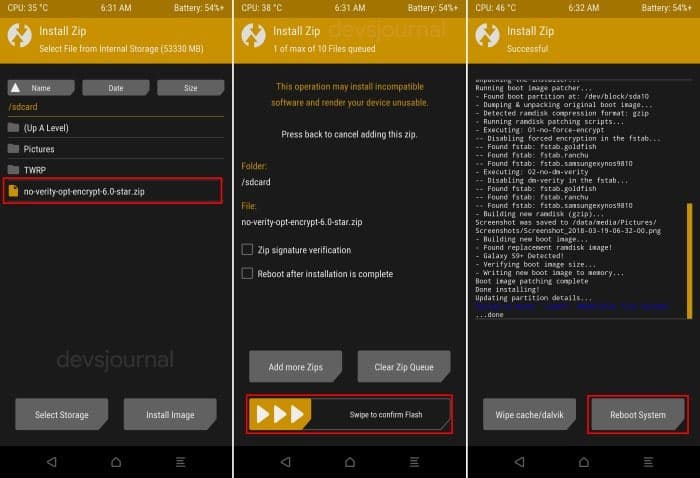
Step 11: When you have rebooted with TWRP, download the dm-verity and force encryption disabler zip on your computer, and transfer it to your smartphone via USB. Next up, you need to go to install in TWRP and browse for the downloaded file and flash it.
Step 12: Next you have to reboot the device and set your account. At this stage, TWRP is fully functional.
2. Completing the Rooting process
There are still some more steps to complete the rooting process of Galaxy S9/S9+. The above steps has installed TWRP in your device. Follow the next steps to root the phone. Now rooting the phone can be done by 2 methods, by SuperSU or by Magisk. In order to prevent any app malfunction due to root, I would suggest using Magisk method.
Root Galaxy S9/S9+ using Magisk
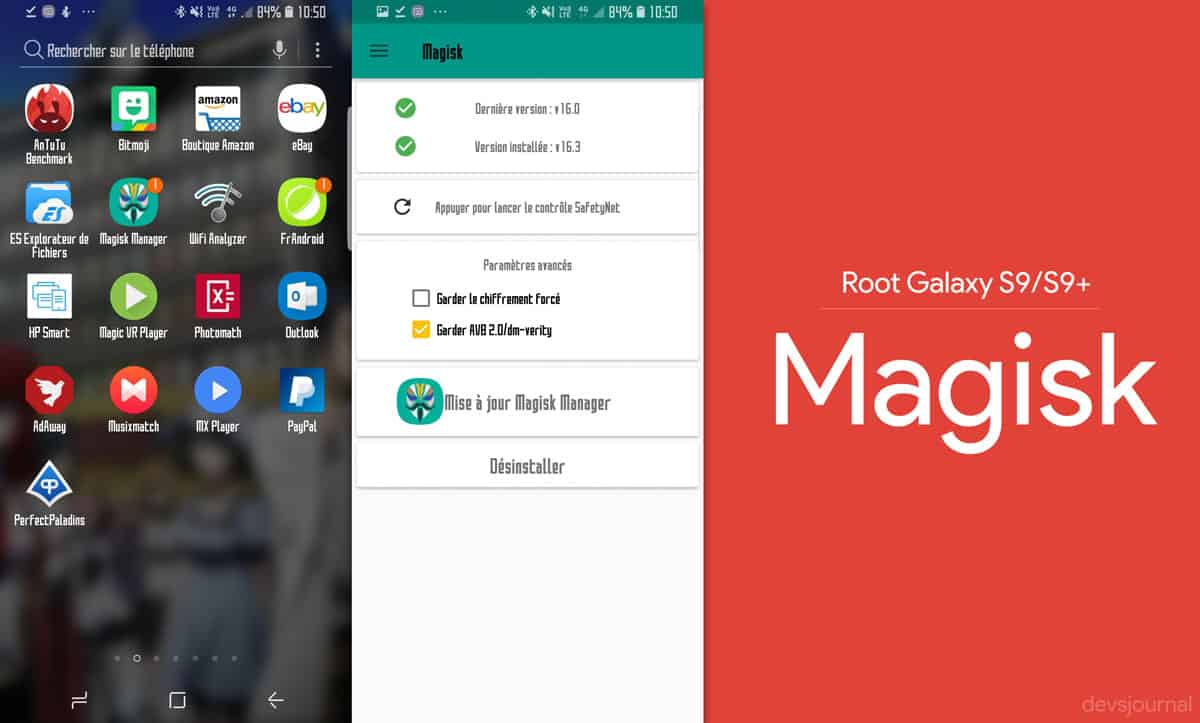
Step 1: Download the Magisk 16.3 modified zip file.
Step 2: Transfer the zip file to your Galaxy S9/S9+ internal storage.
Step 3: By holding the [VOLUME UP] + [BIXBY] + [POWER] buttons, reboot your device to recovery.
Step 4: Tap on the “install” option in the TWRP recovery.
Step 5: Browse for the Magisk 16.3 file you have just downloaded.
Step 6: Flash Magisk 16.3.
Step 7: Once the flashing process is completed, reboot the device.
Root Galaxy S9/S9+ using SuperSU

Step 1: By holding the [VOLUME UP] + [BIXBY] + [POWER] buttons, reboot your device to recovery.
Step 2: Download the N965F_root_OEM_issue_devices.zip to your computer.
Step 3: Transfer the file to your device via USB.
Step 4: Tap on the “install” option in the TWRP recovery.
Step 5: Browse for the file you have just downloaded.
Step 6: Flash it.
Step 7: During the flashing process, the installer may ask for various options. You should remember that both “OEM Patch” and “Root with SuperSU” are selected “yes”.
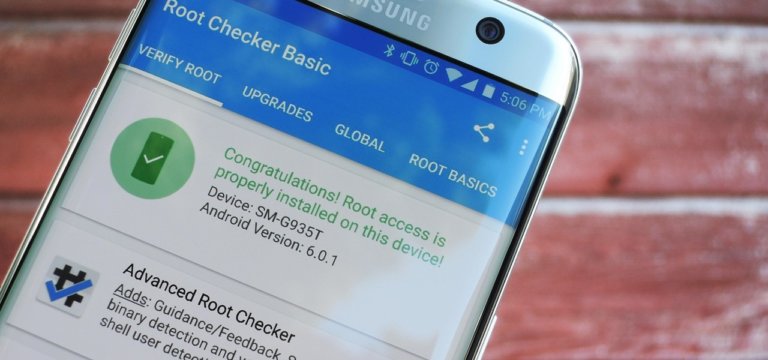
Step 8: Once these steps are done, simply reboot the device and this will make your device rooted with SuperSU.
This being said, we hope you have got a good and resourceful information regarding rooting your Samsung galaxy S9/S9+ phone. You have just now unlocked a whole new feature and power of your smartphone. If you are still unconvinced and want to look for any other resources, you can read the following articles:


Hello, I have an issue, since I rooted my S9+ Exynos version with SuperSU following every step in this tutorial my device turns off a few seconds after turning off the screen and I have to FORCE restart it, it does not even charge, any help? Thank you 🙁
Flash the stock firmware via Odin or flash Magisk zip.