OnePlus recently launched its new flagship, the OnePlus 3T, at a price that made the OnePlus 3 redundant. Chinese Manufacturer knows how to sell products that attract people. OnePlus 3T is the user feedback version of OnePlus 3, which is built to overcome all the issues that users reported in OnePlus 3, like a smaller battery. The OnePlus 3 was the best phone OnePlus had made, and one we highly recommended. But it’s time to improvise.
Rooting provides not only more power but also a better battery. It allows you to remove Bloatware, install custom ROMs, flash different Mods, increase your device’s connection speed, & the list goes on and on once you start digging through the advantages. So today, we’re here with the simplest & 100% working method for How to Root OnePlus 3 and OnePlus 3T easily!
How to Root OnePlus 3/3T
Rooting OnePlus 3 and OnePlus 3T is pretty easy. The rooting procedure of 3/3T can be broken down into 3 steps, Unlocking the Bootloader, Installing TWRP Recovery & finally installing Magisk to gain root access. Each new step relies on the previous step to have been completed, and a basic summary of each part is:

Stage 1: Unlocking Bootloader: Unlocking bootloader is the first step to rooting and flashing custom ROMs. The bootloader is a code that tells your device’s operating system how to boot up. In order to avoid any system modifications, manufacturers lock their firmware. In order to install any 3rd party files into your system, you need to unlock the bootloader.
Stage 2: Installing a Custom Recovery: Stock recovery doesn’t allow any installation of 3rd party zip files. In order to install any other zip which is not signed by the firmware manufacturer, we need to install TWRP Recovery. TWRP is a powerful tool that gives control over the phone without needing to boot into Android. It can be used to flash a ROM or use minor app mods, as well as to create and manage backups.
Stage 3: Rooting: Magisk is an app that grants you Administrator rights (called “root access”) to run or install specific apps restricted by the Android Operating System for security concerns.
After completing these steps, your phone will be rooted, the phone will have a custom recovery installed, and the bootloader of the phone will be unlocked. This, in our opinion, is the most practical and beneficial method for rooting your phone. It gives you some basic ADB/fastboot knowledge, and should hopefully help you have a decent understanding of what is going on. Also, this method will work regardless of what android version your phone has.
Prerequisites:
- Install Minimal ADB Fastboot Tool to unlock bootloader.
- Download & install OnePlus 3/3T drivers – ADB USB Drivers.
- TWRP Recovery for OnePlus 3/3T: Download
- Magisk installer: Download
- Backup all your data from your device as unlocking bootloader erases all the data.
- Charge your device upto 70% to avoid any shutdown during the procedure which might cause some big issue.
- Enable USB Debugging – Go to Settings > About Phone > Tap on Build number 7 times > Return to Settings > Developer Options > USB Debugging.
- Enable OEM Unlocking – On your phone go to Settings > Developer options. Then enable the ‘OEM Unlocking’ option.
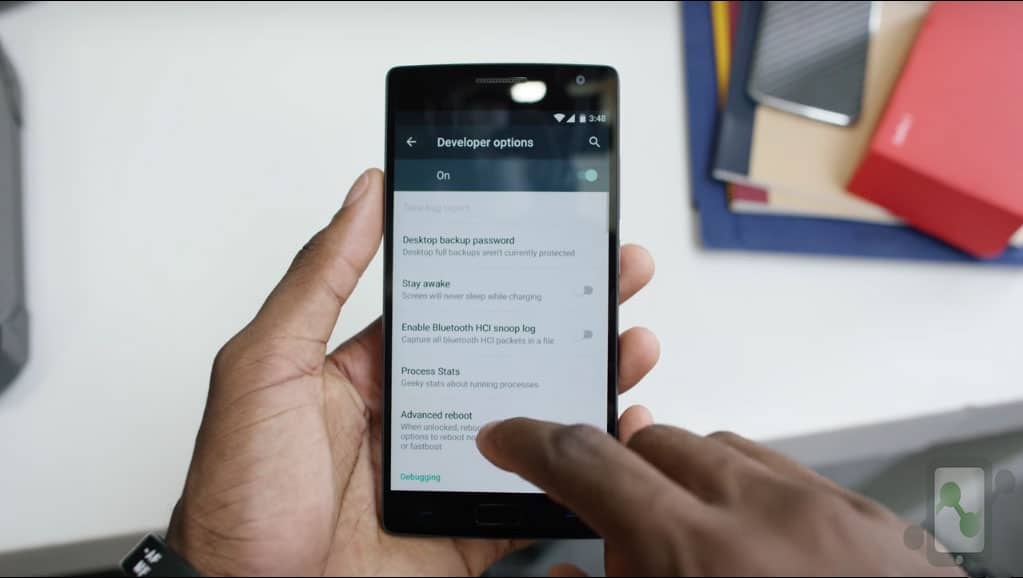
- Enable Advanced Reboot – On your phone go to Settings > Developer options. Then enable the ‘Advanced Reboot’ option.
How to Unlock Bootloader on OnePlus 3/3T
Step 1. Turn off your device. Then boot it into fastboot mode by holding volume up + power. (The phone will display “fastboot” text indicating that it has successfully entered fastboot mode.)
Step 2. Connect your device to your PC & launch command.bat file from ADB folder.
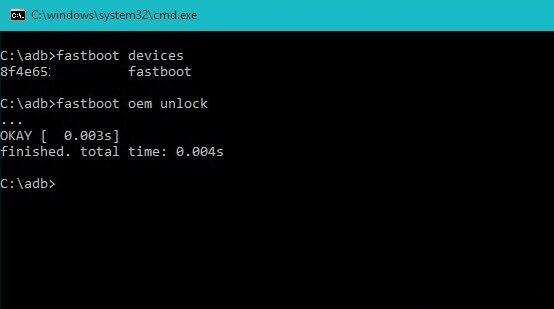
Step 3. To check if everything is working, type below command in command window. It will return your device’s serial number. (If it doesn’t return a serial code, install the ADB drivers again.)
fastboot devices
Step 4. To unlock Bootloader of OnePlus 3/3T, type the below command:
fastboot oem unlock
How to install TWRP Recovery in OnePlus 3/3T
Step 1. Download TWRP Recovery from the above mentioned link and transfer it into Minimal ADB Folder. (Rename the TWRP file to whatever you want, I renamed it to TWRP.img)

Step 2. Open Command window & type the below command to flash the TWRP Recovery into your OnePlus 3/3T.
fastboot flash recovery twrp.img (Replace twrp.img with your file name)
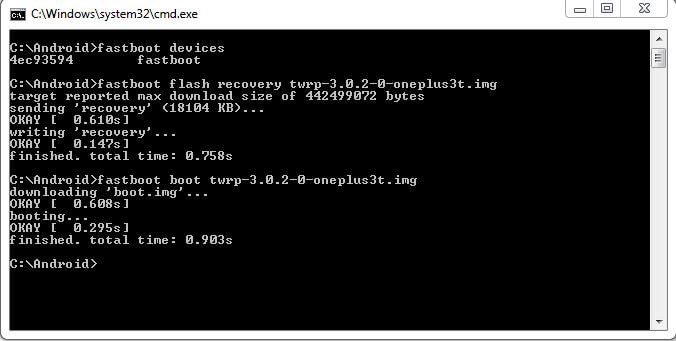
Step 3. Now to boot into Recovery mode, type below command in command window.
fastboot boot twrp.img (Replace twrp.img with your file name)
Step 4. Once your device boots into TWRP Recovery, it will ask to allow system modifications.
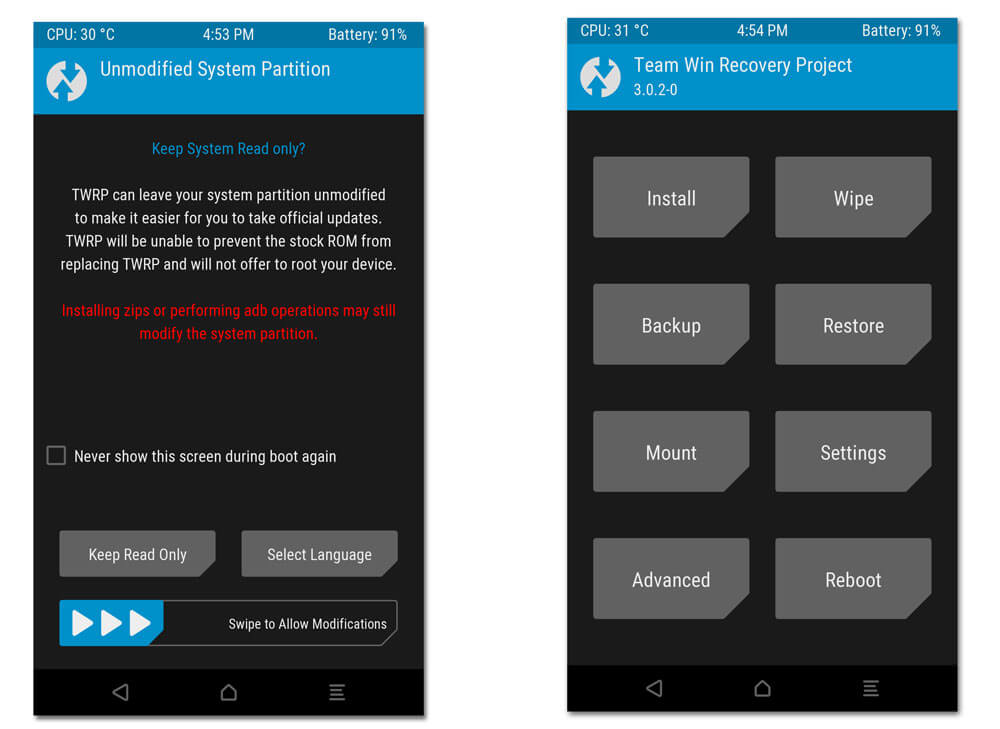
- By swiping right, you will trigger dm-verity, and if you don’t follow the next step you will be unable to boot!
- If you are going to root your device and follow the rest of these steps, then it is safe to swipe right and enable modifications.
- Select your preferred Language, Tap “Never show this screen on boot again,” and Swipe allow modification.
How to Root OnePlus 3/3T
Step 1. Connect your device to PC and Transfer the Magisk file to the internal storage of your phone.
Step 2. Boot your device into TWRP Recovery mode. (Jump to step 3 if you’re already in TWRP recovery)
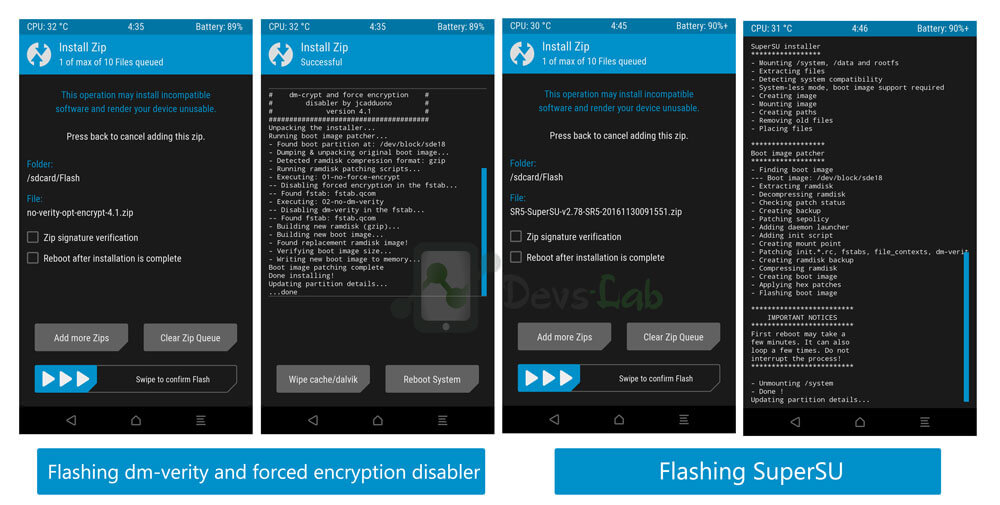
Step 3. Now, click on Install in recovery mode.
Step 4. Wait for the installation to complete & reboot your device.
Keep in mind that the first boot after wiping the phone may take longer than usual, as the phone will need to rebuild the dalvik cache and initialize other first boot and would reboot a few times due to Magisk Flash. Your phone now has an unlocked bootloader, a custom recovery installed and is rooted.
Conclusion:
That’s it. If you followed every step correctly, your device should be rooted by now and will work flawlessly with an increase in battery life, performance, and power. You can check the root permissions by using any app requiring root/ Root checker apps. Also, you can check out our list of Top 10 Apps for Rooted Smartphones. For any queries/issues, please comment below.
did a reboot with ‘fastboot boot twrp.img’ and it just shows ‘1+’ and ‘fastboot mode’ instead of getting into twrp… what can i do to move beyond this screen?
A few important notes that would have saved me a lot of time:
Your phone directories may not show up on your PC, or may be locked all-together. You have to allow file transfers- It shows up on the phone’s notification screen when you plug in to your PC. I did not know this because I just got the phone and I’m not familiar with it yet.
Default is an encrypted system. You cant read the .zip files in TWRP in this mode. In fastboot you can type “format userdata” do resolve this, but it deletes the .zip files. They have to be transferred while you’re in TWRP (if there are still issues, see next step).
My PC could not detect the phone device in TWRP without doing “scan for hardware changes” on my PC. I had to do this to be able to download the .zip files.
The correct comand is FASTBOOT REBOOT and not FASTBOOT BOOT.
Why?????
Thats why: Some users need a custom recovery for a temporary period, so they live boot
the recovery. In this scenario, the custom recovery replaces the stock
recovery until a reboot is performed. Place the file in your fastboot
folder then enter this command:
Fastboot boot to use a particular file to boot. Fastboot reboot will restart your device.