
There could be a plethora of factors for the very reason Steam is denying to open at your end. It’s a powerful application that is arguably one of the popular platforms for ardent gamers. Now if you are thinking – despite being the largest digital distribution platform for PC gaming, how even the developers behind Steam aren’t able to fix bugs?
But the truth is, most of the times, I’d say nearly every time the issue that prevents Steam from opening, originates at the user’s end, and barely the developer’s team is at fault. Although, for the technical bugs that often pop out from nowhere, Steam updates would do the magic.
Anyways, even if you have presumed the opposite, that’s completely acceptable since the world isn’t going to end for that.
So, without any fuss, let’s straight off get into the workarounds that you’ll need to implement to make the Steam work stably. Now, how will you go through these methods is by complying from the first one and follow until the issue get wholly fixed.
How to fix “Steam Not Opening”
1. Restart your PC
An one in all remedy to even fix the severe technical problems plaguing a certain program or application on the system. It’s a typical go-to method that we perform regardless of the type of issue we are facing. What restart does is, it flushes all sorts of system states and caches and resets the stuff causing trouble.
2. Check if Steam is down
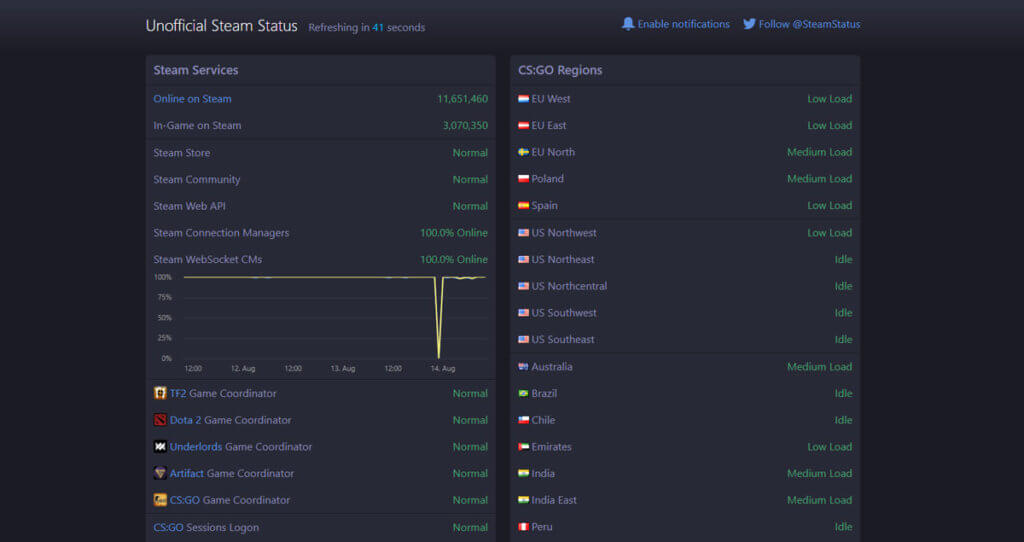
As I have already mentioned above, there would be a rare chance where Steam itself could be held responsible for not working properly. This is the initial step where you should begin troubleshooting if Steam app isn’t opening or maybe going through frequent crashes.
Before you reach out your hands to the advance stuff, firstly always make sure that your internet is working fine and appropriately connected to your PC. Of course, it’s a no-brainer, but I guess it’s worth mentioning.
And for knowing Steam’s current status if it’s temporarily down or not, you can ensure that by checking on steamstat.us or issteamdown.com. Even though, if you find Steam is down for the moment, there’s no need to panic because most downtimes are not of more than 10 minutes, to say the least.
Furthermore, every Tuesday there’s scheduled maintenance at around 16.00 Pacific time, so sometimes, you may notice a slight lag at the declared time.
3. End Steam sessions
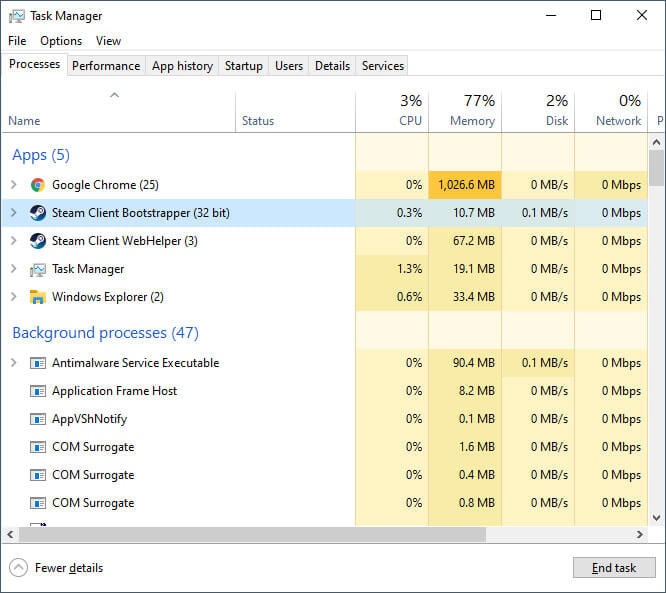
In some cases, which happens quite often, when you quit or closed an application on Windows, it’s still technically running and consuming the CPU usage on the background. And when you subsequently try to launch the new session while the previous one is still haven’t closed yet entirely, it triggers an iteration to the enclosed version running in the background.
And this is what prevents the application from launching. Hence, the logical yet straightforward fix to this problem is to close all the Steam processes, if has any running. We are going to do this, using Task Manager, and below is how-to-do.
- Press ctrl + alt + del keys and choose Task Manager from the options shows up on the screen. Or else, right-click on the Taskbar, and then tap on Task Manager.
- Now what you have to do is, look for the Steam processes, and right-click on it and tap on “End Task.”
Once all the Steam processes are no longer showing in the Task Manager, you can close the Window and then relaunch Steam to find if it’s working or not. And if not, restart your PC and then test.
Also Read: Best Real-time Voice changer for Discord
4. Clear Steam AppCache
The Cache is a mechanism that helps the data to load faster. When you access an application, the system automatically stores some data locally, which is known as AppCache.
So when next time you use that application, the system will search in the cache for the data information of that particular app. And what it does is, it load the data directly from Cache instead of waiting for the page request to reach the server and receive a response.
It’s arguably useful, but sometimes it can mess up the process, so to make sure that AppCache isn’t the reason you not being able to launch Steam, we’ll try clearing it to see what does it results in.
- Firstly, close Steam and all the related processes, otherwise you can’t access the directory.
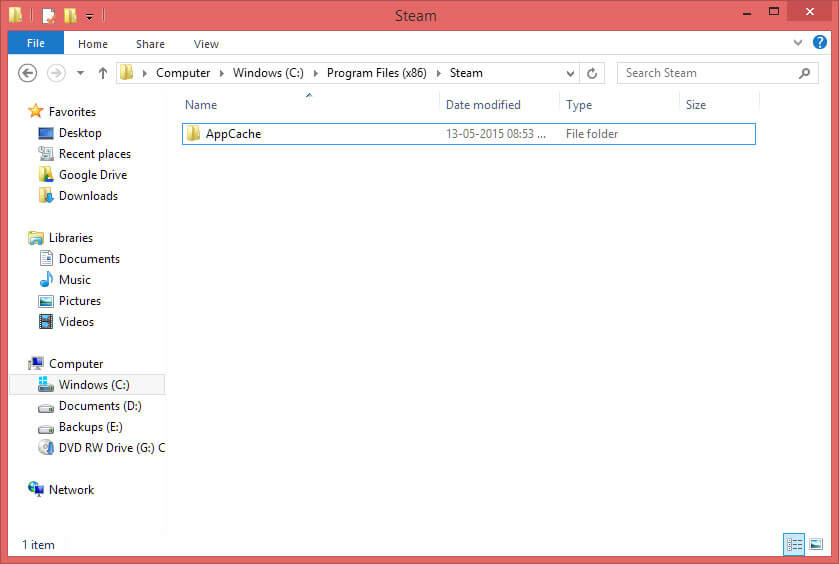
- Assuming that you have installed Steam client on C:\ drive, navigate to C:\Program Files (x86)\Steam and look for appcache folder.
Optional: Not mandatory though, but to be the on the safe side if you don’t want to take any chance, create a backup of the appcache folder by copying and pasting it to another location.
- And then you can delete the original folder from Steam directory.
- Relaunch Steam client and see if it’s opening or not; also, doing so would automatically create a new appcache file within the directory.
5. Run Steam as Administrator
Executing Steam with “Run as administrator” command would allow the system to mark the application as safe and provides the administrator privileges. And as a result, if Steam client lacked any permissions earlier, it’d no longer be the case to concern about. You can do it with two ways given below.
Method 1:
This is the quickest of both.
- Right-click on the Steam icon on the desktop and choose “Run as administrator.”
- That’s it!
Method 2:
If you don’t have the desktop icon of Steam, you can make use of this method. It’s a bit lengthy, but not complicated at all.
- Press Windows + R key, and you will get a Run dialog box appeared.
- On the given box, type in the location path of Stream directory. If you have it installed on C Drive, then most likely it should be C:\Program Files (x86)\Steam\ or it could be varied depending on the drive or partition Steam is installed.
- Navigate to the Steam directory and locate Steam.exe file.
- Once found, right-click on it and select “Run as administrator.” Alternatively, if you don’t see the option as of yet, you can navigate to Properties >> Compatibility and under Settings tick the option “Run this program as an administrator.”
- Now, for saving the changes, click on Apply and then OK.
6. Refreshing Steam’s installation
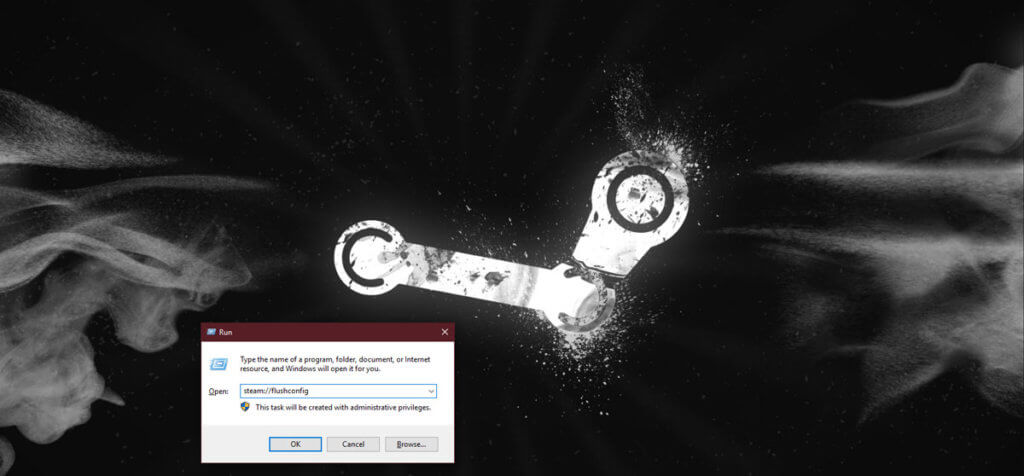
This is an alternative of the method 2 (clear Steam’s appcache) and can be used optionally. Here we’d make use of a command that will refresh the client installation and is capable of resolving a number of other issues as well.
- Press Windows + R key to open Run dialog box.
- Type steam://flushconfig in the box, and hit Enter. (Refer)
- A pop-up box will appear to ask whether or not you wish to proceed with the command. Press, OK, and you are done. Now you have to login again to Steam when you relaunch it.
7. Get rid of Steam Beta Client
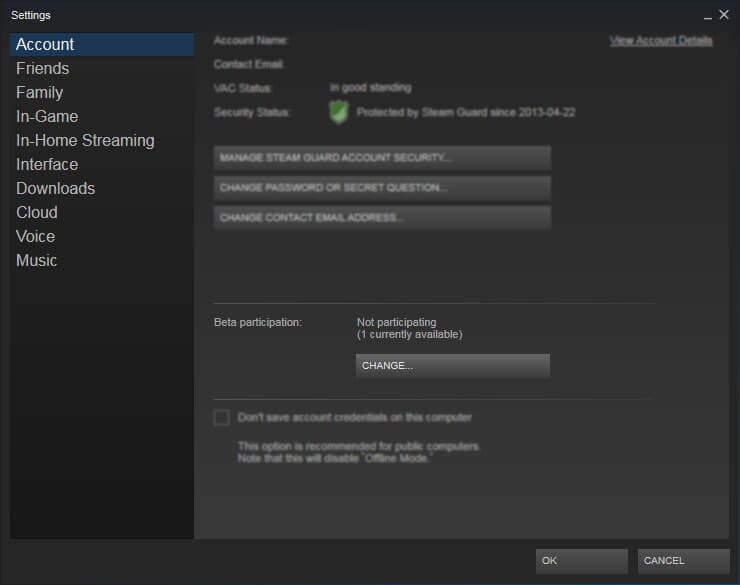
Enabling to the Steam Beta Client lets you use the latest features before its actual release. But since it’s a pre-release of the features, Beta versions aren’t stable or as technically polished as the main versions. Therefore, it may be possible that because of that, Steam is not opening or causing trouble.
So, to ensure you aren’t running Beta Client or perhaps if using, for knowing how to delete it, follow the steps mentioned.
- Go to the Steam installation directory by navigating to C:\Program Files (x86)\Steam\ and locate “package” folder.
- Within the mentioned folder, if you find any file name titled with “beta,” simply delete it.
Restart your PC and run the Steam client to know if the issue has gone or still waiting for you.
Also Read: How to add bots to Discord Server and use bot commands
8. Investigate Antivirus software and Firewalls
Antivirus software tends to block certain operations that found to be suspicious, and this sometimes affects the disk and network operation that results in preventing Steam from connecting to its servers. So, in order to make sure that it isn’t causing the issues, we would temporarily turn off the AV software or Windows firewall to run a quick test.
And if you find these programs are the real culprit blocking Steam to work, you may have to add exceptions in your firewall’s configuration.
9. Reinstall Steam
If you have tried all the methods given above, and still nothing seems to be working for you as the issue persists; uninstall Steam from the system and reinstall it back. So, what it does is, it would forge a clean start of the application from scratch that’s a proven remedy even to get rid of obscure errors or bugs.
Next, for uninstalling Steam client, go to Control Panel, and under Programs, click on “Uninstall a program.” You will see a list of all the apps currently installed on your system; find Steam and click on it, select Uninstall, and proceed with the wizard steps.
However, if you are unable to uninstall Steam for whatever reasons, you can still manually remove it by following the method given here.
10. Edit Client Registry
This is a quiet old method shared on Steam community forums by its members. Refreshing the Client Registry is a viable solution that has resolved the issues for many. You can also give it a try to see how it works for you.
- Firstly, close all the Steam processes using Task Manager.
- Next, head over to Steam installation directory and look for the file named as “ClientRegistry.blob.”
- Once found, rename it to “ClientRegistryOld.blob.”
Lastly, restart Steam client, and it will create a new registry file that would hopefully fix the problem.
11. Contact Steam support
After implementing all the methods shared above, if unfortunately, none of them came into work as they were supposed to, what all you got left now? Nothing much, but lastly an option to contact Steam support and make them aware of the problem you’ve been facing.
However, it’d be improbable that even after ensuring Steam installation and computer environment are both in a good state, Steam is still not opening. So, as the last option available, log in to your Steam account and click here to contact Steam support, and let me know about the issue and the changes you’ve have already made in the quest of fixing “Steam not opening.”
And I hope with the cooperation of customer support you’ll get rid of this problem.


