Google has finally released Android 12 with some of the most exciting features. Also, Android 12 comes with a revamped design that comes with some of the most beautiful widgets. These newly added features give you more transparency and keep you in the loop about which application has access to your data. Primarily focused on personalization, Android currently has over 3 billion users across the globe.
Currently, Android 12 is only available for the Pixel smartphone series from Pixel 3 to Pixel 5. You will need to download the Android 12 beta version directly from Google’s developer website on other devices. However, Google has partnered with multiple smartphone giants such as OnePlus, Xiaomi, Realme, Oppo, and many more. This means that you will be able to direct the Android 12 update on your android device.
If you are looking to upgrade your phone with some Android 12 features, you have come to the right place. In this article, we will walk you through how to get android 12 features on any android device.
How To Get Android 12 Beta on a Partnered Device
As mentioned above, the Android 12 update is currently available only for the Google Pixel series from Pixel 3 to Pixel 5. This means there will be a lot of time before the update is available for all android powered devices. However, Google has partnered with several smartphone companies such as
- OnePlus
- ASUS
- Oppo
- Realme
- Xiaomi
- Sharp
- TECNO
- TCL
- VIVO
- ZTE
If you possess any of the partnered devices mentioned above, you are eligible to receive the Android 12 BETA upgrade. You can download the beta version from the respective partner’s website.
Also, most of these devices will have OTA delivery which means you can flash and download the beta update directly from the system settings. Every partner that supports OTA delivery will provide you with a detailed guide on the installation process.
To get the beta link for any of the aforementioned partnered devices, refer this article from Google.
How To Get Android 12 Features on any Android Device
As we mentioned earlier, Android primarily focuses on personalization and gives users the freedom to customize their phones accordingly. It comes loaded with tonnes of features. However, the Android 12 update is currently available for the Pixel smartphone series, and it will take time for the update to be completely available for other Android devices.
But thanks to Google’s partnership with numerous tech giants, you can download the Android 12 beta version on your smartphones. Here is how you can get android 12 features on any Android device.
Using these methods, you can replicate the exact Android 12 look on your smartphone.
1. Custom Launcher
There are several launchers you can download from the Google Play store. All these launchers come with their unique set of icon packs. However, to recreate Android 12 features, you can opt for the Nova Launcher available to download on Google Play Store.
Once you download the custom launcher, change the dock icon count to 4. Next, change the dock search widget to light and toggle of the color icons features.

2. Android 12 Wallpapers
Wallpapers are critical if you want to give your phone a more personal and sublime touch. To make your widgets, icons, and notifications look more appealing, you will need an amazing wallpaper to go along with it.
To achieve that, you can download Phonewalls, a wallpaper app that comes loaded with dozens of exciting wallpapers and is completely free to use. Here, you get multiple stock resolutions sporting a 4k resolution categorized accordingly.

3. Android 12 Widgets
As we mentioned earlier, the Android 12 update lets you get exciting widgets on your smartphone. These Android 12 widgets are clean and minimal but give your phone an aesthetic touch.
You get a consistent spread of Google sans font, flat icons, and intriguing color palettes, which combine to give your smartphone a more modern look. All these features are readily available using the KWGT widget app that offers over 25 customizable widgets. These widgets also have a variable variation feature that can help you design your own personalized home screen setup.

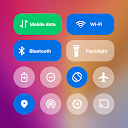
4. Notification Panel
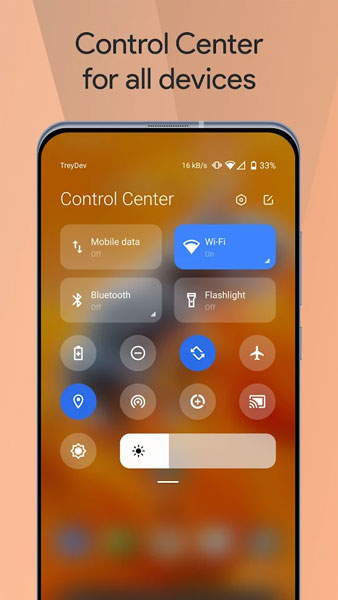
Once you’ve taken care of the icons, wallpapers, and widgets, you will need to care for the notification panel. The Android 12 features a sizeable improvement in the notification panel that will help you see fewer notifications or multiple notifications collapsed together into fewer ones.
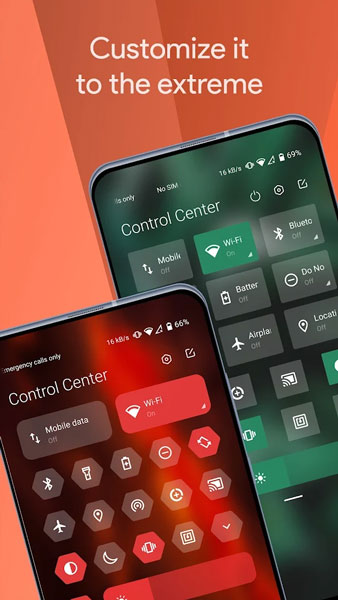
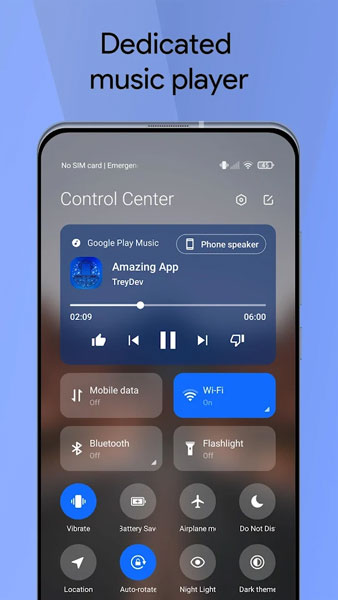
In addition, the Android 12 notification panel has undergone a more aesthetic makeover. Meanwhile, the MI Control center offers similar features to help you achieve the same Android 12 notification panel. All you need to do is make a few minor tweaks, and you’re all set.
5. Android 12 Icon Pack
Your icons are the first things you see every time you unlock your phone. You need the icons to be in sync with the wallpaper or theme in the background. If they aren’t, it can hamper the entire look of your smartphone. This is precisely where you need icon packs.
Android 12 features an entirely new icon design, and icon packs will help you with similar aesthetics on your phone. VexCode offers around 1000 icons in dual-tone formats, just like the latest Android 12 update.
6. Privacy Indicators
Though late, Google has finally added privacy indicators with the newest Android 12 update. As the name suggests, this feature automatically lets you know every time an application on your phone is using the camera or the microphone. Access Dots is one such application that provides all these features.
For example, it gives a green indicator every time an application is using the camera. Similarly, it turns orange when an app has access to the microphone.

7. Privacy Dashboard
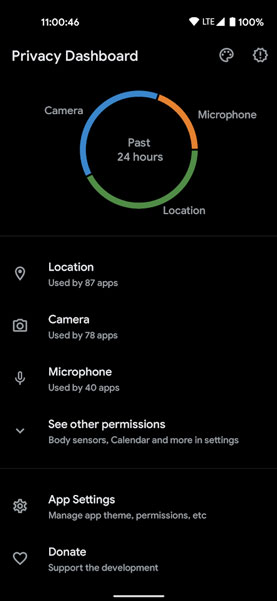
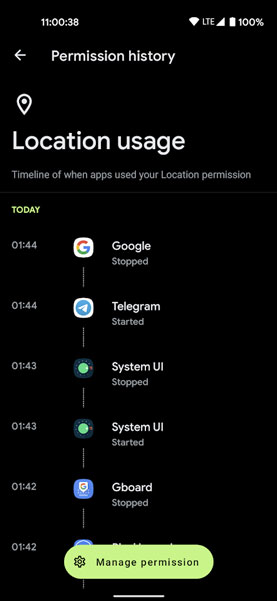
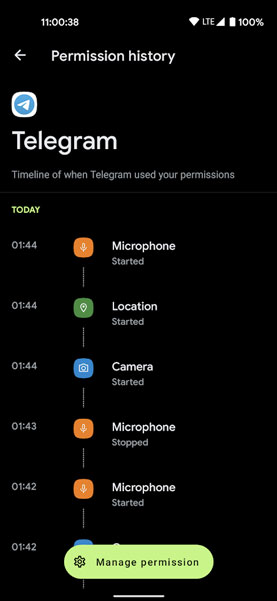
In addition to Privacy Indicators, Google has also added a privacy dashboard with the latest Android 12 update. Like every other dashboard, the privacy dashboard keeps track of every application that logs in and asks for permission.
On the privacy dashboard, you can see the exact time an app asked for permission or accessed the camera and mic. In addition, you can also see the total duration for which the consent was granted. Similarly, you can limit the permissions to an app you think is misusing the camera, GPS, or microphone.

8. Scrolling Screenshots
Another exciting feature that comes with the latest Android 12 update is scrolling screenshots. This is a handy feature to have when you need to capture a page or feed to scroll vertically. When activated, your phone will start scrolling down, and you can tap the screen at the point where you want the screenshot to end.
Just like regular screenshots, scrolling screenshots are automatically added to your gallery, which you can later view or edit. To get this feature on your device, you can download the Longshots application. This third-party application has multiple skins like MIUI, OxygenOS, and other features.

9. Double Tap-to-Back Gestures
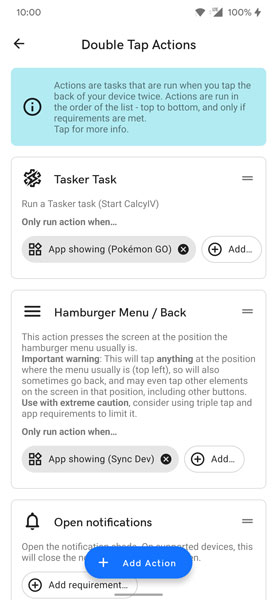
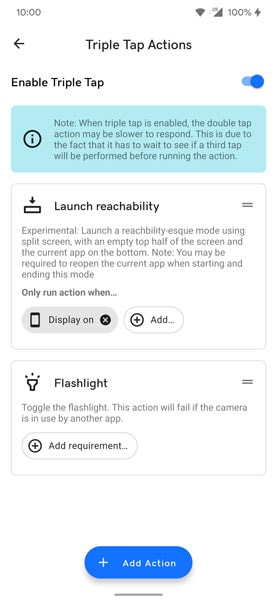
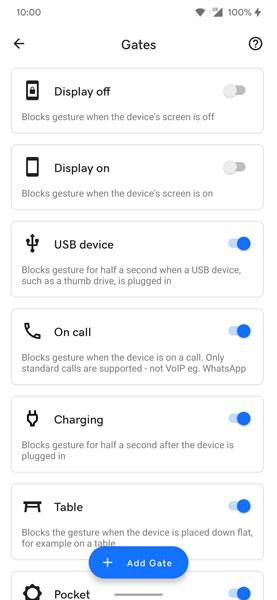
If you are familiar with Android 11’s operation, tapping twice on the back of your Pixel phone lets you launch the phone’s camera and control the media playback. All you need to do is double-tap the back and adjust the settings. You can also configure this feature to simulate the home, back, and recent buttons.
Also, the latest Android 12 update allows you to add a new wake-up device tap. Similarly, you can translate these taps into different languages, including Mandarin, Russian, Brazilian, Portuguese, Ukrainian, etc.
Unfortunately, this handy application is not available on Google Play Store. But thanks to the community forum, you can download this application from this XDA thread.
10. Wi-Fi Password Sharing
One of the most intricate features of Android 12 is Wi-fi password sharing. The latest Android 12 update allows you to share passwords with nearby devices using the Nearby Share application. However, with Android 12 currently only available on Pixel devices, Nearby Share is not available on all devices yet.
But on the bright side, there are various third-party applications available on the Google Play store. You can download any of these applications to get the Android 12 Wi-fi password sharing feature on your device.
All you need to do is open the app, generate a QR code for your Wi-fi network, and enter the SSID and password.

The Bottom Line
We hope our article successfully walked you through the process using which you can Android 12 features on any android device. The Android 12 update is only available for Google’s Pixel smartphones from Pixel 3 to Pixel 5.
But the company has partnered with several other smartphone companies, which means that every Android user can hope to receive the Android 12 update soon. However, non-Pixel users can still update their phones with the Android 12 beta version. Therefore, we have included the link to download the Android 12 beta version on your phone.
![[Guide] From Rooting to Installing Custom ROMS for Dummies](https://devsjournal.com/wp-content/uploads/2014/11/From-Rooting-to-Installing-Custom-ROMS-for-Dummies-768x384.jpg)
All things about this post is really informative to learning about biography. Thank you very much for this. I must visit your site again to see more useful updates and i hope you will come with more useful updates..