Smartphone enables a person with limitless features that can’t be even imagined of. The present time is the era of handheld devices with various brand or companies manufacturing smartphones that come with variety of features. This has exponentially increased the number of smartphone users.
Popular smartphones do come as a package of great features and some outstanding specifications. Basically hardware specifications do matter the most when it comes in choosing the right phone for you. Any great phone will have a high RAM size, increases the performance of the phone.
However, it should be noted that regardless of how powerful a smartphone is, there will still be some apps or features that run in the background and eat up the RAM size. Such apps do play a vital role in reducing the performance of the device. Though that may not be a concern for normal user, a tech savvy user or a geek obviously will get annoyed by such a case.
There are ways of getting rid of this problem which will be discussed in this article.
Rooting an Android Smartphone
Rooting of a smartphone is not recommended for everyone. However an advanced user usually roots his phone to unlock the operating system so that he can install unapproved apps, delete unwanted apps that eat up the RAM and customize the entire OS as per his requirement. No doubt , for a layman these may sound somewhat scary. After all the rooting process itself is a recipe of disaster as one wrong step may end up turning your device to a bricked handset.
But, if you’re someone who has great interest in Technology and tries to explore different possibilities, you might have thought of rooting your Android Smartphone. Rooting is a reversible process. If you don’t like it, you can get back to the previous state of your device without any data loss (Only if you backup your data after every step).
Why do one-click root (Kingroot) doesn’t work now?
So, rooting old smartphones was pretty easy as they used to come with bootloader unlocked and some one click App like Kingroot or Framaroot would easily root it in one click. But with current smartphones, they come with bootloader locked and companies always try to make the bootloader unlocking process bit tricky to avoid unnecessary troubles. So, to root any Smartphone now, this are the steps you need to follow:
- Unlock Bootloader
- Install/Boot with custom TWRP Recovery.
- Install a Root manager App like SuperSU or Magisk.
Unlocking the Bootloader
Before proceeding for rooting a smartphone, you may need to unlock the bootloader of the phone. However, contrary to the popular belief this is not an absolute requirement for rooting. By rooting it simply means that you have the administration access for changing and modifying the Operating system.
But, with a locked bootloader, the device typically restricts the user from modifying the system partitions with conventional flashing methods. So a rooted device with a locked bootloader usually won’t allow any system modifications and it would remove the root automatically. This is the reason why advanced Android user unlocks the bootloader before performing the rooting operation.
What is a Bootloader?
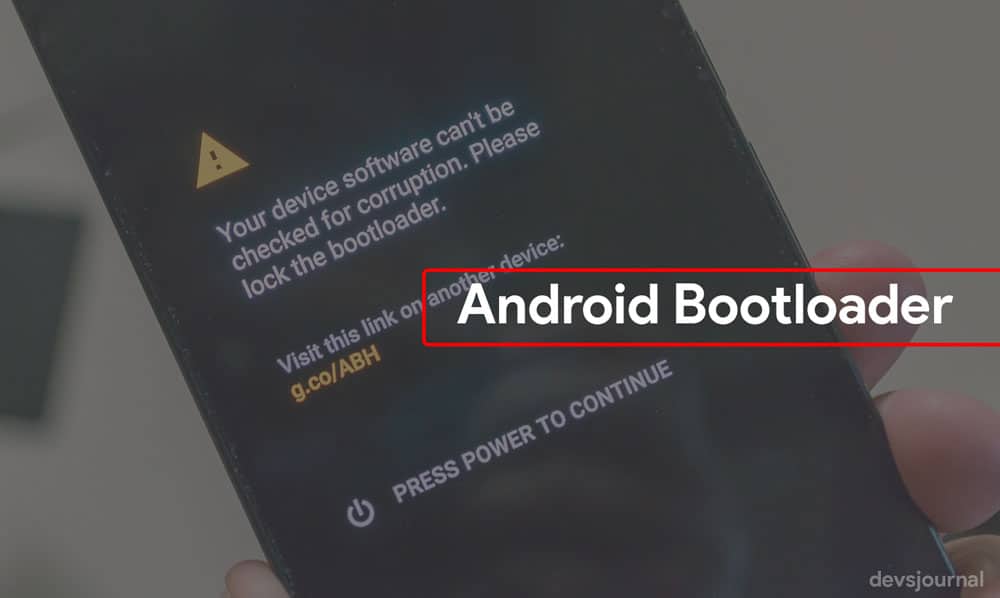
A bootloader is a code that is executed before any Operating System starts to run. The concept of bootloaders is universal to virtually all Operating systems that inculcates operating systems on your PC, laptop, smartphones, and other such devices. Bootloaders basically package the instructions to boot operating system kernel and most of them also have their own debugging or modification environment.
As soon as a device boots up, bootloader is the first piece of code which is executed. Every motherboard has a different bootloader configuration which can be seen in different Android phones. While iPhones share a pretty similar specs which makes their bootloader somewhat similar.
Why the bootloader on Android is locked?
Android being an open source platform, manufacturers are aware of different customizations one can do to their smartphones. The manufacturers want you to stick to their Android OS version specifically designed for the device.
In order to apply this concept, manufacturers lock the bootloader. With a locked bootloader, you cannot perform any system modifications. We have also seen, Motorola packaged an “eFuse” command in their Android phones, which could brick (prevent booting) your device in case you tried to flash an unsigned bootloader.
Why to unlock the Bootloader?
Unlocking the bootloader enables you with the ability to flash custom roms, custom kernels, recoveries and so on. However, unlocking of bootloader is not devoid of its disadvantages. Some of the disadvantages of unlocking a bootloader are listed as below:
- The warranty of the phone will be lost.
- The data will be wiped.
- Some banking apps will not work.
- Find my device issues.
It should however be noted that not all phones allow you to unlock the bootloader. There are two kinds of phones – one which allows you to unlock the bootloader and the other which does not. The Nexus phone is unlockable by nature and there are some other manufacturer whose phone can be unlocked by the same process as the Nexus.
Warranty of smartphones after unlocking
As mentioned, unlocking of bootloader will certainly void the warranty of your phone. However, there are some manufacturer who gives relaxation in that matter and do not void the warranty even if the bootloader is unlocked. Some of such brands are Oneplus , Xiaomi which don’t mind if the phone’s bootloader is unlocked.
It should be noted that, we are talking about rooting a phone or unlocking the bootloader but not unlocking the phone for using it in a different network. Unlocking the phone certainly does not voids the warranty contrary to unlocking the bootloader.
How to Unlock the Bootloader on Android
Now that you have got a brief idea about what unlocking the bootloader mean, let us describe the steps that you need to follow while unlocking the bootloader.
Note: It should be noted that bootloader unlocking is a risky task and you are doing with fully you own responsibility. This blog does not hold any responsibility for damages to the device, if any, that may occur due to unlocking the bootloader. To avoid any loss of data, it is recommended to backup your files in your computer.
Moreover, if there is any app settings that you need to keep intact, create a backup settings file and transfer it to your computer. To ease this scenario and if you are an advanced android user and planning to root your phone eventually someday, we recommend you to unlock the bootloader as soon as you buy the device. With that little tips, let’s head for the steps of unlocking the bootloader of your smartphone.
STEP 1: Install Android ADB and USB drivers
In the first step of the process, you will require to install the Android ADB. To do that you need to head to the Minimal Android ADB page. Follow all the steps mentioned on that page to download and install the Minimal ADB package.
After the Minimal ADB setup, you would need to install your device’s ADB drivers. You can check our guide on installation of ADB drivers for Android Smartphones.
Now you have to turn on the phone and connect it with your computer via a USB cable.
STEP 2: Enable USB Debugging and detect device
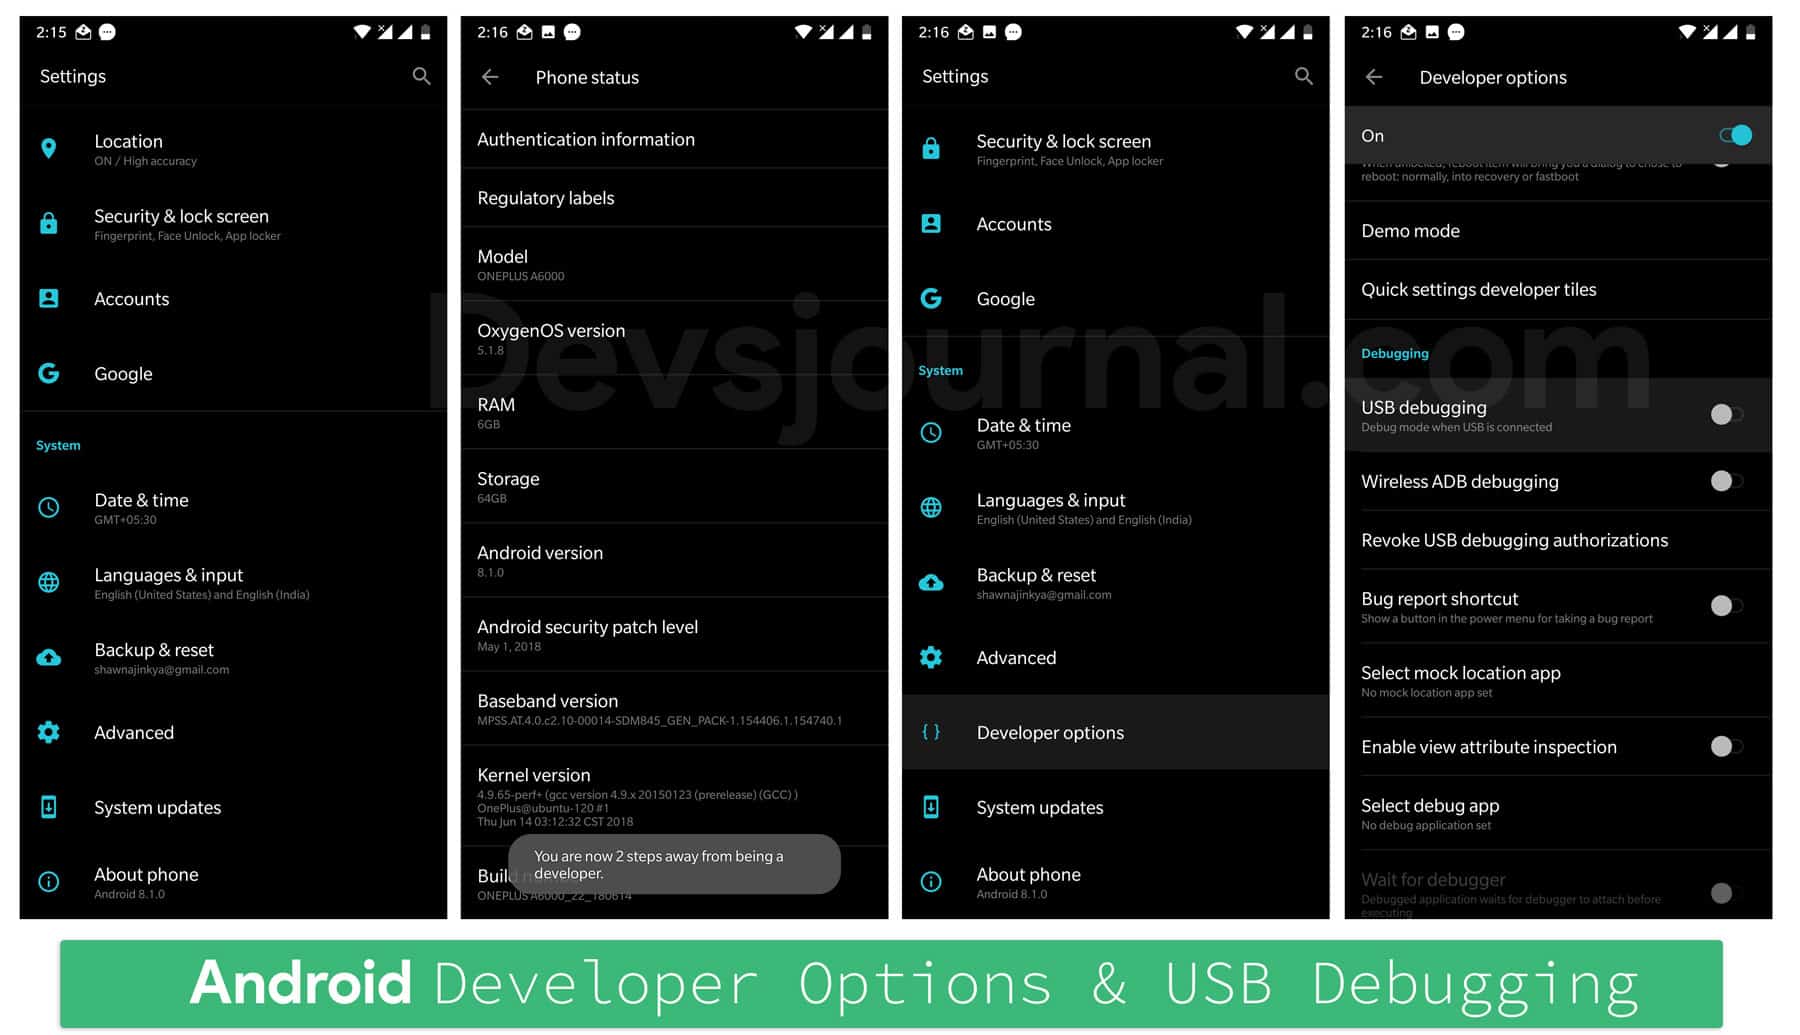
Now on your phone go to “Settings” and select “About Phone”. Next scroll down to “Build Number” and tap on it seven times. This will enable the developer option in your phone. Go back to Settings > Developer Options and enable the “USB debugging”. You may be prompted to enter your password or PIN. Next connect the phone to your computer.
Go to the ADB Folder and click on “adb.exe”. It would open a command prompt window. To check if everything is working fine & the phone is being detected, type the following command “adb devices”. On running this command, A popup will appear in the phone which will read Trust Fingerprint?” Check the “Always trust for this computer”. Tap OK and you are done with this step.

After everything if a serial number is shown in command prompt, it means your device is properly recognized and you can continue with the process.
STEP 3: Getting a Bootloader unlock Key
This step can be skipped if you have a Nexus phone or anything which runs on stock Android like OnePlus. But in case of Non-Nexus devices like Motorola, LG & Xiaomi, you will have to visit the device manufacturer’s bootloader unlocking page , then login or create an account.
- How to get unlock code in Motorola devices
- How to get unlock code in Xiaomi
- For Samsung devices- you unlocked your bootloader by enabling OEM unlock.
- For Google devices go [HERE]
- For Sony devices go [HERE]
- For HTC devices go [HERE]
- For LG devices go [HERE] (LGUP)
The next step will need you to reboot the phone in fastboot mode. This can be achieved by holding the power and volume down button for around 10 seconds. You can scroll to the “Fastboot” option using the volume down and select it using the power button. For more specific information about your phone and to avoid any error you may do a google search before continuing.
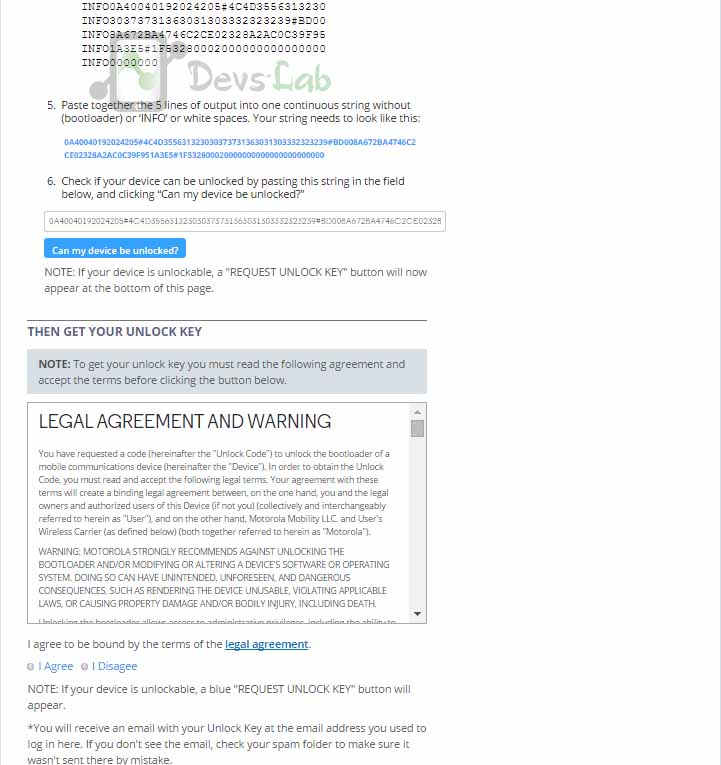
Next connect your phone to the computer with a USB cable. Now go to the ADB folder in your computer and Shift+Right click on an empty area. Then choose the “Open a Command Prompt Here””, and use that Command Prompt window to retrieve your unlock key as described by your manufacturer.
On doing this, the command prompt will give a token of very long strings. Copy this string and paste it in relevant box of the manufacturer’s website’s form and submit it. If your device is unlockable, you’ll receive an email with a key or file that you’ll use in the next step.
STEP 4 : Unlocking the Bootloader
This last step is where you will perform the actual unlocking. If your phone is not in fastboot mode, reboot it in fastboot by connecting your device with USB debugging enabled to your computer. Open adb.exe from ADB folder and enter below command:
adb reboot bootloader
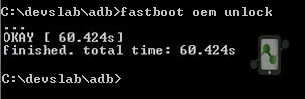
Now you will have to run one simple command to unlock your device’s bootloader. For most Nexus devices the command is “fastboot oem unlock” while for some new versions of Nexus the command is “fastboot flashing unlock”.
fastboot oem unlock
For non-Nexus devices, the manufacturer will tell you which command to run for performing this step. In most cases, you will require the unique key that you have received in the email earlier. After running the command , the phone may prompt a message to confirm if you surely want to unlock.
You need to use the volume keys to confirm. When you are done use the onscreen menu to reboot the phone or use you computer to run the “fastboot reboot” command. If everything has worked correctly, you should by now see a message that states that the bootloader has been unlocked.
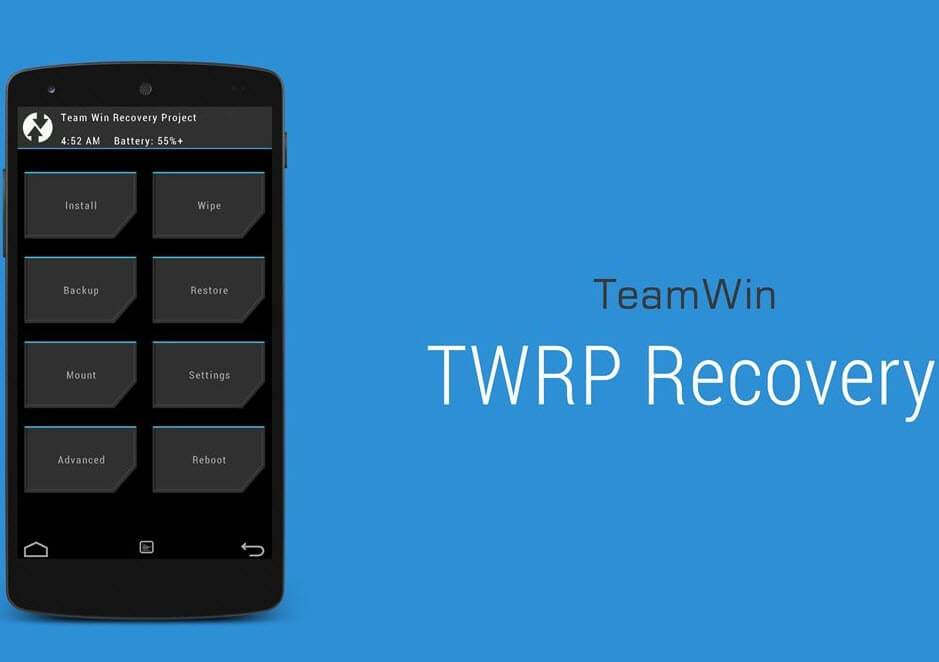
What is TWRP (TeamWin Recovery Project)?
In order to avail the vast advantages that the Android’s development community offers, you need to have a custom recovery installed. There are various custom recoveries available for different android devices and to cover each one of them is beyond the scope of this article.
TWRP stands for Team Win Recovery Project. Basically TWRP is a recovery image from TeamWin. A recovery image in any android system is responsible for flashing new softwares in various system partitions as well as various other tasks like debugging, formatting etc. The good part about TWRP is that is has a very easy and user-friendly UI. TWRP is one of the two main custom recoveries for Android, the other being ClockworkMod Recovery.
While installing system updates in your device, it is required to boot into the recovery. A stock recovery is available with every device for this purpose, but it doesn’t allow any custom ROM with untrusted signature. This is the reason why the stock recovery has to be replaced by a custom recovery like TWRP in order to get access to system modification permissions was previously not possible.
Features of TWRP
- Flashing new OTA updates or Custom ROMs to Android devices
- Format/clean/repair broken partitions
- Create/restore backup of Android device.
- Full system backup: TWRP enables you to perform full system backup. These backups come handy in case you do any kind of tweak with your phone or flash any custom ROM in the phone.
- Restoring backup: If you flash a ROM that you don’t like, or you’re experiencing some kind of bug in your software, restore from a known good backup.
- Flash ZIP Files: Sometimes you get stuck and you’re not able to boot into the Android OS. When this happens, you can try to boot into TWRP and perform a factory reset.
- Fix Permissions:When you’re flashing ROMs, sometimes your system can forget which permissions were granted to different apps. Fixing permissions will set everything back to the way you had them.
How to install TWRP on Android
The installation process starts with downloading TWRP for your device from here . Moreover, you will have to enable USB debugging in your device. Nextly, open the folder where the TWRP Recovery .img file is saved.
Step 1. Reboot into Bootloader
Open the ADB folder that we installed earlier and open “adb.exe” from the folder. Now connect the phone with your PC and run the “adb reboot bootloader” command to reboot the device in fastboot made.
Step 2. Flashing the TWRP Recovery
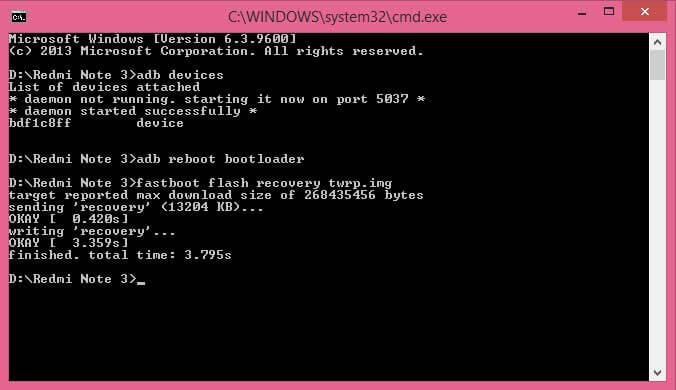
Once the phone boots in fastboot mode, run the following command –
fastboot flash recovery twrp.img
Note: It’s necessary you rename the downloaded twrp recovery file to “twrp.img”.
Once the TWRP is flashed successfully in the device, run the following command – “fastboot reboot”, to reboot your device.
It should be noted that to make installation process easier, there is a TWRP manager which allows you to install the TWRP in the device. However not all devices are compatible for installation via the TWRP.
Verdict
So, in order to conclude this article, let us put forward the gist of the entire discussion:
- Rooting of an android smartphone allows you explore the limitless features that are otherwise blocked.
- Rooting is not recommended to all users. However an advanced user of android may root his phone to unlock many features in the phone.
- Rooting voids the warranty of the phone in most cases. However some manufacturers like Oneplus and Xiaomi do consider this and do not cancels the warranty for rooted phones.
- For performing rooting, it is required to unlock the bootloader.
Lastly, the TWRP custom recovery provides you features like keeping backups, restoring backups and even flashing custom ROM into the OS.