When the storage space is about to max out, you will realize significant changes in the overall functioning of your system. The more occupied the storage space, the slower your system tends to get. There will come a time when you will have to wait for minutes for an application to start. According to multiple tech experts, the majority of the computer’s problems are linked directly with the system’s storage space.
Apart from the visible files, Windows also has a hidden cache, junk files, and a lot of temporary files. A lot of programs on our system further contribute to this unnecessary storage space. Though the temporary and junk files may be small in size, they tend to accumulate on your system over time and can occupy a significant chunk of your storage space. What we don’t see is that our PC has thousands of temporary and junk files stacked across multiple folders throughout the system.
Though we rarely access the majority of these files, they tend to be active in the system storage. While some of these files are critical to the system’s functioning, a large chunk of these Windows 11 temporary files does not affect the system’s functioning and performance whatsoever. Therefore, it is vital that you routinely clean out these Windows 11 temporary files to save on your storage space.
In this article, we will walk you through the different ways using which you can clear temporary files in Windows 11.
NOTE: A lot of temporary files are generally lying dormant in your system. But the majority of them are critical to the system’s functioning. Therefore, ensure that you verify each Windows 11 temporary file before you delete them.
What Are Temporary Windows 11 Files?
We all have come across tons of temporary (temp) files on our system. But we never got around to know what these files are and what they do. Temporary files, as per the name, is a file that is created to hold data temporarily either by Windows or any program the user uses.
These files are identified by the .temp extension and play a significant role in helping Windows function smoothly. These temp files helps to create a backup recovery in our system in case the program or application abruptly shuts down.
For example, when playing FIFA on your computer, we often tend to save our data at specific intervals. This saves game data is then stored on a temp file. You can view these temp files in the save folder inside FIFA.
Is It Safe To Delete Windows 11 Temporary Files?
As we mentioned earlier, there are a ton of temporary files stacked throughout your system. Though their file size is more minor, these Windows 11 temporary files tend to hamper the overall functioning and performance of your system.
However, this does not mean that you should go around deleting each and every temporary file on your system. On the contrary, the majority of the temporary files present on your system are vital to ensure Windows keeps functioning.
Some of the temp files are required for the system’s daily usage. But a temporary file with a large size will eventually slow down your PC. Generally, the files present in the browser cache, unused, and old programs tend to put a significant amount of pressure on your system. Therefore, it is entirely SAFE to delete these temporary files that are larger in size. You can either look for these Windows 11 temporary files manually or can use third-party software using CCleaner.
A temporary file is created when one is using a particular application or program. These files are automatically deleted once the program no longer needs the temp file. However, if you have completely closed the program altogether but the temp files are still present, then it is SAFE to delete these files. Note that a temporary file is recreated once again when the program is running and needs a file to store data temporarily.
How To Delete Temporary Windows 11 Files?
As we mentioned earlier, temporary windows installation files are stacked through our system. The more temp files present on your system, the slower your PC will get. Therefore, it is vital that you take care of these temporary files from time to time.
A lot of temporary files are generally lying dormant in your system. But the majority of them are critical to the system’s functioning. Therefore, ensure that you verify each Windows 11 temporary file before you delete them. But some of the temporary windows installation files contribute absolutely nothing to your system’s functioning.
Note that it is perfectly SAFE to delete temporary windows 11 files on your system. To delete temporary Windows 11 files, we have given a few methods using which you can deal with those unnecessary temporary files.
1. Delete Temporary Files Using Settings
One of the easiest ways to clean the temp, junk, and cache files on your system is accessing them through settings. To delete temporary windows 11 files using settings, follow the given steps.
- Close all running applications
- Right-click on the Start menu
- Click on Settings
- Under Settings, select System, scroll down and select Storage
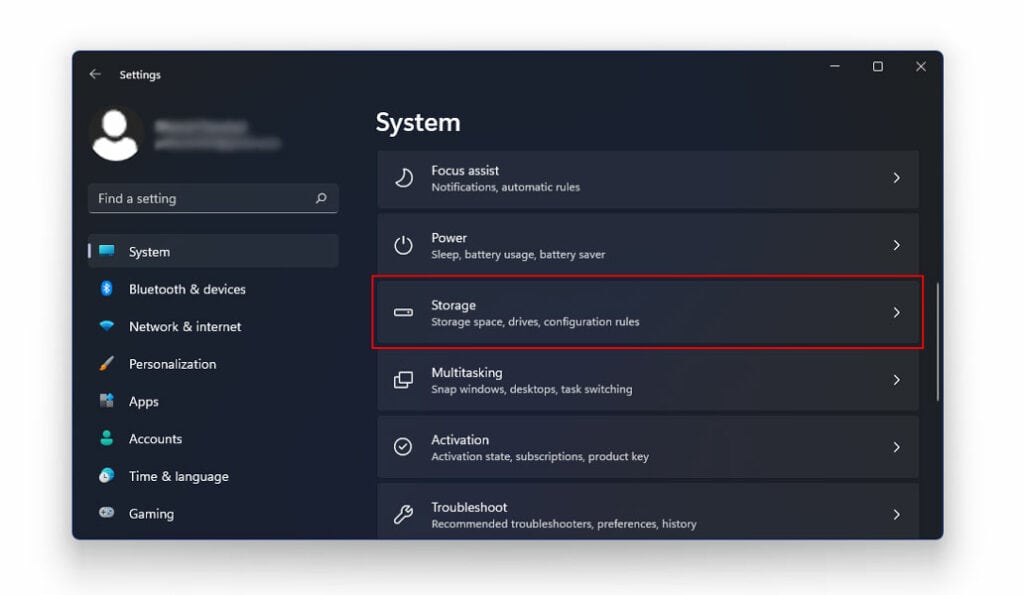
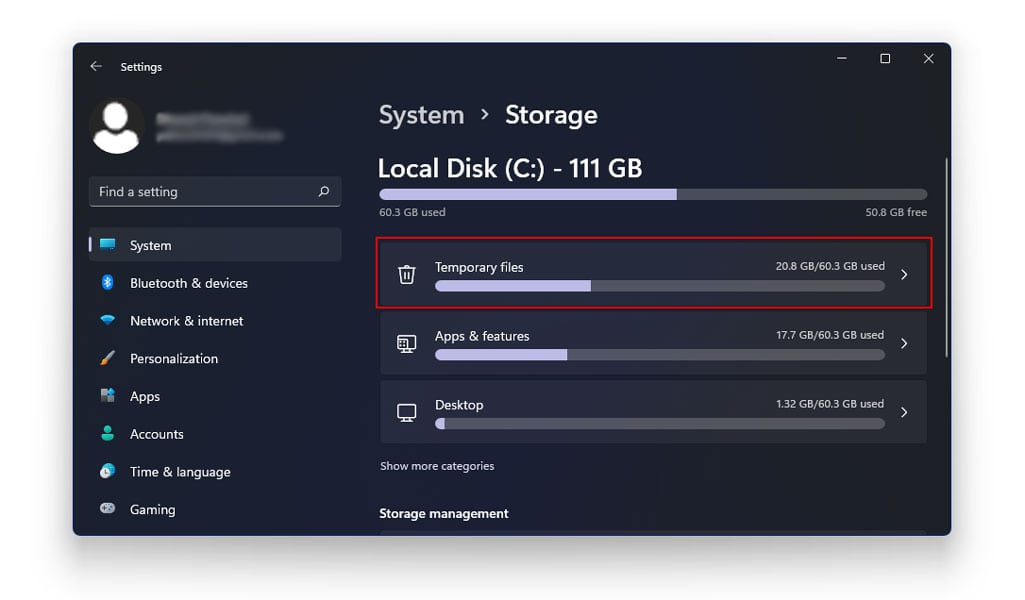
- Windows 11 will now automatically calculate the total occupied under each category.
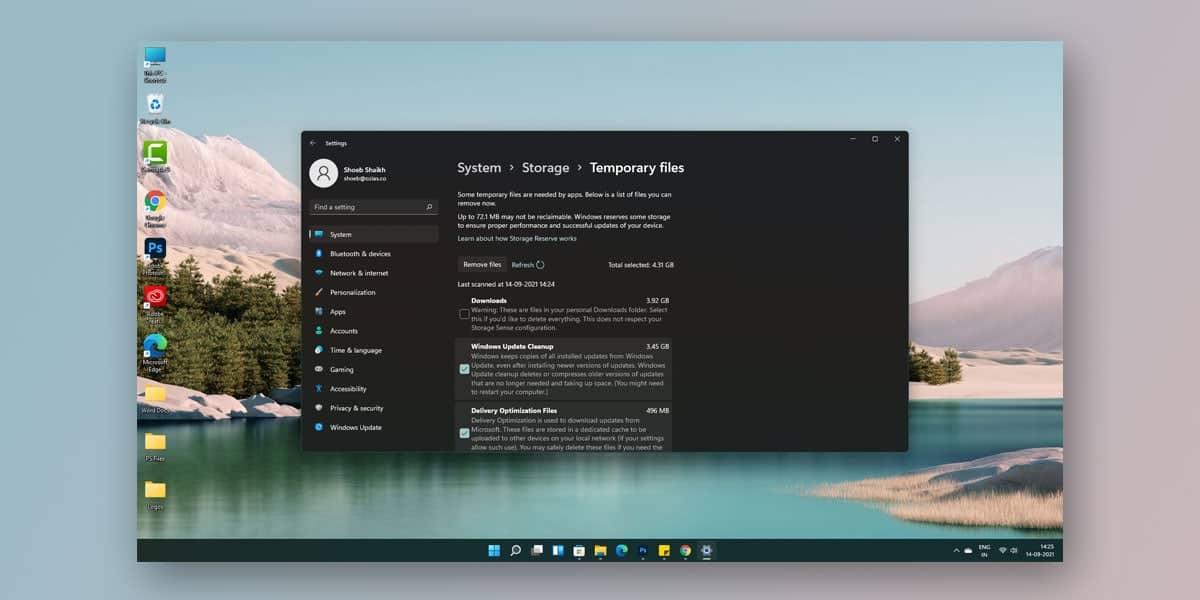
- Next, click on Temporary Files.
- All the temporary files will be arranged categorically
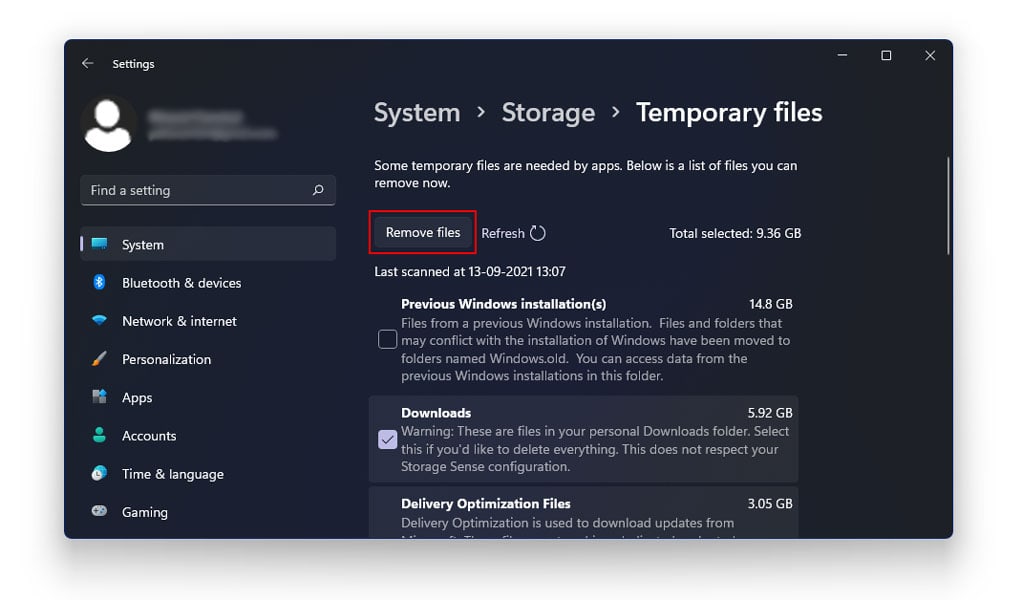
- Tick the checkboxes next to the Windows 11 temporary files you want to delete
- Next, click on Remove Files
Windows 11 will now remove all the selected temporary files. Post removal, Windows will once again calculate the total occupied storage and display it on screen.
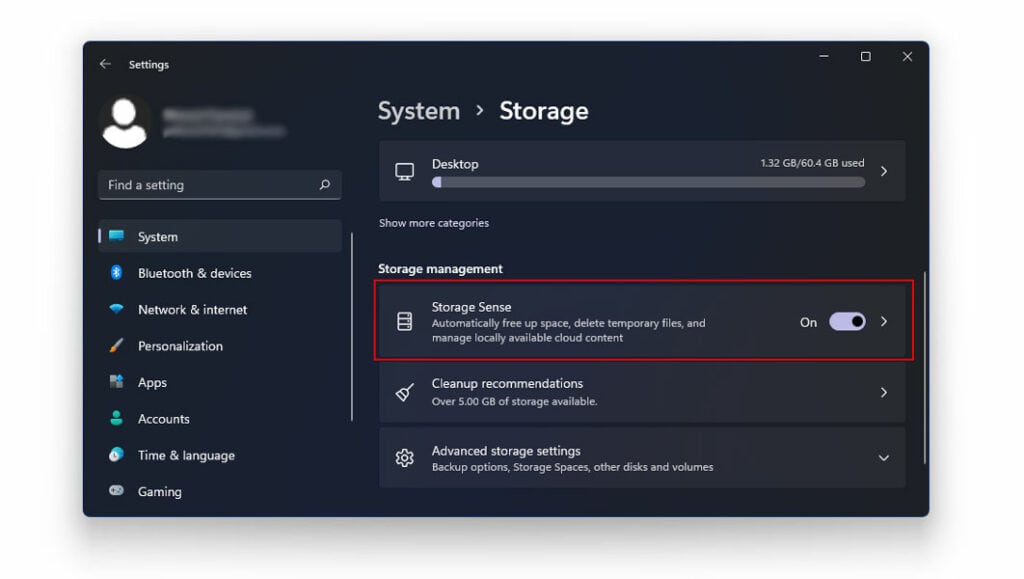
2. Enable Storage Sense
The storage sense is one such built-in tool that automatically detects and deletes unnecessary files and empties the Recycle bin to free up space on your system. Once turned on, the storage sense will automatically take care of all the unnecessary files on your system. To enable storage sense on Windows 11, follow the given steps.
- Close all running applications
- Right-click on the Start menu
- Click on Settings
- Locate and tap on System on the left navigation pane
- Scroll down to locate the Storage section
- Tap on Storage
- Under Storage Management, you will see an option that reads Storage Sense
- Turn on Storage Sense
- Next, click on the > arrow right in front of Storage Sense
- Tap on Configure Cleanup Schedules
- Select the desired cleanup schedule you want to implement
- Doing this will help you choose the files that Storage Sense will automatically delete subsequently as per the set schedule.
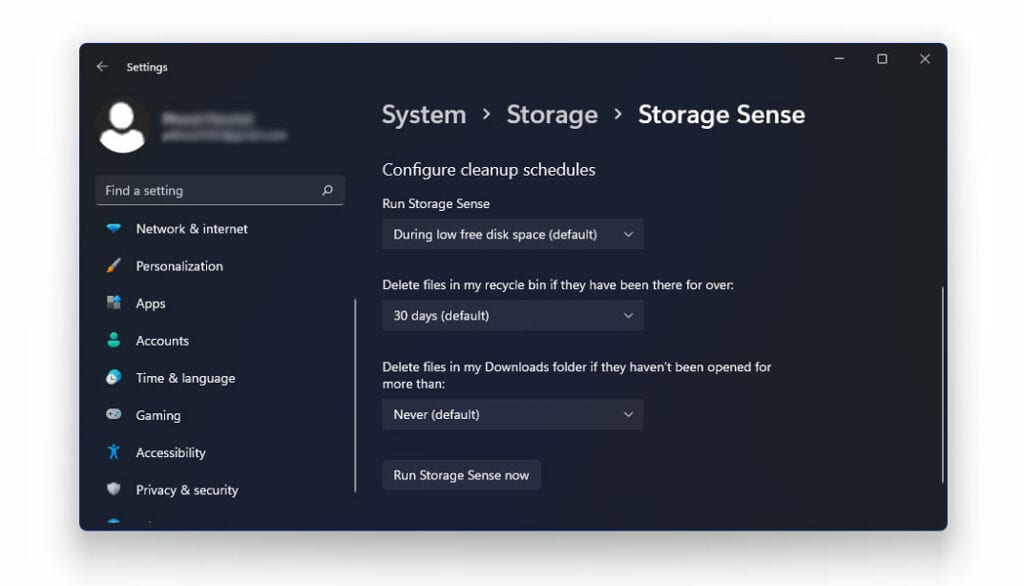
- Windows 11 will now automatically run a Storage Sense scan to look for unwanted files and clean out the temporary files based on your configurations.
3. Using The Disk Cleanup Tool
The Disk Cleanup Tool is an in-built Windows 11 feature that deletes temporary and junk files from your system to free up space from the system. To use the disk cleanup tool, follow the given steps.
- In the Start Menu, type Cleanup
- Next, select Disk Cleanup
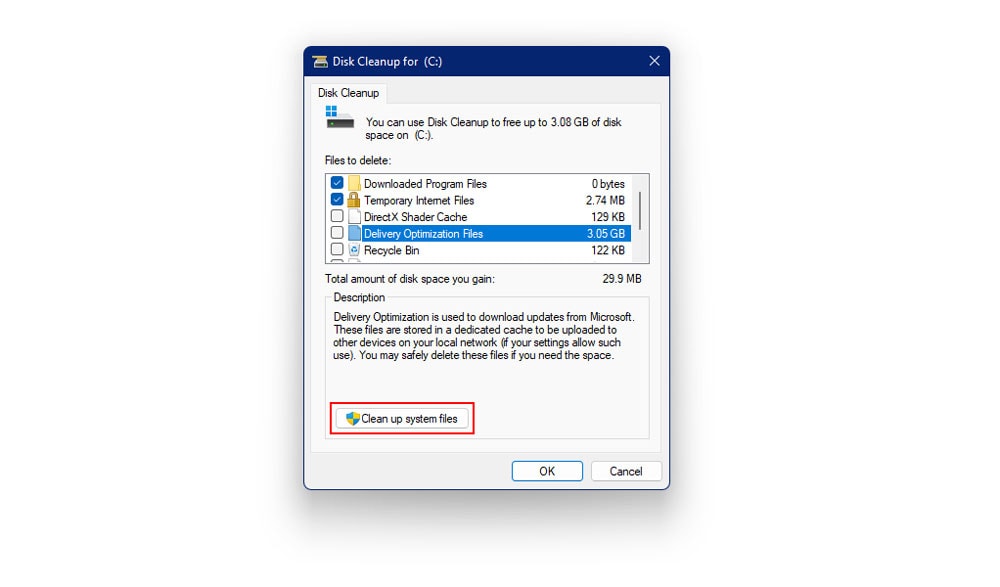
- You will now see a list of unused, temporary, and junk files on your system.
- To delete any of these files, check the box next to each file
- The downloaded program files, temporary internet files, and thumbnails are selected by default
- If you want to further make room for new applications, tap on Clean Up System Files
- Next, select the system files you want to delete
- Once you are done selecting the files you want to delete, tap OK
- After you click on OK, pop up will appear on the screen
- Select Delete Files
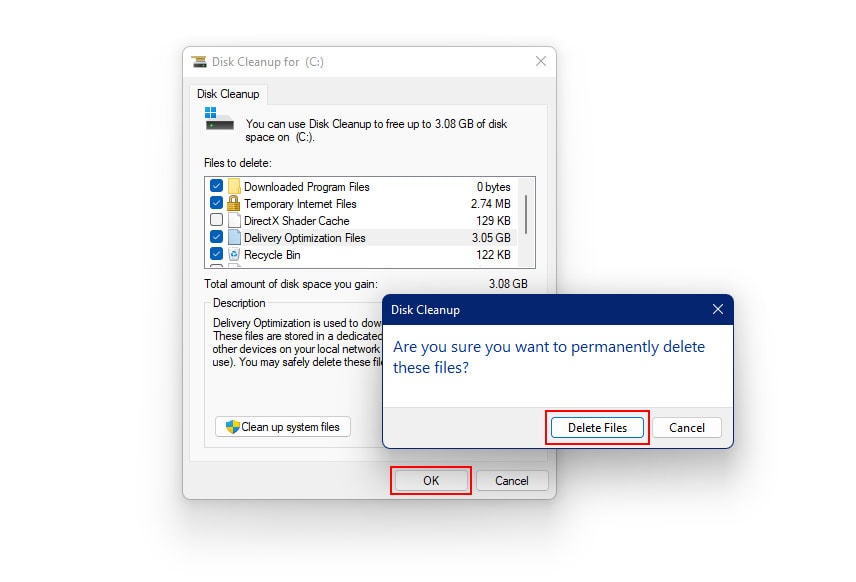
- This will start the cleanup process
4. Delete Temporary Files Directly From The Temp Folder
At times, none of those mentioned above fixes can yield satisfying results. For example, despite having deleted almost half of your system temp data, you see your PC struggling to function smoothly and efficiently as you can.
So when countless fixes don’t mend the problem, you will just have to do it yourself. Similarly, you will now need to delete the temporary files directly from the temp folder. There are various ways through which you can get rid of all the Windows 11 temporary files in the temp folder.
1. Using The File Explorer
To delete the Windows 11 temporary files using file explorer, follow the given steps.
- Close all running applications
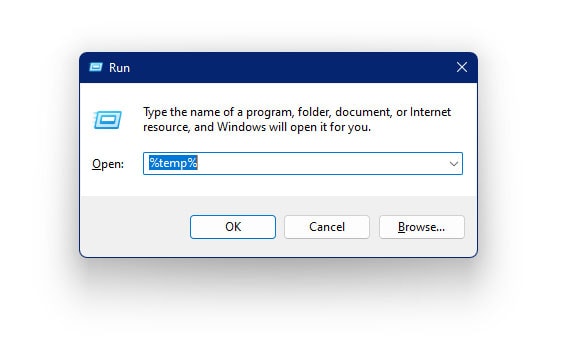
- Press Windows + R on your keyboard
- This will open the Run dialog box
- In the dialog box, type in the following command and press OK.
%temp%
- Here, you can either choose to delete all files or individual Windows 11 temporary files.
- To delete all files, press Ctrl + A
- Right-click on the file panel
- Select Delete
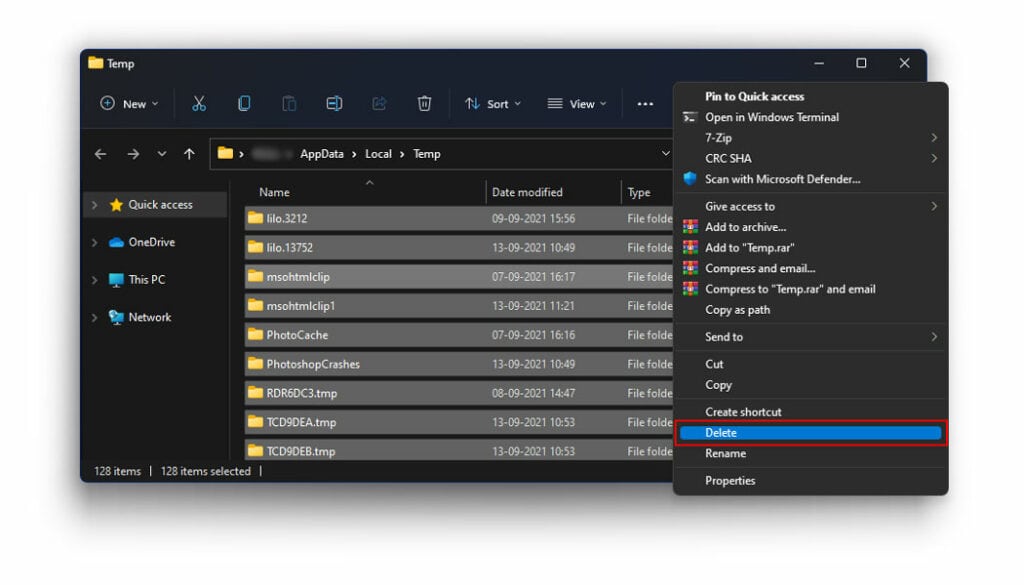
- This will remove all the temporary files from the temp folder
- A confirmation box might pop up for some files.
- Choose the appropriate option to delete those files.
2. Using Command Prompt
To delete the temporary files using Command Prompt, follow the given steps.
- Close all running applications
- In the Windows search bar, type in Command Prompt
- Select Run As Administrator
- Press Yes on the confirmation box that appears
- Here, type in the following command and press Enter
del /q/f/s %TEMP%\*
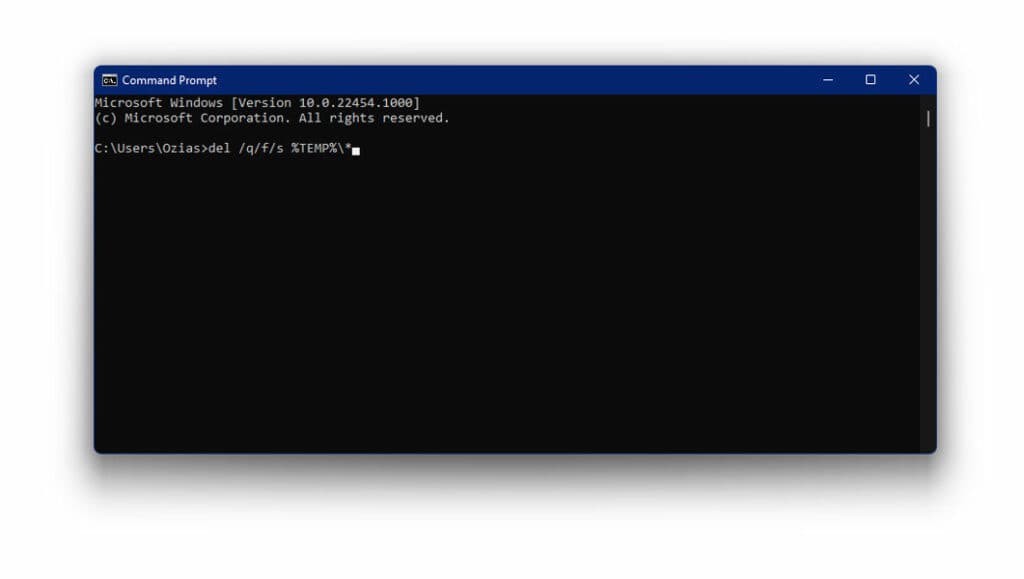
- Windows will now automatically delete all the temporary files that do not need additional permissions.
The Bottom Line
We hope our article was successfully able to walk you through the process of how to delete temporary files in Windows 11. Temporary windows installation files are generally created by a particular program or application to hold data temporarily. Though the temporary and junk files may be small in size, they tend to accumulate on your system over time and can occupy a significant chunk of your storage space.
These files are automatically deleted once the program is closed. As a result, a lot of temporary windows installation files are generally lying dormant in your system. But the majority of them are critical to the system’s functioning. Therefore, ensure that you verify each Windows 11 temporary files before you delete them.

![How to Enable Drag and Drop in Windows 11 [5 Methods]](https://devsjournal.com/wp-content/uploads/2021/09/How-to-Enable-Drag-and-Drop-in-Windows-11-768x384.jpg)