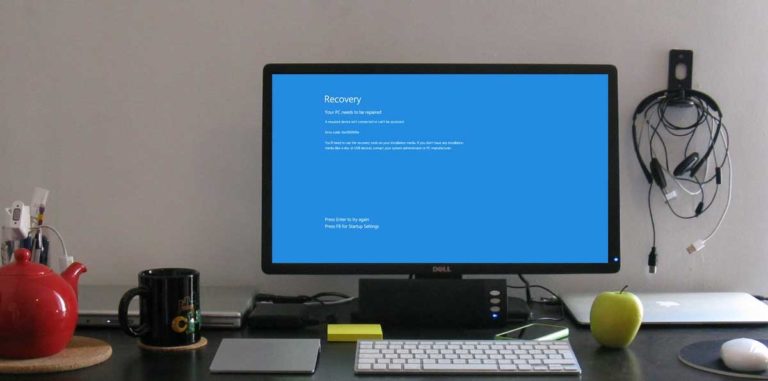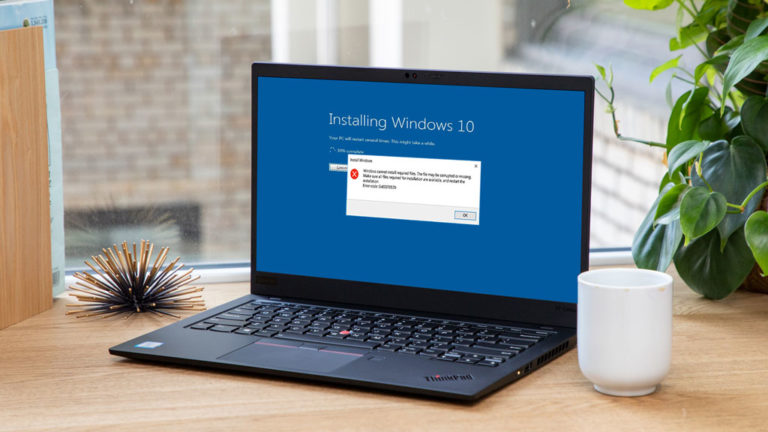
Windows OS can be quite a handful. There are just too many things you can tweak on the operating system. If you are unfamiliar with the OS, you might find a lot of errors popping up. Thankfully, most of these errors can be easily resolved.
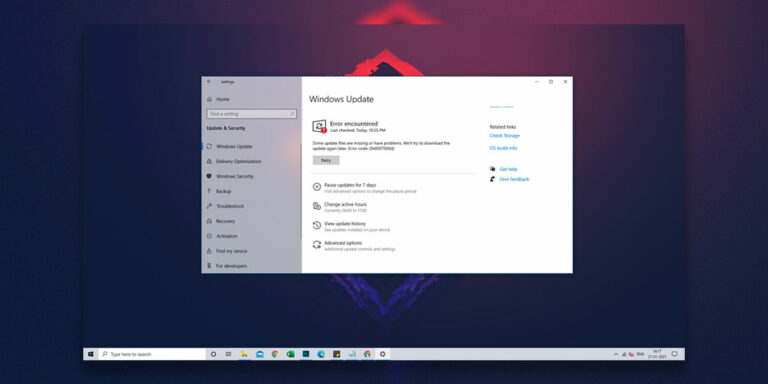
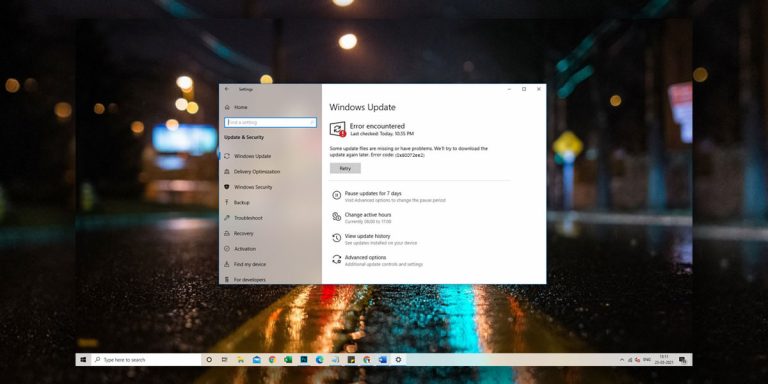
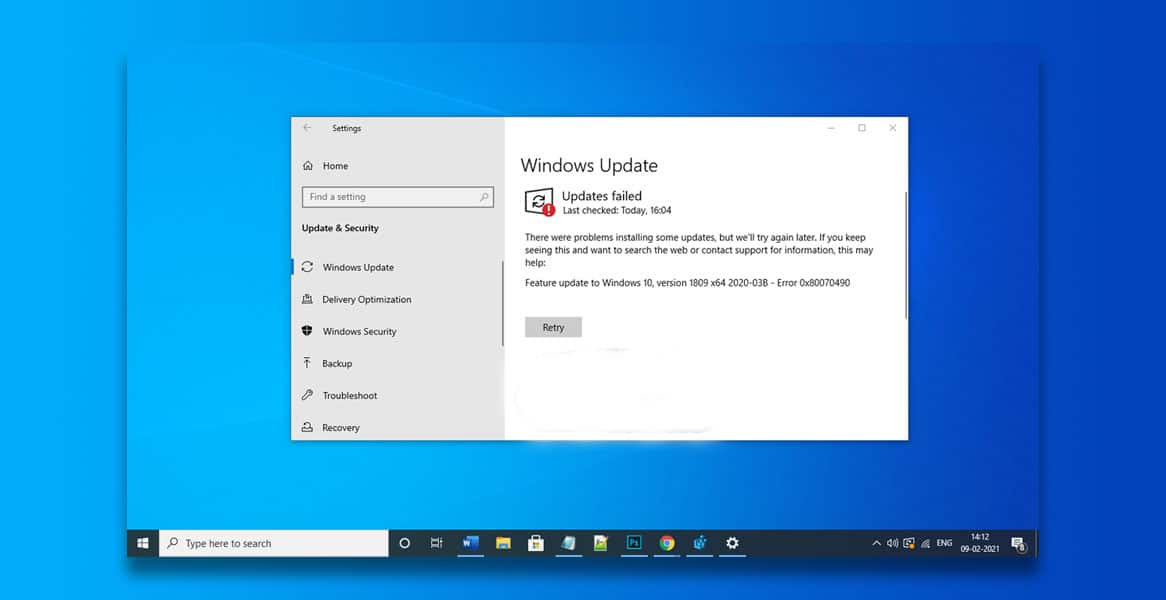
Like other Windows update errors like 0x80070643, 0xc19001e1, 0x80070424 etc. Windows error 0x80070490 is also a Windows update error. The error is pretty common and can be fixed easily. Although, you have to know first what is the most probable cause of this issue. Several system issues may have caused the error 0x80070490. Sometimes it may mean a corrupted file, but most of the time this is caused by some update issues. It may even have different methods of fixing depending on the version of Windows installed on your computer.
Don’t worry as we will go through each possible problem area, followed by the fix we have confirmed to work.
What Is The Error 0X80070490?
| Problem Event Name | 0x80070490 |
| Error Message | Something happened and this app couldn’t be installed. Please try again. Error code: ox80070490. |
| Error Cause | Corrupt files or systems |
| Common Solution | Fix the damage or corrupted system files, or disable the third-party antivirus software. |
Causes Of The Error 0X80070490
The error 0x80070490 usually appears when you are trying to install a new update, or even simply install an app. This happens because there may have been some corruption in the system files, or a third-party antivirus is trying to hinder the process.
How to Fix Windows Update Error Code 0X80070490
We can fix this error by looking at possible areas and fix all the files that may have been corrupted. Actually, it all depends on where the issue is coming from.
Failed installation, for example, maybe fixed by uninstalling the third-party antivirus software. The following are the possible fixes for the error code 0x80070490 you have been experiencing.
1. Run Windows Update Troubleshooter
One of the easiest ways to fix this problem is by using the Windows Update Troubleshooter. However, your computer needs to have Windows 10 to access this option. This isn’t available in other versions. You can still try the other methods listed in this article.
The following are the steps on how to run the Windows Update Troubleshooter:
Step 1. Launch the Settings app on your Windows 10 computer.
Step 2. Look for Update & Security, and click Troubleshoot.
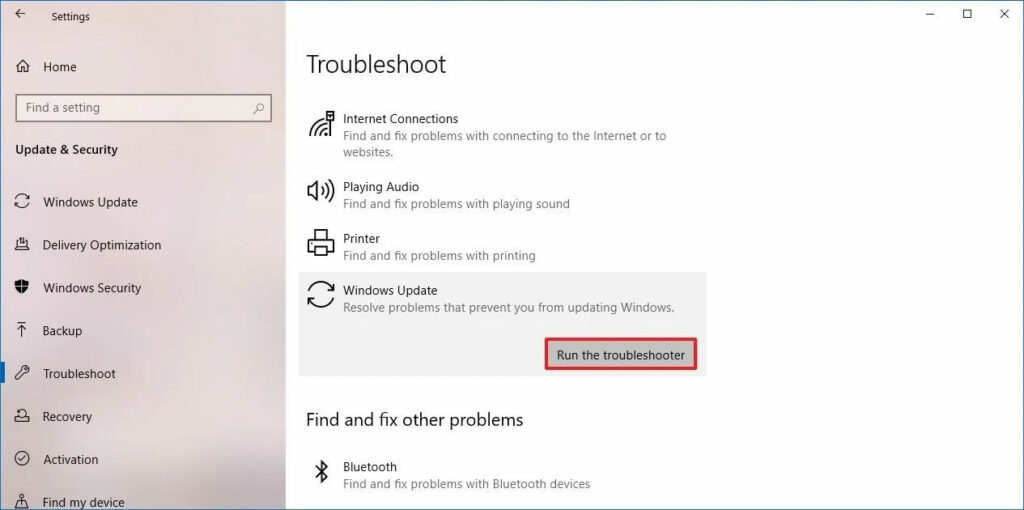
Step 3. Now, you will need to look for Windows Update, then click on “run the troubleshooter.”
Step 4. After this, there may be some further instructions that you will have to follow.
Step 5. Finally, restart your computer.
Note that there are times when the troubleshooter stops before even completing the process. Just follow the instructions on how to fix this on the fourth method.
2. Disable Antivirus
This is also one of the easiest methods on this list. Sometimes, some antivirus software is so aggressive that it hinders even one of the most normal things you can do with your computer – install an app.
In this part, we will teach you on how to disable 3rd party antivirus software on your Windows computer. Note that this only works if you have a 3rd party antivirus software installed. Windows Defender doesn’t cause issues with the app or update installation.
Since there are many 3rd party antivirus software out there, we will cover the general instructions on uninstalling apps on your Windows computer.
Step 1. Click the Windows logo on the lower left of the display, and look for the exact antivirus software you want to install in the list.
Step 2. Press and hold, or right-click on the app you want to uninstall to show options. Proceed with uninstalling the app.
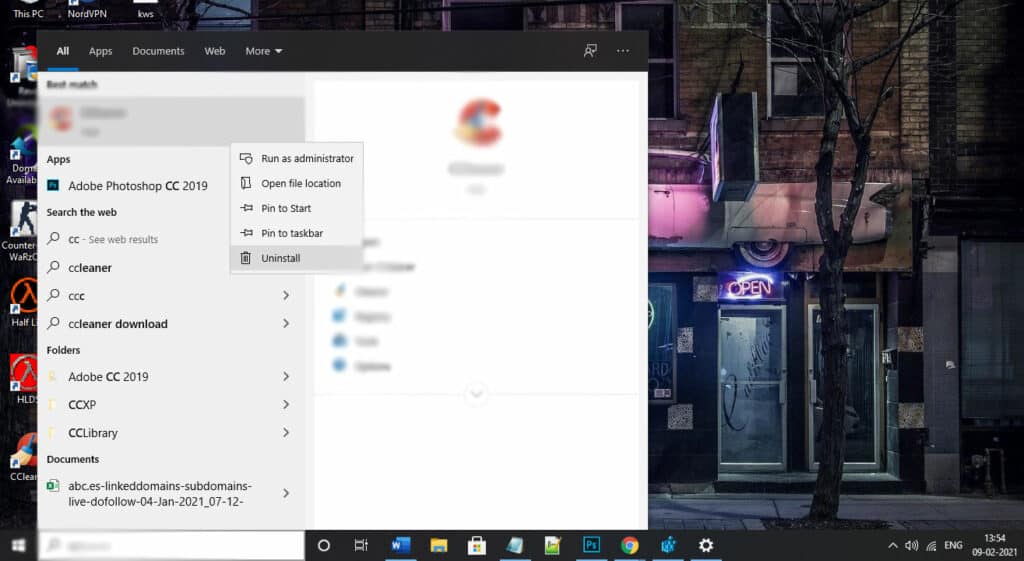
You can also do this from the Settings page. Here is how:
Step 1. Select the Start again (the Windows logo on the lower left side of the display) then look for Settings.
Step 2. Inside the Settings page, look for Apps, then proceed on Apps & features.
Step 3. Select the app you want to uninstall, and proceed with the process.
3. Create a new user account
Okay, sometimes we admittedly messed up things on our computers. If we can’t find any solutions to fix these issues, the best possible way, headache-free method, is to create a fresh new users account.
4. Run SFC & DISM commands
If the other methods didn’t work for you, you might try running SFC and DISM commands. This should scan your system and fix any errors.
Step 1. Press the Windows Key + X to launch Win + X Menu.
Step 2. Look for Command Prompt (Admin) on the options. You can also choose PowerShell (Admin) if the Command Prompt (Admin) is not available.
Step 3. Now, on the Command Prompt (Admin), enter SFC/scannow, then press Enter key. This process may take up to 15 minutes so be patient.
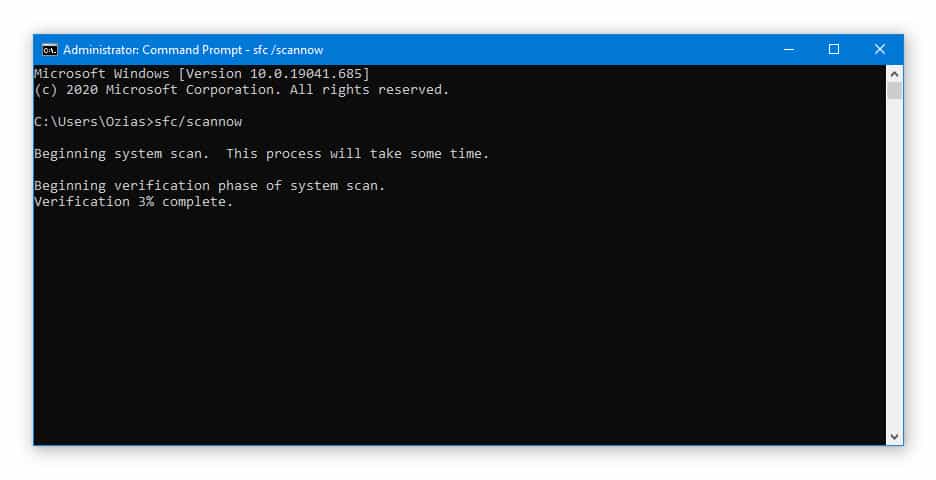
If this method didn’t work to fix the problem, you might try the DISM scan instead. Follow the instructions below:
Step 1. Launch Command Prompt as an administrator.
Step 2. On the Command Prompt screen, type DISM /Online /Cleanup-Image /RestoreHealth then press Enter. Note that the scan may take up to 15 minutes, so I highly advise you to be patient.
5. Rename or delete software distribution folder
The Software Distribution folder holds all the vital temporary Windows Update files. Sometimes, we may have been accidentally renamed the folder or did things that caused issues with the folder. This could lead to many errors such as the 0x80070490. To fix this, we may have to rename the folder back to its original system folder name, or perhaps even delete the whole folder so your PC can refresh and fill the folder with a new system file.
The following are instructions on how to rename the software distribution folder:
A. Using CMD
Step 1. Press the Start button, and search for Command Prompt.
Step 2. Right-click on the app, and run it as an administrator.
Step 3. In the cmd window, type the following commands then press the Enter key each time:
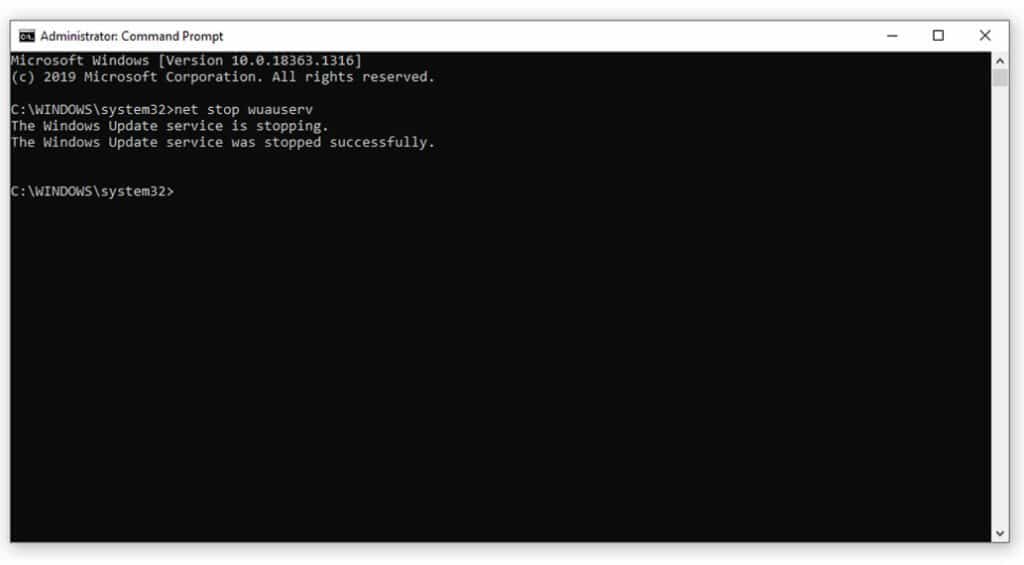
net stop wuauserv
net stop bits
rename c:windowsSoftwareDistribution SoftwareDistribution.bak
net start wuauserv
net start bits
Step 4. Now that you have performed all the commands, all we need to do now is to check if it worked. You can go to the C:Windows folder, and look for the folder named SoftwareDistribution.bak.
B. Using Safe Mode
Now, if the Command Prompt method didn’t work for you, you should try doing the process via Safe Mode.
Step 1. Press the Windows key and R at the same time to launch Run. On the box, type msconfig, then hit the Enter Key. The Windows Configuration window should now appear.
Step 2. Click on the Boot tab, then check Safe Mode under Boot options.
Step 3. Click Apply, then OK.
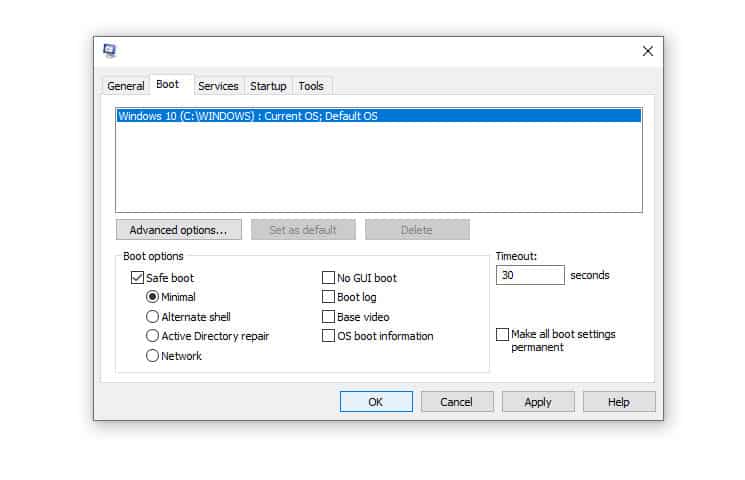
Now, here’s how to delete the Software Distribution folder to let your computer refresh all the files. I recommend that you restart your PC after this.
Before we do this, though, we will have to do the following:
Step 1. On the Search box, type services.
Step 2. Launch Services, then search for Windows Update under the Services list.
Step 3. Right-click on it to reveal Properties. Then choose Disable.
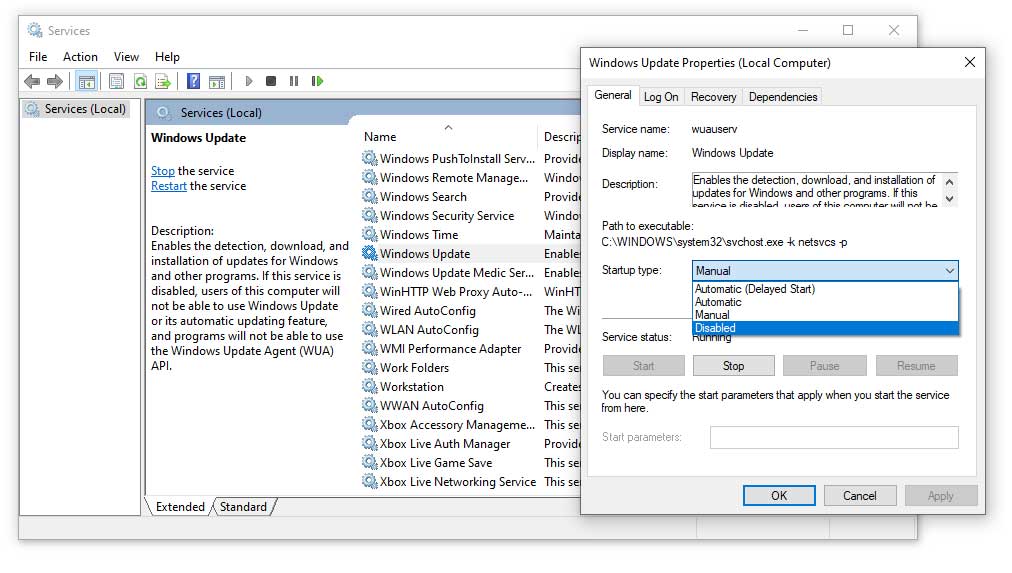
Step 4. Restart your computer.
Now that you have disabled the Windows Update, we will now proceed to delete the folder.
Step 1. Go to C:Windows then look for the SoftwareDistribution folder.
Step 2. Right-click and delete it.
Step 3. Restart your computer.
C. Use Registry Editor
We can also use the Registry Editor to fix the problem. The following steps will guide you on how to do that:
Step 1. Press the Windows key and R key at the same time to launch Run.
Step 2. On the box, type Regedit then press Enter or OK to run the Registry Editor.
Step 3. Navigate the following key in the let panel:
HKEY_LOCAL_MACHINE\SOFTWARE\MicrosoftWindows\CurrentVersionAppxAppxAllUserStore
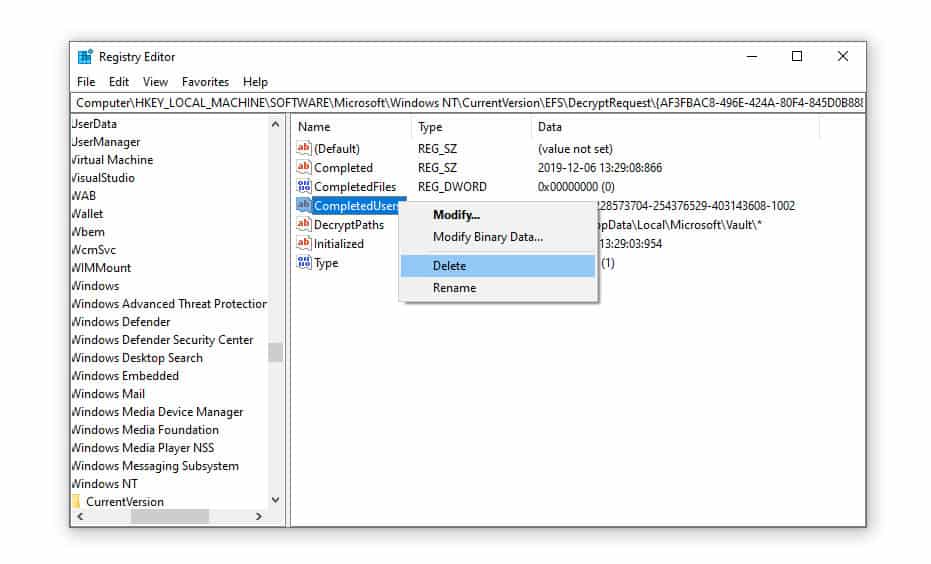
Step 4. Now, you need to look for the keys that look like this: S-1-5-21-1505978256-3813739684-4272618129-1016.
Note that this is just an example and your Registry may show different numbers and format.
Step 5. Delete all of these keys, close the Registry Editor, then restart your computer.
6. Manually Reset Windows Update Components
Now finally, to the last part. Another method to fix the error code 0x80070490 is by manually resetting the Windows Update Components. To do that, refer to the following guide:
Step 1. Download the Reset Script:
● Windows update reset script for Windows 10 build 10240 and later.
● Windows update reset script for Windows 7 and Windows 8/8.1.
Step 2. After downloading the Script, right-click on it and Extract the file. You will now see the WUReset.bat file.
Step 3. Right-click on the WUReset.bat file and run it as an administrator.
Step 4. Wait for the prompt saying that the task has been completed successfully, then restart your computer.
Note:
If you can’t download the script, you can copy the following code on the Notepad then save it as “WUReset.bat” (including the quotation marks). You can then run this script as usual:
 @echo off
 echo .
 echo Simple script to reset windows update-Credits to Shawn Brink for the commands
 echo .
 echo PAUSE
 set b=0
 :bits
 set /a b=%b%+1
 if %b% equ 3 (
    goto end1
 )
 net stop bits
 echo Checking the bits service status.
 sc query bits | findstr /I /C:"STOPPED"
 if not %errorlevel%==0 (
     goto bits
 )
 goto loop2
 :end1
 cls
 echo.
 echo Failed to reset Windows Update due to bits service failing to stop.
 echo.
 pause
 goto Start
 :loop2
 set w=0
 :wuauserv
 set /a w=%w%+1
 if %w% equ 3 (
    goto end2
 )
 net stop wuauserv
 echo Checking the wuauserv service status.
 sc query wuauserv | findstr /I /C:"STOPPED"
 if not %errorlevel%==0 (
     goto wuauserv
 )
 goto loop3
 :end2
 cls
 echo.
 echo Failed to reset Windows Update due to wuauserv service failing to stop.
 echo.
 pause
 goto Start
 :loop3
 set app=0
 :appidsvc
 set /a app=%app%+1
 if %app% equ 3 (
    goto end3
 )
 net stop appidsvc
 echo Checking the appidsvc service status.
 sc query appidsvc | findstr /I /C:"STOPPED"
 if not %errorlevel%==0 (
     goto appidsvc
 )
 goto loop4
 :end3
 cls
 echo.
 echo Failed to reset Windows Update due to appidsvc service failing to stop.
 echo.
 pause
 goto Start
 :loop4
 set c=0
 :cryptsvc
 set /a c=%c%+1
 if %c% equ 3 (
    goto end4
 )
 net stop cryptsvc
 echo Checking the cryptsvc service status.
 sc query cryptsvc | findstr /I /C:"STOPPED"
 if not %errorlevel%==0 (
     goto cryptsvc
 )
 goto Reset
 :end4
 cls
 echo.
 echo Failed to reset Windows Update due to cryptsvc service failing to stop.
 echo.
 pause
 goto Start
 :Reset
 Ipconfig /flushdns
 del /s /q /f "%ALLUSERSPROFILE%\Application Data\Microsoft\Network\Downloader\qmgr*.dat"
 del /s /q /f "%ALLUSERSPROFILE%\Microsoft\Network\Downloader\qmgr*.dat"
 cd /d %windir%\system32
 if exist "%SYSTEMROOT%\winsxs\pending.xml.bak" del /s /q /f "%SYSTEMROOT%\winsxs\pending.xml.bak"
 if exist "%SYSTEMROOT%\winsxs\pending.xml" (
     takeown /f "%SYSTEMROOT%\winsxs\pending.xml"
     attrib -r -s -h /s /d "%SYSTEMROOT%\winsxs\pending.xml"
     ren "%SYSTEMROOT%\winsxs\pending.xml" pending.xml.bak
 )
 if exist "%SYSTEMROOT%\SoftwareDistribution.bak" rmdir /s /q "%SYSTEMROOT%\SoftwareDistribution.bak"
 if exist "%SYSTEMROOT%\SoftwareDistribution" (
     attrib -r -s -h /s /d "%SYSTEMROOT%\SoftwareDistribution"
     ren "%SYSTEMROOT%\SoftwareDistribution" SoftwareDistribution.bak
 )
 if exist "%SYSTEMROOT%\system32\Catroot2.bak" rmdir /s /q "%SYSTEMROOT%\system32\Catroot2.bak"
 if exist "%SYSTEMROOT%\system32\Catroot2" (
     attrib -r -s -h /s /d "%SYSTEMROOT%\system32\Catroot2"
     ren "%SYSTEMROOT%\system32\Catroot2" Catroot2.bak
 )
 if exist "%SYSTEMROOT%\WindowsUpdate.log.bak" del /s /q /f "%SYSTEMROOT%\WindowsUpdate.log.bak"
 if exist "%SYSTEMROOT%\WindowsUpdate.log" (
     attrib -r -s -h /s /d "%SYSTEMROOT%\WindowsUpdate.log"
     ren "%SYSTEMROOT%\WindowsUpdate.log" WindowsUpdate.log.bak
 )
 sc.exe sdset bits D:(A;;CCLCSWRPWPDTLOCRRC;;;SY)(A;;CCDCLCSWRPWPDTLOCRSDRCWDWO;;;BA)(A;;CCLCSWLOCRRC;;;AU)(A;;CCLCSWRPWPDTLOCRRC;;;PU)
 sc.exe sdset wuauserv D:(A;;CCLCSWRPWPDTLOCRRC;;;SY)(A;;CCDCLCSWRPWPDTLOCRSDRCWDWO;;;BA)(A;;CCLCSWLOCRRC;;;AU)(A;;CCLCSWRPWPDTLOCRRC;;;PU)
 regsvr32.exe /s atl.dll
 regsvr32.exe /s urlmon.dll
 regsvr32.exe /s mshtml.dll
 regsvr32.exe /s shdocvw.dll
 regsvr32.exe /s browseui.dll
 regsvr32.exe /s jscript.dll
 regsvr32.exe /s vbscript.dll
 regsvr32.exe /s scrrun.dll
 regsvr32.exe /s msxml.dll
 regsvr32.exe /s msxml3.dll
 regsvr32.exe /s msxml6.dll
 regsvr32.exe /s actxprxy.dll
 regsvr32.exe /s softpub.dll
 regsvr32.exe /s wintrust.dll
 regsvr32.exe /s dssenh.dll
 regsvr32.exe /s rsaenh.dll
 regsvr32.exe /s gpkcsp.dll
 regsvr32.exe /s sccbase.dll
 regsvr32.exe /s slbcsp.dll
 regsvr32.exe /s cryptdlg.dll
 regsvr32.exe /s oleaut32.dll
 regsvr32.exe /s ole32.dll
 regsvr32.exe /s shell32.dll
 regsvr32.exe /s initpki.dll
 regsvr32.exe /s wuapi.dll
 regsvr32.exe /s wuaueng.dll
 regsvr32.exe /s wuaueng1.dll
 regsvr32.exe /s wucltui.dll
 regsvr32.exe /s wups.dll
 regsvr32.exe /s wups2.dll
 regsvr32.exe /s wuweb.dll
 regsvr32.exe /s qmgr.dll
 regsvr32.exe /s qmgrprxy.dll
 regsvr32.exe /s wucltux.dll
 regsvr32.exe /s muweb.dll
 regsvr32.exe /s wuwebv.dll
 regsvr32 /s wudriver.dll
 netsh winsock reset
 netsh winsock reset proxy
 :Start
 net start bits
 net start wuauserv
 net start appidsvc
 net start cryptsvc
echo Task completed successfully! Please restart your computer and check for the updates again.
Conclusion
The error code 0x80070490 is one of the most common errors Windows users encounter. Due to this, there are many guides online that tell you how to fix this. In this article, we have summed up every single method available to fix the error, and hopefully, let you use your computer again.
