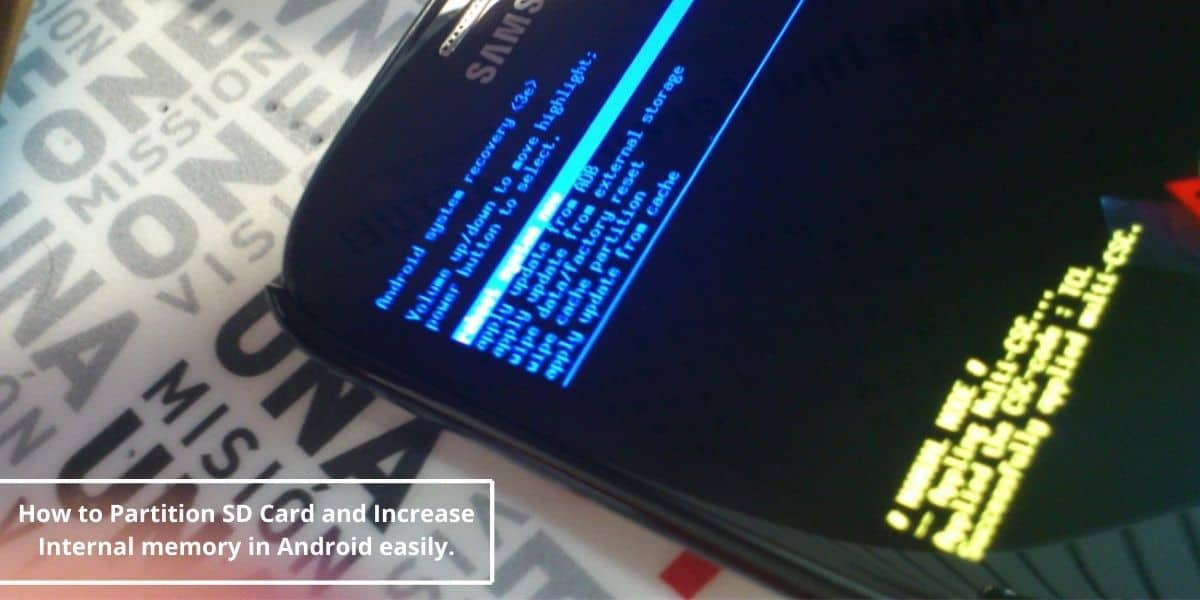
Internal memory of a device plays a major role in device performance & Storage. Few Apps can only be installed in Internal memory which in turn reduces device’s performance. Most of the low-end device users experience this issue. After lot of request for ‘Method for Increasing Internal Memory’, I am writing this post. This might be the easiest & safest method to increase the internal memory of your Android Device.
Steps to Partition SD Card Android Using Mount2SD
Mounts2SD started out as a simple sd-ext script which is the only difference between it and others like it. It did not use symlinks to create links between /data and /sd-ext. Today it has grown to be so much more. It now comes packed with an Application for controlling the script, viewing current states and more.
The script itself has grown to become a large storage and management script with features that controlls SWAP, ZRAM, mount optimization, storage thresholds, different external and internal MMC configurations, cache and more.
The content management is able to move a lot more different content between /data and /sd-ext, including the new internal storage, which on some devices, is placed in data/media, and it also contains more than one option for storing system content on both data and sd-ext.
For this method you have to partition your SDcard into two parts:
- First partition as Fat32 (used as main SDcard)
- Second partition is EXT2 ( used as Internal memory )
Do not forget to take a nandroid backup of your phone before doing this. CWM recovery > Backup & Restore > Backup
NOTE:
- If you have already ‘PARTITIONED’ your SDcard into ‘FAT32’ & ‘Ext2’ then Skip Step 1&2.
- If you have already partitioned your SDcard. But made the second partition of other file type then ‘EXT2’ EG : FAT32 , EXT4 then Skip Step 1.
- If you are new to Partitioning then Follow each step carefully.
Pre-requisites:
- Memory card.
- MiniTool Partition Wizard Home Edition: Download
- Mount2SD : Mounts2SD
- Rooted Android Phone.
- Init.d support enabled. Follow this : Enable Initd support on android.
- Busybox pro: Download
1. To Create an SD Card Partition with Minitool
In this process, your memory card will be formatted.
Step 1: Install Minitool partition on your pc.
Step 2: Copy any data you want from your SDcard to a file/folder in your computer.
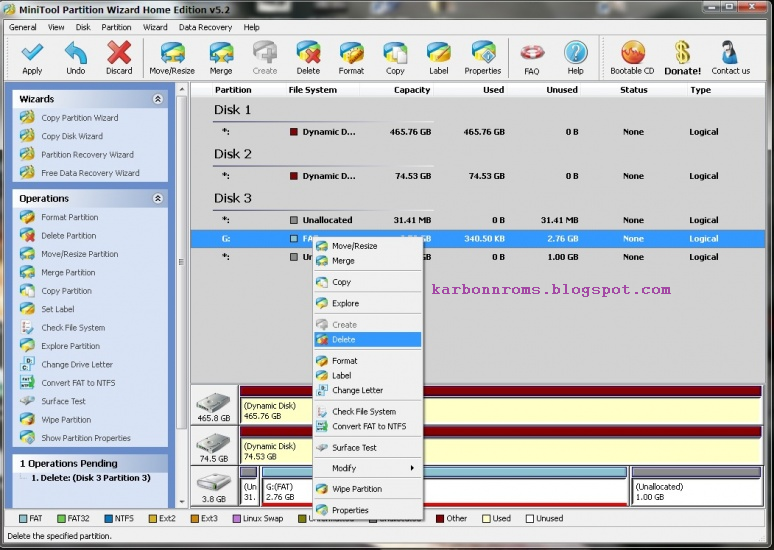
Step 3: Launch MiniTool Partition Wizard and wait for the application to recognize and display your drives.
Step 4: Right-click on the heading for your SD card and select “Delete.” If there are any existing partition on your card then all the data stored on the card will be deleted.
Step 5: Now again right-click on the SD card & Click the “Create” button and select “Primary” in “Create as”.
Step 6: Select “File System: FAT” if your card’s capacity is less than 2GB; select “File System: FAT32” if the card is 4GB or greater.
Step 7: Select the amount of space you wish to allocate for regular file storage from the Partition Size menu (the remaining space will be the internal memory of your android). Then click “OK” to close the menu.
Step 8: Now there will be two partitions of your SDcard. Now, right click on the second partition of your SDcard (which will be showing as unallocated) and Click “Create” and again select “Primary”, then choose “File System: EXT2”
Step 9: Click “Apply” when finished. None of the actions described above will occur until you click this button – “MiniTool Partition Wizard” queues actions to run in sequence instead of processing them when entered.
That’s all, after the process finishes you will have two partitions. when you connect your SD card next time, in ‘My Computer’ it will show the capacity as the first partition.
2. Convert To EXT2 Partition
This is for those who have already created a partition but have set their 2nd partition as FAT32 or other but now want to convert them into EXT2 partition.
Note : In this process your main memory card is not formatted. But still create a backup.
Step 1: First uninstall all the apps like link2sd (if u have linked any app then delete all the links) and app2sd and do a factory reset of ur phone and then connect ur memory card through a card reader or through USB cable with pc.
Step 2: Open Minitool partition u will be able to see ur two partitions.
Step 3: Right-click on the second partition (mostly the one with smaller size) and click on delete (do not disturp the first partition) and click OK now your second partition will be shown as unAllocated.
Step 4: Right-click again on the second partition and click on create and choose “primary” in create as “Ext2” in the file system.
Step 5: Now click OK and then click on apply on the top left corner and wait for the process to finish thats all you have created a EXT2 second partition.
3. Install Busy Box and Init.d Support
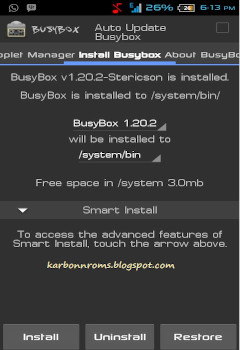
Step 1: Use this tutorial to install init.d support – Init.d.
Step 2: Download Busybox pro from above link.
Step 3: After installing it open Busybox, slide left, and click on “Install Busybox”
Step 4: After this, a File will be loaded. So, wait till the above screen comes. Now select ‘Install’, And then it will ask you to choose smart or normal Choose ‘Smart install’. Done!
4. To Install and Use Mounts2SD
Step 1: Download and install Mounts2SD on your Android from the play store.
Step 2: Launch Mounts2SD. Click on the options button (the button left to the home button of your device) and select “Applications Setting”.
Step 3: Now in ‘Application settings’ select “Install scrips on startup”. and wait till the process is over.
Step 4: Now press back, and you will be on the main screen of Mount2SD. Now go to settings (the Wrench icon – it will be next to the eye icon on the top).
Step 5: Click on the cache and enable it. Check the applications, data, and Dalvik cache (do not select system apps) and now close the mounts2sd.
Step 6: Now reboot your device. (The boot may take longer time but it’s normal so don’t panic and also an android upgrading message may come on boot)
Note: If you want to check the remaining memory of your second partition open the Mounts2SD and in "Storage" tab see the external it is your second partition.
Wait till everything is over and your mobile is booted . Now go to “Settings > Apps” and see the internal memory. Now install any app or game and again check the internal memory. It will still be the same.
I hope this article helped you. If you have any doubt or suggestions you can comment below. Do Like & Share this post . If this method didn’t work, you can use this method of increasing internal memory which too is safe and has a 100% Success rate.
![Fix: Android 13 Fast Battery Drain Problem [8 Effective Fixes]](https://devsjournal.com/wp-content/uploads/2023/07/Android-13-battery-drain-768x384.jpg)

I have redmi2 prime with rom 8.2.1.0(LHJMIDL), blurtooth is not working properly with my car system. gets connected & disconnected while using phone. can’t play media even though paired. can you suggest meany solution?
Hey I Need a Clean iOS8 theme ROM for my MTK6572 .. Apple look alike device …
I presently dont have playstore and have loads of crapware that keep popping up every 10 mins on my phone.
I was excited to discover this greaqt site.
I need to to thank you for ones time due to this wonderful read!!
I definitely really liked every bit of it and I have you book marked
to check out nnew things on your web site.
hello!
Can i merge my internal storage and phone storage memory on my karbonn titanium s5+? How can i do so? I am not being able to install much apps on my phone evenif i have a device memory of 4 gb. Please help me out of this.
If can’t understand any of the stuffs above, you can simply install Link2SD *ROOT* which helps to transfer Apps from Internet storage to SDcard.
hi I need a android 5.1.1 rom for my karbonn a35 I know you are a super cool developer and no matter to make a rom. so I am requesting you to make a rom for my phone bro. I am just dying for this. and your super cool work on other rom.
keep it up
and thanks for rom in advance. (h)
sir i have tried using link2sd for karbonn a25 custom rom s4 but it is showing insufficient memory and mount2sd is not working plss help and give any solution for mount2sd
its good ajinkya.i have tried the lewa os on karbon titantium s5 plus its was working fine.but when i see this increasing of internal memory i also tried but after restarting its does not start again.
now my mobile is restarting in 5 sec again and again. now wat u do i am trying from last 2 days to go in recovery mode but that also not available.
pleasse help………………….
Hey Anil ! I really apologize & feel sad as this method didn't worked for you but don't worry its pretty simple. First download Stock ROM for S5+ from here : S5+ Stock ROM. Then install Stock ROM by this method : S5+ Stock ROM Installation.. Keep calm don't worry !
will it work in s4 rom of a25?
i tried but no luck
Follow the same procedure with link2SD ( Use Link2SD in place of Mount2SD). Given in this post : http://karbonnroms.blogspot.in/2014/09/use-link2sd-efficiently-to-increase.html
in link2sd some apps which is big are not link properly. i follow ur step but it shows insufficient memory every time after installing big app (above 50 mb app).
i am using kitkat rom of a25 till now in this mount2sd works gr8.
how to install mount 2 sd in miui rom in karbonn 25
Ritik Mount2sd doesn't work for MIUI. So, use link2sd pro follow the same procedure as mount2sd. Hope this helps.
yeah! its all working
It should. 😀