
One of the most powerful budget smartphone, Lenovo A6000 & Lenovo A6000 Plus received Android Lollipop 5.0.2 on 4th September. While many of the users are not much happy with the update as it ultimately made the phone slower & reduced battery life. But, you can actually fix many of this issues by rooting your device. Rooting provides many features, check here: Features of Rooting & Custom ROMs.
Major Features of Rooting
- Boost your Phone speed & Battery Life.
- Remove Preinstalled crapware like System Apps.
- Remove Bloatwares, Apps like Facebook, Chrome Keep sucking your Ram & battery by running in background So, Among the smartphone geek crowd, applications like these are referred to as “bloatware:” they do nothing but bloat the software by existing as unnecessary applications.
- Tweak your phone like : Increase Video streaming speed, Increase Wifi Speed, Increase SIM detecting Speed, Increase SD read/write speed.
- Most Important & Best part, Install Custom Kernel & Custom ROMS ( I will explain about it in Installing Custom ROM section Custom ROM section )
- Finally, Truly Own your Device, Make it appear in the way you want.
Prerequisites:
- Lenovo A6000, charged upto 40%.
- A USB Cable.
- Tools required (Contains ADB, fastboot, supersu, custom recovery): Download
- TWRP Recovery 3.1.0 & replace this recovery with recovery.img in the downloaded Tool folder – Download
How to Root Lenovo A6000 / Plus
Rooting A6000 and A6000 Plus is pretty easy. The rooting procedure of A6000 and A6000 Plus can be broken down into 2 steps, Installing TWRP Recovery & finally installing SuperSU to gain root access. Each new step relies on the previous step to have been completed, and a basic summary of each part is:
Stage 1: Installing a Custom Recovery: Stock recovery doesn’t allow any installation of 3rd party zip files. In order to install any other zip which is not signed by the firmware manufacturer, we need to install TWRP Recovery. TWRP is a powerful tool that gives control over the phone without needing to boot into Android. It can be used to flash a ROM or use minor app mods, as well as to create and manage backups.
Stage 2: Rooting: SuperSu is an app that grants you Administrator rights (called “root access”) to run or install specific apps restricted by the Android Operating System for security concerns.
How to Install TWRP Recovery in Lenovo A6000 / Plus
Step 1. Connect your Lenovo A6000/A6000+ to your PC by enabling USB Debugging mode from Developer options in Settings. If you can’t find the developer options, Goto Settings> About Phone> Device Information. Tap 7 times on the Build Number. Now you can find the developers options in Settings.
Step 2. After connecting, Select USB Storage device (Open USB Storage).
Step 3. Extract the downloaded files. Copy SuperSU.zip from the zip file into your SDcard or Internal Storage.
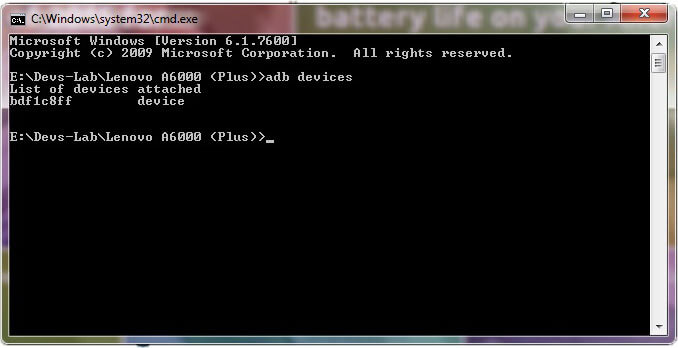
Step 4. Now, Open command.bat from the extracted folder & type
adb devices
It should return a screen similar to this
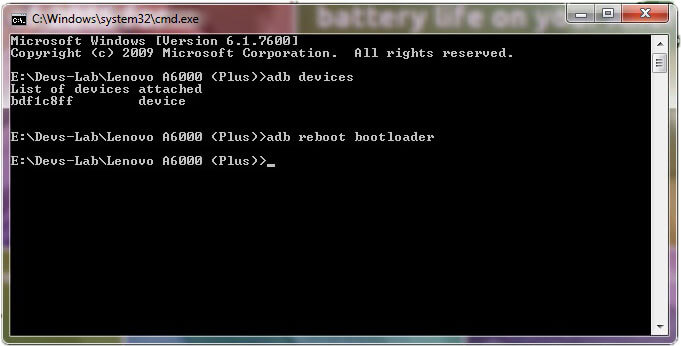
Step 5. Now type:
adb reboot bootloader
The above command will boot your device into ‘bootloader’ mode. As soon as you enter this command, you would see A Lenovo Logo with small text “Powerkey long press can reboot phone” at the bottom of the screen.
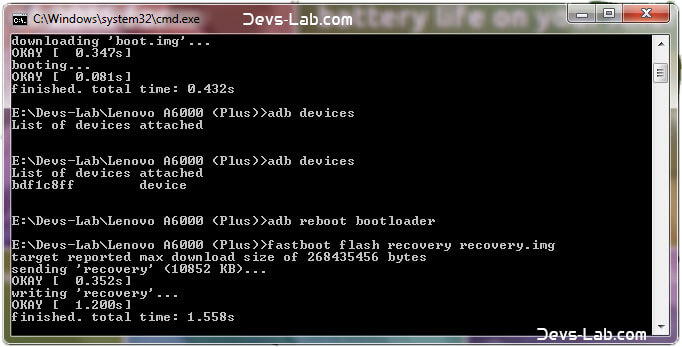
Step 6. Now, type
fastboot flash recovery recovery.img
This would replace the stock recovery with TWRP Recovery.
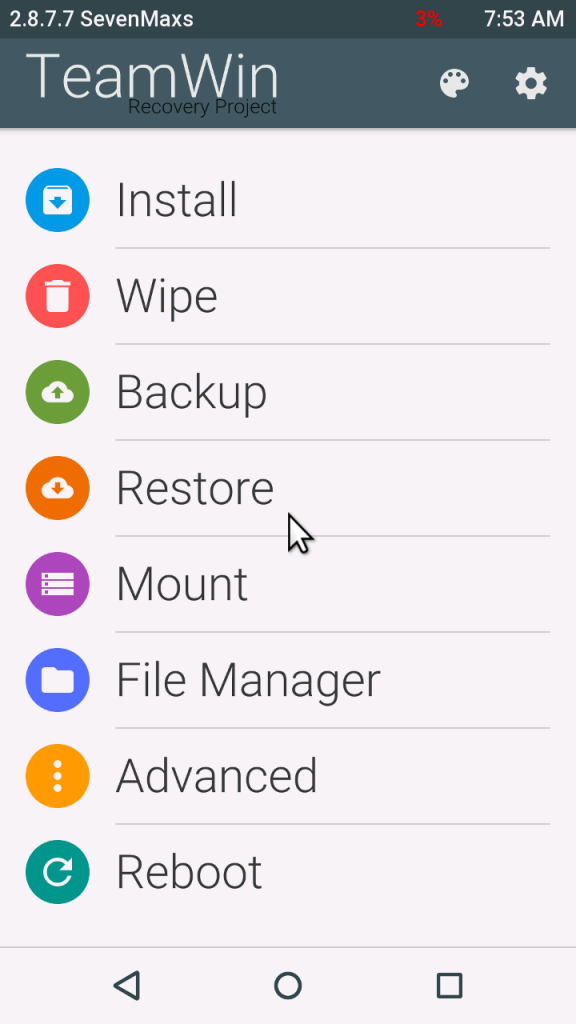
Step 7. Now switch off your device & remove the USB cable. Press & Hold Volume Up + Volume Down + Power button simultaneously.
You will see the TeamWin Recovery in your device
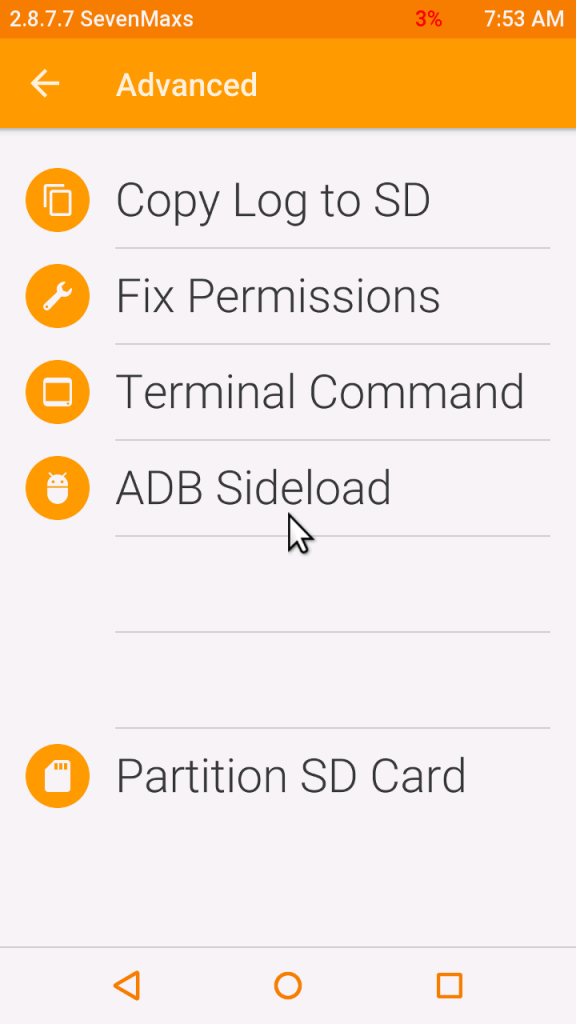
How to Root Lenovo A6000 / Plus
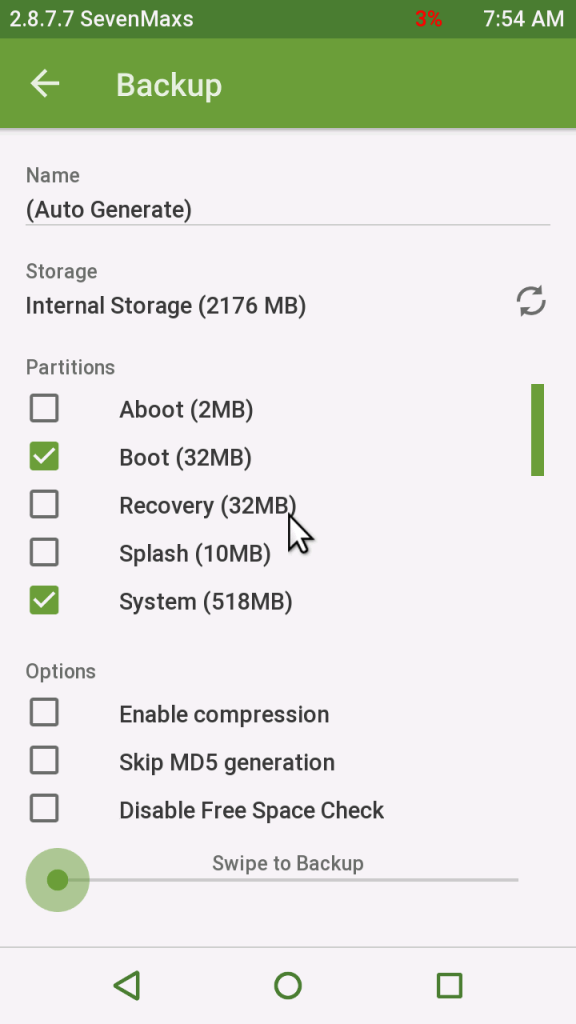
Step 1. Click on the Backup option on the TWRP screen, select Boot & System option in the Partitions and swipe it.
You will see the TeamWin Recovery in your device.
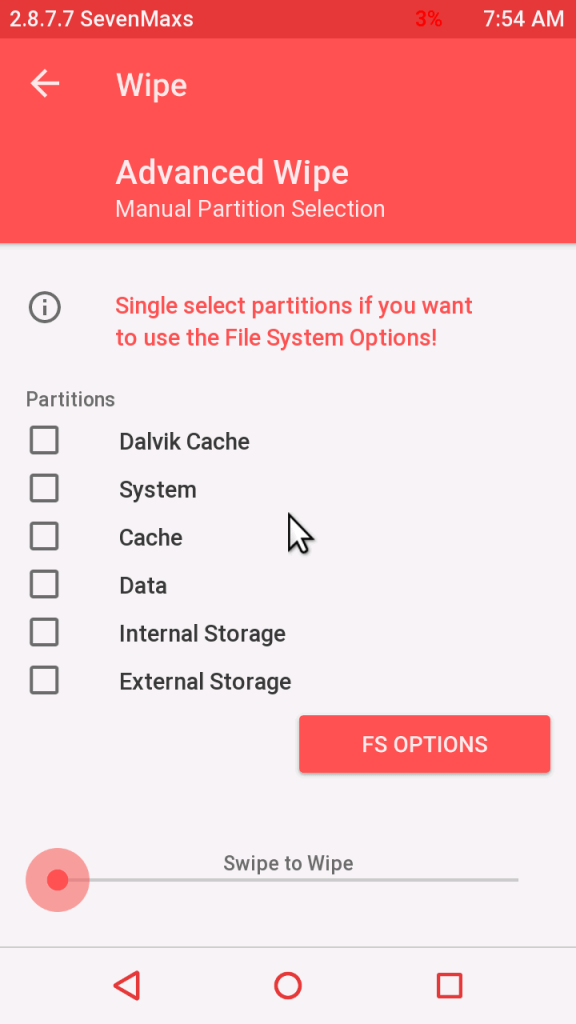
Step 2. Wait for completion of the Backup Process and then Click on the Wipe option on the TWRP screen, select Dalvik Cache option in the Partitions and swipe it.
Step 3. Download and transfer the Supersu zip file to your device.
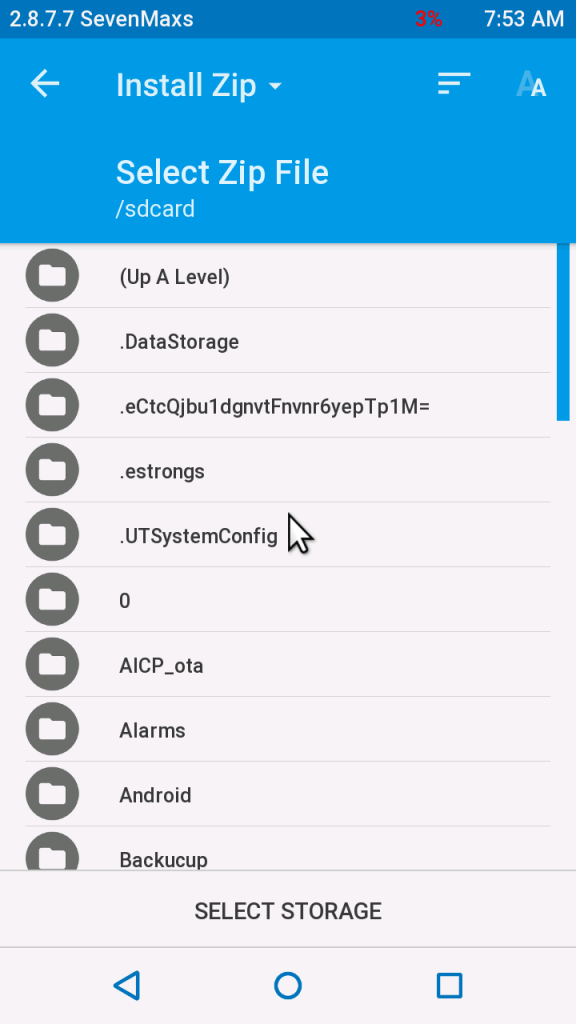
Step 4. In the main menu, tap on Install option and search for the Supersu zip file.
Step 5. Select the file and swipe to the right to start the flashing process.
Step 6. Next, remove your device from PC and Reboot by long pressing the power button. Alternatively, remove and reinsert the battery, then restart.
Step 7. Don’t interrupt the boot process, give some time for the first boot.
Step 8. Done! You have successfully rooted your Lenovo A6000 & A6000 Plus.
Conclusion
You have successfully installed TWRP Recovery, Rooted your Lenovo A6000 & A6000 Plus. If you are stuck at any step, you can contact us through the comment section or the contact us page.


after doing this procedure all was ok but when i am trying to enter recovery mode it shows the stock recovery i have tried more than recoevery.img and all the same. i am using kitkat
The recovery file is for Lollipop. For Kitkat, download this file: Kitkat TWRP & extract it. Replace the TWRP.img file with the twrp file from the file downloaded from here.
showing dtb error when i try to boot in recovery
Yes its necessary to install TWRP to flash custom ROMs. You can install custom ROMs only through TWRP.
How can I download this TWRP ? And how can I install and run it can you help me out
Hello sir, I have rooted my Lenovo a6000 through the simple method using the app king root and is it necessary to install TWRP after I have done that ?….
The reason is I want to install costume ROM .
Hope you can help me out ty.
$ fastboot boot recovery.img
downloading ‘boot.img’…
OKAY [ 0.418s]
booting…
FAILED (remote: dtb not found)
finished. total time: 0.530s
You allowed the permission popup in your device?
What permission? I enabled USB debugging already.
After typing “adb devices”, you get a fingerprint popup in your device. Allow it.
list of device is not showing in the command box . so im not able to continue.plz help asap
Have you installed the USB drivers properly? Have you enabled USB debugging? After entering “adb devices”, did you allow device fingerprint in your phone?
nothing is listed under “List of devices attached”
You are entering this commands in ADB & not in command prompt? The device is in fastboot mode?
sir i too have the same issue what should i do
Please open command.bat file from the ADB folder you have downloaded.
I believe the problem is that SD folders are not recognized after that command. The problem is you didnt specify taht from which folder do we need to run the batch file. From the folder in our PC or in the SD card of phone?
Please reply ASAP.
Try to reinstall stock recovery after doing a recovery format by entering “fastboot erase recovery”.
No need to install ADB. Just download the zip file & extract it. Now follow the procedure as mentioned.
fastboot is not recognized as internal or external command am getting this error after entering this line fastboot flash recovery recovery.img
Sir I flash it but TWRP recovery not seen ,my phone saw only phone recovery not TWRP recovery
Hey my phone is working fine but when I try to open my stock recovery which I have replaced to fastboot flash recovery it just stucks at the Lenovo opening screen when I turn my phone on.
Please help because I need it to upgrade my phone to lollipop.
Please guide me because I am confused
1. ADB install karna hai ya NAHI Kisi step mein likha Nani hai
2.twrp recovery.img ke sath Kya karna hai copy ya NAHI ,copy karna hai to KAHA karna hai
3. During Google search I totally confused.
Please guide me
Extract ADB zip file. Download the TWRP Image file, place it inside the extracted ADB folder. Now follow the procedure. Open command.bat file & follow.
Twrp image ko place inside ADB folder after ADB installation.
ADB install karna hai PC mein aapne Kisi step me likha NAHI hai . Please guide me