
One of the most powerful budget smartphone, Lenovo A6000 & Lenovo A6000 Plus received Android Lollipop 5.0.2 on 4th September. While many of the users are not much happy with the update as it ultimately made the phone slower & reduced battery life. But, you can actually fix many of this issues by rooting your device. Rooting provides many features, check here: Features of Rooting & Custom ROMs.
Major Features of Rooting
- Boost your Phone speed & Battery Life.
- Remove Preinstalled crapware like System Apps.
- Remove Bloatwares, Apps like Facebook, Chrome Keep sucking your Ram & battery by running in background So, Among the smartphone geek crowd, applications like these are referred to as “bloatware:” they do nothing but bloat the software by existing as unnecessary applications.
- Tweak your phone like : Increase Video streaming speed, Increase Wifi Speed, Increase SIM detecting Speed, Increase SD read/write speed.
- Most Important & Best part, Install Custom Kernel & Custom ROMS ( I will explain about it in Installing Custom ROM section Custom ROM section )
- Finally, Truly Own your Device, Make it appear in the way you want.
Prerequisites:
- Lenovo A6000, charged upto 40%.
- A USB Cable.
- Tools required (Contains ADB, fastboot, supersu, custom recovery): Download
- TWRP Recovery 3.1.0 & replace this recovery with recovery.img in the downloaded Tool folder – Download
How to Root Lenovo A6000 / Plus
Rooting A6000 and A6000 Plus is pretty easy. The rooting procedure of A6000 and A6000 Plus can be broken down into 2 steps, Installing TWRP Recovery & finally installing SuperSU to gain root access. Each new step relies on the previous step to have been completed, and a basic summary of each part is:
Stage 1: Installing a Custom Recovery: Stock recovery doesn’t allow any installation of 3rd party zip files. In order to install any other zip which is not signed by the firmware manufacturer, we need to install TWRP Recovery. TWRP is a powerful tool that gives control over the phone without needing to boot into Android. It can be used to flash a ROM or use minor app mods, as well as to create and manage backups.
Stage 2: Rooting: SuperSu is an app that grants you Administrator rights (called “root access”) to run or install specific apps restricted by the Android Operating System for security concerns.
How to Install TWRP Recovery in Lenovo A6000 / Plus
Step 1. Connect your Lenovo A6000/A6000+ to your PC by enabling USB Debugging mode from Developer options in Settings. If you can’t find the developer options, Goto Settings> About Phone> Device Information. Tap 7 times on the Build Number. Now you can find the developers options in Settings.
Step 2. After connecting, Select USB Storage device (Open USB Storage).
Step 3. Extract the downloaded files. Copy SuperSU.zip from the zip file into your SDcard or Internal Storage.
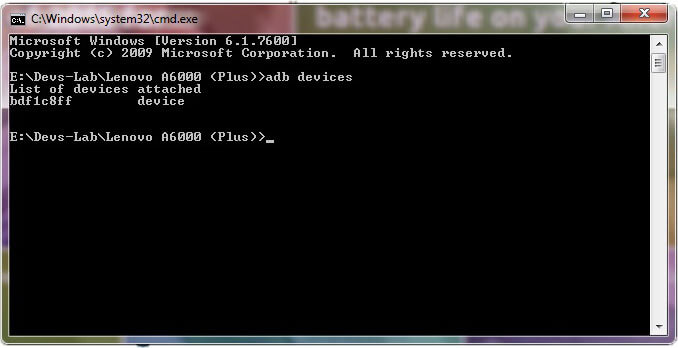
Step 4. Now, Open command.bat from the extracted folder & type
adb devices
It should return a screen similar to this
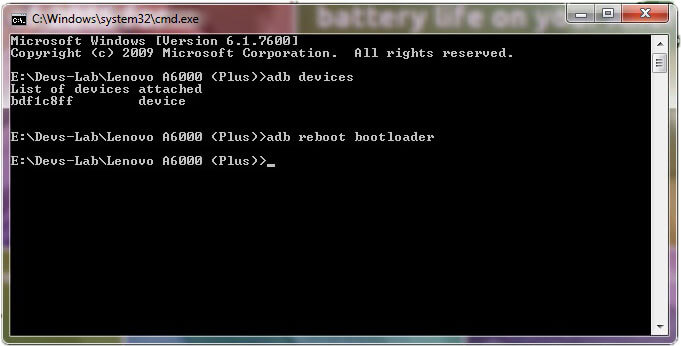
Step 5. Now type:
adb reboot bootloader
The above command will boot your device into ‘bootloader’ mode. As soon as you enter this command, you would see A Lenovo Logo with small text “Powerkey long press can reboot phone” at the bottom of the screen.
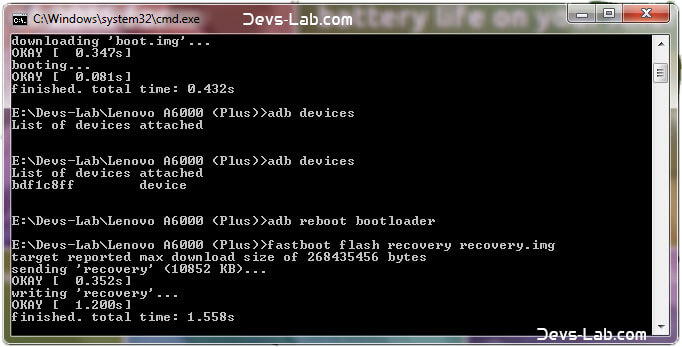
Step 6. Now, type
fastboot flash recovery recovery.img
This would replace the stock recovery with TWRP Recovery.
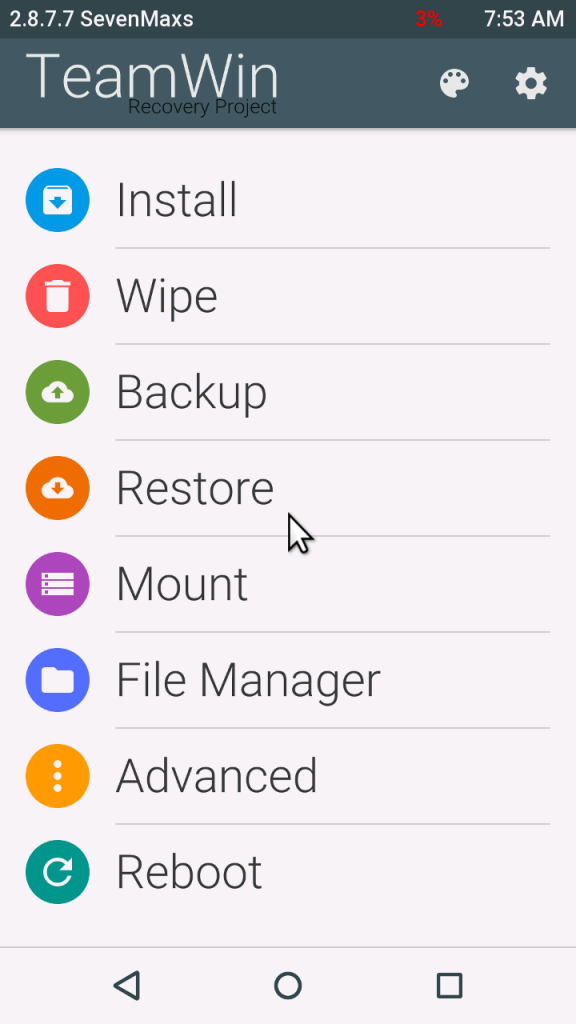
Step 7. Now switch off your device & remove the USB cable. Press & Hold Volume Up + Volume Down + Power button simultaneously.
You will see the TeamWin Recovery in your device
How to Root Lenovo A6000 / Plus
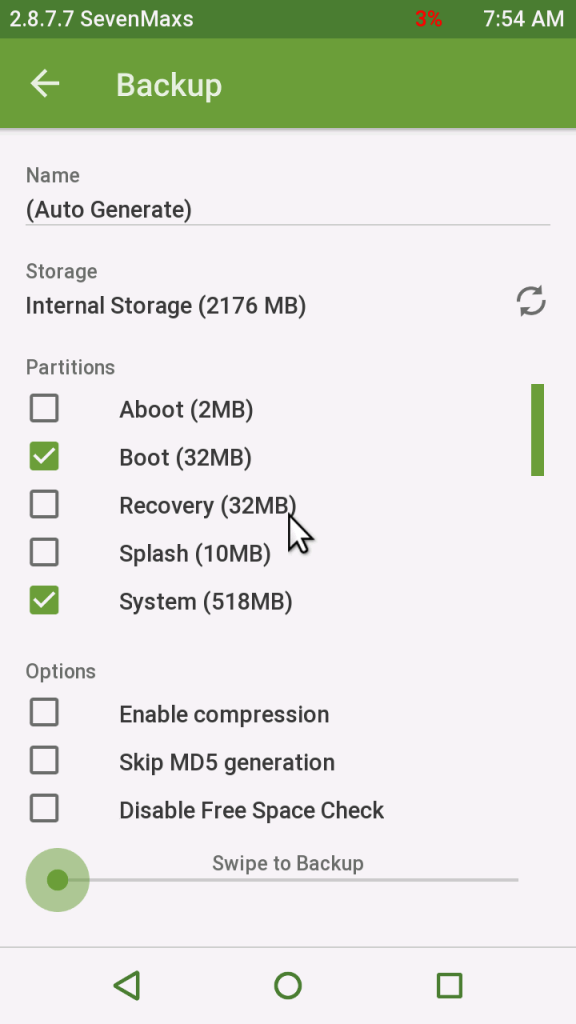
Step 1. Click on the Backup option on the TWRP screen, select Boot & System option in the Partitions and swipe it.
You will see the TeamWin Recovery in your device.
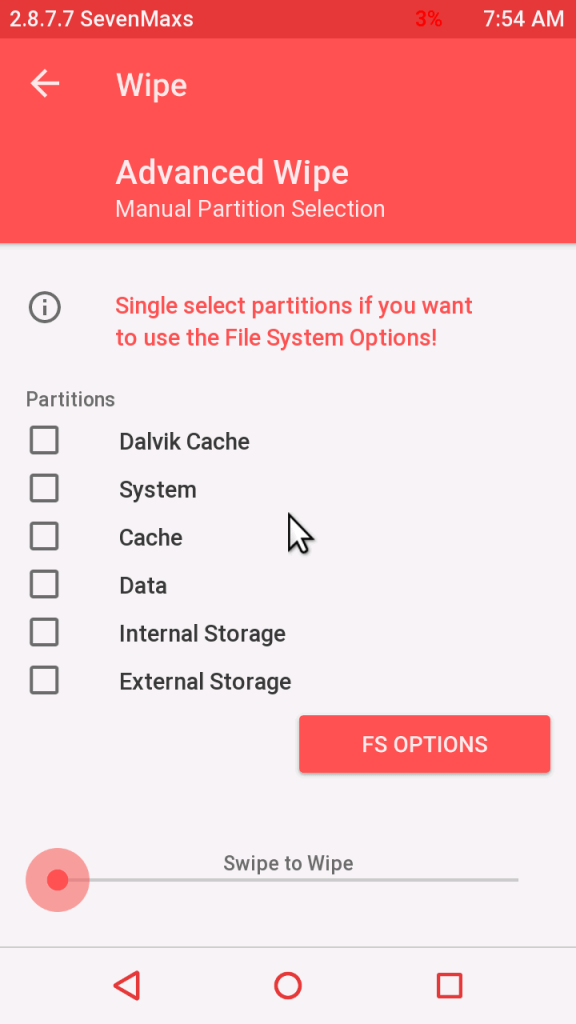
Step 2. Wait for completion of the Backup Process and then Click on the Wipe option on the TWRP screen, select Dalvik Cache option in the Partitions and swipe it.
Step 3. Download and transfer the Supersu zip file to your device.
Step 4. In the main menu, tap on Install option and search for the Supersu zip file.
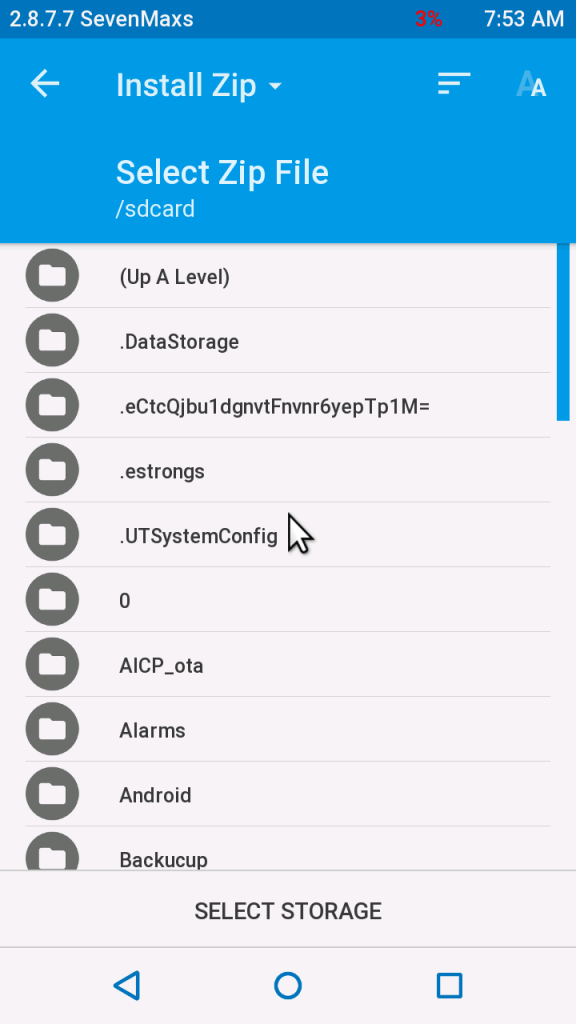
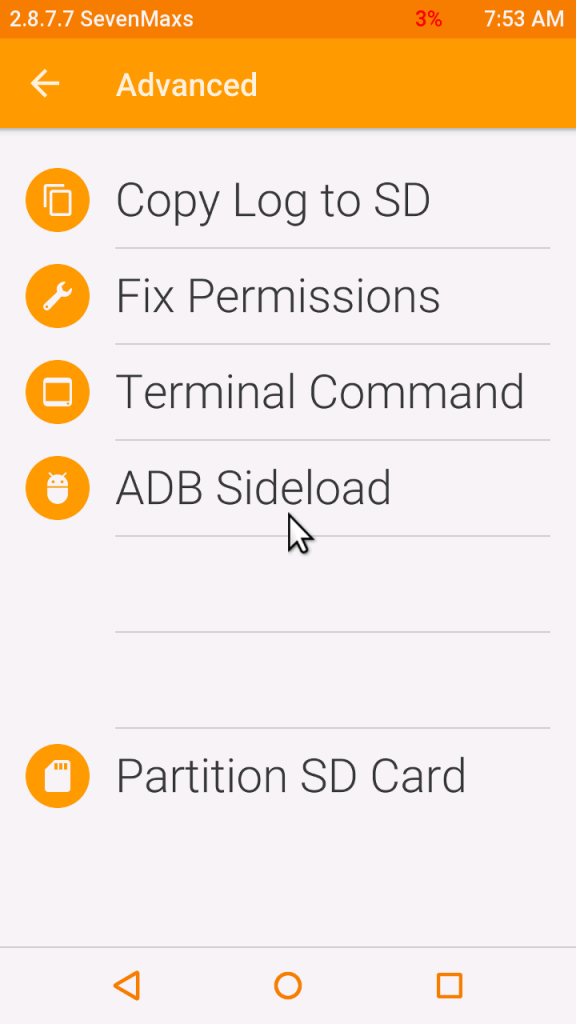
Step 5. Select the file and swipe to the right to start the flashing process.
Step 6. Next, remove your device from PC and Reboot by long pressing the power button. Alternatively, remove and reinsert the battery, then restart.
Step 7. Don’t interrupt the boot process, give some time for the first boot.
Step 8. Done! You have successfully rooted your Lenovo A6000 & A6000 Plus.
Conclusion
You have successfully installed TWRP Recovery, Rooted your Lenovo A6000 & A6000 Plus. If you are stuck at any step, you can contact us through the comment section or the contact us page.


salah cuk “fastboot boot ******.img ” its corect
Dear admin, i Follow the steps you writ for our guidline thankx u so much,but i have a problem after all 6 steps when i right adb fast recovery recovery.img ,
its show waitinng for devive,, plz kindly guid.
After Step 5: adb reboot bootloader, should we need to press power button for long time? I’m confused between Step 5 and Step 6. Please elaborate anyone.
Dear admin, i Follow the steps you writ for our guidline thankx u so much,but i have a problem after all 5 steps when i right adb fast recovery recovery.img ,
its show waitinng for devive,, plz kindly guid.
installing zip
it shows E:failed to verify whole-file signature
E: signature verification failed
use command fastboot flash recovery.img
then use fastboot boot recovery.img
After second command it’s showing “error device ‘null’ not found
how to switch off device after fastboot boot recovery.img done… i have no clue .. it’s lenovo a6000. what’s the key combination or is there any cmd command? or just i should pull off battery?
I am unable to touch the option, I think as I do not have any os install in the system. I have install TWRP recovery, But with all option a cursor is showing not I ma unable to touch the option.
i not able to get he mirror 1 file what should i do??
when i enter adb reboot bootloader than showing this error:
error: more than one device/emulator
Enter these commands
Adb kill-server
Adb start-server
It should be showing only one device now.
Problem solved.
first you shoud have to root you devicse
hi i have installed the adb boot reloader but i am getting into TeamWin Recovery in my device by pressing those button instead of that phone screen blinks and get restared ! help me out..
hi i have installed the adb boot reloader but i am getting into TeamWin Recovery in my device by pressing those button instead of that phone screen blinks and get restared ! help me out..
Hi there,
I have done install recovery in my lenovo a6000 successfully and it was shown the menu as you shown in image. but only first time then I am not able to open that recovery menu again.
Hope you help.
after running”flash boot recovery. i
mg
”
command prompt is always “waiting for device”
i have done it in my lenova a6000plus connected to windows10.
Please install USB drivers, Allow Fingerprint notification in device & make sure USB cable is working.
can u plz suggest a usb driver for windows 10
Try this command :
Fastboot flash recovery (recovery file name)
May be a command problem.
bhai recovery file name kya daale.
in win 7, i am also facing the same message any one can support us
what version android needed? is for KK 4.4.* or Lollipop 5.*.*