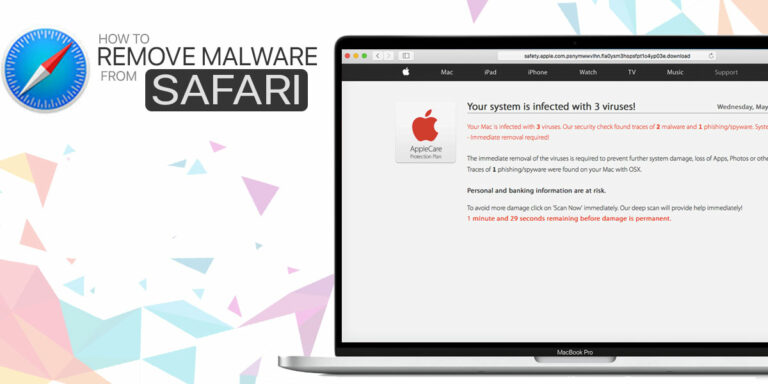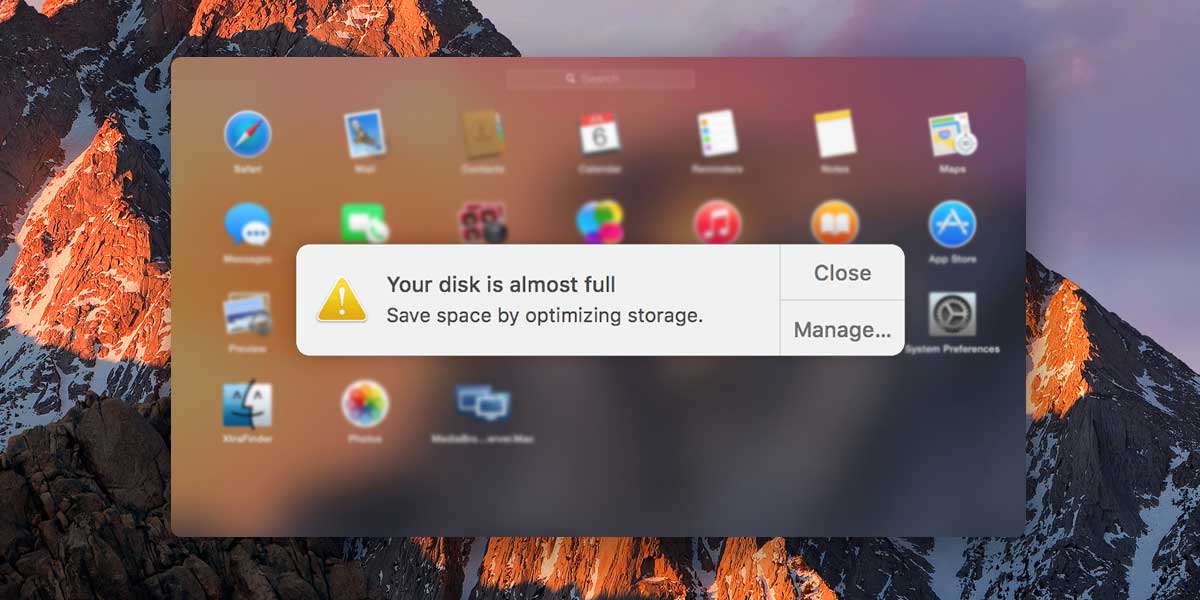
“Hard Drive Is Almost Full” is the nightmare of any Mac user. In a nutshell, it means that your most critical disk is running out of space. You’re probably here in the hope of finding ways to let your Mac breathe more freely. Don’t worry: After reading this post, you’ll know how to make more room on your Mac’s hard drive. Let’s dive in.
The disk storage full type of problem can bring about a manner of issues, ranging from sluggishness to overheating. Most of them appear because your device is incapable of adequately storing more data, and therefore has to resort to the virtual memory function, impeding other processes. That’s why it’s vital to keep at least 15% of free storage on your Mac, so it can function properly.
6 Ways to Fix Hard Drive is Almost Full Issue on Mac
1. Check your disk status
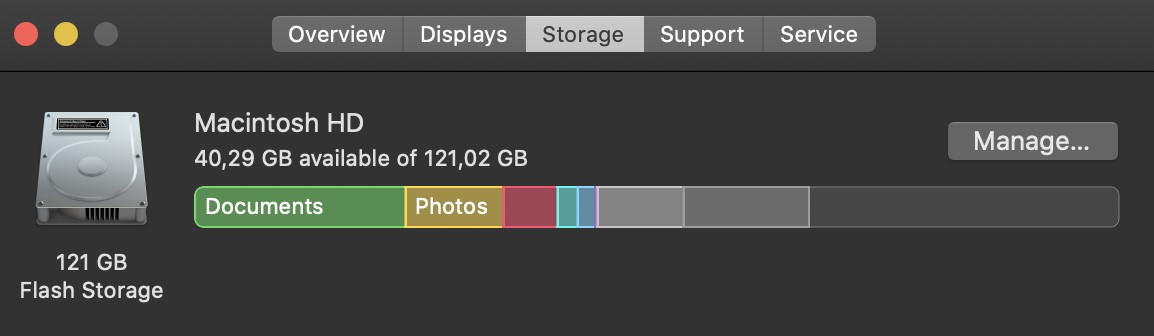
That brings us to an important question: How much space is available on your disk? Follow this path to find an answer: Open the Apple menu in the menu bar – About this Mac – Storage. In this tab, you’ll see precisely how much room you have on your disk and how your data shares it. If your disk lacks space, you should roll up your sleeves and free it up from junk. Below are the tips on how to get more space on your Mac.
2. Review downloaded files
The Downloads folder is a goldmine when it comes to freeing up storage space. It collects everything you’ve ever downloaded on your Mac, so if you’ve never paid a visit to this place, it’s time to dive into and clear it. Chances are, you’ll find some gems that have been lying around there for a while. You can find your Downloads folder by going to Finder – Downloads. When you access the folder, you can review the files, choose the ones you don’t need, and move them to the Bin. That’s all!
3. Delete Useless apps
While having many apps on your Mac can be convenient, they can fill up your storage significantly. With this in mind, consider removing unnecessary apps, especially the ones you can download from the Mac App Store again whenever you need them. You can find the list of all apps you have installed via Finder – Applications, where you can sort your apps by size and choose the ones you want to part ways with. To do that, right-click on an app and drag it to the Bin. For some apps, you may be asked to enter your username before you can delete it.
Launchpad is another place to get a bird’s eye view of the apps you have. Click and hold an apps icon until it starts to jiggle, and then click on the cross to delete it.
4. Clear the Bin
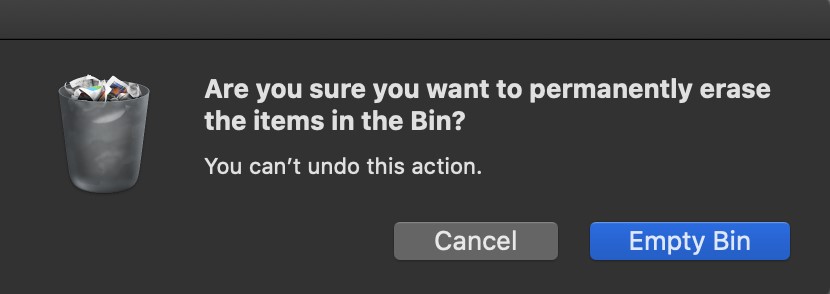
Do you use the Bin as a stronghold of your files? While it’s convenient to get unneeded files out of sight and return to them later using the Bin, your deleted files can take up a lot of storage. That’s why clearing the Bin is an essential step if you want to expand your disk space. You can remove all the files in the Bin in one fell swoop via Finder: Open Finder, go to the menu bar, and choose Empty Bin under the Finder option. Alternatively, you can right-click on the Bin and select Empty Bin. That’s how you clear your deleted files – don’t forget to do it from time to time to keep your Mac clean.
5. Purge temporary files
A major source of files is MacOS itself, as it generates a lot of temporary files. Although temporary files are aimed to speed up your Mac, at the same time, they tend to clog your storage. That’s why it’s recommended to free up the system from those files from time to time. You can find temporary files in the folders that belong to your apps. Launch Finder – Go – Go to Folders, copy the following: ~/Users/User/Library/Application Support/ and paste it in the address field. That will take you to your apps’ folders, where you can identify temporary files by “temp” in the title. You should drag and drop these files into the Bin and then clear it.
6. Use external storage
While you can remove the junk from your Mac to clear some space, it’s impossible to get rid of all files. If you have a lot of vital files you need to have at hand, consider moving them to an external hard drive. This way, you’ll keep the files you need and make some room on your Mac as well. After you connect the external storage to your Mac, access it via its icon on the desktop. Now you can move your files to their new home. Launch Finder and find the files you want to relocate. Then, select the files and extract them by right-clicking on their icons. Now you can choose the external drive in Finder and move the files into the storage.
In the end, your Mac boasts a storage management tool you can find under Apple Menu – About this Mac – Storage – Management. The options you’ll find there, such as Store in iCloud, Optimize Storage, Empty Bin Automatically, and Reduce Clutter, are self-explanatory, so feel free to use them without hesitation whenever you need to tidy up your Mac.