The Windows Error Code 0xc00000e9 is one of those blue screen of death situations that can arise due to many reasons. Although Microsoft doesn’t explain what exactly causes the error, reports from several users seem to suggest that the error code 0xc00000e9 is commonly caused due to faulty USB devices or failed hard drive.
If there’s an issue with your PC’s registry files, drivers or system file corruption, then it might also result in the 0xc00000e9 error. So, if you just booted up your PC only to be greeted with this annoying blue screen, this guide will surely help.
Here we will explain all the probable causes for the error code 0xc00000e9 in Windows 10 and give you the step-by-step troubleshooting method to get rid of this error.
What is Error Code 0XC00000E9?
| Problem Event Name | 0xc00000e9 |
| Error Message | An unexpected I/O error has occurred |
| Error Cause | System File Corruption or Hard Drive Failure |
| Common Solution | Repair System Files |
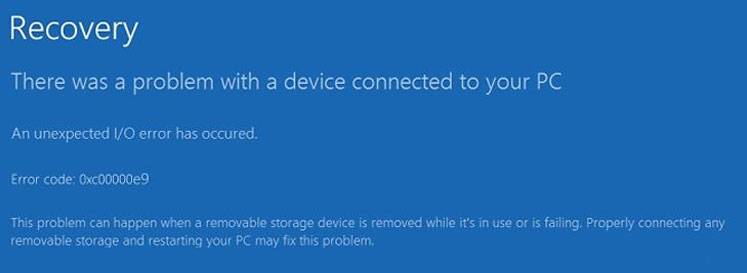
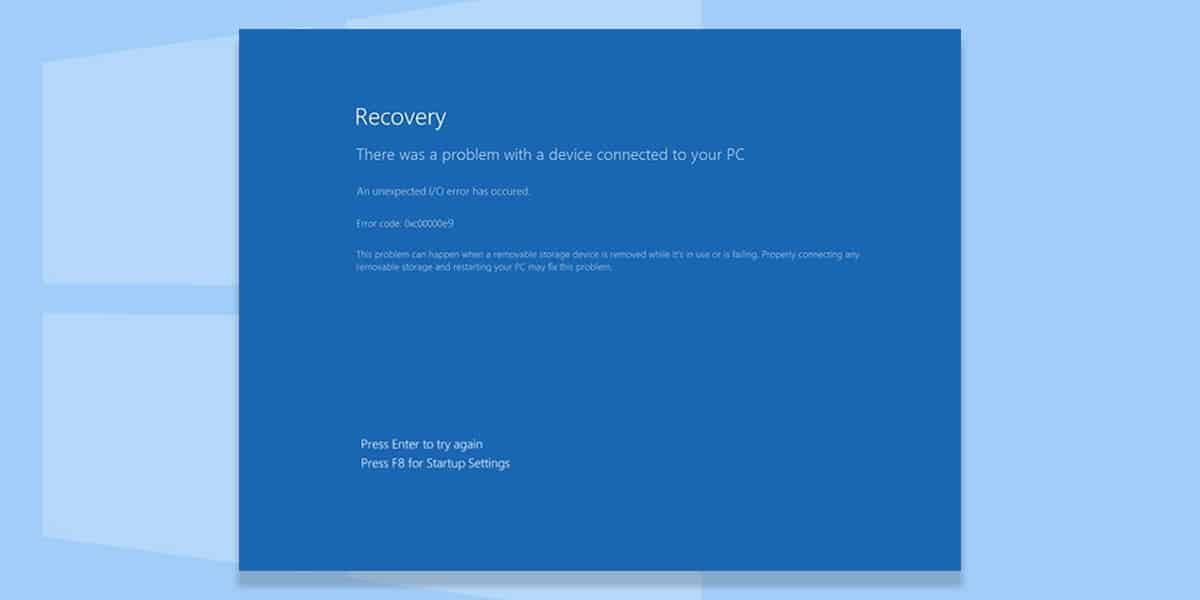
The Windows error code 0xc00000e9 is a boot error that happens whenever your computer is having trouble fetching boot files or BIOS settings. It can also occur when there is a hard drive failure, in which case you need to check your hard drive’s integrity using Advanced Boot Options.
It’s a common error reported by Windows users, which makes it even more frustrating to deal with. All you see on booting up is the blue screen showing the message “an unexpected I/O error has occurred”, and the system won’t load past that.
Luckily, there are some possible fixes you can try which seem to have worked for many users. But before you proceed to the troubleshooting procedure, it’s important to know what causes the Windows boot manager error 0xc00000e9.
Causes of 0XC00000E9 Error
Some of the most common reasons responsible for the error code 0xc00000e9 are given below:
- File System Corruption.
- Faulty I/O ports or devices.
- Malware infection of the Boot sector or Registry files.
- Hard drive failure (or Loose HDD data cable).
- Corrupt BIOS, CMOS or UEFI settings.
- Buggy Windows Updates.
How to Fix Windows Error code 0XC00000E9
Now that you are aware of what might be causing the error, it’s time to actually move on to fix that. This is a long list of solutions, and you don’t have to try them all. Simply proceed in a step-by-step way until you find the method that works for you.
1. Remove any attached hardware
As we mentioned earlier, faulty USB devices or other peripherals can be a common reason for the Windows Boot Manager error 0xc00000e9. Before trying any repair method for your operating system, disconnect all the peripherals or external hard drives and reboot your computer.
Now if the error doesn’t pop up when you boot your PC, it’s likely that one of those devices is causing the problem. To identify that, simply plug in the devices one-by-one to find out the faulty device. Then you can choose to try updating its drivers or maybe even replacing it with a new one.
2. Boot Windows in Safe Mode
Starting your PC in Safe Mode is a great way to diagnose many issues related to booting, including unwanted apps or malware that’s interfering with the boot process.
Now if your computer isn’t loading to the sign-in screen or the desktop, then you need to first enter the Windows Recovery Environment (WinRE) before entering safe mode. You can do this by following the steps below:
Step 1: Turn off your computer by holding the power button for 10 seconds.
Step 2: Power it on again. As soon as it starts, turn it off again by holding the power button.
Step 3: Repeat the above steps one more time and allow your PC to restart. It will enter WinRE.
Step 4: From the “Choose an option” screen, click on Troubleshoot > Advanced options > Startup Settings > Restart.
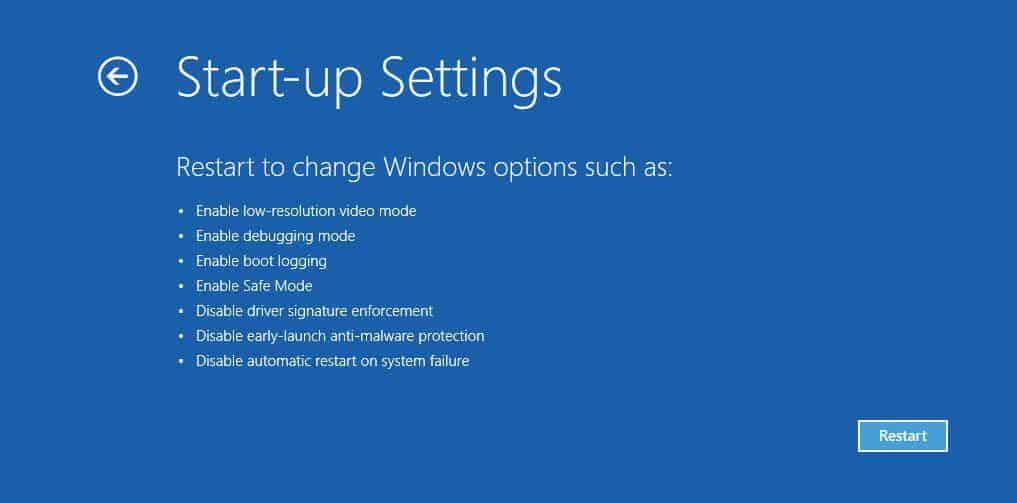
Step 5: Once your system reboots, select option 5 or press F5 to enter Safe mode with networking.
Once your PC is in safe mode, you can try various solutions below.
Update Drivers
You need make sure all the device drivers are up to date so that your OS can communicate with all the external devices. While in the safe mode, perform the following steps:
Step 1: Press Windows Key + X and select Device Manager.
Step 2: Click on Disk drivers to expand it.
Step 3: For each hard drive driver on this list, right-click and select Update driver.
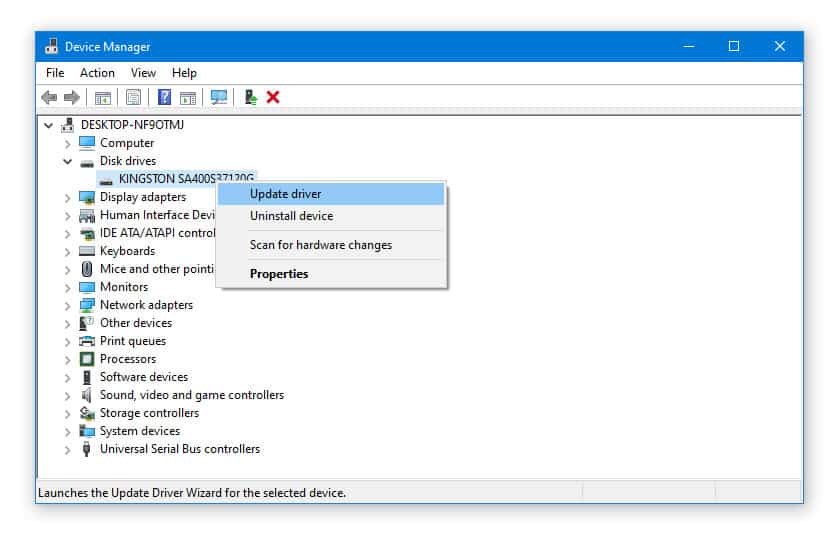
Step 4: Select Search automatically for updated driver software in the pop-up window.
Run SFC scan
If the 0xc00000e9 error is caused due to corrupt or missing system files, then running a full system scan can identify and repair them. SFC (System File Checker) is a Windows tool that can replace damaged or missing files with correct system files.
Step 1: Enter WinRE as described above.
Step 2: Select Troubleshoot > Advanced options > Command Prompt.
Or in Windows, search command prompt from the bottom left and Run it as Admin.
Step 3: In the command prompt window, type sfc/scannow and press ENTER.
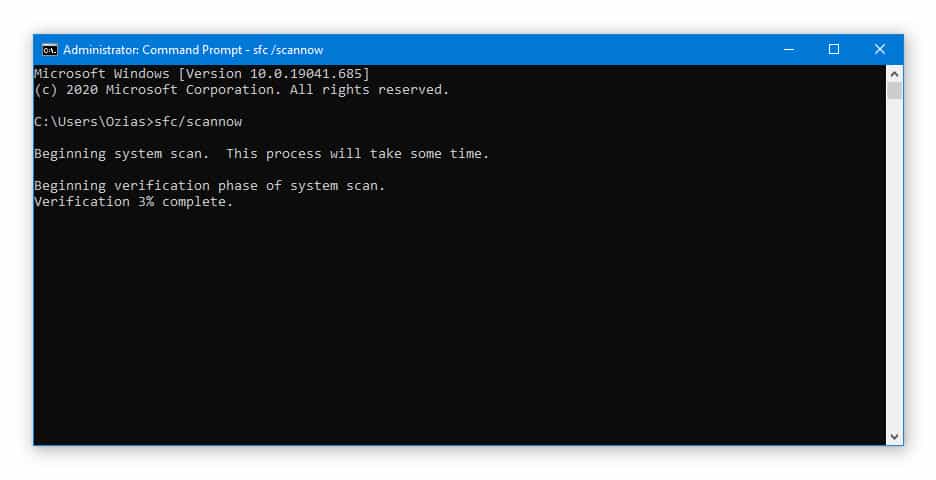
Step 4: Wait for the process to finish, and then reboot your computer.
Run DISM
If the SFC doesn’t seem to fix the problem, you can also try running DISM (Deployment Image Servicing and Management), which will restore system files.
Step 1: To run DISM, open the command prompt and type the following commands one-by-one.
exe /Online /Cleanup-image /Scanhealth
exe /Online /Cleanup-image /Restorehealth
Step 2: Wait for the scan to complete, and then restart your device.
This will likely resolve the Windows error code 0xc00000e9. If it doesn’t then there is a problem with your BIOS settings or Boot configuration files.
3. Check BIOS Settings
You need to check your BIOS settings and see whether its mode is set to UEFI or Legacy. In addition to that, you also need to check that your hard drive is in AHCI mode, not IDE.
If you have previously changed these modes without reinstalling Windows, you may face the Windows boot manager error 0xc00000e9, as changing modes from IDE to AHCI or vice-versa requires a full reinstallation of Windows.
In your BIOS settings, you can switch these modes to their defaults, as well as check if the boot drive order is appropriately configured. Here are the steps to do this:
Step 1: Reboot your computer.
Step 2: As soon as it shows signs of booting (manufacturer logo etc.), press the key to enter the BIOS menu. This is usually the F2, F12, ESC or Delete key (Refer to your PC manufacturer or user manual).
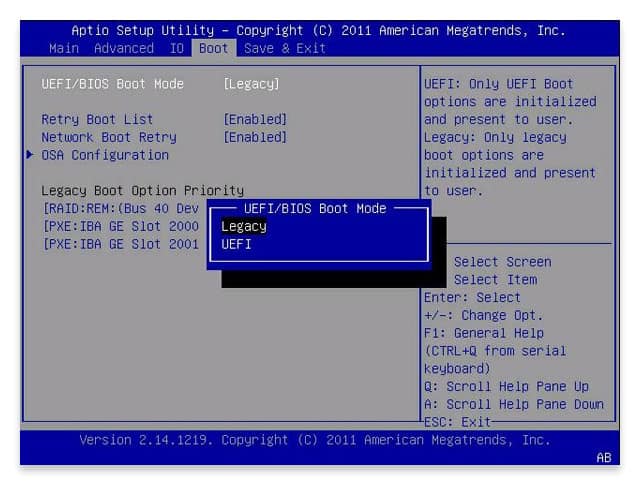
Step 3: In the BIOS Setup Utility screen, go to the Boot tab.
Step 4: In the Boot options, you can change the UEFI/BIOS Boot mode to either UEFI or Legacy BIOS. You can also change the order of boot drive preferences and move your primary Windows installation drive to the top.
Step 5: Save your changes and exit by pressing F10 key and restart your PC.
4. Use Windows Startup Repair
If you can’t sign-in to Windows, you can try Startup Repair. It’s a built-in utility which can repair corrupt registry files, system files and issues with boot configuration data.
You need to have a Windows installation media like a bootable USB or DVD to perform startup repair, and then do the following:
Step 1: Insert the Windows Installation USB/DVD and restart your computer.
Step 2: You’ll be prompted by the message “Press any key to boot from CD or DVD”. Press any key to continue.
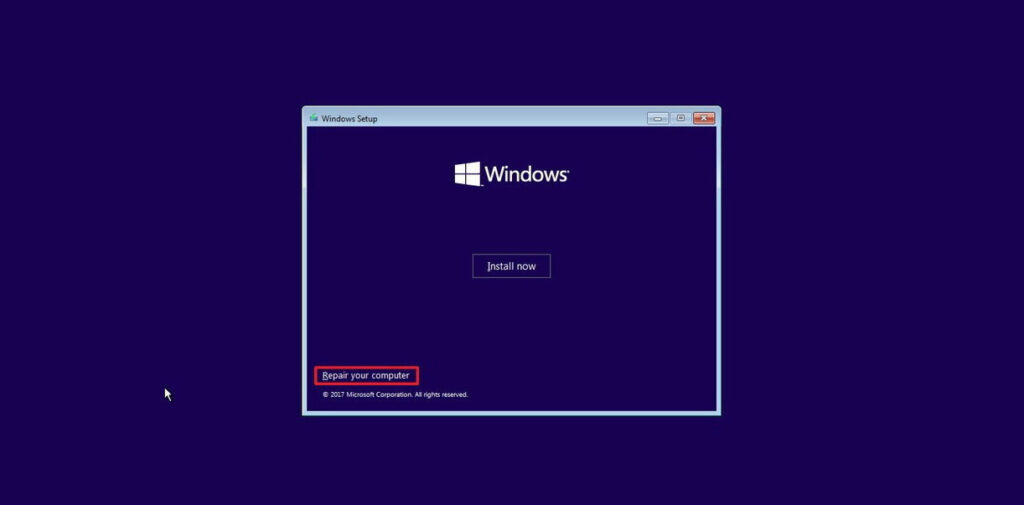
Step 3: In the Windows Setup menu, select the keyboard, language, time and click Next.
Step 4: Click on Repair your computer on the bottom-left corner of the screen.
Step 5: Go to Troubleshoot > Startup Repair.

Step 6: Startup Repair will now scan your system for errors and attempt repairs.
Step 7: Wait for it to complete and reboot your computer to see if the error is fixed.
5. Update Volume boot code
The Volume boot code is used to load the files and software from your Windows installation drive into the BOOTMGR, which then loads the operating system.
It’s easy to see that if it’s faulty or is not properly configured with the BOOTMGR, it can cause serious problems. A corrupt volume boot code can result in various errors like the hal.dll and 0xc00000e9.
Luckily, updating and fixing the volume boot code is easier than it might seem. We’ll use the “bootsect” command available in the command prompt accessed via Advanced Startup Options.
Step 1: Boot from a Windows installation USB/DVD and access Advanced Startup Options.
Step 2: Open Command Prompt.
Step 3: In the prompt window, type the following command and then hit ENTER:
bootsect /nt60 sys
This command will update volume boot code on your primary drive partition where Windows is installed.
Step 4: Wait for the process to finish and after that you should see something like this appear in the command prompt screen:
C: (\\?\Volume{37a450c8-2331-11e0-9019-806e6f6e6963})
Successfully updated NTFS filesystem bootcode.
Bootcode was successfully updated on all targeted volumes.
Step 5: Close the command prompt and remove the Windows installation media from your computer.
Step 6: From the Advanced Startup Options screen, Select Continue.
Step 7: Your Windows device will boot normally now.
6. Repair Master Boot Record
Sometimes updating the volume boot code is not enough. In those cases, you need to repair and update the master boot record. It’s similar to the volume boot code, and is the first sector in your hard drive accessed during the booting process.
To repair and fix the integrity of the MBR sector, you can use an automated tool or simply follow the steps below using the bootrec.exe utility.
Step 1: Boot from Windows installation DVD/USB.
Step 2: In the Windows Setup screen, click on Repair your computer.
Step 3: Select Troubleshoot > Command Prompt.
Step 4: Type the following commands one-by-one in the prompt window, and hit ENTER after each one.
bootrec /FixMbr
bootrec /FixBoot
bootrec /ScanOs
bootrec /RebuildBcd
Step 5: Remove the installation media from your PC.
Step 6: Type Exit in the command prompt and press ENTER.
Step 7: Now reboot your computer to see if the error code 0xc00000e9 is fixed.
7. Reinstall Windows
If you have tried everything we discussed above, but still find yourself out of luck, then you probably want to do a clean installation of Windows. Make sure you backup ALL of your data before proceeding.
This should be the last resort and will overwrite all your existing data and system files and restore them to their defaults. A clean install is performed in two steps: removing the existing Windows installation and installing a new OS or the existing one afresh.
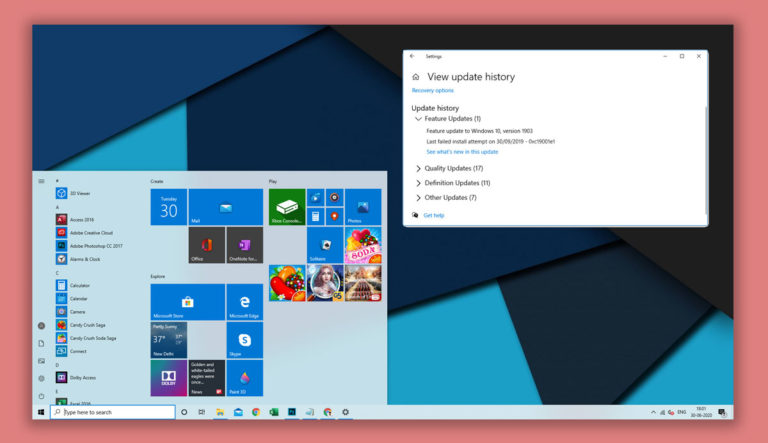
On a Windows 10 PC, open Settings > Update & Security, and go to the Recovery tab. Then under the “Reset this PC” section, click on Get started. Now in order to do a clean install, you have to select Remove everything. This will wipe all your data and settings and restore everything to its factory defaults.
Conclusion
We hope that one of the above methods worked out for you and you can once again log in to your PC without any issues. If any of the software troubleshooting doesn’t work, then reinstalling the Windows becomes the only option left with you.
If the Windows error code 0xc00000e9 appears even after a clean install, then your HDD/SSD is probably broken and you would need to replace it with a new one.
So, that was it from our side. If you need help with one or more solutions we discussed or have anything else to ask, you can drop us a comment below.