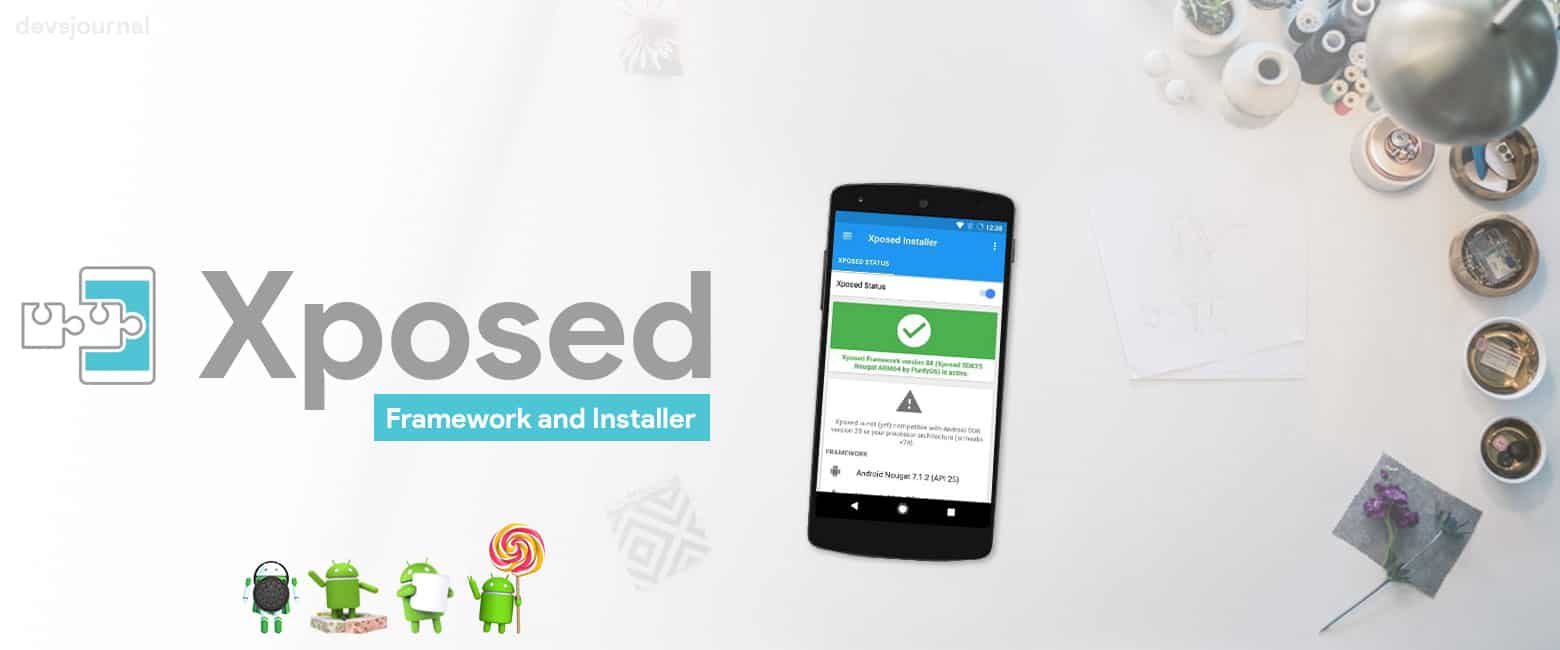
Xposed is one of the most beloved tools an Android enthusiast can have, as it allows for all sorts of modifications to extend the functionality of our favorite devices. If you don’t like getting your hands dirty by compiling & decompiling different System files, then Xposed Installer is the perfect App for you. You can perform all the changes to your choice in just few clicks. You’ll can Download Xposed Framework and Installer for Android Q, Lollipop, Marshmallow, Nougat and Oreo from here.
Xposed is an essential app required to run various different Xposed Modules to add extra functionality to your Android device such as Changing Status bar Icons like Xperia, iOS, Greenify or any other.
Few users didn’t update their device to Android Oreo as Xposed Framework was not available for Android O. It’s been a while now, since Xposed Installer is available for Android O. Without wasting much time, lets get started. After Android Kitkat, one cannot install Xposed directly in their device. Due to too many restrictions & updates from Android Lollipop, Xposed was installed in parts. First we need to flash the Framework which hooks into the system & then the installer that uses the Framework to change system files.
Prerequisites:
- An Android device with bootloader unlocked and TWRP custom recovery
- Your device must be rooted.
- Check which Android version your device is currently running so that you know which zip to download from the below list of Xposed downloads.
- If you’re running Android ICS or below, you don’t need to flash the Framework zip but you need to have a rooted device (Follow this), just download the Xposed Installer, install it as normal APK & grant root access.
- Backup all your data & Apps before flashing the Xposed framework file to avoid data in case anything goes wrong or your device doesn’t boot up. You backup your Android device, you can use FlashFire or Titanium backup.
Xposed Framework and Xposed Installer
Download Xposed for Android R (11.0)

| Platform | Download |
|---|---|
| Magisk – edXposed | Android R 11.0 |
| Magisk – reruCore | Android R 11.0 |
| EdXposed Installer APK | Android R 11.0 |
Download Xposed for Android Q (10.0)

| Platform | Download |
|---|---|
| Magisk – edXposed | Android Q 10.0 |
| Magisk – reruCore | Android Q 10.0 |
| EdXposed Installer APK | Android Q 10.0 |
Download Xposed for Android Pie (9.0)

| Platform | Download |
|---|---|
| Magisk – edXposed | Android Pie 9.0 |
| Magisk – reruCore | Android Pie 9.0 |
| EdXposed Installer APK | Android Pie 9.0 |
Download Xposed for Android Oreo (8.0/8.1)

| Platform | Download |
|---|---|
| ARM (32-bit) | Oreo 8.0 | Oreo 8.1 |
| ARM64 (64-bit) | Oreo 8.0 | Oreo 8.1 |
| x86 (Intel devices) | Oreo 8.0 | Oreo 8.1 |
Download Xposed for Android Nougat (7.0/7.1)

| Platform | Download |
|---|---|
| ARM (32-bit) | Nougat 7.0 | Nougat 7.1 |
| ARM64 (64-bit) | Nougat 7.0 | Nougat 7.1 |
| x86 (Intel devices) | Nougat 7.0 | Nougat 7.1 |
Download Xposed for Android Marshmallow (6.0/6.0.1)

| Platform | Download |
|---|---|
| ARM (32-bit) | Marshmallow 6.0 & 6.0.1 |
| ARM64 (64-bit) | Marshmallow 6.0 & 6.0.1 |
| x86 (Intel devices) | Marshmallow 6.0 & 6.0.1 |
Download Xposed for Android Lollipop (5.0/5.1)

| Platform | Download |
|---|---|
| ARM (32-bit) | Lollipop 5.0 | Lollipop 5.1 |
| ARM64 (64-bit) | Lollipop 5.0 | Lollipop 5.1 |
| x86 (Intel devices) | Lollipop 5.0 | Lollipop 5.1 |
Download Xposed Installer APK
Xposed APK acts a middle man between Xposed Framework & Xposed modules. It allows the modules to makes changes to the system files using the Xposed framework.
Download Xposed Framework Uninstaller
If your device doesn’t boot after Installing Xposed framework, Install this framework remover zip & everything will be fine.
- Xposed Uninstaller: Download
Note: DevsJournal won’t be responsible for anything happening to your device during this process. You will be solely responsible for anything happening to your device as you have decided to make this modifications to your device. If you are unaware about Rooting and customising system files, please do some research. Read: What is Rooting, Recoveries & Custom ROMs.
Features of Xposed
- No need to modify any APKs. This means:
- No need to decompile, change things. It will work for odexed and deodexed ROMs.
- Your mod is not bound to a specific version of the ROM. Unless there is a major change in the methods called for a certain functionality, your mod will continue to work even when you upgrade your ROM. Many modules work for a wide range of ROMs from different vendors.
- Multiple mods can be installed at the same time, even if they modify the same app. So you can use these battery icons and those quick toggles. Even hooking the same method twice is possible. Of course, this only works properly if the mods are not trying to do incompatible things.
- It does its magic at runtime. That means that developers can implement settings and do changes based on them (instead of statically forcing a certain behavior). Or you can have some extra logic for certain ROMs, without building different modversions.
- It can be disabled easily without having to reflash.
- It’s open source and free (as in beer and in speech).
- There is a repository with many popular modules.
How to install Xposed on Android (L/M/N/O/P/Q/R)
Step 1. Download the given files at from above & transfer it in your Internal memory/SD card.
Step 2. Now Switch off your device. Press & hold the necessary key combinations (Mostly it is Vol Up+Power button or Vol Up+Vol Down+Power) for devices having hardware keys, the key combination is mostly Vol up+home+Power button to boot into Recovery mode.
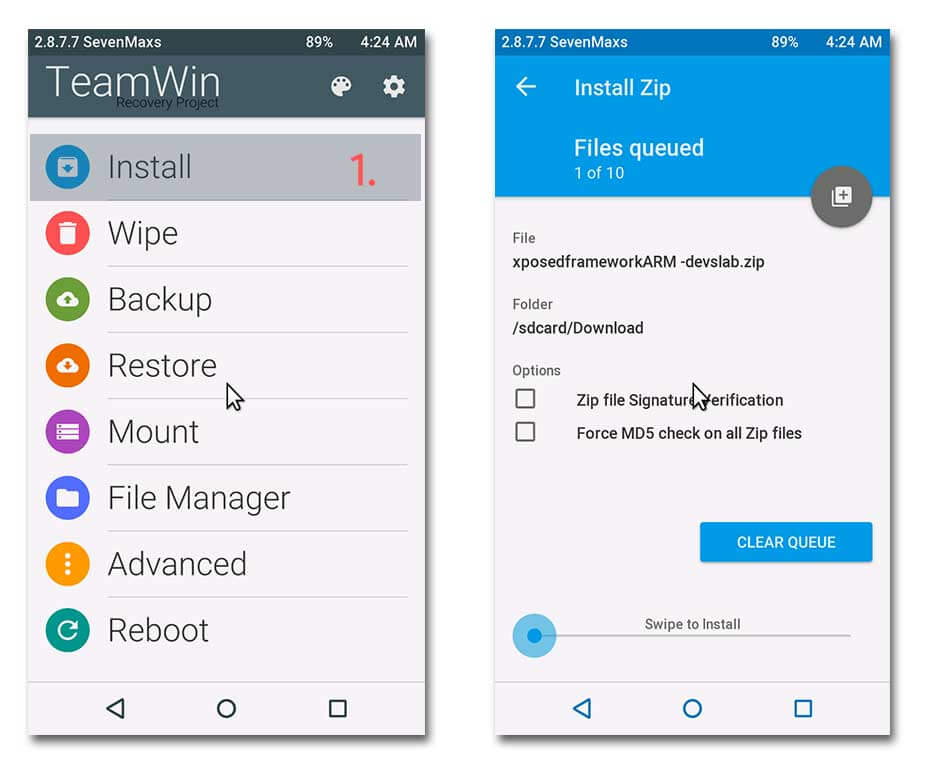
Step 3. After booting into recovery mode, Goto Install zip from SDcard (in CWM) or Install (in TWRP) & locate the downloaded Xposed framework zip that you transferred in your device.
Step 4. Select the zip & Install. Wait for the Installation to complete. Now, Wipe Dalvik & System cache. Reboot your device.
Step 5. You will now have to install the Xposed Installer APK on your Android device. Using a file manager, navigate to the location where you had saved the APK and install it. If you get an error saying “Unknown installations blocked” similar to below image, Just Goto Settings App > Security > Enable Unknown sources. Now install the Xposed app.

Step 6. To check if everything is done perfectly, launch Xposed App & goto Framework. It would show app_process and Xposedbridge with some no. below Active.
How to install Xposed Modules on Android
Once Xposed hooks into your System, you are left to decide which feature you want in your Android device. Each Xposed modules comes with different features to offer. Xposed Framework doesn’t give any features, it’s just a bridge between System and modules.
Xposed uses modules, small applications that plug directly into the Android operating system and give you unprecedented control over the look and feel of your phone. Therefore, any changes made can be removed easily by simply disabling the modules and rebooting.
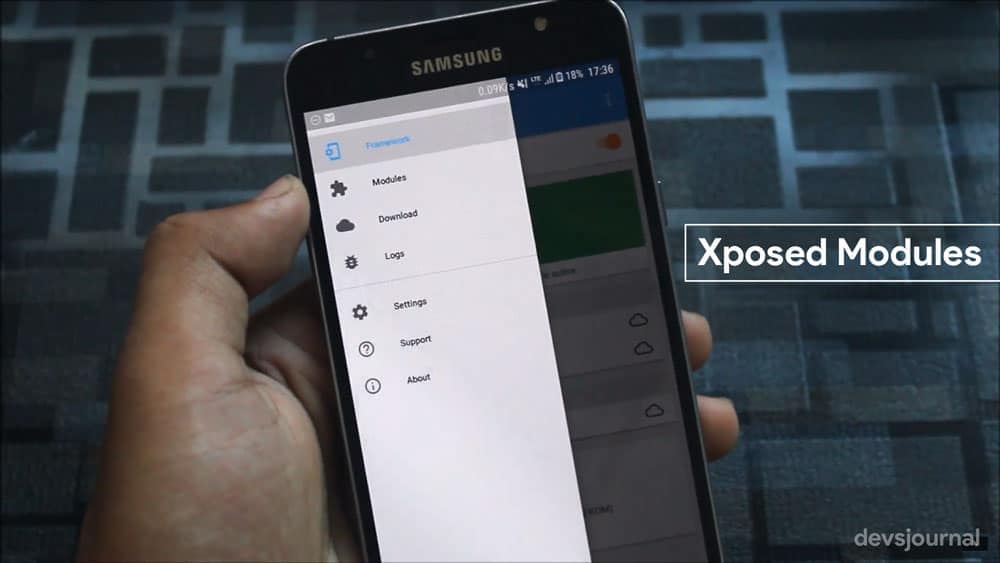
Xposed modules can be downloaded either from the Xposed App itself or via APK file.
Method 1: Installing Xposed modules via Xposed App
Step 1. Open the Xposed Installer app and tap on “Downloads” option from the menu.
Step 2. Search for the required module of you can scroll through the modules list.
Step 3. Once you have found the required module, tap on the module name. Swipe to Versions tab and click on Download of the latest version available of the module.
Step 4. It will show the app permissions and the features of the module, confirm the installation process by pressing the install button.
Step 5. Once the installation is completed, you can tap on the open option to open the Modules app right away. After the installation, you need to enable the module.
Method 2: Installing Xposed module via APK
Step 1. Download the Xposed module.apk from the repository or from any source and install it normally.
Step 2. Launch the Xposed Installer and go to the “Modules” section (you will also get there if you click on the notification warning you that the module is not enabled yet)
Step 3. Now you need to enable the module, for that follow the below step.
How to enable/disable Xposed Modules
Step 1. Open the Xposed App and click on “Modules” tab. If you have installed the module, you’ll find the list of all the installed modules on your phone.
Step 2. You can toggle the app to ON mode to enable the module and Off mode to disable the module. After enabling/disabling any module, you need to restart your device.
Xposed FAQs
Thanks to XDA’s rovo89 for his awesome work in Xposed Android devices. If you found any issues while installing the zip file. You can ask us in the comment section below. If after flashing the zip file, your device doesn’t boot, Install Xposed framework remover zip from above link. If after installing zip, Xposed is not working, Install different zip file from (ARM,ARM64 & x86).



Thanks for the guide, I will try it as soon as possible. But first I have a question: I am using a Samsung Tablet 2 10.1 with CM 13 and custom recovery. Should I use the a samsung specific xposed zip or the one given here?
Given here. As you have changed the OS to CM, you can consider your device as stock Android device like Nexus devices.
Makes sense. But although I did everything as described, it still says my device was not supported after opening the afterwards installed apk. I flashed the zip through the external SD BTW, did this make any difference?
May I know which zip file you have flashed?
Sure, I took xposed-v85-sdk23-arm zipped as it is, since it was recommended as the most common one.
Does this work for Asus Zenfone 2 Laser ZE550KL marshmallow upgrade ??
Please tell… if possible please share a method for rooting ze550kl marshmallow too !!
thanks in advance, & keep up the good work…
We’ll soon share a complete procedure. Btw yeah, this will work in any Marshmallow device.
Nexus 6 running stock 6.0.1, rooted with later TWRP. Which version should flash? I’ve tried 3 different ones, but got an error each time. Thanks in advance.
6.0.1 64-bit
Is the error saying “short write”? If so, it’s because you do not have enough space in your system partition. Marshmallow uses nearly all of it. You have to remove some unused apps from the system partition and free up at least 10 MB.
I have a nexus 6 device on CM13.0 20160402 nightly build. I downloaded v85 arm (32bit). tried above steps using TWRP. When I launched xposed app, and entered the framework menu, it says – not compatible with SDK 23 or your processor architecture armeabiv7a, and below that libdvm.so not found.
so I uninstalled the app, as well as uninstalled the framework and tried a version 79 arm (32bit). still ran into same issues.
I even tried a 64bit installation, got a error that its compatible with my platform (device is 32bit), so I couldn’t flash it.
Nexus 6 is a 32-bit device. Some MM devices are creating issues with Xposed.
Which gapps package should I download for Cm 13 note 3 please help me
ARM>6.0>Pico/Micro/Mini…
Xposed Installer says: Xposed is not supported for android sdk version 23 or my processor architecture is not (armeabi-v7a) compatible.
I also tried to install/flash the framework manually for android SDK 23 Manually (http://dl-xda.xposed.info/framework/sdk23/arm/)
Device:
Sony Xperia Z3 D6603
Root on MM 6.0.1
Xposed has issues with Sony devices.
after installing on my LG G3 , turning on my phone says the message ” ui unfortunately the system has stopped ” because I happen?
Flash the uninstaller zip.
LG Stylo Metro. MM 6.01. Under framework in installer states Xposed is not supported for android sdk version 23 or my processor architecture is not (armeabi-v7a) compatible.
Firmware itself seemed to flash without issue.
Am i beat?
Will this work for Samsung Galaxy S7 on 6.0.1 ( SM-G935FD)?
Xposed for Galaxy S7 is here: Xposed for Galaxy S7
It didn’t work for me i have a Samsung Note 3 with custom rom 6.0.1 ? Any help ? I flashed the zip but when i start the phone i don’t have the xposed app installed
Mate, after flashing the Xposed framework. You need to install Xposed APK after switching on your device. Now you’ll find the App. Have a good day tweaking! 🙂
It says it doesn’t support it. I’m using 6.0.1 and xposed app doesn’t say it worked. Are there any other compatible versions? Using S5 installing the 32bit arm
Hi, im not quite sure if i get this right, so my device runs samsung 4.4.2, so i dont have to install this right https://devsjournal.com/download-install-xposed-for-samsung-devices.html because its says lollipop/marshmallow only. and so i can just follow the instructions here right? i dont want to download the wrong thing and mess up my device :<
Can this Xposed work on Galaxy S3 i9300 on Custom Rom CM 13?
Yup, it will work perfectly!
which installer should i use for my moto x play???
i think i will try hard reset