If you are a Windows 11 user, Microsoft Edge is technically your default web browser, but if you prefer Chrome over Edge, you are not the only one as Chrome has 60% of the total browser market share on the Internet. Despite Edge being built on the same Chromium engine, Chrome offers a seamless experience with Google services.
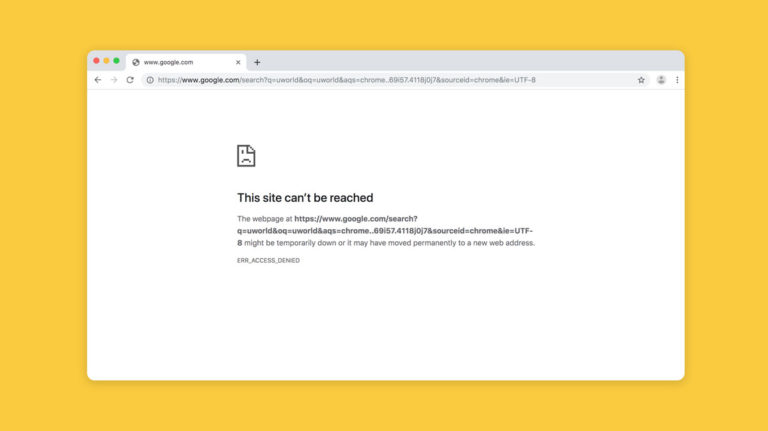
So, in spite of being a clear winner, why is Chrome so slow? In this article, we will be discussing the 8 ways you can fix your slow Chrome issues in Windows 11. We will first understand the reasons underlying the problem, and then promptly move on to the fixes.
Let’s begin at the basics.
Why is Google Chrome so Slow on Windows 11?
As for why Chrome is slow on Windows 11, there are a multitude of reasons that can be causing it. However, here, we will go through the most prominent few.
First and foremost, your Chrome could be slowing down due to too many tabs being opened simultaneously, holding up the temp files or cache in its memory for a prolonged period. Storing one too many browsing histories will inevitably slow down your browser.
If there’s a slow loading issue with one of your own sites, you can opt for any free website hosting and get an SSL protection for it. Accessing sites with no SSL certificate can also slow Chrome in Windows 11. Using sites with no SSL certificate will hamper the browser speed and counter-productively put your security at risk.
Furthermore, if you are running an outdated browser, you might be experiencing a slow Chrome in Windows 11. The reason behind that is the lack of the updates, patches, and fixes. Chrome should be automatically updating itself, but if for some reason, it’s not, you might be running into a multitude of issues.
Also, often noticed reason is that Google Chrome uses excessive resource usage. Chrome makes use of several threads to amp up your browsing experience, and this naturally takes up ample resources. If you happen to use way too many add-ons or/and extensions, keep too many tabs open simultaneously, or even have a large browser history, you will be running into problems.
8 Ways to Fix Slow Chrome in Windows 11
Now that we have established the reasons as to why Chrome is slow, it’s time to move to the fixes for it. Before we start, make sure you have a stable internet connection while using Chrome, and try switching to a different one, just to be sure. Also, an unspoken rule is to restart Chrome as well as your device once before attempting more complicated fixes.
That being said, let’s look at the 8 ways to fix slow Chrome issues in Windows 11:
1. Disable Killer Prioritization Engine
Sometimes the Killer software could be making your browser slow. Simply disabling it either from Startup or the Killer Control Center can make a world of difference. It sounds more complicated than it is, and it is absolutely beginner-friendly.
Follow the steps and you should be able to fix the slow Chrome issues in Windows 11 by yourself:
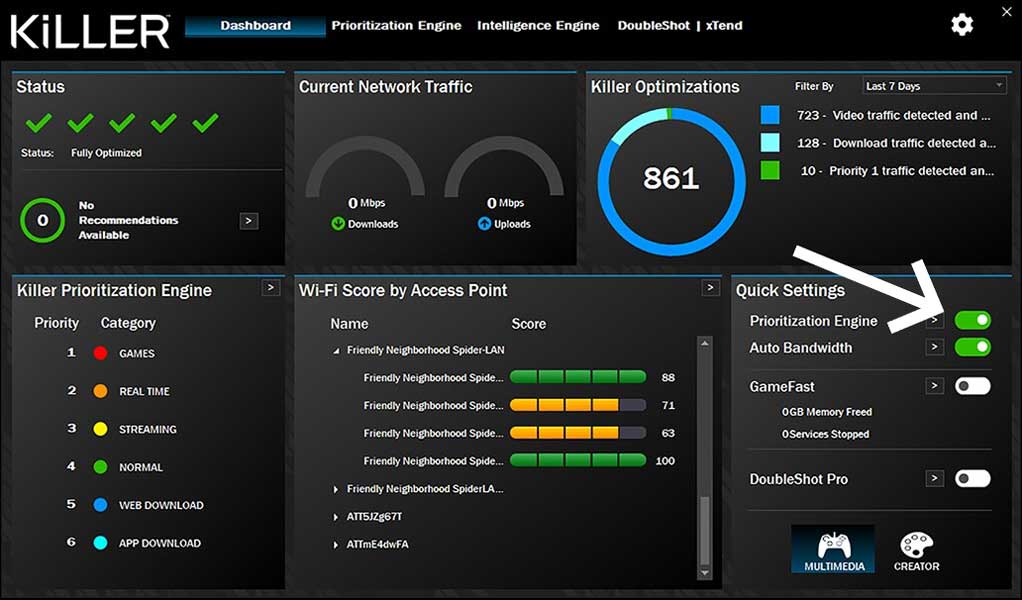
- Open Killer Control Center.
- Under Settings, Disable Killer Prioritization Engine
If you want to disable it from Startup, here’s how to do that:
- Right-click on the Windows icon on the taskbar.
- Click on Task Manager, and select Startup.
- Scroll down and locate the Killer Control Center, and right-click on it to find the Disable option.
It’s fairly easy to navigate, and if it does work, you will save a lot of time and effort. However, in case it doesn’t, take a look at the next fix.
2. Disable Preload Pages on Google Chrome
It’s a fact well known that Chrome, much like other web browsers, uses cookies to improve your browsing experience and tailor it to your individual preferences. One such result of that prediction is pre-loaded pages that Chrome shows right after startup, to make your work easier. It tries to draw your attention towards sites you show tendencies of visiting.
Disabling preloaded pages on Chrome can make a great difference in speed. Here’s how to disable it:
- Launch Google Chrome on your computer.
- Tap on the three-dot menu at the top, and select Settings.
- Navigate to Security and Privacy.
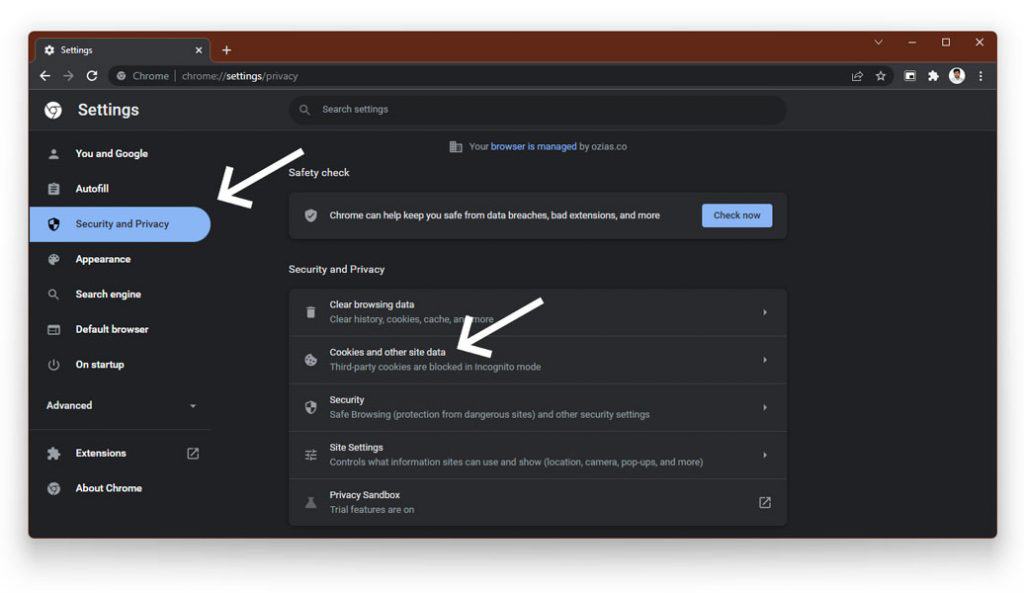
- Now, under ‘Cookies and other site data’ section, disable the ‘Preload pages for faster browsing and searching’ option.
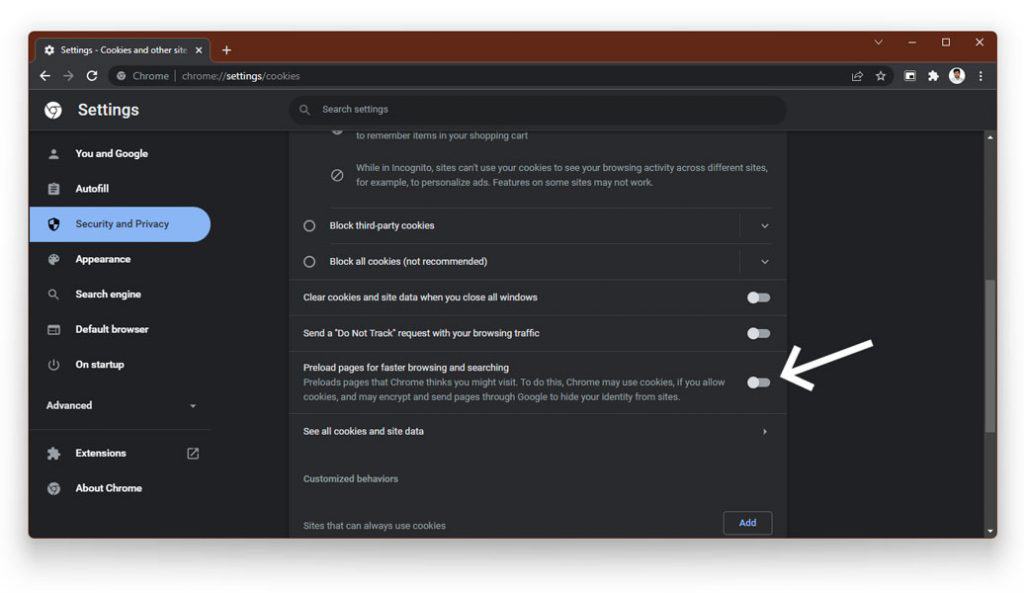
- Close Chrome and reopen it.
Voila, that should help you overcome the slow Chrome issues in Windows 11. If that does not help however, we have just begun.
Also read: How to Clear Cache & Cookies of Single Site in Chrome, Firefox & IE
3. Use Task Manager on Google Chrome
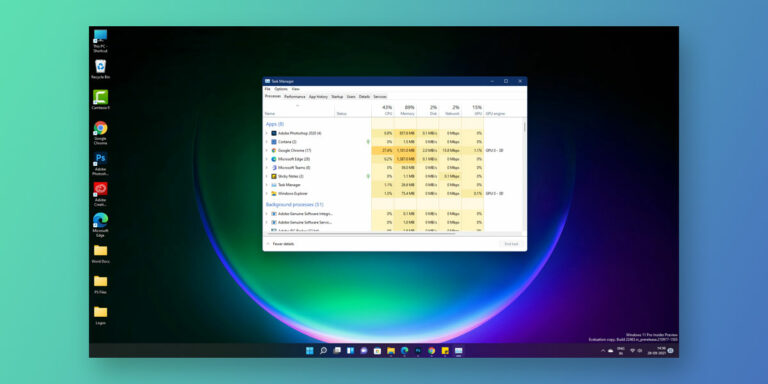
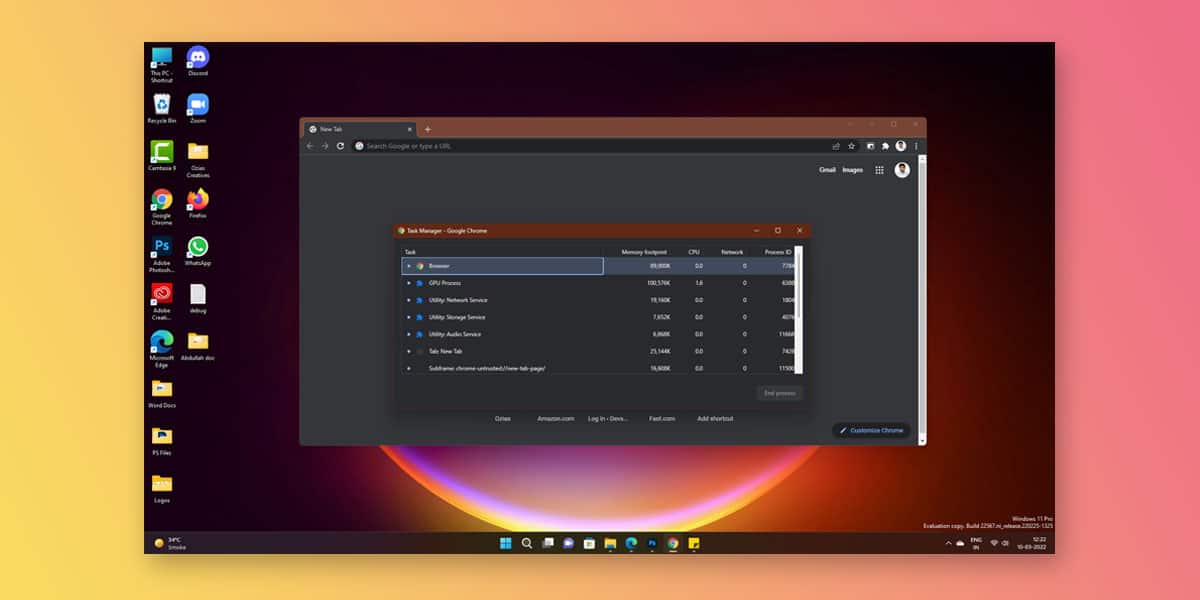
When in use, Chrome starts running several simultaneous processes such as new tabs, extensions, preload pages, and similar other ones in the background. The more you use it, CPU usage skyrockets. It can be difficult to point out the real factor behind the excessive CPU usage. This is where Chrome’s built-in Task Manager plays a role.
Here’s how to do it:
- Keep Chrome open and press on Shift + Esc to open Task Manager.
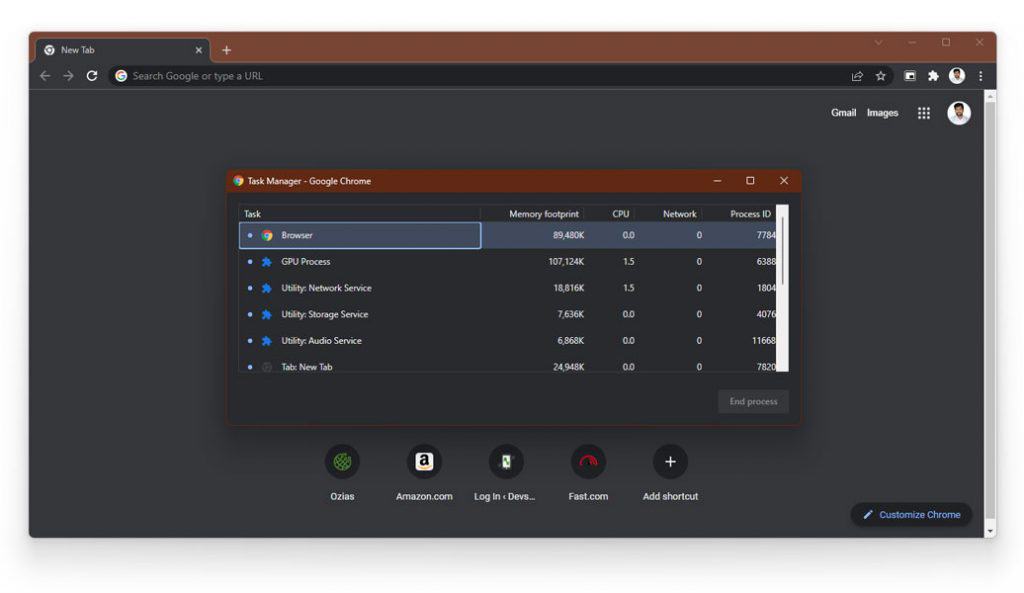
- Check the Memory footprint and CPU usage for several Chrome processes.
- If any particular task(s) seems to cause unnecessary high CPU usage, click on it and choose End Process at the bottom.
This should get rid of the slow Chrome issues in Windows 11. If you are still struggling with it, check out the rest of the methods.
4. Clear Browsing Data
Sometimes, clearing the browsing data seems to be the best option to tackle a slow Chrome in Windows 11. If you haven’t cleared the browsing data for a prolonged time period, it could lead to a relatively slower Chrome experience. To resolve the situation, simply clear the browsing data, and you’ll be good to go.
Here’s how to do it:
- Locate and click on the 3 vertical-lined dots at the top right corner.
- Go to Settings and Tap on Security and Privacy from the left pane.
- Select Clear Browsing Data.
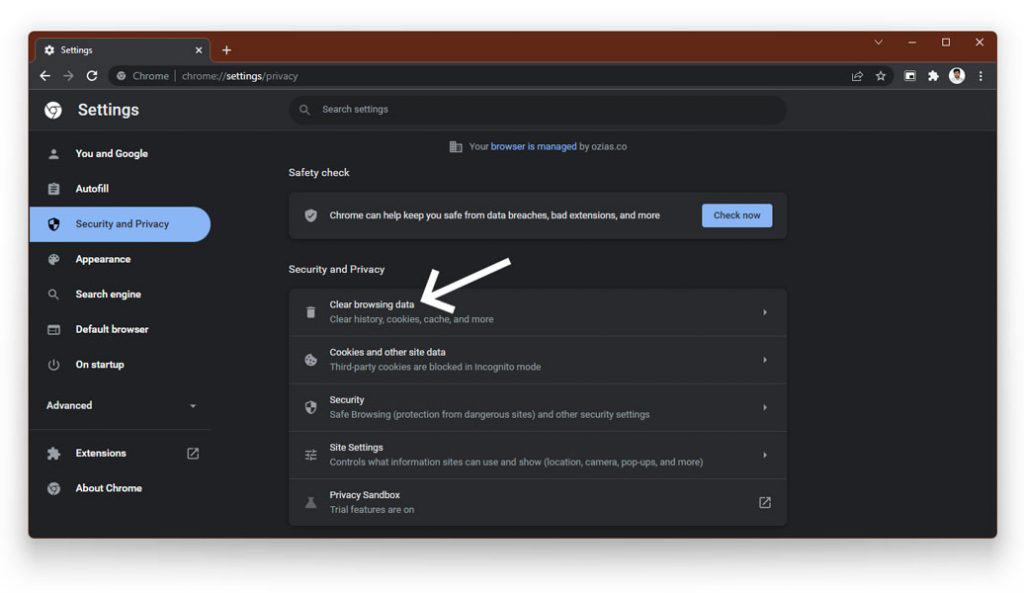
- Go to the Time range tab, and click on All time from the available options.
- Prioritize whichever kind of data you want to remove (all, if possible) and choose Clear Data.
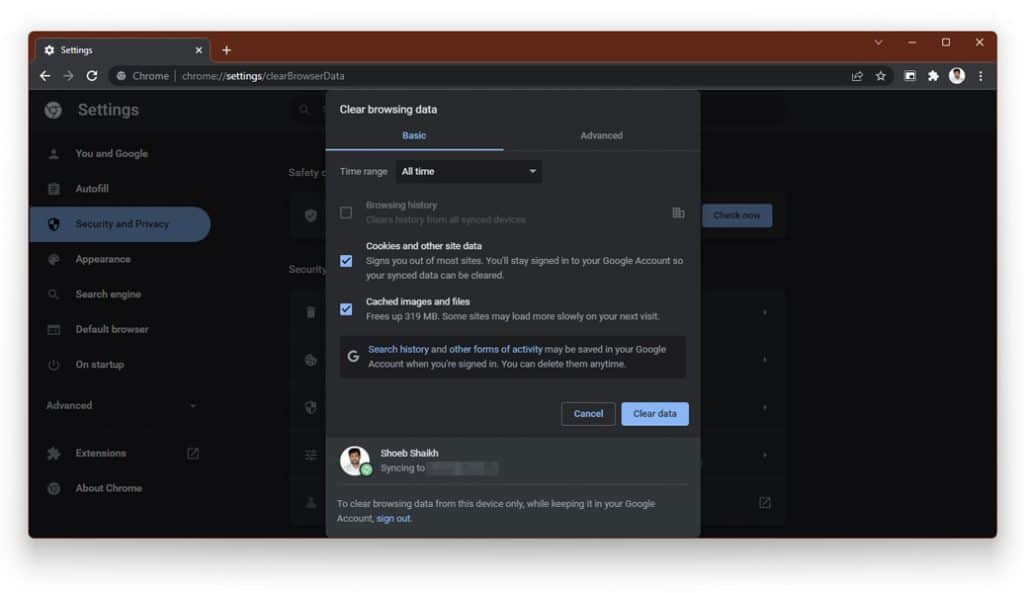
- Lastly, restart Chrome.
This has a high chance of getting Chrome back into action, but if you still think Chrome is slow, read on for some more possible fixes.
5. Remove Chrome Extensions
Oftentimes, Chrome extensions are the culprits behind the web browser’s laggy performance. While not all extensions might be acting up, it’s not feasible to single out the one that is causing the lag.
The only way out is to remove all extensions first, and understand if the browser is running faster. If it is, the next step is to install the important extensions one after the other to see if the installation of any particular one brings back the lags.
Here’s how to remove Chrome extensions:
- Locate and click on the 3 vertical-lined dots at the top right corner.
- Go to More Tools, and select Extensions.
- Click on the Remove button accompanying each extension. Alternatively, you can also toggle the deactivate button in the lower right corner.
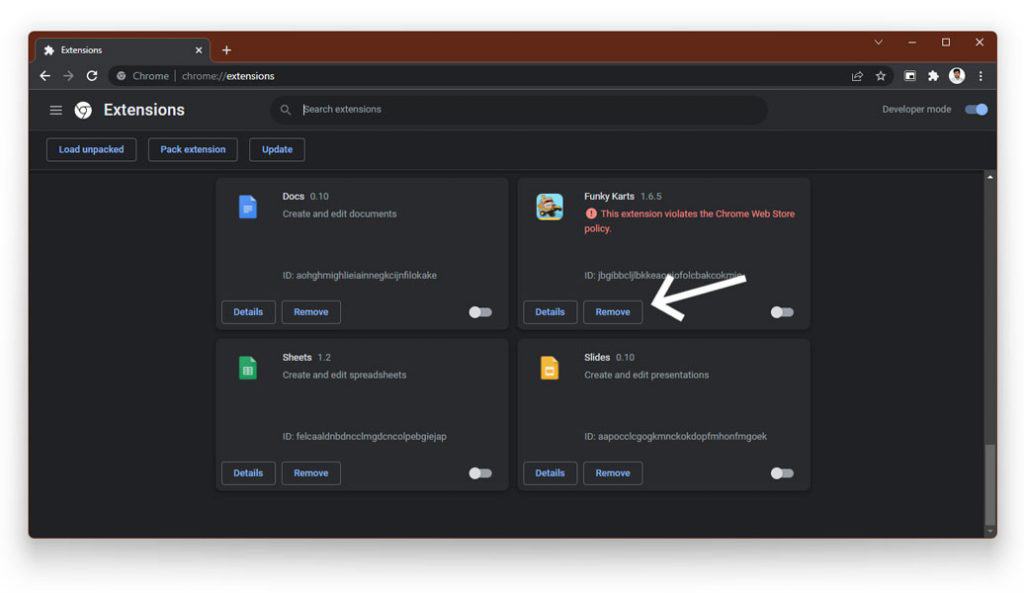
- Restart Chrome.
Once it relaunches, gauge whether its performance is still laggy. If not, go ahead and reinstall the necessary extensions, and pause in between every addition to check if any of them is the reason why Chrome is slow.
6. End Other CPU Consuming Apps
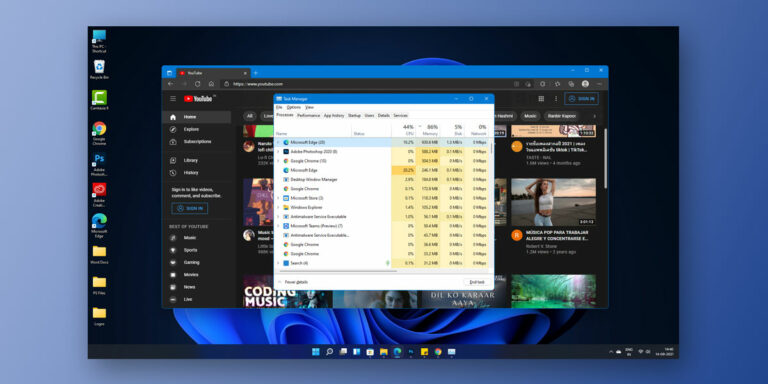
One simple yet effective way to deal with slow Chrome issues in Windows 11 is to end the background activity of other CPU consuming apps. With Windows 11’s snappy UI, you can get this done all by yourself from the Task Manager.
Here’s how to end the background processes of CPU-draining apps:
- Right click on the Start button, and click on Task Manager.
- Scroll down to locate all apps draining CPU.
- Individually right click on them and select End Task.
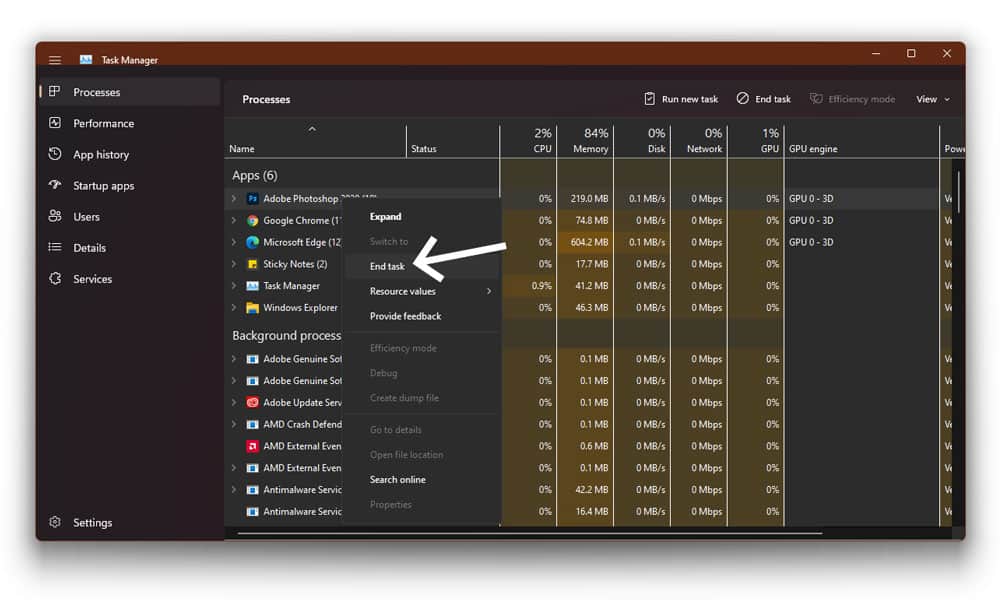
This should be able to fix your laggy browser issues. If not, there’s still two more ways to talk about it.
7. Reset Google Chrome
One way to get Chrome back on track is to reset it to its default settings. The issue with that is that you will lose all customizations, be it themes, aesthetics, or extensions. So, make sure you make a note of all important customizable details before resetting it.
Here’s how to rest Chrome:
- Locate and click on the 3 vertical-lined dots at the top right corner.
- Select Settings.
- Click on the Advanced option from the left, and tap on Reset and clean up.
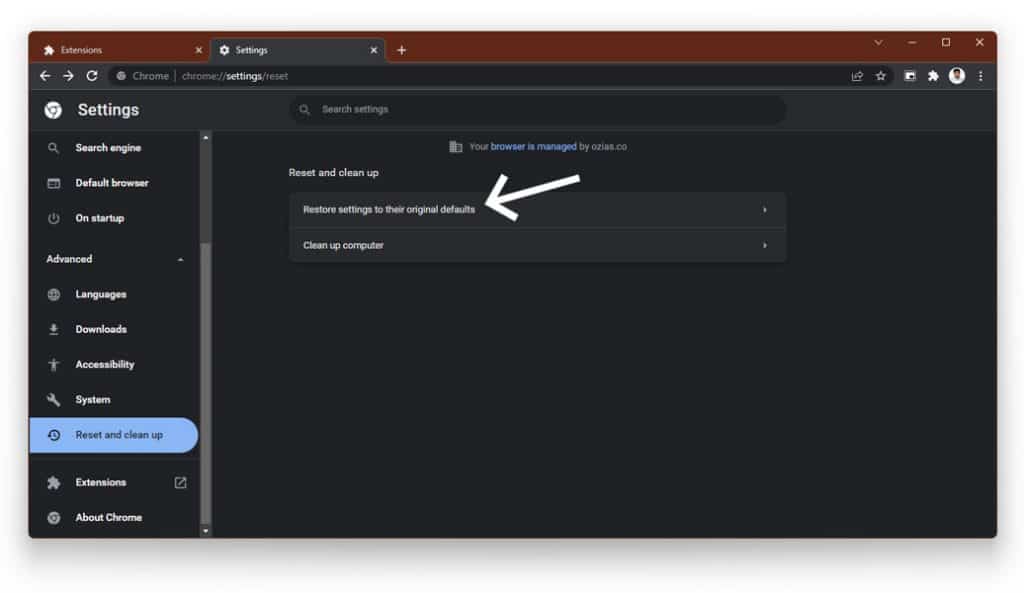
- Choose ‘Restore settings to their original defaults’.
- Click on Reset settings.
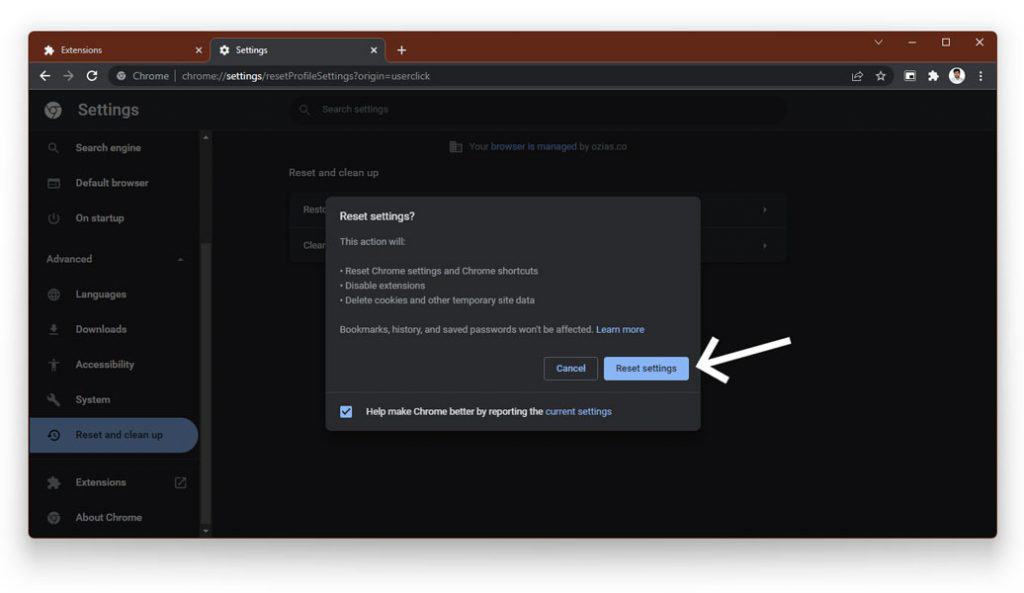
That’s all. With your Chrome restored to its default settings, you will have much more wiggle room to weed out the issue, if it still persists.
8. Update Windows 11
One last reason behind your slow Chrome issues in Windows 11 is an outdated OS. If your Windows 11 doesn’t have all the latest updates or patches, you could be experiencing slow Chrome. To remedy that, simply go to Settings from the Start menu on the taskbar, and scroll down to find Windows Update at the bottom of the left pane. Click on it and it will show you if any updates are pending.
Conclusion
The bottom line is, make sure your Chrome is up to date, along with your OS. Check off each fix from the list to ensure you weed out the issue at its core. One of these will definitely work for the issues ailing your system.
Good luck!
