
Android being an open source platform allows editing its sources and installing whatever the users want. But, this open source feature doesn’t come out of the box as deleting your system files isn’t legal according to most of the smartphone manufacturers. Most of the users prefer using this feature, commonly known as Rooting. While most of the users enjoy after rooting, few users don’t like it & love to stay with stock because they can’t enjoy OTA updates or might be facing some stability issues. There is also an option for such users, i.e., unRooting.
UnRooting doesn’t claim your warranty back (It’s possible with OnePlus and few smartphones of Samsung, Nexus, LG & HTC device.). Coming to the point, today we’ll discuss some of the easiest and safest methods to unroot any Android device easily. You can use any one approach to unroot your Android device.
How to unroot any Android device
1. Using SuperSU
After rooting your Android, you would have installed any root handling app like Supersu, Kinguser, Magisk etc.
Each App comes with an inbuilt unroot function which is possibly the best, easiest & the safest method to unroot your Android device. Let us use SuperSu for this example.
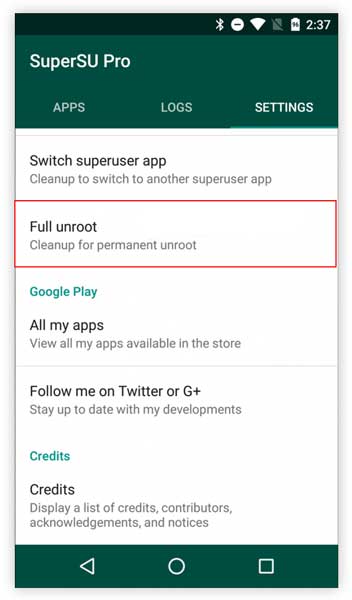
Step 1: Open the SuperSu App
Step 2: Go to settings >> Scroll to the bottom >> click on “Full Unroot”.
Step 3: After tapping on “Full Unroot”, click on “Continue”.
Step 4: The unrooting process will begin, once you reboot your phone, it should be unrooted.
2. Using Magisk
If you don’t have SuperSU then might have Magisk on your device. The Magisk doesn’t have a separate unroot option like SuperSU. So to unroot your device follow the steps given below.
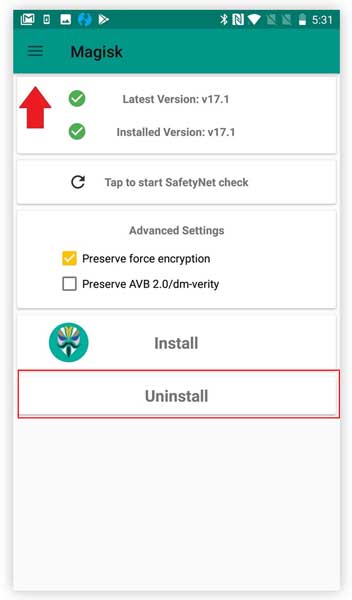
Step 1: Open the Magisk App
Step 2: Scroll down to locate “Uninstall” button and click on it.
Step 3: A popup will appear to confirm your selection. Click on “Complete Uninstall” to uninstall Magisk from your device.
Step 4: After the Magisk is uninstalled all the modules will be removed. Install a root checker app to check if there is still any root access.
Also read: Magisk vs SuperSU – Which one is Better?
3. Through File manager
While rooting your Android device, the software places a small file known as “SU Binary” which is the root file. All the permissions are granted via this bin file.
To unroot your device, you can delete this file. Although this has quite less success rate like around 85%. To Unroot your device follow these steps :
Step 1. Download any Root file manager (Recommended: ES File Explorer.)
Step 2. Grant Root permissions to the App & enable R/W (Read & Write) mode. You can find this option in the menu (drag from left to right) select Root Explorer. This mode allows to edit system files. Check the images.
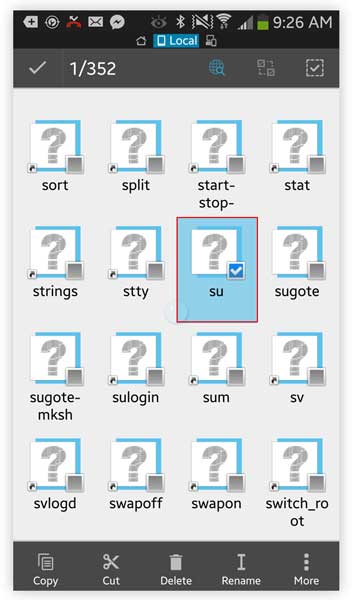
Step 3. Go to Device (From the Top menu) Go to System >> bin folder, you’ll find a file named as ‘su’. Delete it, That’s all !
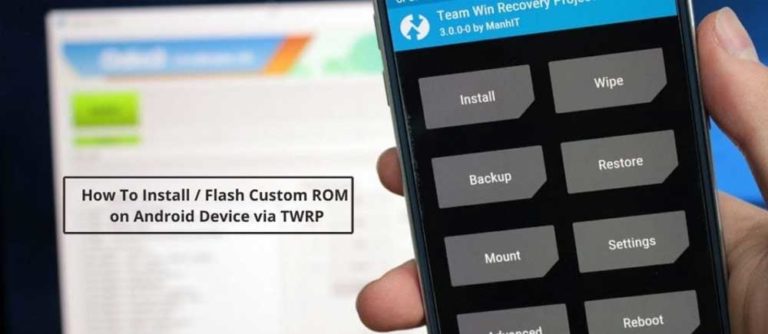
4. Flashing Stock / OTA Update
As phone manufacturers don’t allow updates for rooted smartphones. You can remove your Android phone’s root by manually flashing your phone’s OTA (Over the Air) update or Stock ROM. As its bit difficult, you should use this method only if you were not able to unroot your device through any of the above methods. You can install the OTA update via ADB and fastboot. Follow The Steps Below To install the OTA update.

Step 1. Download and install ADB and fastboot on your desktop.
Step 2. Download the OTA update zip file and move it to the ADB and fastboot folder. (You can rename the file to update.zip for ease of access later)
Step 3. Connect your device to PC and Enable USB Debugging. To enable USB debugging, go to Settings -> Developer Options -> Check USB Debugging option. You can find more steps on our article “How to (Sideload) Apply Update From ADB and Stock/TWRP Recovery”
Final words
As every coin has two sides, there are few disadvantages of rooting too. If you have any problem in any of the above methods, you can comment your problems in the comment section below. Keep in mind that, majority of the manufacturer won’t consider your phone under warranty even after rooting, so make sure you don’t go to their Service center & demand for service after rooting your Android.
FAQ’s
1. What Is Unrooting?
Unrooting is the process of changing your back to its stock or default mode after it has been rooted.
2. What Is The Difference Between Rooted And Unrooted?
There are quite a few differences between rooting and unrooting your phone.
Rooted devices allow us to control the root menu where the ROM is built. Rooting the device gives us complete control of the device. Rooting also allows us to install applications which were not compatible with the device. You can also add more than one OS since we can control the ROM.
An unrooted device are the manufactured devices; The ROM is under a layer which is specific to the company. In an unrooted device, you can only install apps available on the playstore. Unrooted devices don’t allow the user to use more than one OS. The OS only gets updated when the manufacturer has released an update.
3. What Happens If I Unroot My Phone?
Just as rooting your phone gives you complete control over your phone, unrooting your phone will give you only limited control over your phone. Your unrooted phone will also not be the same as the phone you received at the time of purchase. To make it similar to the phone you received at the time of purchase, you would also have to change the system files back to how it was.
4. How Can I Tell If My Device Is Rooted?
There are apps available on the playstore that check whether your phone is rooted or not. So if you have just rooted your phone and want to check if it has actually been rooted, you can download any of the apps available on the playstore or you can also download the terminal app from the playstore. Once installed, open it and enter the word “su”, if your login prompt changes from a “$” to a “#”, you are a superuser and your phone has been rooted.
5. Can A Rooted Phone Be unrooted?
Yes, as the methods above show, a rooted phone can be unrooted. Unrooting is a lot easier if all you have done is root. You can unroot your phone by using the methods shown above.
6. Does Factory Reset Remove Root?
Your phone will still be rooted if you do a factory reset. If you want to unroot your phone, you would have to flash a stock ROM or go to system/bin and delete su binary and then go to system/app and delete the Super Su app.
7. Does Unrooting Bring Back Warranty?
Companies used to be very strict before and warranty would remain void once the phone was rooted, but a few manufactures such as Google (Google Pixel) 7 Oneplus allow phones to be rooted. For companies that don’t allow rooting, make sure that your phone does not say “modified” in the about section. Also make sure that your flash counter is 0, you can find out your flash counter by botting your phone into recovery mode.
8. How Do I Unroot My Device Without A Computer?
Step 1: Open the SuperSu App
Step 2: Go to settings >> Scroll to the bottom >> click on “Full Unroot”.
Step 3: After tapping on “Full Unroot”, click on “Continue”.
Step 4: The unrooting process will begin, once you reboot your phone, it should be unrooted.
9. How Do I Unroot Manually?
To Unroot your phone manually, follow the steps below.
Step 1: Open a root file manager present in your device. If you don’t have one, you can install one from the playstore.
Step 2: Find And press /system/bin/.
Step 3: Find a file named “Su” and delete it. This file may not be present depending on how you have rooted your device.
Step 4: Find /system/xbin and click on it.
Step 5: Delete the “Su’ File present over here.
Step 6: Find /system/app and delete the supersu.apk file.
Step 7: Reboot Your Device


I have one plus 2. I rooted it and now I didn’t able to update ota . now if I flash to stock rom , do I able to get ota updates ?
To receive OTA updates, you need to unroot your OnePlus 2 & flash Stock firmware. Don’t forget to replace Custom recovery with Stock recovery.
I use samsung tablet 3v..i already unroot my device using super su.but i still cant update my device.what should i do?
I use samsung tablet 3v..i already unroot my device using super su.but i still cant update my device.what should i do?
I have one plus 2. I rooted it and now I didn’t able to update ota . now if I flash to stock rom , do I able to get ota updates ?
To receive OTA updates, you need to unroot your OnePlus 2 & flash Stock firmware. Don’t forget to replace Custom recovery with Stock recovery.