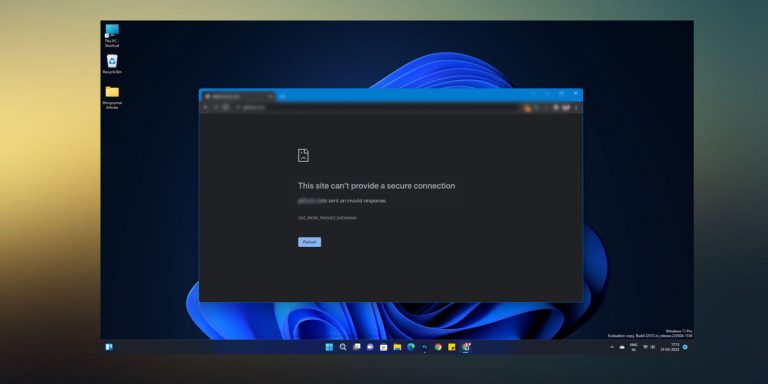
Did you just witness a small caution triangle appeared by your network icon? Understandably, as usual, you’d have right clicked on it for troubleshooting, but most likely what you will encounter is “Windows not automatically detect this network’s proxy settings” error.
There might be several reasons due to which you are getting the aforementioned internet connection error. But not to fret, this is one of the common network problems, one could possibly face time and again.
However, the good news is:
You can effortlessly eliminate it by performing some simple workarounds. Few of the significant ones, we have compiled below which you can execute in order to get rid of the network error.
So, without further ado, let’s get into the step by step tutorial you ought to follow for solving the issue.
[toc]
How to Fix “Windows could not automatically detect this network’s proxy settings” Error
NOTE: If you head over to the Google and search for the same error, you could end of getting tons of crap methods, those are of no use. Considering that, below we have only listed the working methods by filtering the fuss out of it. Although, why to snoop around here and there when you already have got the steps under your sleeves?
Before you head over to any of the complex troubleshooting methods given, don’t forget to try these simple steps:
- Restart your computer and reconnect your internet and check if the error persists.
- Double check your router connection and ensure that it’s working fine.
For most of the cases, a simple reboot resolves the fundamental internet issues. If for you the error is still there, we have got you more steps below.
You can go over the following workarounds one by one in the same array they have listed. However, that doesn’t mean you mandatorily need to perform every method given below; who knows the very first one itself solve your issue.
Method 1: Disabling Proxy Server
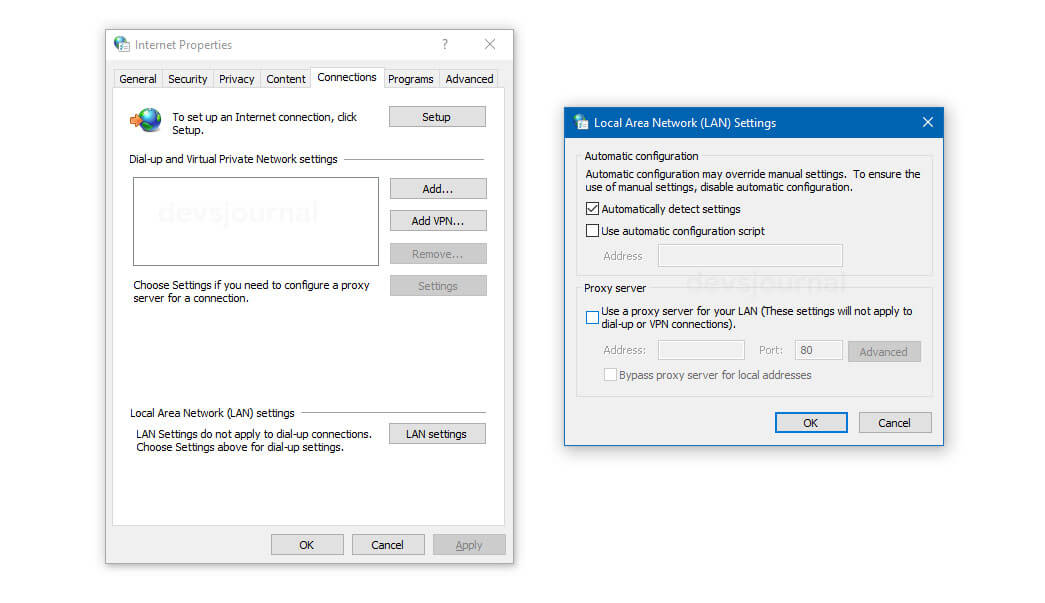
If you do not use any proxy server for connecting internet, make sure the proxy server settings must be unchecked.
- Firstly, simultaneously hit the Windows Key + R and type in the word “inetcpl.cpl” the box appeared.
- Then tap on the OK button.
- Next, click on the Connections tab and select LAN settings.
- Uncheck both boxes “Use a proxy server for your LAN,” and “Use automatic configuration script,” except the box “Automatically detect settings.”
- Click on OK.
- Reboot your PC and check again if now you have an active internet connection.
For Windows 10 users:
Alternatively, the proxy server settings can also be set by heading over to Settings >> Network & Internet >> Proxy, and enable the “Automatically detect settings.” Make sure all other options are disabled.
Method 2: Reset Network Settings & Flushing DNS
There might be a great chance that a corrupt system file is causing the connection issue. Therefore, resetting can fix it. And here’s how to do:

- Tap on Window Key + R, type in “cmd” and hit enter
- Next, in the command prompt window, you will be needed to run these below-mentioned commands.
netsh winsock reset
netsh int ip reset c:\netshlog.txt
ipconfig /flushdns
- Next, you’ll be asked to restart the device in order to complete the performed actions, just do it.
- And that’s it; you are done resetting TCP/ IP network.
For Windows 10 users:
In Windows 10, you can easily reset the network settings by navigating to Settings >> Network Settings and tap on the Network reset option.
Method 3: Temporarily Disabling Antivirus & Firewall
If there is any antivirus software running on your device, disable it for a while and now reconnect your internet connection. And if still, you don’t see any changes, try disabling Windows Firewall.
Once done, do check for the error, and if persist, be sure to enable the Firewall settings and head over to the next method given below.
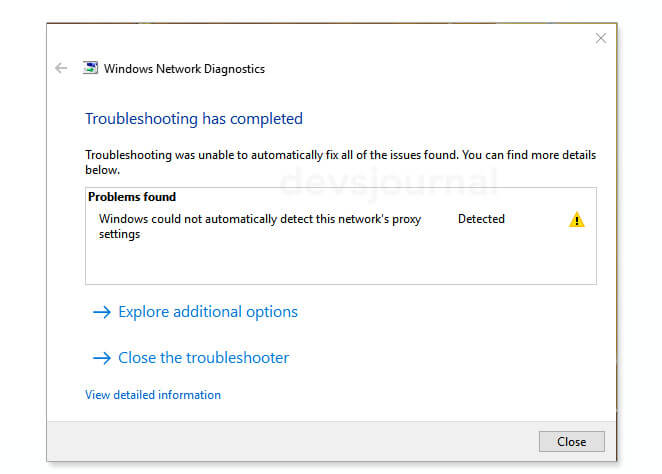
Method 4: Run Network Troubleshooter
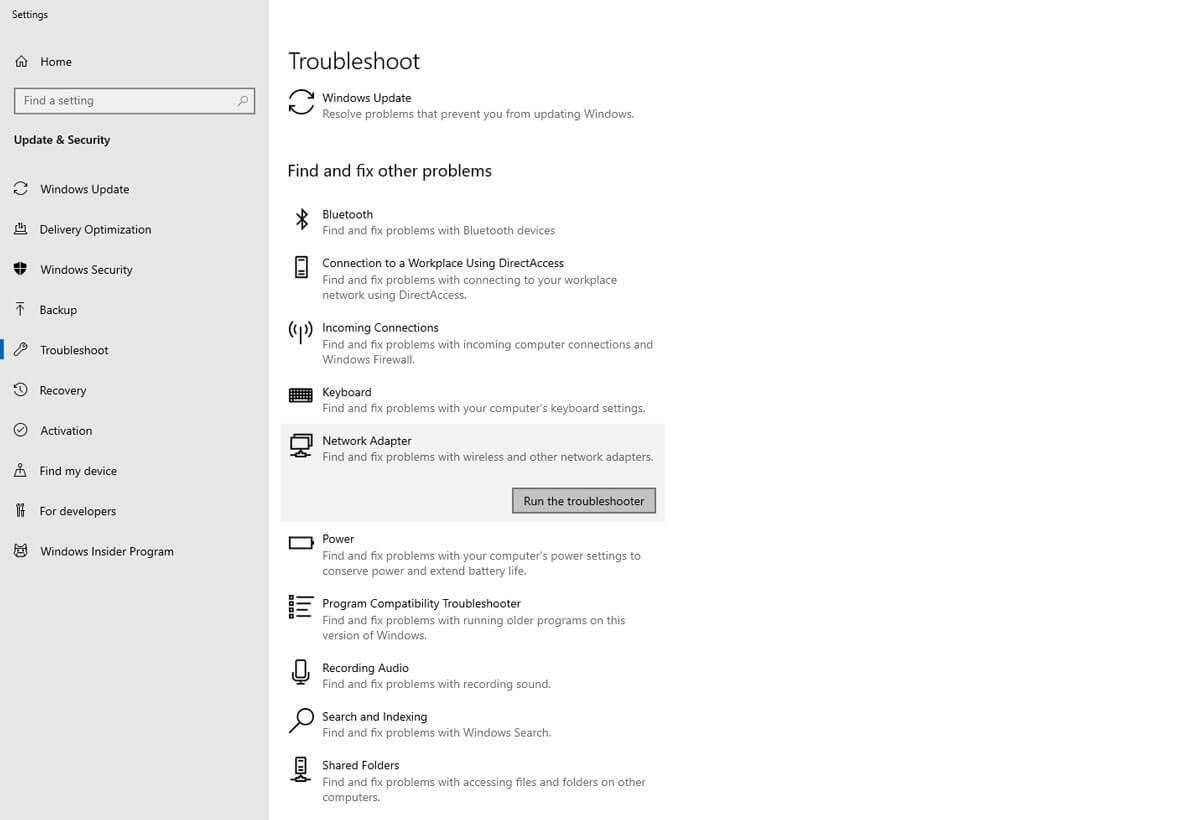
Running Network Troubleshooter might be a boon for you resolving the error. Follow the below steps in order to carry out this method.
- Click on the Windows icon given at the bottom left of your screen, and then tap on Update & Security.
- Next, at the left pane, you’ll see Troubleshoot, tap on it.
- Scroll down to the Network Adapter, click on it and select Run the troubleshooter.
- Wait until the whole process gets done, and next you will be asked to follow some instructions on the screen, do it.
Furthermore, at the same right pane, you will see an option “Internet connection” you can troubleshoot it as well if you wish too. However, it is not mandatory.
Method 5: Use System Restore
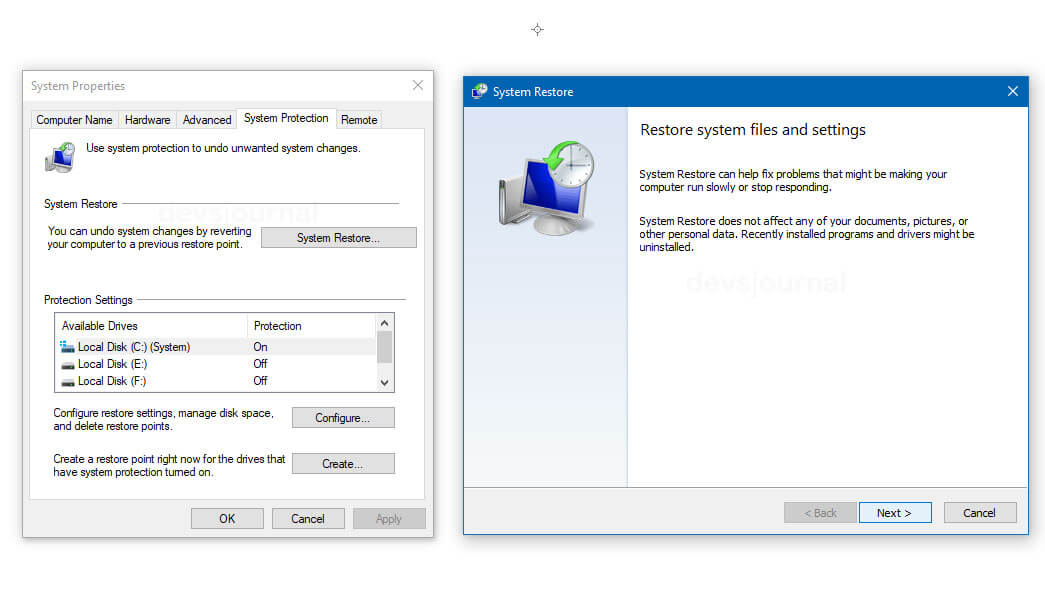
This is yet another working method you can employ to get rid of the “Windows not automatically detect this network’s proxy settings” error.
Although, it has been reported that such errors might occur either due to the installation of new applications or after modifying the network configuration. Hence, System Restore could be a potential workaround to perform. Below is how to do:
- Navigate to the search bar or hit Windows key + S and type in Create a restore point. Click on it and a “System properties” will appear.
- Tap on the System restore >> Next, and you will see a list of recent restore points.
- Click on the option “Automatic restore point” and select Next.
- Now, follow the instructions shown in your screen for completing the running process.
We hope following the above-mentioned steps will aid you to resolve the error. And if not, we have got you more methods you can go for.
Also Read: What is Windows Service Host Superfetch and fix it’s high CPU Usage?
Method 6: Enable “Obtain DNS server address automatically” Setting
There is a great chance that manually setting up the DNS server address can lead to the various kind of network errors. In order to ensure and fix the same, below are the steps you can follow and set the aforesaid setting to automatic.
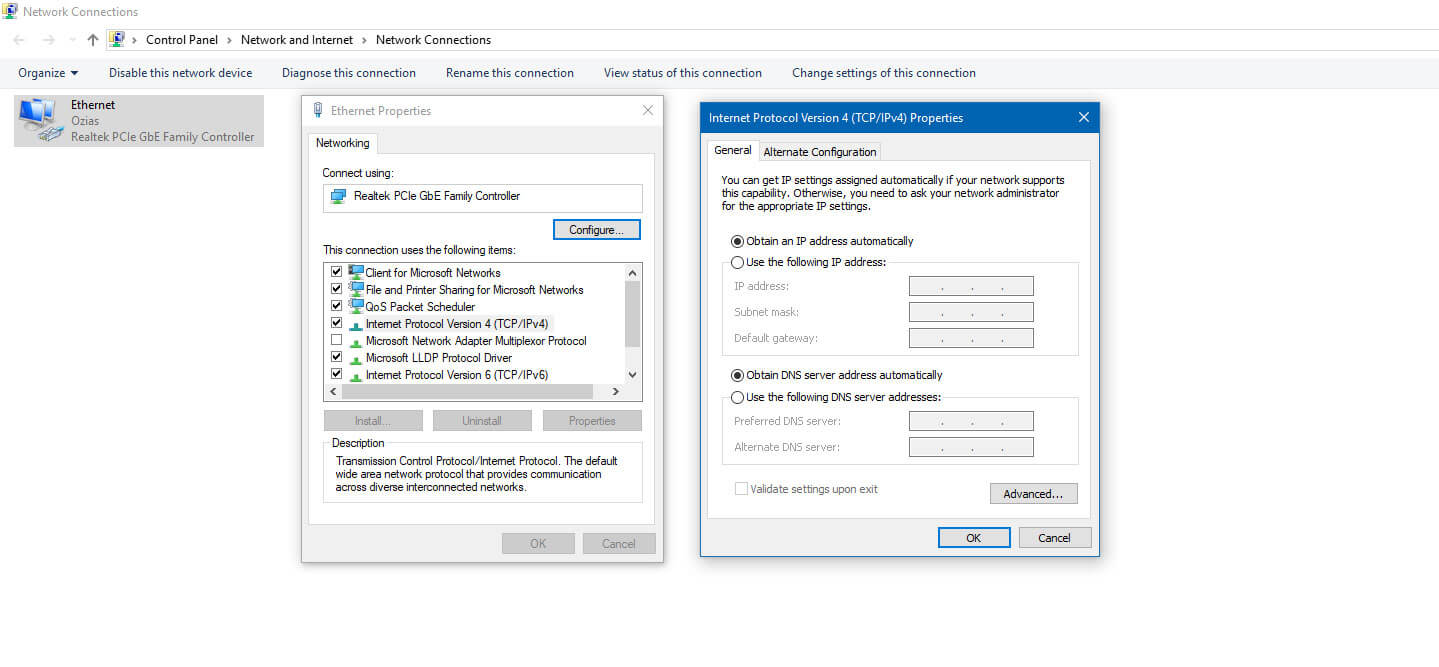
- Open Control Panel >> Network & Internet and tap on Network & Sharing Centre.
- Under the same page, at the left pane, click on Change adapter settings.
- Now, hover to your network connection, right click on it and tap on the Properties option.
- Select Internet Protocol Version 4 (TCP/IPv4) and then click on Properties and choose Obtain DNS server address automatically
- Lastly, tap on the OK button to save changes, and that’s it for the method.
Method 7: Reset Internet Settings
If you haven’t yet succeeded in fixing the error, do try resetting your internet settings.
- Open Control Panel and then select Network and Internet
- Click on Internet Options and tap on the Advanced tab then Reset
- Next, if you want to delete your personal data, you can check the box at Delete personal settings option. And hit the Reset button
- Lastly, tap on Apply and Ok button to save the changes.
Now, you have successfully reset the internet settings for your device.
Method 8: Restart Network Adapter
Last but of course not the least. You can try resetting the Network Adapter if you still encountering the error while accessing to the internet.
- Navigate to the network icon, given at the bottom right corner of the screen, and right-click on it.
- Select Open Network & Internet Settings and now at the right pane, under the “Change your network setting” section, click on the Change adapter settings.
- Locate and right-click on your network connection and hit Disable from the menu.
- Next, wait for a few seconds and then once again hover to your network connection and right-click on it then hit Enable.
After restarting the network adapter, the issue must get resolved, and you will be able to use the internet with no hassle.
Also Read: Want to know about different Windows Services? Check our Explanatory guides.
Conclusion
And that’s all; I hope by now you should have kicked off the “Windows not automatically detect this network’s proxy settings” error. Furthermore, if you are still not able to let go of it, feel free to reach us by comment box below, we’d be happy to resolve your problems.