Have you heard of the term rooting a Android phones? If yes, you might also have heard about the risks rooting brings to your smartphone. One of such risks is bricking of the phone. Bricking is a very serious issue where your phone is transformed into a mere useless brick-like object. This state of the smartphone occurs due to several issues that also include rooting.
No matter how expensive your phone is, it is still not void of the risks of getting bricked. Every smartphone has the threat of getting bricked if something goes wrong while experimenting. Samsung’s flagship model Galaxy Note 9, though being a highly sophisticated phone, is not an exception here.
If you own a Galaxy Note 9 and have unfortunately bricked it, you have arrived at the right place. In this blog post, we will be discussing the possible solutions to unbrick Samsung Galaxy Note 9.
What Does “Bricking” a Device Mean?
A bricked smartphone usually means that the phone is not booting properly which makes it inoperable. This may be due to different faults in the core software of the phone. Whatever it may be, the phone turns into a totally useless brick.
Bricking is generally of two types:
- Soft brick
- Hard brick
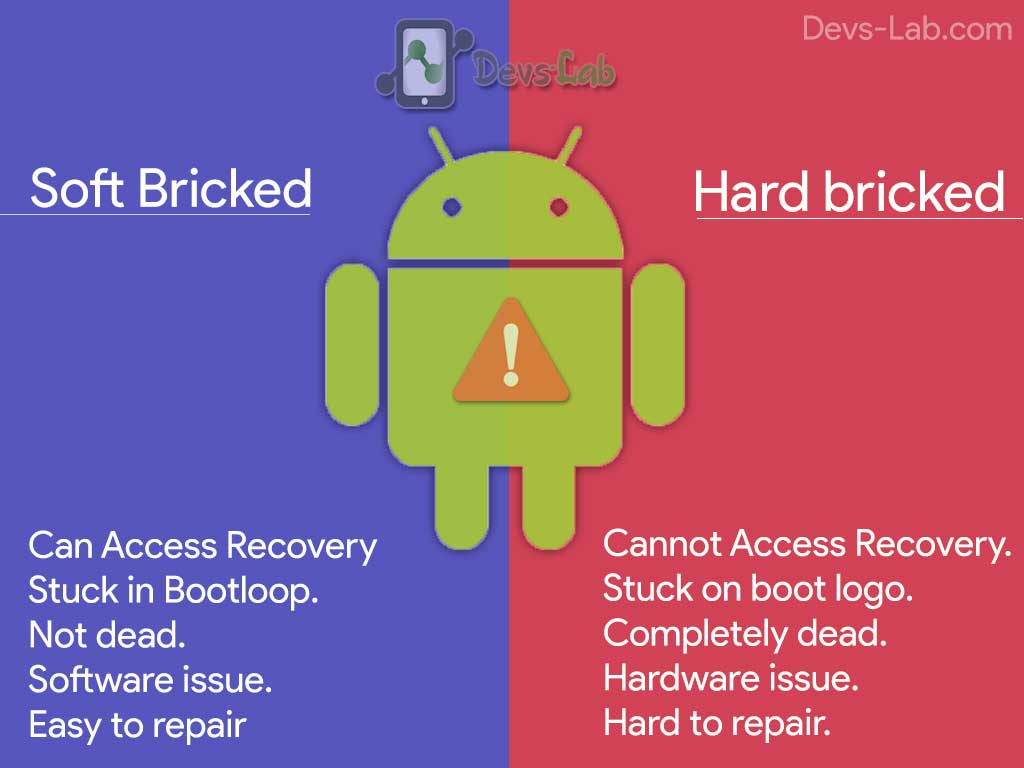
A soft-bricked device is one which boots to recovery or keeps rebooting. While a hard bricked device is unable to boot at all.
| Soft Bricked | Hard Bricked |
| 1. Can Access Recovery. | 1. Cannot Access Recovery. |
| 2. Stuck in Bootloop | 2. Stuck on Boot logo |
| 3. Not dead | 3. Partially dead |
| 4. Software issue | 4. Hardware issue |
| 5. Easy to repair | 5. Hard to repair. |
Possible causes of Soft Brick: Soft brick is caused if you flash something that is not meant for the device. Due to soft brick, you will experience frequent restarting of the device after being struck at the Samsung logo for a few seconds.
Possible causes of Hard Brick: Hard brick is usually caused due to rooting by inexperienced hands, due to excessive CPU or GPU overclocking.
In this guide, we are going to discuss different ways through which you can unbrick a Samsung Galaxy Note 9 smartphone and make it work like before. Let’s explore.
How to Unbrick Samsung Galaxy Note 9
Just like any other smartphone, Samsung Galaxy Note 9, also has the risk of getting bricked. Samsung has claimed to have designed the Note 9 phone with some robust technologies, and equipped with the best offerings from the company. That being said, if you try to root the phone, the phone still cannot escape the risk of getting bricked.
Please do remember that in the course of unbricking your phone, you might be required to wipe your phone completely. So, we would suggest you to keep a backup of the phone. Meanwhile, you should know that the tricks and techniques that we will discuss are officially supported by Samsung, so you don’t need to worry about getting your phone hampered.
Method 1 (Soft brick): Remove Toxic Apps From Your Smartphone.
Some applications are designed intentionally to diminish the user’s experience or maliciously harm the device. If you, by chance, have installed such app, it is highly recommended that such apps are removed from your device. In order to remove such applications, always use the safe mode. The good thing about safe mode is that, your device will only load the system applications and all other third-party apps will be turned off. You can follow the below-mentioned steps to remove any toxic applications using the safe mode.
Step 1: Long press the power button to bring out the power button.
Step 2: Next tap and hold the power off menu on our smartphone.
Step 3: Release your hold once the safe mode option appears. Tap on the safe mode option. This will take you to a safe mood.
Step 4: Once the OS is loaded, uninstall the apps that you think are causing trouble to your device.
Step 5: Once these tasks are done, exit the menu.
The above step will eventually solve the problems caused by toxic applications.
Method 2 (Soft brick): Perform a Hard Reset of Your Device
Android applications usually keeps gathering cache data that by time accumulates as garbage and starts impacting on the performance of the phone. This is why, it is highly recommended that you perform a factory reset of your device at least once in two or three months. This will make your device run smoothly all the time and also enhance the performance of the phone.
In order to Hard reset your Samsung Galaxy Note 9 phone, you may follow the following steps:
Step 1: In your phone, go to Settings.
Step 2: Scroll down and tap on Back and reset option.
Step 3: Now find Factory data reset and tap on this option.
Step 4: Now tap on Reset phone or Reset Device button.
This will finally reset your Galaxy Note 9 phone. Once you restart the phone, it will ask you to enter the Google account details. This hard resetting of your phone will eventually let you solve the bricking of device problem. However, it should be kept in mind that, hard reset will wipe out all the data in your device. It is therefore recommended to keep backup of all your data before proceeding to hard reset the phone.
If the above two mentioned methods do not seem to work, there is still yet another method which definitely will solve the problem for your bricked Galaxy Note 9 phone. Let’s have a look at this method.
Method 3 (Hard brick): Unbricking the Galaxy Note 9 Using the Stock Firmware
Flashing stock ROM removes all the custom configurations, applications, recovery and root access of your device. They are replaced by the default settings and official stock aspects. Flashing stock firmware has myriads of benefits. One of them being restoring of the warranty of the phone which otherwise was voided due to flashing custom ROM.
We will discuss in details about the unbricking of Galaxy Note 9 using the stock firmware. Prior to that, let us introduce one single tool that we will be using in the entire process. This tool is called Odin flashing tool, an utility software developed and used by Samsung. Before proceeding with the unbricking process, there are few preparations mentioned below that need to be followed.
Pre-requisites:
- Windows computer along with USB cables which will be required for connecting purpose.
- Enable USB debugging on your phone.
- You will be required to download and install Samsung drivers of your phone on the computer. You will get the drivers here
- Make sure the phone has an adequate charge.
With these initial preparations, you are all set to initiate the flashing of stock firmware in your Samsung phone. Follow these steps to flash the stock firmware.
Step 1. Download the Odin flashing tool and install the software in your windows computer.
Step 2. Go to samsung-firmware.org to download the official firmware of your phone.
Step 3. You can get the appropriate firmware by using the device number of your phone. It can be found in Settings-> Software Information->About Phone->Device Model number.
Step 4. After downloading, extract the file to your computer. The firmware file has a .md5 extension.
Step 5. Now restart the phone in download mode. Press and hold the Volume down and Power button simultaneously until the Samsung logo appears. Use the volume up and Volume down button to navigate to the download mode.
Step 6. The Odin program can automatically detect your phone. Tap on the ‘AP’ button and load the firmware file (having .md5 extension.).
Step 7. Now, tap on the Start button to begin the flashing process.
Step 8. Once it is complete, take OFF your phone.
The phone will reboot now. It will take you to the setup screen where you have to enter the Google details and configure the setup as you want.
Conclusion
Finally, we would like to conclude by stating that Samsung Galaxy Note 9 is a highly sophisticated phone that comes with a price. That is why we would advise you to use it delicately and carefully.
Always install only trusted apps from the Play Store. Even then, if you face the problem of bricking the phone we believe this blog post will serve as a comprehensive guide in solving your problem.