Outlook remains to be one of the most popular email providers we have today. Founded in 1997 by Sabeer Bhatia and Jack Smith as Hotmail, the company was acquired by Microsoft the following year, 1997, and relaunched it as MSN Hotmail.
Since then, it had been through major rebrands including Windows Live Hotmail, and the most recent one, Outlook in 2013. Microsoft also transferred hundreds of millions of its customers to the newer “@outlook.com” domain, and overhauled Outlook to a wholly new product which design incorporates with the more modern UI/UX on Windows OS.
However, despite these changes, and redevelopment, Outlook still encounters some frustratingly annoying issues. Fortunately, most of these issues can easily be fixed with simple methods.
One of the most common issues users have with Outlook is the “outlook data file cannot be accessed.” In this article, we will try to resolve this issue. The “Outlook datafile cannot be accessed” is one of those issues that can easily be dealt with, following some simple steps in the system. Alternatively, you can use Outlook Recovery Toolbox to fix Outlook cannot be accessed issue, without making changes to your system or outlook.
6 Ways to Fix Outlook Data File Cannot be Accessed Error
We don’t know for sure why is this happening to some users, but unlike other problems that doesn’t have any solutions unless diagnosed, the issues with “Outlook file cannot be accessed” have some simple solutions online. We try to collate them, and weave it into one article.
1. Repair Microsoft Office 365
If you encounter the “Outlook data file cannot be found”, the first thing that you need to do is to fix or repair the Microsoft Office 365. Outlook is one of the Office programs that come in bundled with the Microsoft Office 365. Hence, it is ideal to first fix the Microsoft Office 365 to resolve the issue. Not only does this fix the Outlook, but it can also possibly fix recurring issues with other Office programs such as Microsoft Word, Microsoft PowerPoint, Microsoft OneDrive, and Microsoft Excel among many other Office apps.
To repair the Microsoft Office 365:
- Type in, and search for the Control Panel in the Windows search bar. After that, click on Programs, then go to Programs and Features.
- Look for Microsoft Office 365 in the list of programs installed.
- Right-click (if using mouse) or two-finger click on it on the trackpad to launch a drop down. Click Change.
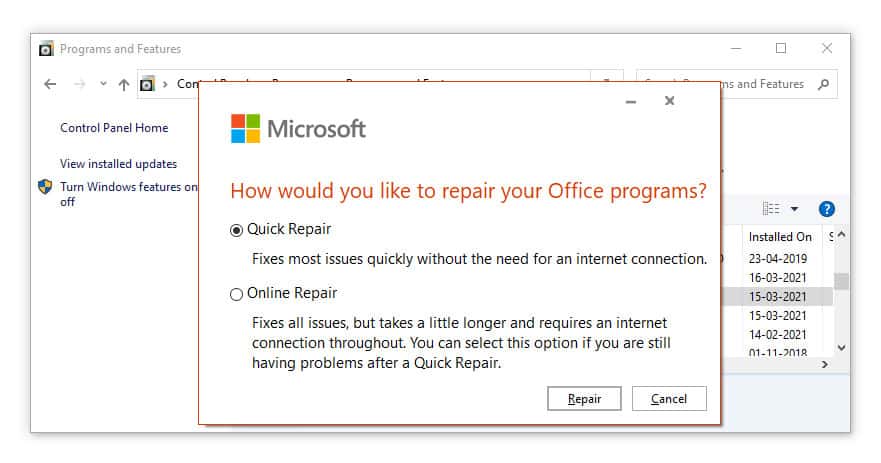
- Now, wait for the repair wizard to start-up. Then choose what type of repair you want to execute. Quick Repair doesn’t need an internet connection, while on online repair, you will have to be connected on the internet for possible program reinstallation.
- Wait for the repair to finish, then restart your device.
2. Create a New Outlook profile
In most hopeless cases, you will have to create a new Outlook profile. Don’t worry, as long as you make a backup of your data file, and delete your old Outlook profile before creating a new one, this should fix the issue and you may be able to access the file from your newly made Outlook account. The backup will be able to save your original Settings, but it will fix the issues with the old profile.
To create a new Outlook profile:
- Launch the Win+X menu by pressing Windows key and X.
- Look for Settings, and click on Accounts, then Email & accounts.
- Click Add an account button, and an Add account window will appear.
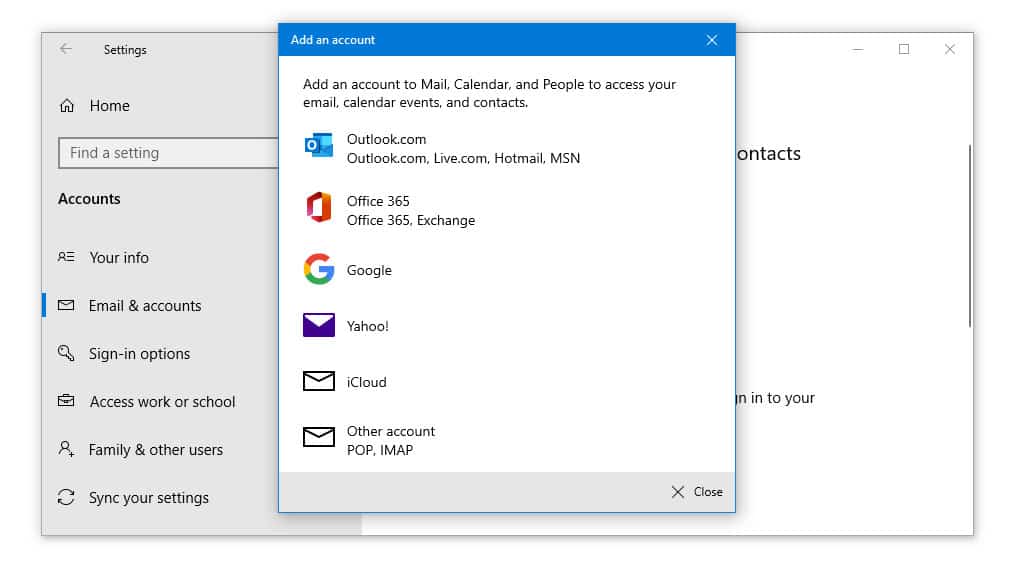
- On the same window, select your Email Account option, enter your profile name and other required account information.
- After doing it, click on Next, and Finish. Your account will now then be created. If the Email server supports it, Outlook will automatically create an IMAP account by default.
3. Set the Inbox folder
The “Outlook cannot be accessed” error can also appear if the Inbox folder isn’t specified well. To fix the issue, follow the following instructions:
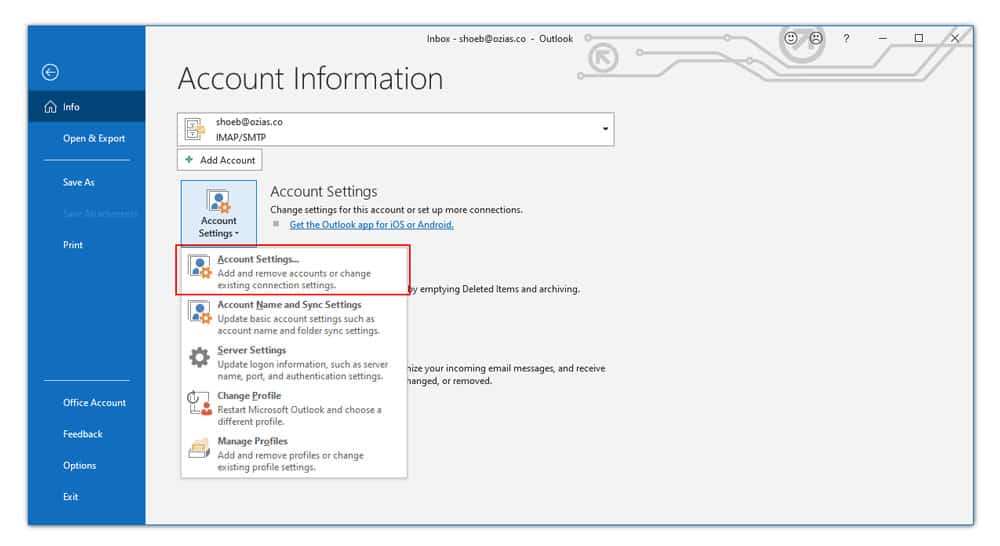
- On the Outlook app, go to File, then Account Settings, and then click another Account Settings from drop down.
- Click the Change Folder, and expand the folder by clicking the + next to it.
- Click Inbox, then OK. After that, close Account Settings and click the Send and Receive button.
4. Change The Mail Delivery Location
The next solution we have to fix the “Outlook data file cannot be accessed error” is to change the mail delivery location. This method should be able to refresh the data file on Outlook, and should fix the annoying issues you are encountering with it.
- First of all, launch Outlook, and click the File tab on the upper left side of the screen.
- On the left side bar, select Info, then Account Settings, and another Account Settings from the drop down menu.
- This should take you to an Email tab. Next to it, however, is the tab called Data Files. Click on that, and then Add.
- After this, Outlook will be asking you where you want to save the file. Put it on a folder where you can easily track it.
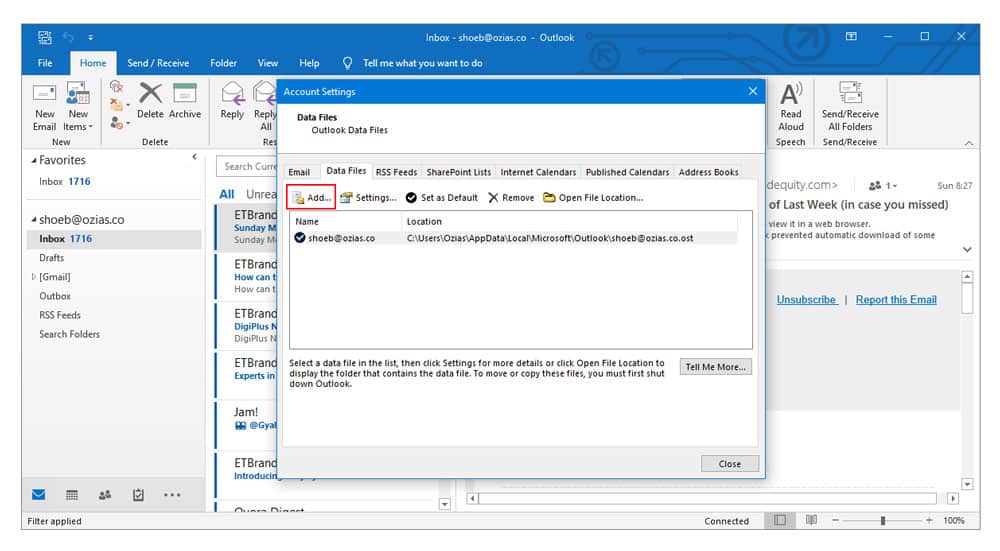
- Finally, choose the location, enter the desired name for the file, then click OK to save the file. Since Outlook will still be saving your data file to the old default data file, we suggest that you change the settings of your new data file, and Set as Default.
5. Change the Ownership of Outlook Data File
The next solution to resolve the “Outlook data file cannot be accessed” is to change the ownership of Outlook data file. To put it simply, make sure that you have the ownership of your own data file.
To do that:
- Access your Outlook’s data file recovery by launching the File Explorer. Since Outlook may sometimes save its file on different folders (depending on the user), I advice that you look for instructions online on how to locate where Outlook saves its file folder. Don’t worry it will be an easy and trite forward process.
- Right-click (if using a mouse) or two-finger click (if using a trackpad) your Outlook data file and choose Properties.
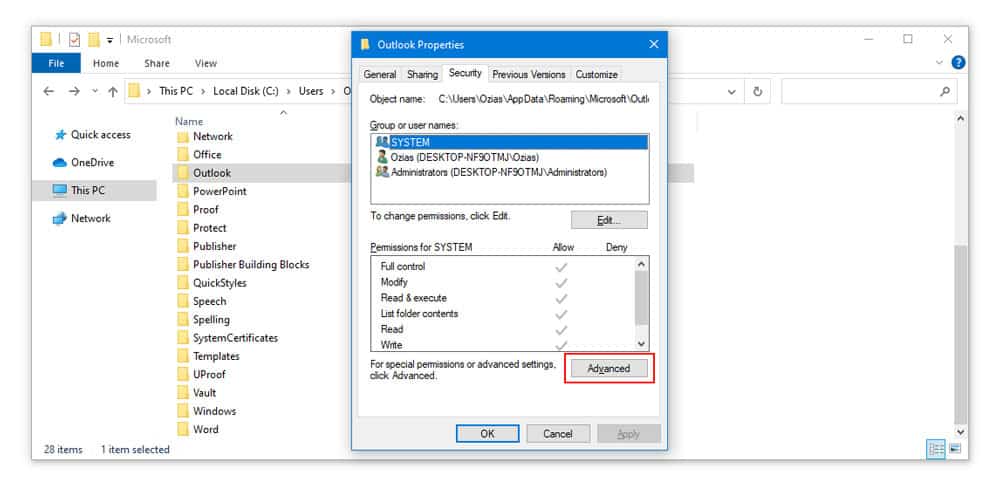
- Under the Properties window, click on the Security tab, then go to Advanced.
- Now, click Change next to where it says Owner, and change the owner of the selected data file.
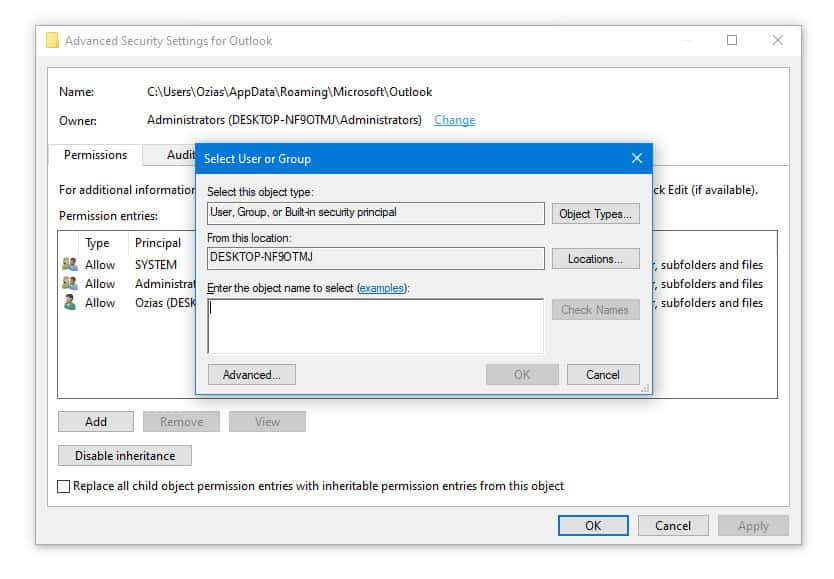
- To save the changes, click on “Enter the object name to select”, then type in your computer username, and then click on Check Names. Finally, click OK.
- Make sure that the Access column next to your name says Full control. Then click OK.
6. Setting a New .pst File
The last solution on our list is setting a new .pst file. However, it will be replacing your old .pst file, and the best thing you can do is to create a copy of this .pst file to preserve your data.
Now to set a new .pst file:
- You need to launch Outlook. Go to File, located on the upper left side of the screen, then click Account Settings. You may need to look for the desired account if you have multiple accounts on the app.
- Now, click Change Folder, and “Create new Outlook data file”. Choose how you want to name the new data file, click the + icon, and choose inbox. You should be able to see a new path added below the Change Folder button.
According to some users, you can also fix this issue by creating a new .pst file, and setting back your old .pst file as the default one. Feel free to try it if this method will work for you.