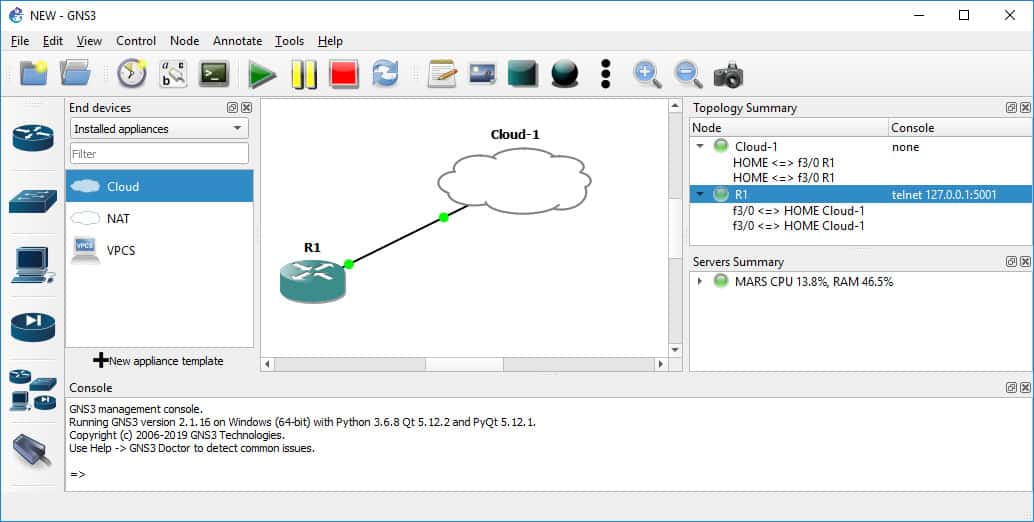
If you are a network expert, then you must have heard about GNS3 or Graphical Network Simulator 3 in the past. It is one of the best simulators made for network simulation. This tool allows you to set up a virtual network with multiple virtual devices in it. As a result, you can test out various things with this GNS3 simulator if you are into networking.
Some of the most common tests done using this tool include things like CCNA and CCNP that are quite common among network experts. In case you want to emulate the Cisco IOS or Cisco Internetwork Operating System, then needing GNS3 as well as having the correct files for it is quite essential.
Thus, today we are here to show How to Download Cisco IOS Images for GNS3 and How to Install GNS3 on your computer. You can also learn more about GNS3 IOS images in this article in the FAQ section. So, if you are also a network expert and want to emulate networks, make sure to go through this article until the end.
Download the Latest Version of GNS3
Now that you know more about GNS3 or Graphical Network Simulator 3, chances are that you want the GNS3 IOS images download link for your computer. But before you go ahead and download Cisco IOS images, you have to first download and install GNS3 on your computer. Only then you can go ahead and install these IOS images on your computer. So make sure to follow the given GNS3 download and installation steps:
Steps to Download the Latest Version of GNS3
Step 1. First, go to the Download page of the official GNS3 website where you have to log in with your account.
Step 2. Then, choose the version of GNS3 that you want to download according to your system’s platform like Windows, macOS, or Linux.
Step 3. Once the GNS3 download for the installer file has been completed on your computer, go and open it using any file explorer.
Step 4. Now, follow all of the instructions on your screen one by one to successfully finish the installation process.
Step 5. Then, you can open the GNS3 software on your computer and start using it right away.
GNS3 IOS Images Download Links
After GNS3 download has been successfully completed on your computer, it means that you can start using it for things like using the Cisco IOS images for GNS3. But, just like GNS3 itself, you have to first get GNS3 IOS images downloaded on your computer.
But, as networking and network simulation is such a wide topic, there are a lot of files available. We have provided some of the most common GNS3 IOS images in this article. You can simply follow the given links one by one to download these GNS3 router images on your computer and start using them:
- C1700 IOS image for GNS3 — Download
- C2600 IOS image for GNS3 — Download
- C2691 IOS image for GNS3 — Download
- C3640 IOS image for GNS3 — Download
- C3660 IOS image for GNS3 — Download
- C3725 IOS image for GNS3 — Download
- C3745 IOS image for GNS3 — Download
- C7200 IOS image for GNS3 — Download
- C7200p IOS image for GNS3 — Download
How to Add IOS Images to GNS3?
Once you have completed the Cisco IOS download process on your computer by getting the GNS3 router images linked above, you can go ahead and add them to GNS3 and start using them. But using these GNS3 IOS images is not that straight forward if you are new to GNS3. Hence, we are here to show you how to add and use Cisco IOS for GNS3, as shown in the following steps:
Step 1. Open the GNS3 program on your computer and go to console, click edit, and select Preferences to see all of the settings of the GNS3 program.
Step 2. In here, go to the IOS routers option under the Dynamips option present on the left hand side menu.
Step 3. Once that is done, click on New and browse for the IOS image that you want to add to the GNS3 on your computer.
Step 4. Then you can tweak the settings of this image using the options given on your screen as per your liking.
Step 5. Finally, you can use your console in GNS3 to use this image as per your needs and requirements.
Conclusion
After going through this article, you must be able to successfully get the Cisco IOS download files as well as install them on your computer. This article can also teach you more about Cisco IOS for GNS3 that can be handy if you are new to GNS3. All of the information mentioned in this article is very useful for most network users out there. And if you still have any doubts regarding GNS3 and Cisco IOS, then you can either go through the following FAQ section or leave your thoughts in the comments section down below.
FAQs
Thankfully, GNS3 is a highly universal program that works the same on almost all Windows versions out there. Hence, you can follow the steps given below to add IOS images in GNS3 0.8.5 in Windows 10.
There are a lot of Cisco IOS images available out there that can be considered for GNS3 users. While there are already multiple options, we have already mentioned some of the best IOS images for GNS3 earlier in this article. You can also find their download and start using them right away.
Just per the name, this directory contains all of the IOS images that you will download and add to GNS3 later on. As for the directory itself, it comes included in the root directory of the GNS3 system and allows you to access all of the added and loaded IOS images afterwards.
To load IOS images in GNS3, you have to first download the correct IOS images on your computer. Once that is done, then you can add and load the images using the GNS3 preferences option quite easily.
As mentioned earlier, there are a lot of IOS images that you can use with GNS3. All of these images offer different usage and features to the user. Hence, you can get any of these as per your needs and requirements.


