
Nexus 9 is a great Tablet released back in 2014, in association with HTC. As it a Nexus device without a buggy UI, It has good developer support. Recently, Lineage OS 16 based on Android 9.0 Pie has made its way for the Nexus 9. Regardless of Android updates, it is still a capable device with 64-bit support. As it also a quite old, so this is time to Root the device and unleash the power in it by Android tweaks and Custom ROMs. Follow our Guide to Unlock your device and Install the Lineage OS 16 based on Android Pie.
Rooting provides not only more power but also a better battery. It allows you to remove Bloatware, install custom ROMs, flash different Mods, increase your device’s connection speed, & the list goes on and on once you start digging through the advantages. Follow our Guide to Unlock your device and Install the Lineage OS 16 based on Android Pie.
How to Root Nexus 9
Rooting Nexus 9 is pretty easy. The rooting procedure of Nexus 9 can be broken down into 3 steps, Unlocking the Bootloader, Installing TWRP Recovery & finally installing SuperSU to gain root access. Each new step relies on the previous step to have been completed, and a basic summary of each part is:
Stage 1: Unlocking Bootloader: Unlocking bootloader is the first step to rooting and flashing custom ROMs. The bootloader is a code that tells your device’s operating system how to boot up. In order to avoid any system modifications, manufacturers lock their firmware. In order to install any 3rd party files into your system, you need to unlock the bootloader.
Stage 2: Installing a Custom Recovery: Stock recovery doesn’t allow any installation of 3rd party zip files. In order to install any other zip which is not signed by the firmware manufacturer, we need to install TWRP Recovery. TWRP is a powerful tool that gives control over the phone without needing to boot into Android. It can be used to flash a ROM or use minor app mods, as well as to create and manage backups.
Stage 3: Rooting: SuperSu is an app that grants you Administrator rights (called “root access”) to run or install specific apps restricted by the Android Operating System for security concerns.
Prerequisites
- HTC Nexus 9
- ADB and Fastboot: Download
- TWRP for Nexus 9 (flounder): Download
- LineageOS 16 (flounder): Download
- Google apps: Beans GApps (optional)
- SU addon zip: Download
- Backup all your data from your device as unlocking bootloader erases all the data.
- Charge your device upto 70% to avoid any shutdown during the procedure which might cause some big issue.
How to Unlock the Bootloader of Nexus 9
1. Make sure your computer has ADB. Setup instructions are here.
2. Enable USB debugging, and OEM unlock (if present)in the Developer options on the device.
3. Connect the device to your PC via USB and Open the ADB with Administrative rights
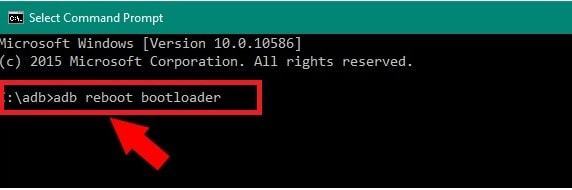
4. Boot the device into fastboot mode by typing:
adb reboot bootloader
Alternatively, You can also boot into fastboot mode using the key combination. (keeping the device powered off, hold Volume Down & Power buttons.)
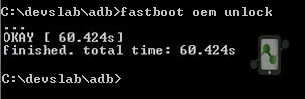
5. Next, type the following command to unlock the bootloader:
fastboot OEM unlock
6. Reboot the device. As its factory resets and erases all the data, you have to re-enable USB debugging again.
How to Install the TWRP Custom Recovery in Nexus 9:
1. Download TWRP recovery for Nexus 9 and place it the ADB installation folder. Also, rename the recovery image file to “twrp”
2. Connect the device using USB cable, to the PC.
3. Open the ADB installation folder. Right click on white space while pressing the shift key and Select the Open command window here
4. Open the device in the fastboot mode using steps stated above.
5. Command to Flash recovery onto your device:
fastboot flash recovery twrp.img
6. Now reboot into TWRP recovery: powered off the device, hold Volume Down & Power, then use the on-screen menu to select Recovery.
7. Select the Backup button in the Main menu to create a backup of your Stock ROM(recommended)
LineageOS 16.0 (Android 9) in Nexus 9
LineageOS is an open-source and free operating system for smartphones, tablets, and computers based on the Android mobile platform.
LineageOS 16.0 is a free, community-built, aftermarket firmware distribution of Android 9.0 (Pie), which is designed to increase customization, performance, power, and reliability over stock Android for your device.
Steps to Install the Lineage OS 16.0 in Google Nexus 9
- Download the Lineage OS install package from the Prerequisites section.
- Place the Lineage OS .zip package, as well as any other optional packages on the root of sd card:
- Using ADB: adb push filename.zip /sdcard/
- Reboot into recovery, using the Key combinations stated above.
- Select Wipe>> Advanced Wipe.
- Select Cache, Syatem and Data partitions to wipe and then Confirm to Wipe.
- Go back to the main menu, then select Install.
- Navigate and select the LineageOS Zip package.
- Confirm the Flashing by swiping.
How to Root Lineage OS
- Root the device by flashing the Lineage OS su add-on. (arm 64)
- In TWRP, select the Su Zip package and Confirm the Flashing.
- After completion, return to the main menu and select Reboot>> System.
Conclusion
You have successfully installed TWRP Recovery and rooted your Nexus 9. Now, your Nexus 9 will boot with new Lineage OS 16.0 based on the Android Pie. If you are stuck at any step, you can contact us through the comment section or the contact us page. Follow us more updates and Device specific rooting guides.


Everything here is great…. except the Nexus 9 doesn’t have an SD-Card slot. I got past this limitation by formatting /data and then sideloading the zip files there with adb.
Everything here is great…. except the Nexus 9 doesn’t have an SD-Card slot. I got past this limitation by formatting /data and then sideloading the zip files there with adb.
Buna ziua!Am istalat pe un samsung s5 plus g901f kccat6, recovery lineage os 16 cu softul aferent.Dupa instalare am dat reboot si imi apare recovery fara a trece mai departe.Ce pot sa fac?