It’s pretty easy to take screenshots with our phones, we sometimes accidentally trigger the button combinations and a screenshot is taken. However, after using an ASUS laptop in the past few days, I wasn’t sure which buttons to press to take a screenshot. And for sure, I’m not the only one.
I’m not a big fan of Windows laptops, and I haven’t used one since the XP, and perhaps, the Windows 7 days. I tried the method I am now using on MacOS to capture the full screen, and I remember, there’s no “Command” key on Windows laptops. Bummer.
How to Take a Screenshot on ASUS Laptop
1. The Print Screen Method
The Print Screen key on your ASUS laptop keyboard can let you do many things. It is generally labeled as “PrtScn,” “PrntScrn,” or in my case, “prt sc.” But it should all work the same way.
This key will let you take a screenshot and save it as a file, take a screenshot without saving it as a file (like pasting it on the Paint app), or take only a screenshot of one window instead of the full screen.
Taking Screenshot using the Print Screen key without Saving it as a File

You can take a screenshot without saving it as a file by pressing the “Function” or “fn” key and “prt sc” key simultaneously. After pressing the combined key, there will be no indication on the display that a screenshot has been taken. The screenshot, however, is already saved to your clipboard and is ready for pasting. For example, on the Paint app, or Microsoft Word.
Taking a Screenshot using Print Screen key and save it as a file
Now, if you want to save the screenshot as a file similar to the smartphones, there is also an option for that on ASUS Laptops. It’s pretty easy.
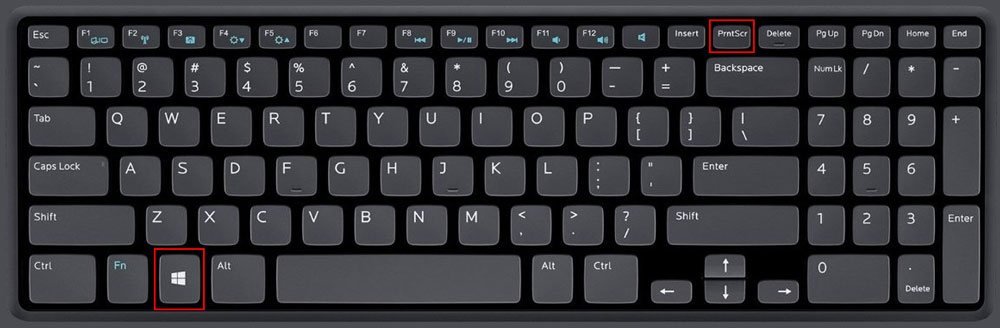
Just press the “Windows Logo” key and “prt sc,” and this should save whatever is on your display. Unlike the first method, in this second method, the screen will dim after a quick snap, indicative that the screenshot has been taken and saved.
On some ASUS laptops, you will need to press the “Windows Logo” key + “Ctrl” + “PrtScn”, or sometimes, “Windows Logo” key + ” Fn” +” PrtScn”. Again, it depends on your computer’s manufacturer.
You can find the file on the File Explorer\Pictures\Screenshots.
Note that you will only see your screen dim every time you take a screenshot if you have the “Animate windows when minimizing and maximizing” turned on in your Visual Effects settings.
To enable it, launch the Run command by pressing Windows key + “R” at the same time. Type sysdm.cpl on the command prompt and click “OK” to launch “System Properties.” Tap the “Advanced” tab, and under “Performance,” click the “Settings” button. On the “Performance Option,” make sure the “Animate windows when minimizing and maximizing” is marked.
2. Taking a Screenshot of a Single-Window using the Print Screen key
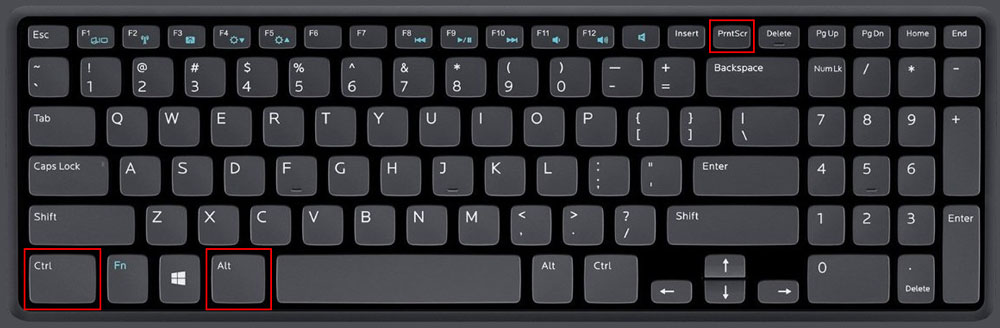
If you only want to capture the information on a single window, you can do this by clicking on the title bar of the window, then pressing the “Alt” + “prt sc” key simultaneously. Unlike the previous method, there will be no indication this time that the screenshot was taken. Just like the first method, the screenshot is already saved on your clipboard and is ready for pasting.
You may also try “Alt” +” Fn” +” PrntScn” if the key combination doesn’t work on your ASUS Laptop.
3. Taking a Screenshot of just a Part of your Screen
This is my favorite method of taking a screenshot on mac-OS. And I’m glad to have seen this on an ASUS laptop. This type of screenshot lets you choose just a part of your display to save as a screenshot.
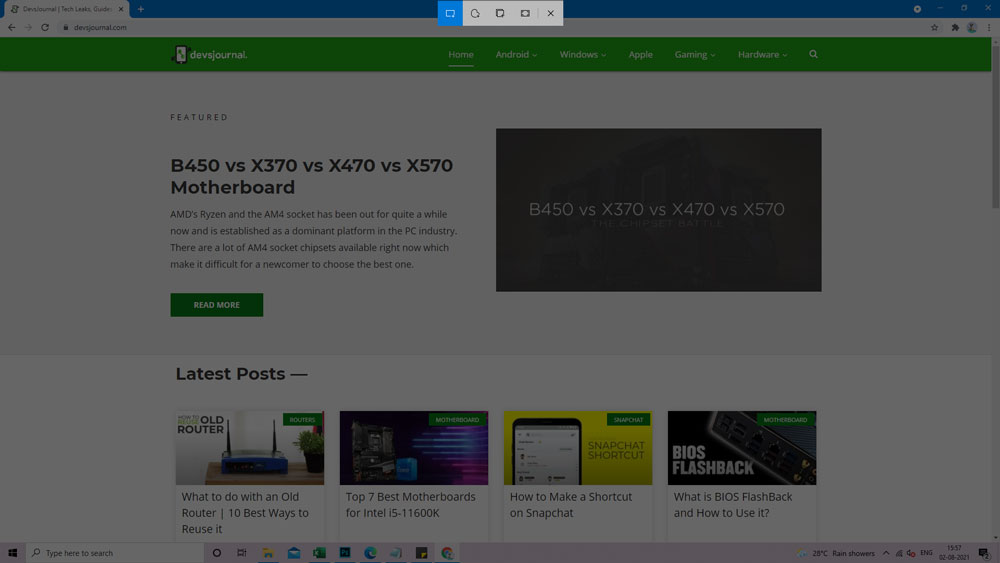
Just combine the “Windows Logo” key + “Shift” + “S.” Your display will grey out, and your mouse pointer will change; drag and adjust it to the part of the display you want to save as a screenshot, and you are done. It will also save your screenshot to your clipboard and will be ready for pasting.
4. Snipping Tool Method
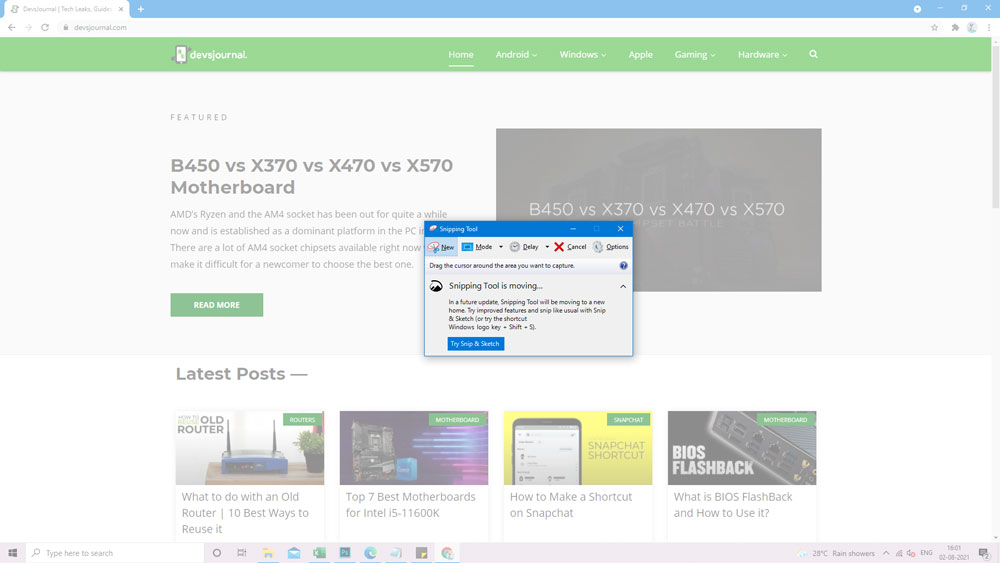
The Snipping Tool has been part of the Windows operating system since the Windows Vista. However, it never really got any new features through the years other then bug fixes. That is not to say it is pretty much useless, because it isn’t.
Snipping Tool is like a screenshot app, with a basic image editor. Clicking on “New” will grey out the screen, which is an indication that you can now select which part of the display you want to capture. After capturing, you will automatically be redirected to its image editor. This includes tools like Pen, Highlighter, and Eraser. There is also an option to edit the screenshot on Paint 3D, which is just one click away.
There is also a new “Delay” option. If you want to capture something that is just about to pop-up, this feature is a saving grace. However, I also don’t use it for that reason. It’s always more convenient to just set up the display first before taking a screenshot, than running after the time (5 seconds is the maximum time delay).
5. Game DVR Method or Xbox Game Bar
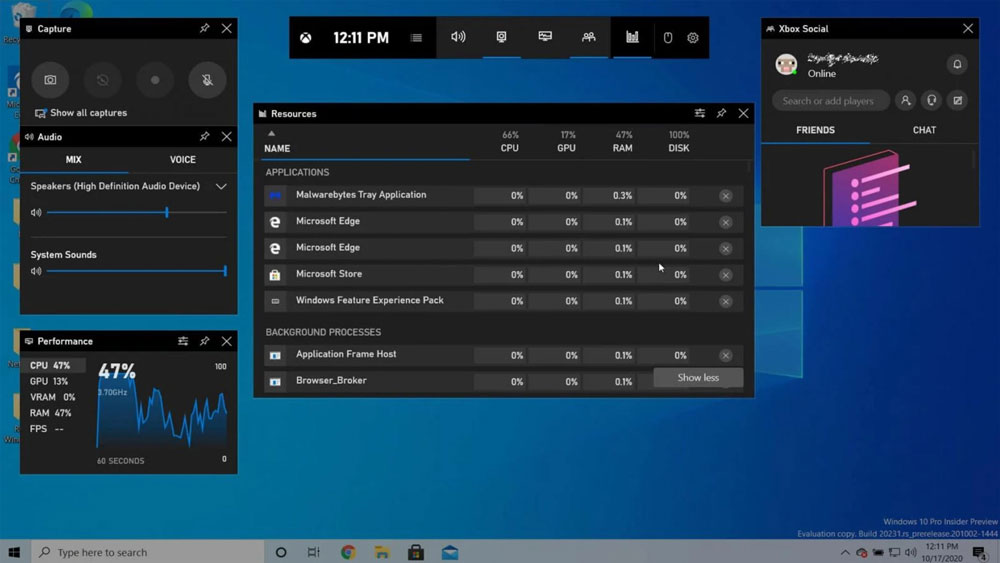
I love this feature. Windows 10 ships with Game DVR feature, which allows users to record their gameplay footage, and also take screenshots.
Just press the “Windows Logo” key + “G” and wait for a small pop-up that will ask you if the program that is displaying on your screen is a game. Just confirm, and wait for another pop-up on the bottom of your display. Just press the camera logo, and it will save your full screen as a screenshot on your ASUS Laptop. And that’s it.


not download