Irrespective of what the iOS users tell you, Android phones have reached a point where they have started to do some amazing things with their operating system. Having said that, electronics are more fragile than we make them to be and can falter without any physical damage.
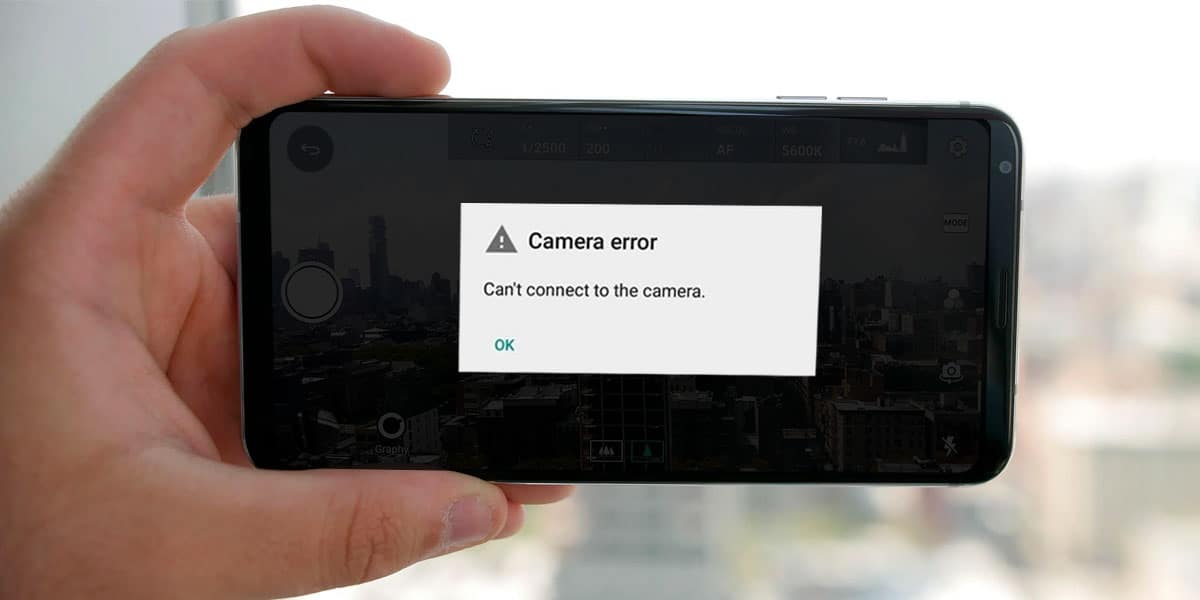
Many android users complain about their phones showing “can’t connect to the camera” error on their phones. This is represented when you start your camera app, but all you get is a blank screen with the camera logo, followed by the error. This error is not very common, and there are various reasons which could be causing it.
In the following, we will look into the reasons which may be causing this error and how we can correct it.
Possible Causes for “Can’t Connect to Camera” Error
Since technology today, especially a smartphone, is so intricately built the smallest of malfunction could cause a chain of events that cause applications to fail. Following are some of the common reasons why you are facing the “can’t connect to camera” error.
- Low RAM – in case your RAM is full of temporary files, it may cause your Camera app to malfunction.
- Too many installed apps – if too many applications are installed on your device, it may hinder the performance of your Camera.
- Third-party app obstruction – you may have apps on your phone which have permission to use the camera and these apps might be obstructing your camera from opening.
- Low Internal Memory – if the internal memory on your phone is low then the functionality of a few storage consuming applications may get affected.
- Incompatible Camera – if your camera is not updated to its latest version then it won’t be compatible with your current operating system. This will hinder the functionality of your Camera.
- Inbuilt Software Gitch – a file in your application or operating software may have become corrupted. If this is the case then many applications on your device may stop working properly.
How to Fix Android “Can’t Connect to Camera” Error
Irrespective of which android version you are using, the following solutions should help you fix the android camera error. However, if you are using a very outdated version of android we can’t promise anything. Before following any of the following steps, make sure that your flashlight is off as it may sometimes stop your camera from opening.
1. Restart your Device
For most electronic devices the easiest correction to any problem is restarting it. A device like a smartphone doesn’t get an off day. Making a phone call has become a second job for a smartphone. Today our smartphones carry our flight tickets, used for making transactions, order food and entertain us. Our smartphones never shut down.
Constantly running can overheat your phone and affect the performance of one or multiple applications. Trying restarting your phone and check whether the camera can start. If it doesn’t, try shutting the case down the phone and give it a cooldown of 30 to 60 minutes. In case you have a removable battery type smartphone, then you can soft reset by removing the battery while your phone is running.
2. Use the Camera Restarter App
There are a lot of internal fixes that you can carry out to correct this Camera error. Though these fixes work well, they are not intrusive enough. You will require a tool that can run diagnostics, find the root cause and fix the problem. In this situation, you will require a Camera Restarter app. These applications are available on Google Play Store to download for free. Browse through the multiple options available and choose the best one available.
3. Clear Cache & Data of Camera
Your cache is responsible for holding temporary folders. Most of these files have a short shelf life and become corrupt very soon. These corrupted files are like spoiled food and may affect affecting the stored pictures and videos.
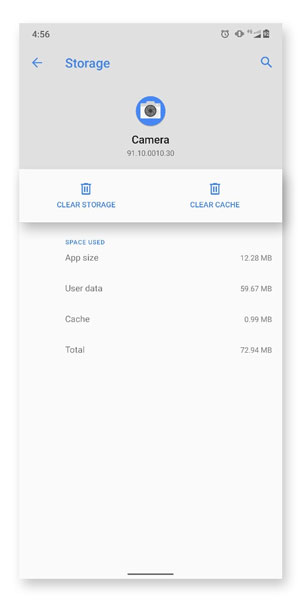
To clear the cache & data of your camera app follow these instructions:
- Open Settings and go to “Apps/Apps and Notification”. Here choose “All apps”.
- Inside Apps, look for option “Camera”.
- Select “Storage & cache”.
- Click on “Clear Cache” & then click on “Clear Storage”
- Restart your device and check if it resolved the issue.
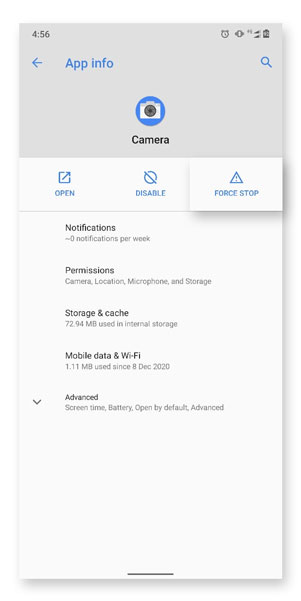
4. Force Stop Camera App
Even if an application on your phone is not accessed, it may be running in the background. This may block your application like Camera from opening correctly. If such is the case then you must completely shut down the application. This can be done by force stopping the app. It can be done as follow
- Open Settings and go to “Apps/Apps and Notification”. Here choose “All apps”.
- Inside Apps, look for option “Camera”.
- Click on the option marked “Force Stop”. This will completely shut down the application.
- Exit Settings and try restarting Camera.
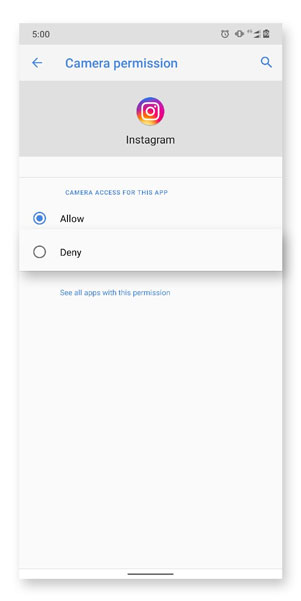
5. Remove Third-Party Apps with Camera Access
Many installed applications have access to your camera, most common being social media apps like Instagram and Snapchat. One of these applications may cause “cannot connect to camera” error. In this situation either you can completely uninstall the application, or you can deny them permission to the camera.
Let’s assume Instagram is causing the error. To uninstall, tap and hold on to the Instagram logo. In the drop-down choose “Uninstall”. Trying opening the camera and see if the problem prevails. To deny permission follow the underwritten steps
- Open Settings and go to “Apps/Apps and Notification”. Here choose “Apps Info or All Apps”.
- Find Instagram and click on it.
- Inside look for “Permissions”.
- Within Permissions, click on “Camera” and choose “Deny” permission.
After uninstalling or denying permission to each application try starting the Camera application and check if the problem continues.
6. Update your Android Device
Keeping your applications updated is important, but it is of no use if your operating system is outdated. If your applications version and Android’s version do not match, then the app will not be able to function properly.
While the updates change the UI, its main purpose is to fix any bugs that were encountered. Some of these bugs might be the reason for your Android camera error. To update your application visit the Google Play Store and under “My Apps & Games” check if any new update for your Camera is available.
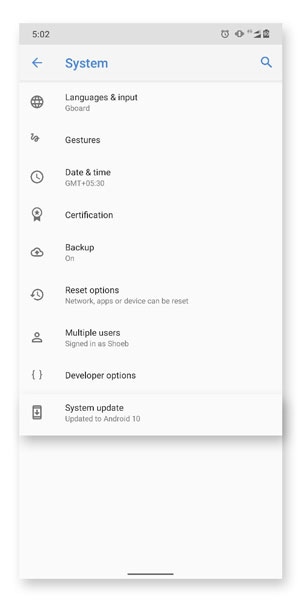
To update your Android OS, follow the steps below
- Go to “Settings” and find “System”.
- In System click “System Update”.
- Incase any update is available, click on “Download and Install”. The process may take from a few minutes to an hour based on the size of the update.
- Once installation is complete, your device will reboot. After reboot, check if the Camera error prevails.
7. Visit the Service Centre
If all of the above-mentioned steps have been tried and the problem remains, then you may not have the resources to fix the problem. At this point, the problem might be because of an advanced software crash or a hardware error. You will have to visit the nearest service centre and let the professionals take care of it. Make sure to visit a certified service centre of the company your device belongs to.
Conclusion
There are a set of applications that come pre-installed in your device when it is first purchased, one of them being the Camera app. There is a small probability that these core apps will fail. However, that doesn’t make them fail-proof.
Camera’s are an important feature in a smartphone and a big inconvenience if they stop working. If you follow any of the above-mentioned steps, you are guaranteed the full functionality of your Camera back.
![Fix: Android 13 Bootloop Issue [6 Working Fixes]](https://devsjournal.com/wp-content/uploads/2023/06/android-13-bootloop-768x384.jpg)