We can directly change the screen resolution on our PC, and it will automatically alter the text on the Display screen. Similarly, by changing the DPI on the Android smartphones, we can adjust the size of text and resolution. DPI refers to the Pixel Density of your device, which is the ratio of the screen resolution to the display size of your device.
Users want to change their device’s DPI due to various reasons. While some manufacturer OEMs offer this feature in their devices as part of their modifications to the Android, the ability to change DPI is not available in stock Android ROMs before Nougat. You can change DPI on Android devices after rooting and then changing the settings or DPI can be changed by accessing few UI tuner permissions using ADB, without rooting too. Here, follow our guide, how you can change the DPI of your Android device with and without rooting.
Screen density is a ratio of resolution and display size, which can be quantified as dots per inch, or DPI. The higher the dpi, the smaller each individual pixel is, and the greater clarity. Simply put a higher dpi means more detail is displayed per inch, but does not necessarily correlate with a higher screen resolution.
Change DPI on Android Devices Without Rooting
You can change Android screen resolution i.e. DPI without rooting as per your device’s Android version. Check your phone’s Android version and then choose one of the following methods for changing DPI without rooting.
Method 1: For Android Devices Running Nougat and Below
Google introduced a simpler way to change the device’s DPI by giving an option in the Android settings from Android Nougat. You can easily modify Android DPI settings on the device running Android Nougat by following the steps below:
Step 1: Open your device’s Settings > Display option. You’ll come up with two options – Font Size and Display Size.
Step 2: Tap on “Display Size” and use the slider to change the user DPI Android settings of your device. Additionally, you can alter the font size as well to set your preferences.
Certain Android Devices with Nougat and Above versions might not have the above settings. For such situations, you can use the following method.
Method 2: For Android Devices Running Nougat and Above (7.0+)
Step 1: Enable Developers options on your phone. For this,
Go to Settings > About Phone > Tap on built number option for 7 times
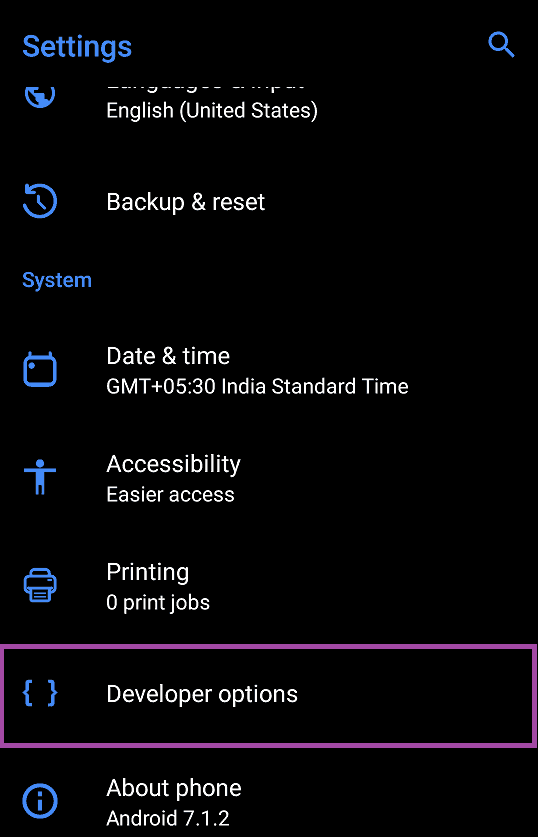
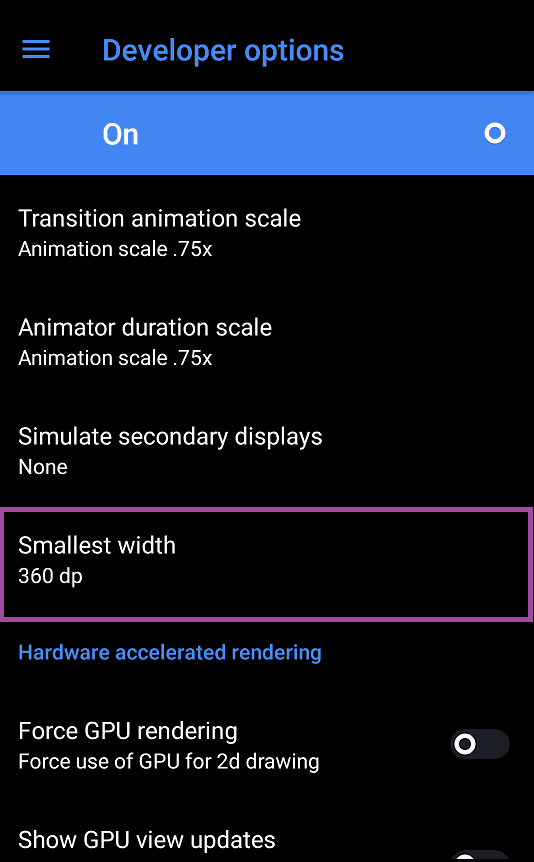
Step 2: Now, Go to Settings > Developers Option > Select Drawing > Choose Smallest Width. There you will find the default DPI Value.
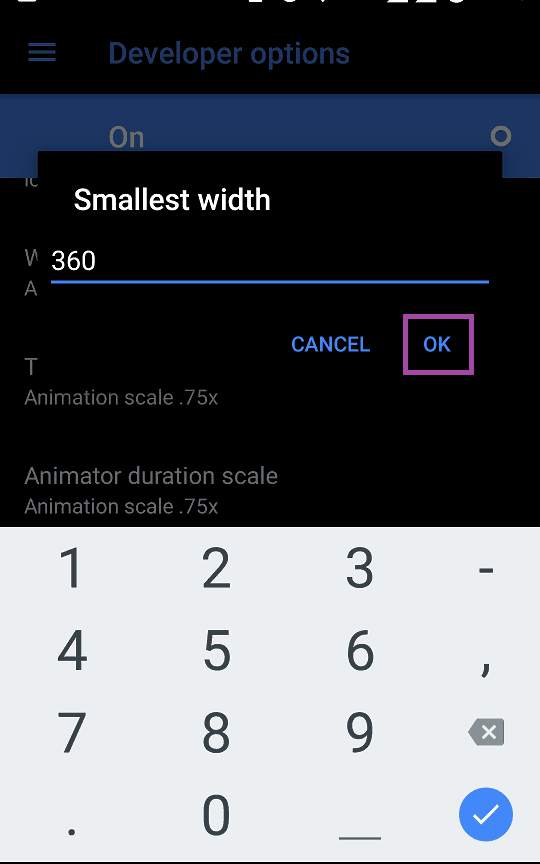
Step 3: Change the value of DPI according to your requirement.
Method 3: Android Devices running Jelly Bean and Above (4.1+)
Step 1: Open the Play Store and install the Android DPI Changer app. Once you open the app, it will now check for root access. Tap on the “Get Root” button to allow the app to check for the same.
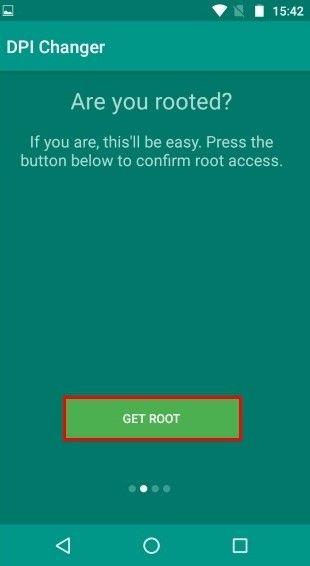
Step 2: If your device is rooted, you’ll come with a screen saying that “root access has been granted,” and you can proceed with changing DPI
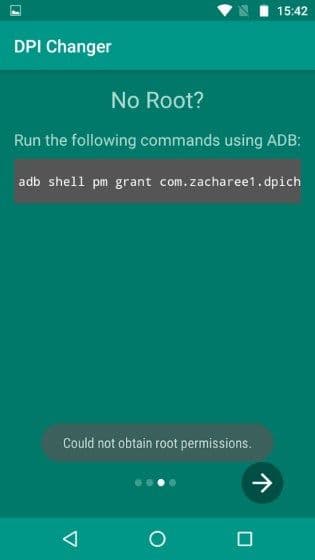
Step 3: If your device is not rooted, you’ll come up with a screen that said, App would require you to run a command via ADB to proceed
Step 4: First, Go to the “Developer Options” on your device and enable “USB Debugging.”
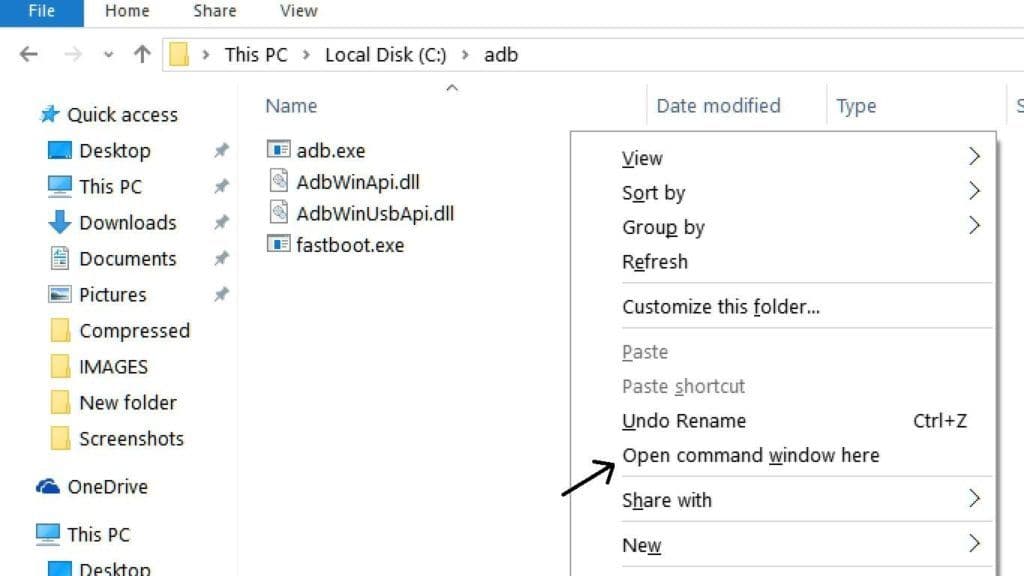
Step 5: Now, connect your device to your PC and Navigate to the ADB installation folder. Now right click on the screen, while holding a shift key then select open up a Command Prompt or Powershell here.
Step 6: In the Command Prompt, type “ADB devices” without the quotes. Once your device name appears, enter the next command in the Command prompt:
Adb shell pm Grant com.zacharee1.Dpichanger android.permission.WRITE_SECURE_SETTINGS
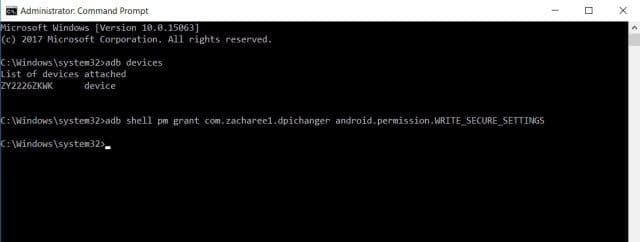
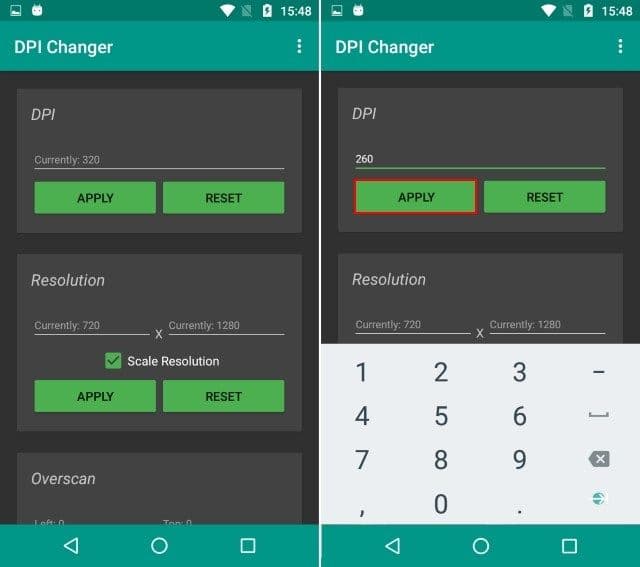
Step 7: The entered command should give the app the permissions it requires. Once done, This completes the setup. Now, In the DPI changer App, you can enter the desired value in section DPI and tap on “Apply.”
Step 8: A dialog box pops up, asking you whether you want to continue with the modified settings or reset. Just tap on OK, and you can witness the new DPI on your device.
While the app changes the DPI in real time, we still recommended rebooting your device.
Change DPI on Android Devices With Rooting
For the phones with Android versions Jelly bean to Marshmallow, you can also root your phone and then change the DPI value for your device. To change Phone DPI by rooting, make sure that you root your phone through Magisk or SuperSu. Once you root your device, follow the below-mentioned steps.
Step 1: Download the Builder Prop Editor App
Step 2: Once installed, grant it the permission to Root
Step 3: Open the app and under “Build Info”, scroll down to “ro.sf.lcd_density”
ro.sf.lcd_density shows the default DPI value for your phone
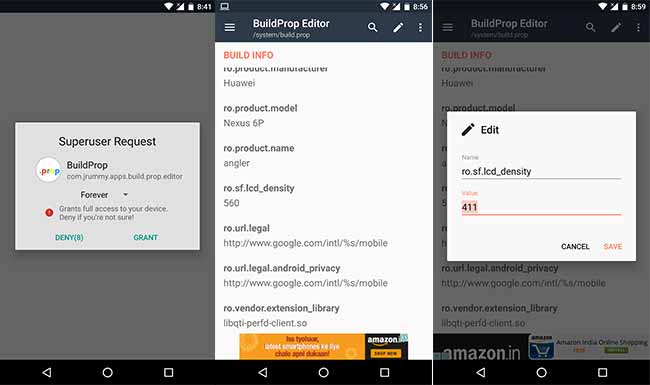
Step 4: Tap on it and change the value as per your requirement and click on the Save option
In this form, you can easily change DPI value for your device. Select the method that bests suits you. We hope you can quickly change your device’s DPI using these methods. However, if you have any doubts, Please comment below.
![Android 12: Google Assistant Not Working [8 Fixes]](https://devsjournal.com/wp-content/uploads/2022/03/Android-12-Google-Assistant-Not-Working-768x384.jpg)

![Fix: Android 12 Apps Crashing after Update [8 Fixes]](https://devsjournal.com/wp-content/uploads/2022/02/Android-12-Apps-Crashing-768x384.jpg)
I don’t get that smallest width option in developer options