Many computer peripheral making companies have their own software, which is synched with the peripherals accordingly. Just like Logitech has its own G-Hub, Razer has its Razer Synapse. Razer is one of the most well-known companies famous for designing gaming essentials. The company software, the Razer Synapse, allows you to customise controls and reassign macros to any of your Razer peripherals while saving all your settings automatically to the cloud.
Though this is rock-solid software, users have complained about instances wherein the Razer Synapse doesn’t respond. Despite trying different ways, they were not able to start the Razer Synapse software. But the good news is that we have the solution that’ll solve your problem almost immediately.
In our troubleshooting guide, we have laid down the seven best ways to fix your Razer Synapse issue. This article will walk you through a series of fixes you can apply to get your software back online.
7 Ways to Fix Razer Synapse Not Working Issue
The majority of the users using Razer Peripherals have complained about the Razer Synapse crashing every now and then. As a result, we have put together seven ways to fix the razer synapse not working issue. Note that these fixes have been mentioned serially per the severity of the problem.
1. Reinstall Razer Synapse Drivers
Often the reason why your Razer Synapse isn’t responding is that it may be corrupt. In such a case, the best possible fix to get your Razer Synapse software back online is by completely uninstalling it from your system and then reinstalling it. Follow the steps mentioned to uninstall and reinstall the Razer Synapse Driver.
- Press “Windows + R” in your start menu
- In the “Run” tab, type “devmgmt.msc” and then tap on the Run to open the “Device Manager.”
- Uninstall all the Razer devices you are using (Mouse, keyboard etc.)
(Your Razer devices can be found under Razer Device, Human Interface Devices, Keyboards, Mice or other pointing devices sections )
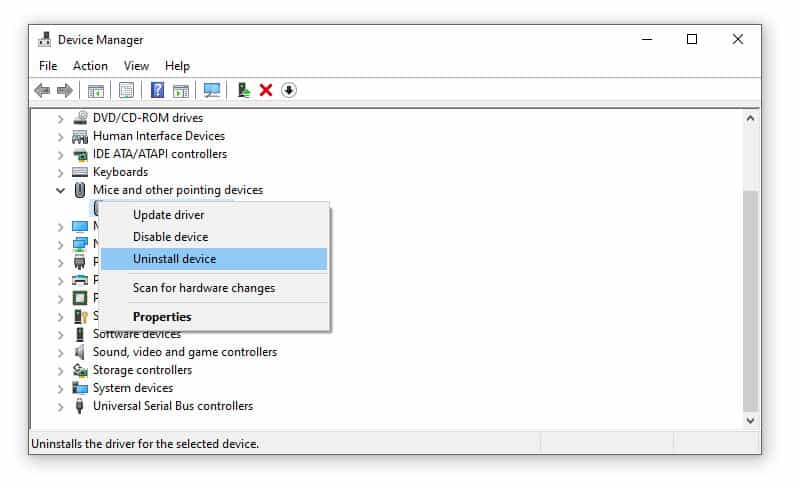
- Right Click on the Razer Device
- Tap “Uninstall Device”
Your Razer Devices have now been uninstalled. To ensure that there no residual files, you can try using a third-party uninstaller application such as Revo Uninstaller.
To reinstall the device/s, follow the steps given.
- Unplug all your connected Razer Devices (Keyboard, mouse ) for a few minutes
- Restart your system
- Upon restarting Windows, plug in your Razer Devices. After plugging in the devices, Windows will automatically start reinstalling drivers for the devices.
- Download the latest Razer Software from the link mentioned: https://www.razer.com/synapse-3
- Install the latest Razer Software using the setup wizard.
Launch the Razer Synapse application to ensure whether the issue has been resolved or not
2. Uninstall Razer Surround
If your Razer Synapse Software isn’t responding, then uninstalling or disabling the Razer Surround can help fix the problem.
- Press “Windows + R” in your start menu
- In the “Run” tab, type “appwiz.cpl” and then tap on Run
- Select “Razer Surround”
- Right-click and select “Uninstall.”
Check to see if the issue has been solved. If you reinstall the Razer Synapse software, you can choose to Cancel the razer surround installation when you log into your account after reinstalling synapse. You will see a feature update pop-up on your screen once your Synapse is connected to the Internet. Click “CANCEL.” This will cancel the installation of the Razer Surround
3. Close All Razer Processes In The Background
At times, the processor may get overloaded because a number of heavy applications are working in the background.
- Right-click on the Razer Central Icon in the taskbar
- Select “Exit All Apps”
- Now, press Ctrl+ Shift + Esc together to open the Task Manager
- Select “More Details.”
- Locate all the Razer Synapse processes running the background.
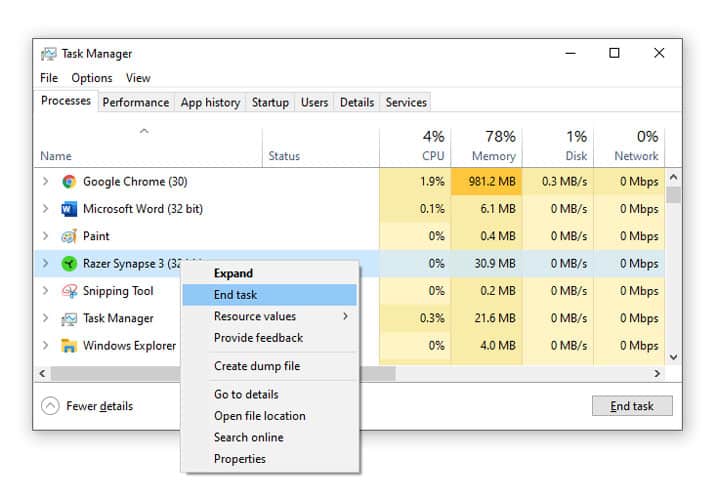
- Right-click on each Razer Synapse process and select “End Task.”
- Repeat this process until all razer processes are done with
Launch the Razer Synapse application to ensure whether the issue has been resolved or not
4. Uninstall Completely and Reinstall Razer Synapse
Sometimes, uninstalling and then performing a clean Razer Synapse installation can get the job done.
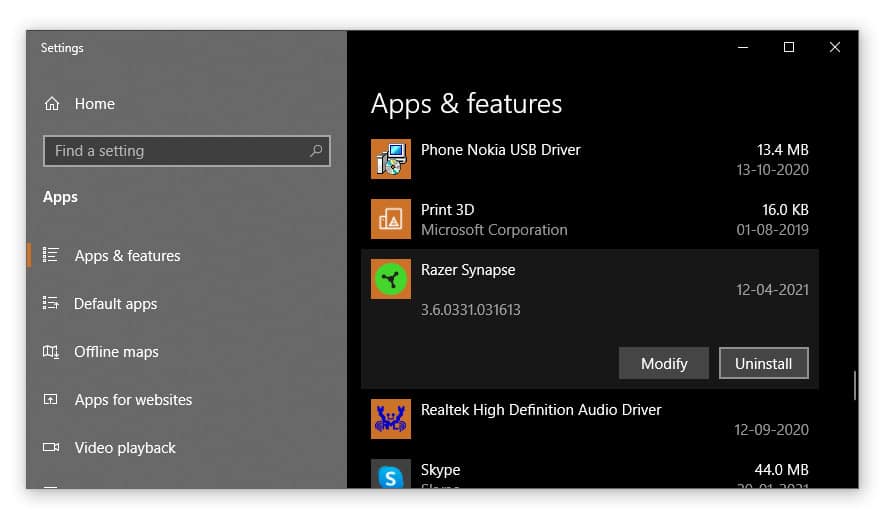
- Right-click on the Start Menu.
- Select Apps And Features.
- Locate Razer Synapse and Razer Cortex.
- Select them and tap “Uninstall.”
- Click “Uninstall” once again to confirm the action.
- Now, the Razer Synapse box will be visible on your screen.
- Select “Uninstall.”
- Select Razer Synapse and Razer Cortext
- Click on “Uninstall”
- Tap “Yes” to confirm the uninstallation of Razer Synapse and Cortext from your computer
Now, the Razer Synapse has been completely uninstalled from your PC. Once the application has been uninstalled, hold down Windows + E to open the File Explorer. At the file explorer address box on the top, type in C:\Program Files (x86)\Razer and then hit “Enter.” Now, select all the residual folders in the Razer file. Right-click on the selection and then press “Delete.”
In the address bar, type C:\ProgramData\Razer and then hit “Enter.” Again, select all the folders, right-click on the selection and then hit “Delete.” Note that the Razer Synapse software has now been completely removed from your PC, including the cache as well
To reinstall the Razer Synapse software, follow the given steps.
- Download the latest Razer Software from the link mentioned: https://www.razer.com/synapse-3
- Wait for the download to finish
- Run the installer to start the Setup Wizard
- If you want to install the Razer Cortext, mark the checkbox next to it
- Click “Install.”
- Open the Razer Synapse Application
- Enter your credentials and log in
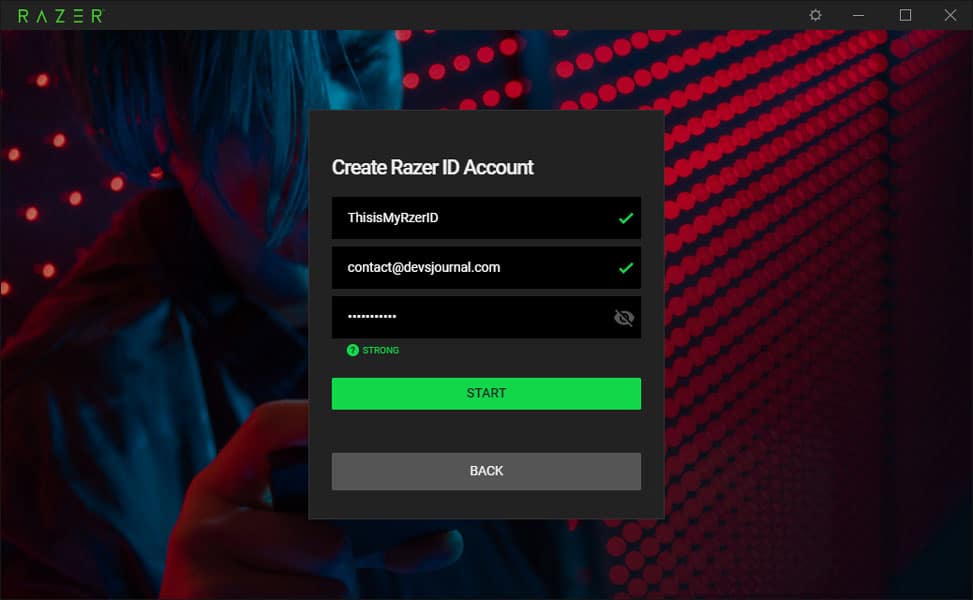
5. Create A New Razer Synapse Account
At times, there might be a glitch in your current Razer Synapse account, which is why you might be facing this issue. After performing a clean installation of your Razer Synapse Driver or after logging out of your Razer Synapse account, follow the given steps.
- Open the Razer Synapse Application
- Click on “Sign Up.”
- Type in your new Razer ID
- Enter your “Email Address” ( Enter the email address which is NOT associated with Razer Synapse. You might want to create a new email ID to create a new Razer account)
- Type in your new Password
- Click Start
- Accept the Terms and Conditions
- Go to your Email Inbox ( Inbox of the email ID associated with Razer Synapse)
- Open Razer’s Verification Email
- Click on the link given in the email
- Your new Razer account is now Verified
- Click “Next.”
Your new Razer Account is now successfully created and verified. Log in to your Razer Synapse account and check whether the issue has been resolved.
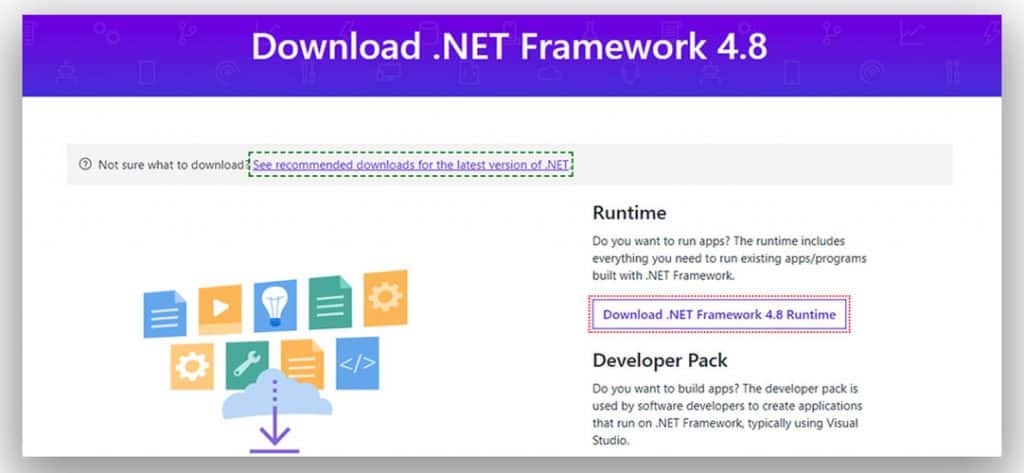
6. Install the latest Microsoft.NET framework
To download and install the latest version of the latest microsoft.net framework, follow the given steps.
- Open the web browser and open the Microsoft.NET download page
- Select the latest version ( NET Framework 4.8) from the top and click on it
- You will now be redirected to the download page of your chosen version
- Click “Download.NET Framework 4.8 Runtime (version may vary)
- Once the download is complete, run the installer
- Accept the terms and conditions
- Click “Install”
- Upon completion, click “Finish.”
Now launch the Razer Synapse application to check whether the issue has been resolved.
7. Turn Off Windows Defender Firewall/ Third-Party Antivirus
Your in-built antivirus will automatically detect and quarantine files that could be harmful to your system. However, some of these files are crucial for a particular application to function, and the application won’t run as the files are under quarantine. Turning off your Windows defender firewall or any third party antivirus could help solve this problem. Follow the steps mentioned.
- Press Windows + R to open Run
- In the text box, type firewall.cpl and hit OK.
- This will now open the Windows Defender Firewall Control Panel
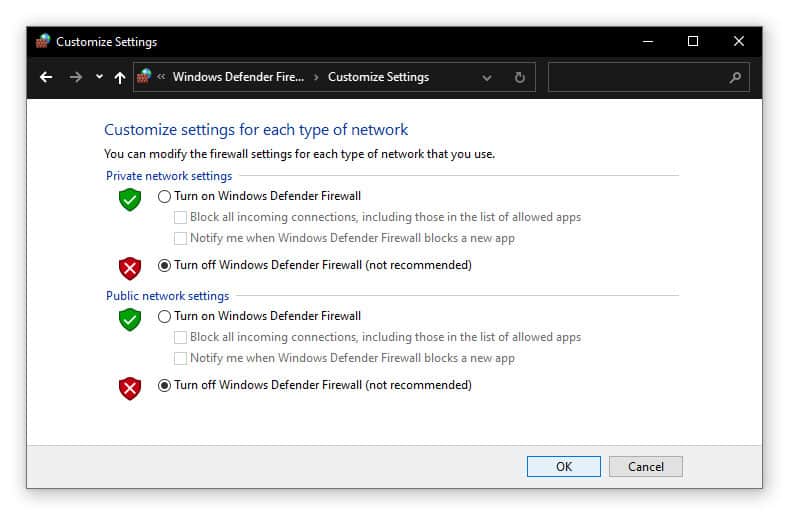
- Click the “Turn Windows Firewall On Or Off” option on the left
- Then select both the Turn off Windows Defender Firewall radio buttons, and click the OK button.
You can disable most of your third-party antivirus by selecting the disable option in their system tray icon context menus.
The Bottom Line
We hope our article was able to thoroughly guide you with the process and accordingly resolve the issue. Note that these fixes are mentioned according to the problem’s severity and should be applied in chronological order. These are some of the resolutions that will probably fix Razer Synapse when it doesn’t open. Let us know in the comment box which of the fixes worked for you. If you have any other fixes that can help solve this issue, feel free to share them in the comment box below.