Motorola’s new mid-range smartphone, Moto G5 Plus is finally out in the market. With the price of a mid-range & specifications of flagship device, it is surely worth the money. In a recent report, Flipkart claimed Moto G5 Plus to be the fastest selling smartphone on their website.
While the Moto G5 comes with AOSP stock Android 7.1.1 out of the box, it offers minimal customization. Considering the device is relatively new, it will take some time for the developers to craft some sweet ROMs for the device but till then you can unlock your device and try rooting it.
Prerequisites:
- A Windows/Linux PC
- ADB Drivers (Click the link and you’ll find installation and download in the post)
- Minimal ADB Fastboot Tool (This is the minimal version ~1MB of Android Studio. Helps you to perform operations from your PC directly into your phone)
- A working USB Cable (Make sure you’re using the original one)
- TeamWin Recovery: Moto G5 | Moto G5 Plus
- Magisk zip and Magisk Manager
- Charge your device upto 60% to avoid any Shutdown during the process.
- Make sure to backup all your important files, photos, apps, contacts etc. as unlocking the bootloaders erases the Internal storage.
Why You Must Unlock the Bootloader on Moto G5/Moto G5 Plus?

Unlocking the bootloader is the first step towards rooting your device, which is the ultimate purpose of most of the Bootloader unlock. Rooting allows you to add additional functionality, debloat your device and have a lot more control on your device then the manufacturer wanted you to have.
After you unlock your device, you can flash a ROM. Most ROM will increase your device’s functions, offer customization, battery life and most importantly your overall Android experience. Since, now you have a little bit background about Bootloader, ROMs and everything, let’s proceed to Unlocking procedure.
How to Unlock the Bootloader on Moto G5/Moto G5 Plus
Step 1. First you have to let the device allow you to unlock the bootloader. To do this, go to Settings-> About Phone, then tap Build Number until you see a pop up saying “You are now a developer.”

Step 2. Then find Developer Option in your settings. Enable OEM Unlock by tapping on it once. Confirm the warning.
Step 3. Turn off the smartphone.
Step 4. Put the device in the fastboot mode by pressing Volume Down and Power key simultaneously.
Step 5. Now navigate to SDK-> platform tools and right click while pressing Shift key-> Open Command Promt here.
Step 6. Connect your device to the PC.
Step 7. Type adb device and if you see a serial number then your fastboot is correctly configures, so proceed forward. If not, configure your fastboot correctly.
Step 8. Now visit Motorola Unlock page. Read the page and then proceed by pressing the Next button.
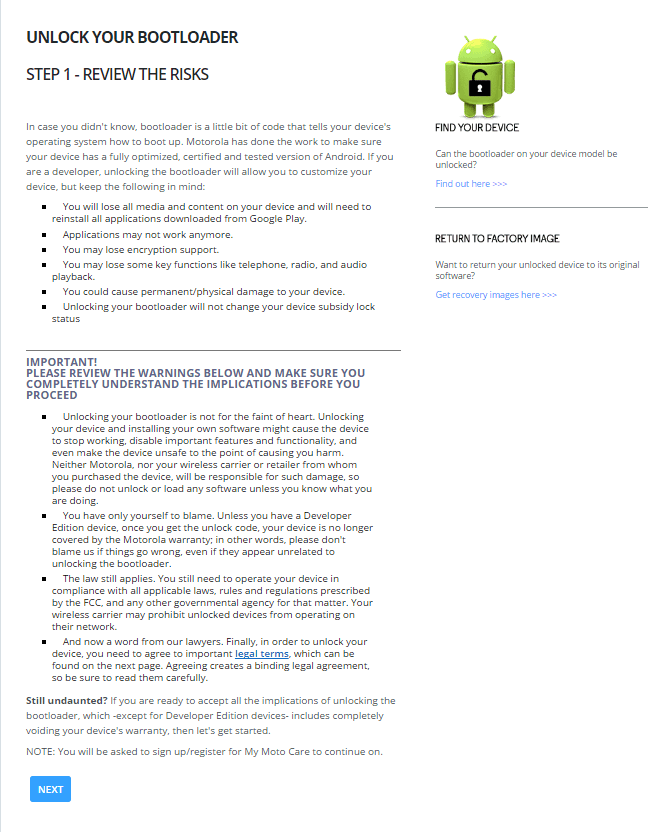
Unlock The Bootloader
Step 9. You will be asked to Sign in. Either sign in with your Motorola account or sign with the same Google account with which you signed in in your device.
Step 10. Now type fastboot oem get_unlock_data
Step 11. Now you will see a code on your screen. Copy it and paste it in Data Scrub Tool and then select the entire code and paste it in point 6 on Moto Request Unlock Tool website.
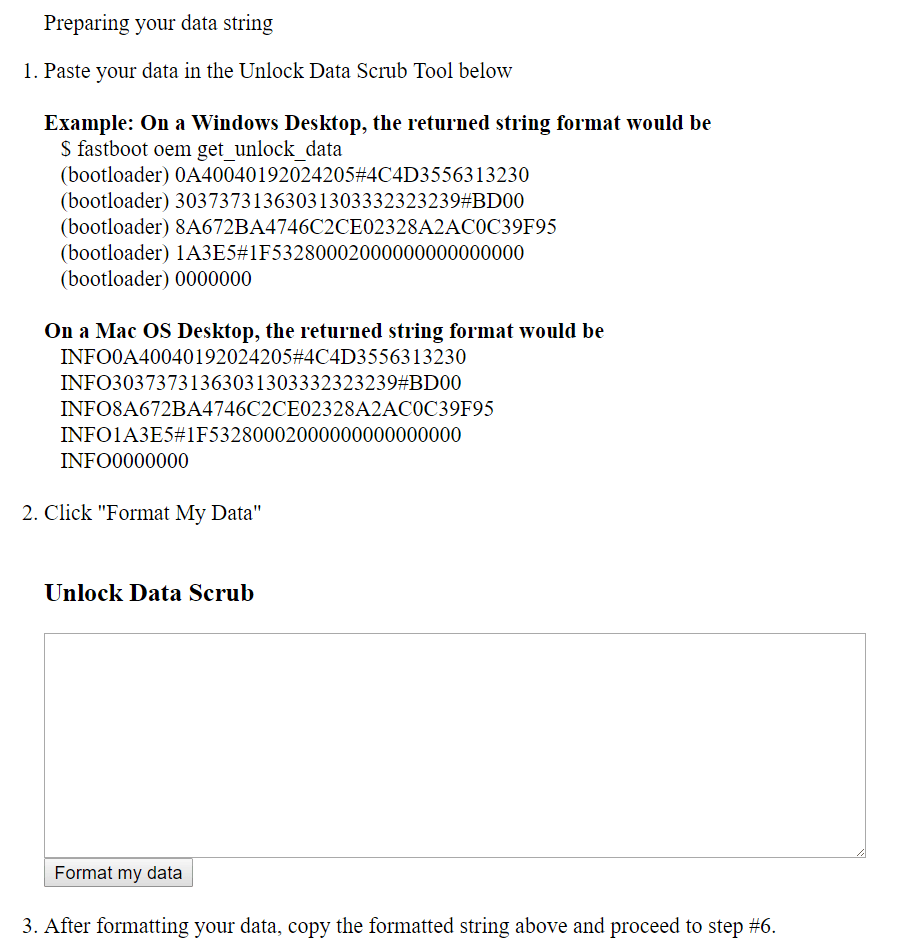
Data Scrub Tool
Step 12. Now click I Agree and you should see a Get Unlock Code. Click on it.
Step 13. Your should receive an Unlock Code.
Step 14. Now type fastboot oem unlock UNIQUE_KEY
Step 15. You will receive a warning, just enter the same command again. You will now receive an Unlock Successful message.
How to Install TWRP Recovery in Moto G5/G5 Plus
Step 1. Download the TWRP recovery from above downloads.
Step 2. Connect your phone to PC with a USB cable.
Step 3. Open a command window in the folder where you have downloaded TWRP. For this, go to that folder, and then in the address bar, type cmd and hit enter key.
Step 4. Now, use the following command to boot the device into bootloader mode:
adb reboot bootloader
Step 5. Now install the TWRP recovery by issuing the following command:
fastboot flash recovery twrp-3.1.1-sanders.img
That’s it. TWRP has been installed in your device. To access TWRp, use command:fastboot boot twrp-3.1.1-sanders.img, or while in bootloader mode, use volume button to highlight and then press the power button to boot into recovery mode.
How to Root Moto G5/G5 Plus
Step 1. Download the Magisk zip file and Magisk Manager APK.
Step 2. Copy both the files to your device.
Step 3. Boot your device into TWRP recovery, and tap on install Magisk zip file.
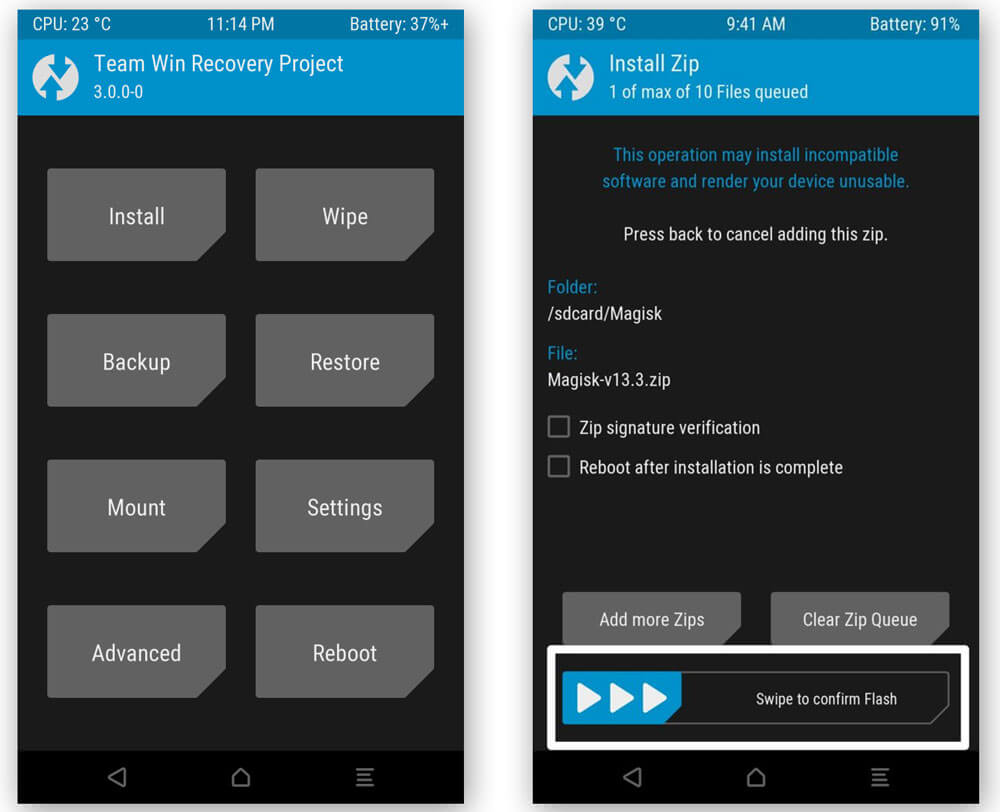
Step 4. After selecting, perform, Swipe to Confirm Flash at the bootom of screen.
Step 5. After it is flashed, you will get the Reboot System Option. Select it.
Once your device reboots, go to file manager app > Folder of Magisk APK > Install it. After the APK is installed, open it and check the root status. Enjoy your newly Rooted Moto G5/G5 Plus.
Congratulations, you just unlocked the bootloader and rooted your Moto G5 or Moto G5 plus device.


![[Android P] LineageOS 16 for Motorola Moto G4/G4 Plus](https://devsjournal.com/wp-content/uploads/2017/01/LineageOS-for-Motorola-Moto-G4-Plus-768x384.jpg)
I need to relock my bootloader of MOTOROLA MOTO G(1ST GEN).. Anybody please help me
Head over to xda.com and search, you’ll probably find a solution there! 🙂